Overview
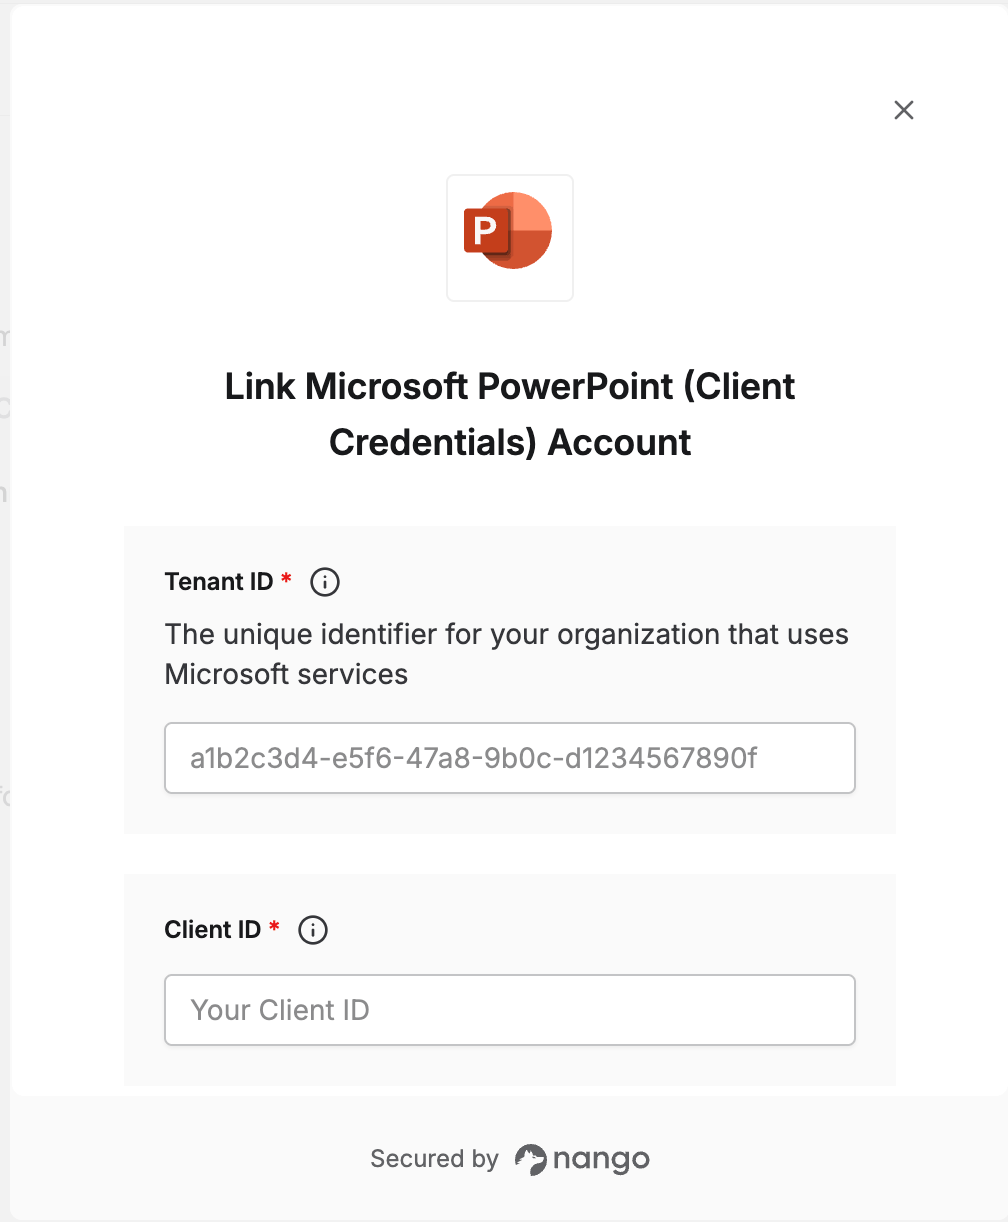
To connect Microsoft PowerPoint in Nango, you need to provide:- Tenant ID — The unique identifier for your organization that uses Microsoft services.
- Client ID — The unique identifier that Azure assigns to your application when it’s registered.
- Client Secret — A unique string that enables the client application to access Microsoft Graph.
Prerequisites
- You must have an active Azure account with a Microsoft 365 subscription (OneDrive/SharePoint).
- You must have permission to register applications and grant admin consent in Microsoft Entra ID.
Instructions
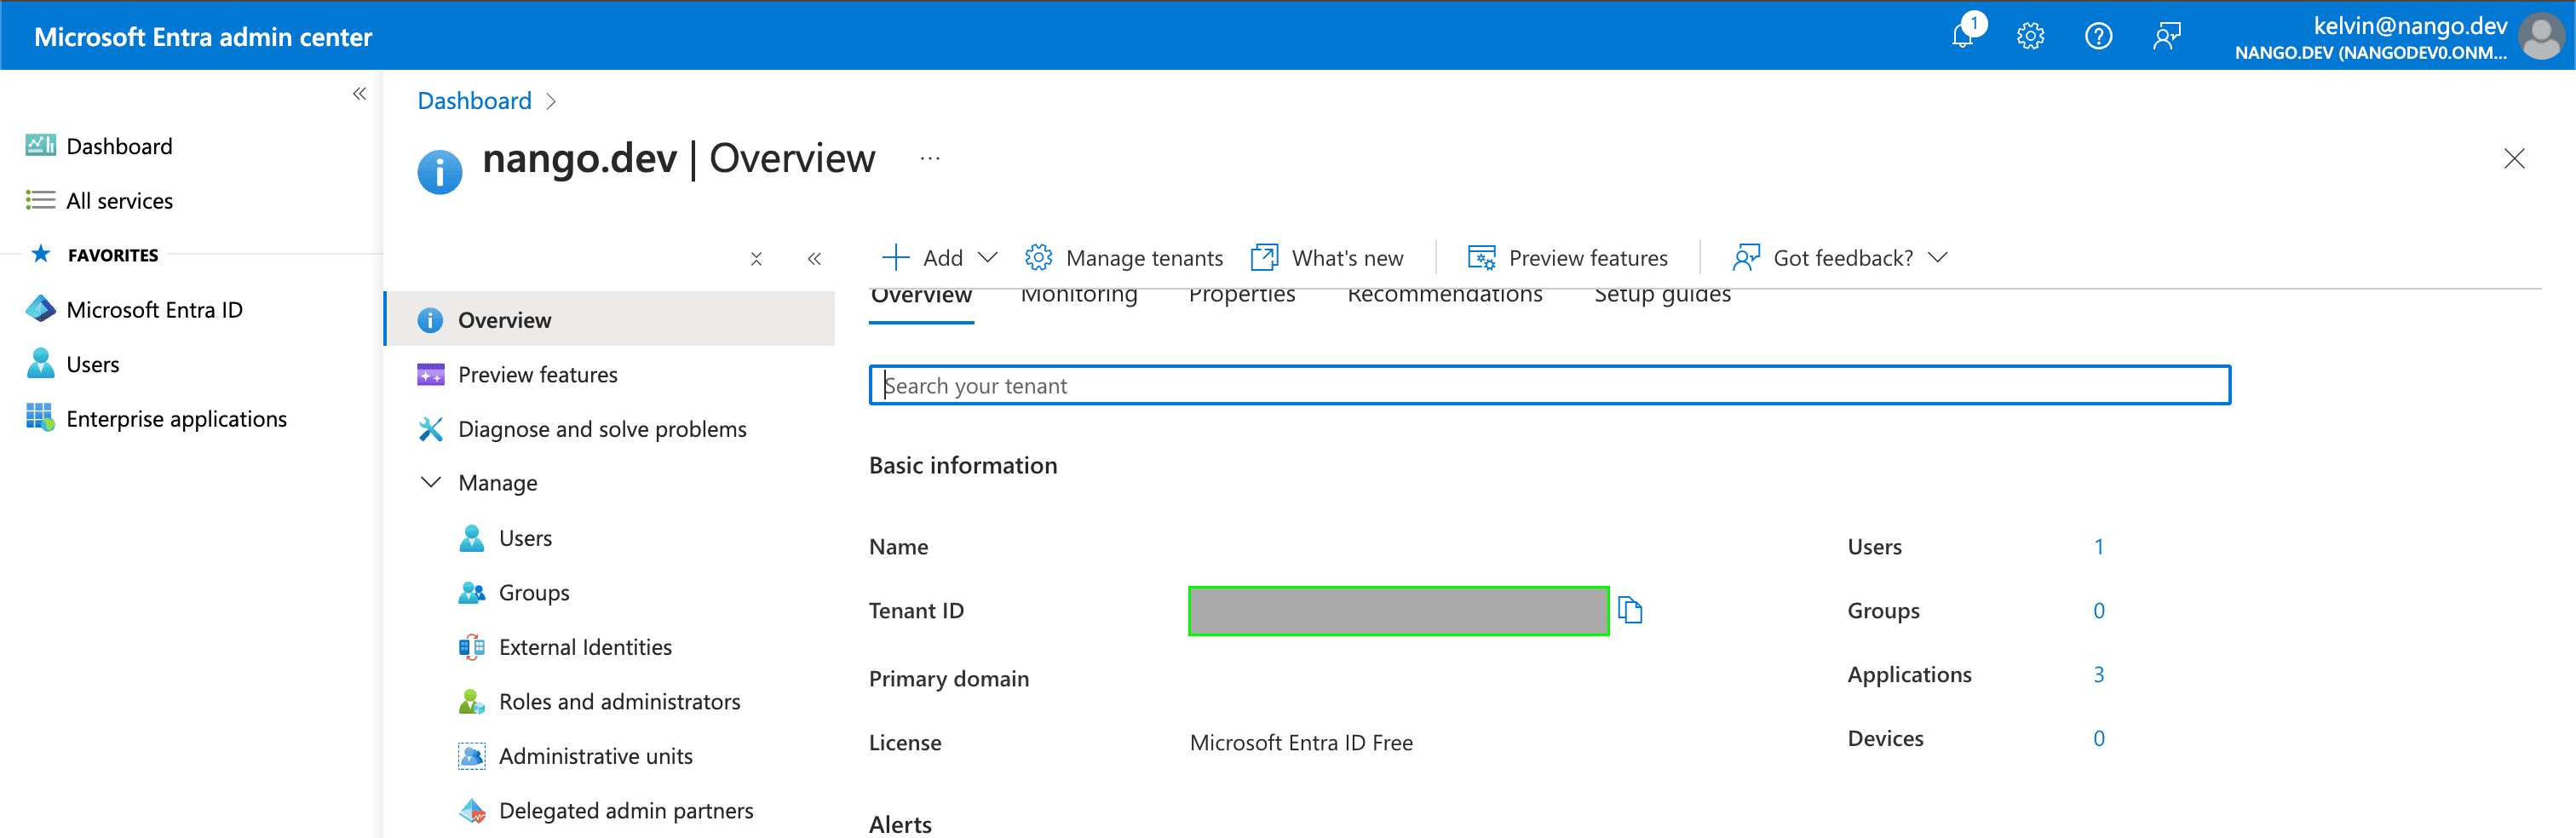
Step 1: Finding your Tenant ID
- Your Tenant ID can be found in the Tenant ID field on the Overview page within your Azure account.
Step 2: Generating your Client ID
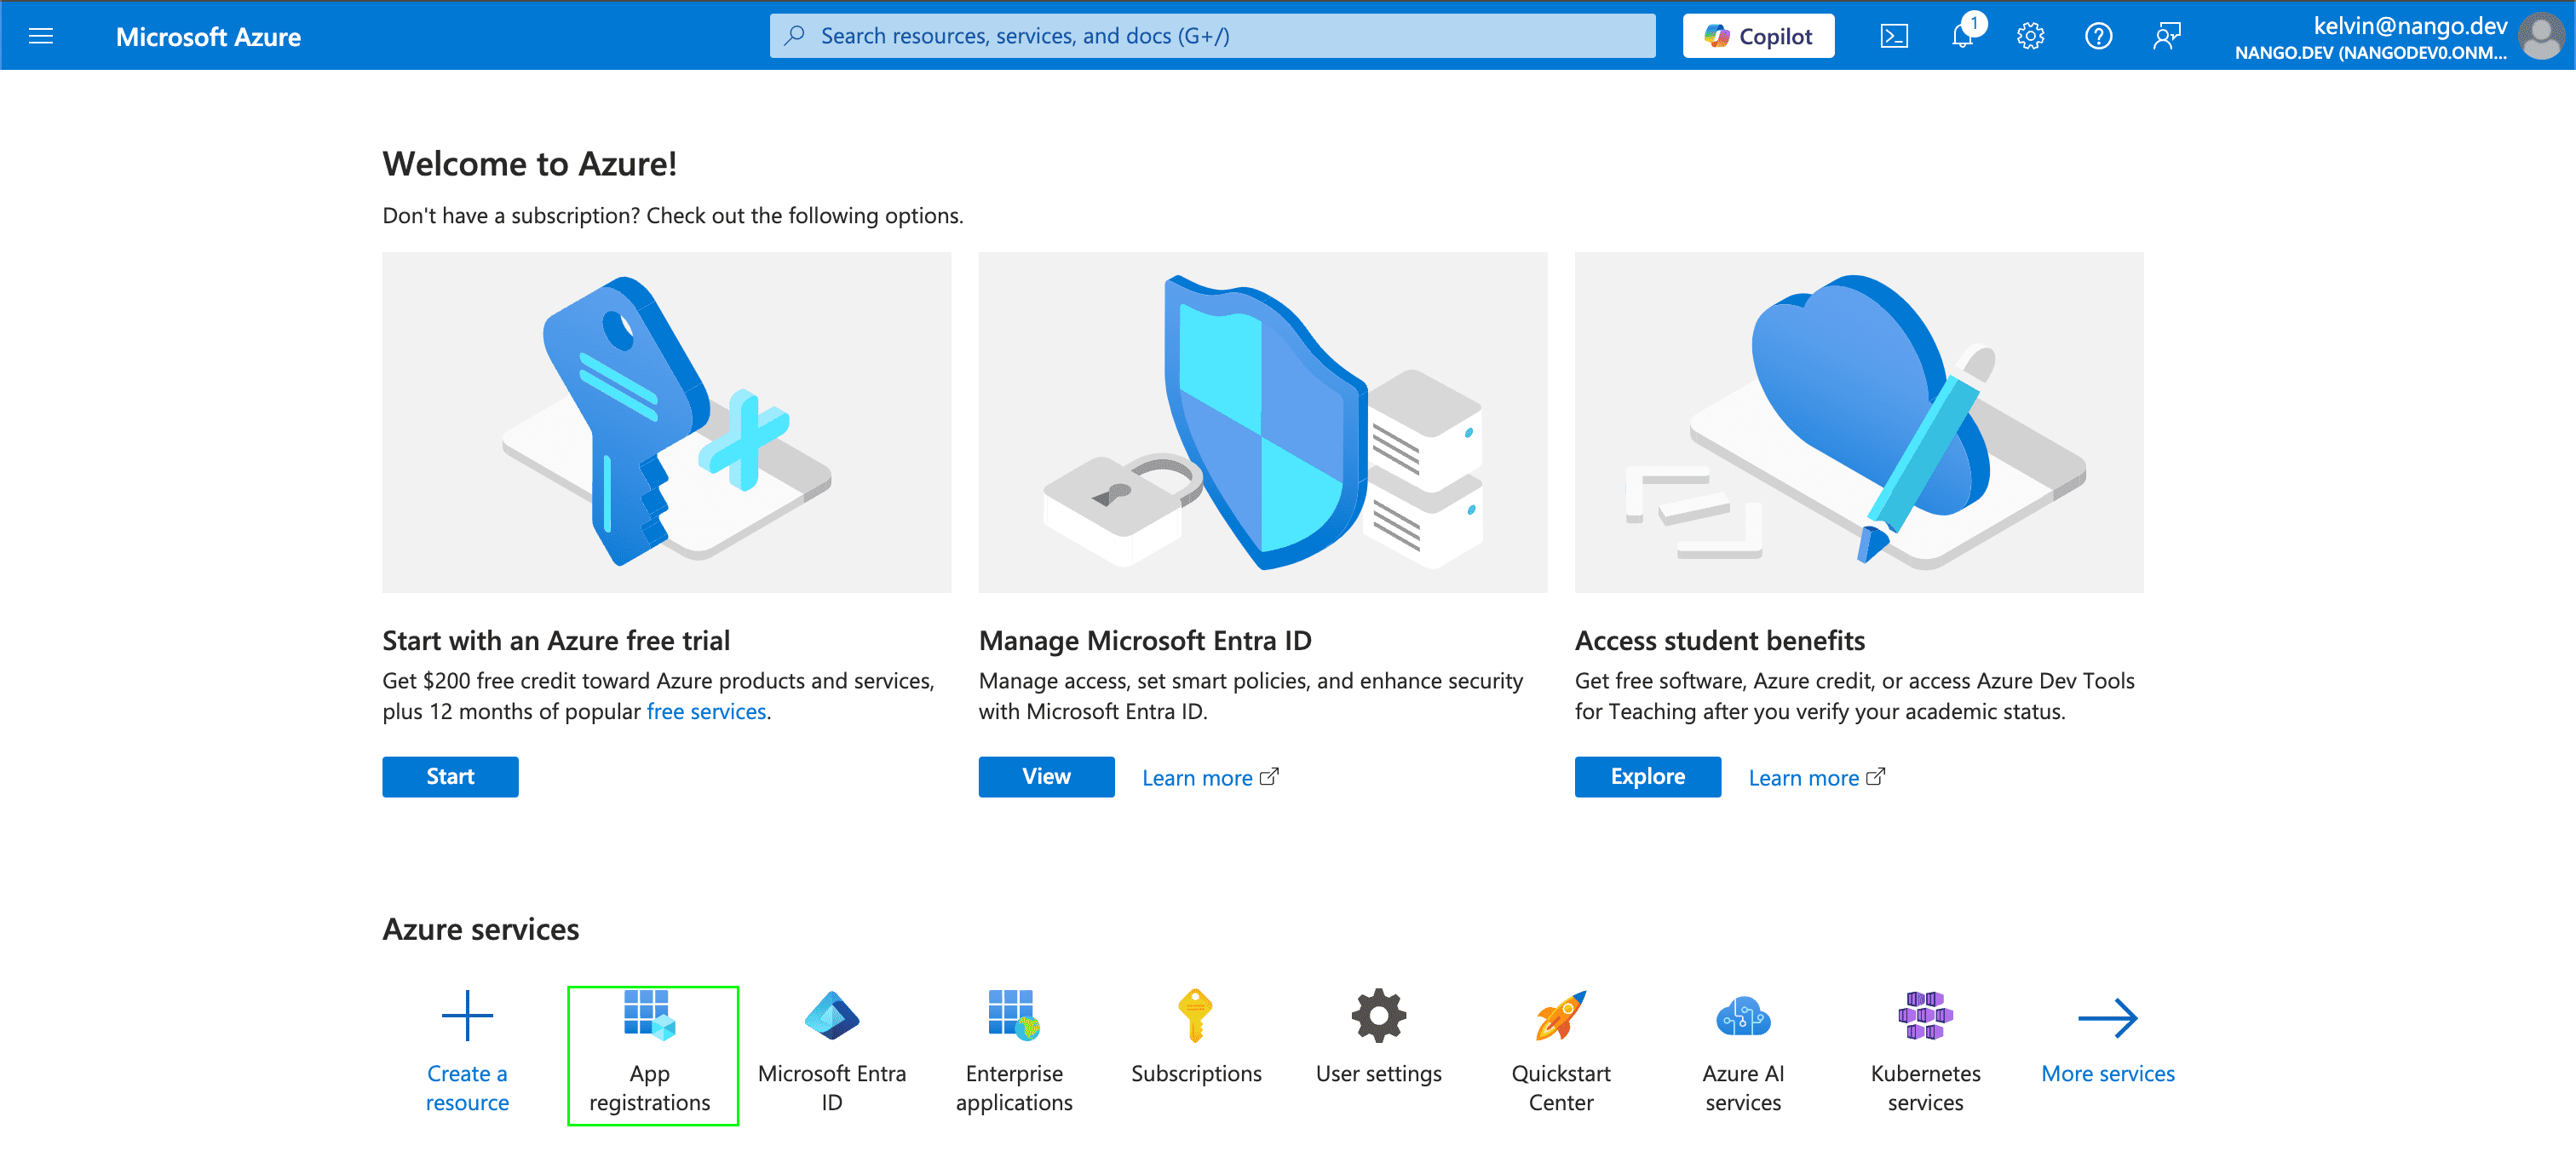
- Navigate to the Azure portal home page and sign in using the credentials of an administrator.
- Select App registrations.
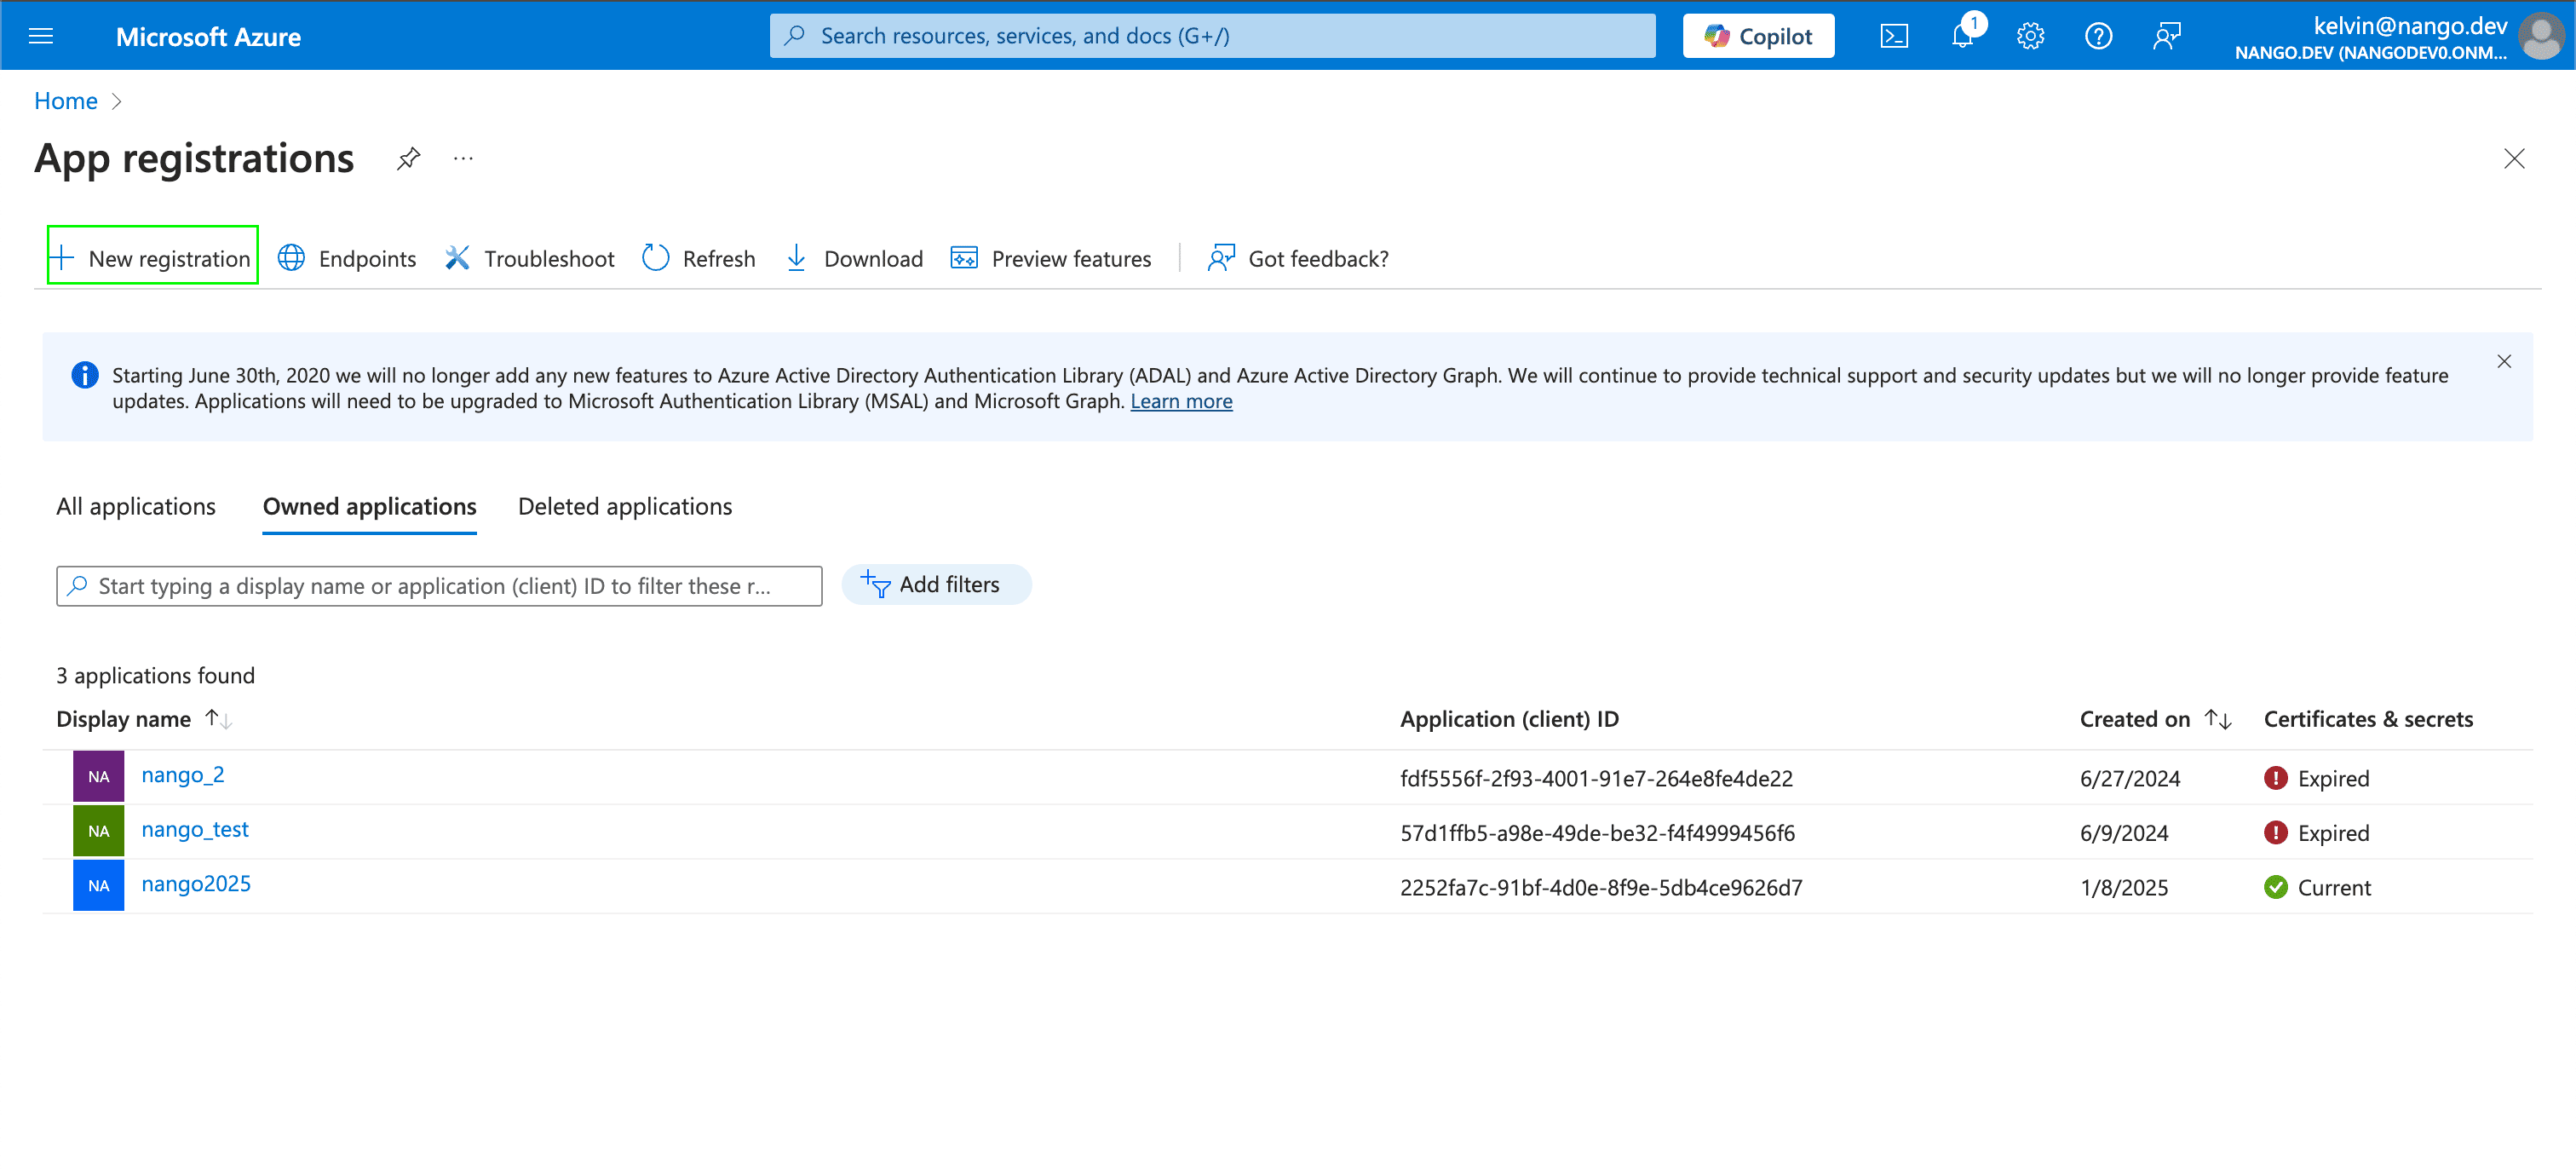
- Select New registration.
- In the Register an application section, enter a meaningful application name to display to users (e.g.
Nango PowerPoint). Under Supported account types, leave it to the default one which is Single tenant Only and click Register. - Once you have registered your application, your Client ID will be displayed in the Application (client) ID field within the Essentials. Your Tenant ID is shown in the Directory (tenant) ID field.
Step 3: Generating your Client Secret
- After registering a new app in the step above, navigate to Certificates & secrets under Manage, and click New client secret.
- A pop-up modal will appear, prompting you to enter your secret’s Description and Expires values. Fill these then click on Add.
- Once completed, copy the Client Secret from the Value field immediately and store it securely; it will not be shown again after you leave this page. Don’t confuse it with the Secret ID column in the same table — that’s just an identifier for the secret entry, not the credential itself.
- After generating the Client Secret, you must grant the registered application the necessary permissions. Navigate to API permissions, select Add a permission, and choose Microsoft Graph.
-
From the displayed list, choose Application permissions, select the required permissions, and click Add permissions. Common permissions include:
Files.Read.All— read all files across the tenantFiles.ReadWrite.All— read and write all files across the tenantSites.Read.All— read SharePoint sites, needed to resolve a site ID before reading its files
- Select Grant admin consent for [your organization] and confirm. Admin consent is required for application permissions.
Application (client credentials) permissions have no signed-in user — the token can read or write across the whole tenant, scoped only by the permissions you grant. Grant the narrowest set your integration needs.
Step 4: Enter credentials in the Connect UI
Once you have your credentials:- Open the form where you need to authenticate with Microsoft PowerPoint.
- Enter the Tenant ID, Client ID, and Client Secret in their designated fields.
- Submit the form, and you should be successfully authenticated.