

1
Register an application
- Sign in to the Microsoft Entra admin center as at least an Application Developer.
- Go to Identity > Applications > App registrations and click New registration.
- Enter a name for your app, for example “Nango Integration”.
- Under Supported account types, choose Accounts in any organizational directory so administrators of other organizations can connect, or Accounts in this organizational directory only for your own tenant.
- Under Redirect URI, select Web and enter
https://api.nango.dev/oauth/callback. - Click Register.
2
Note your application (client) ID
On the app’s Overview page, copy the Application (client) ID. This is the client ID for Nango.
3
Generate a certificate
Generate an RSA private key and a self-signed certificate with OpenSSL (or use a certificate from your organization’s certificate authority):This creates
private_key.pem (keep it secret) and certificate.pem (the public certificate).4
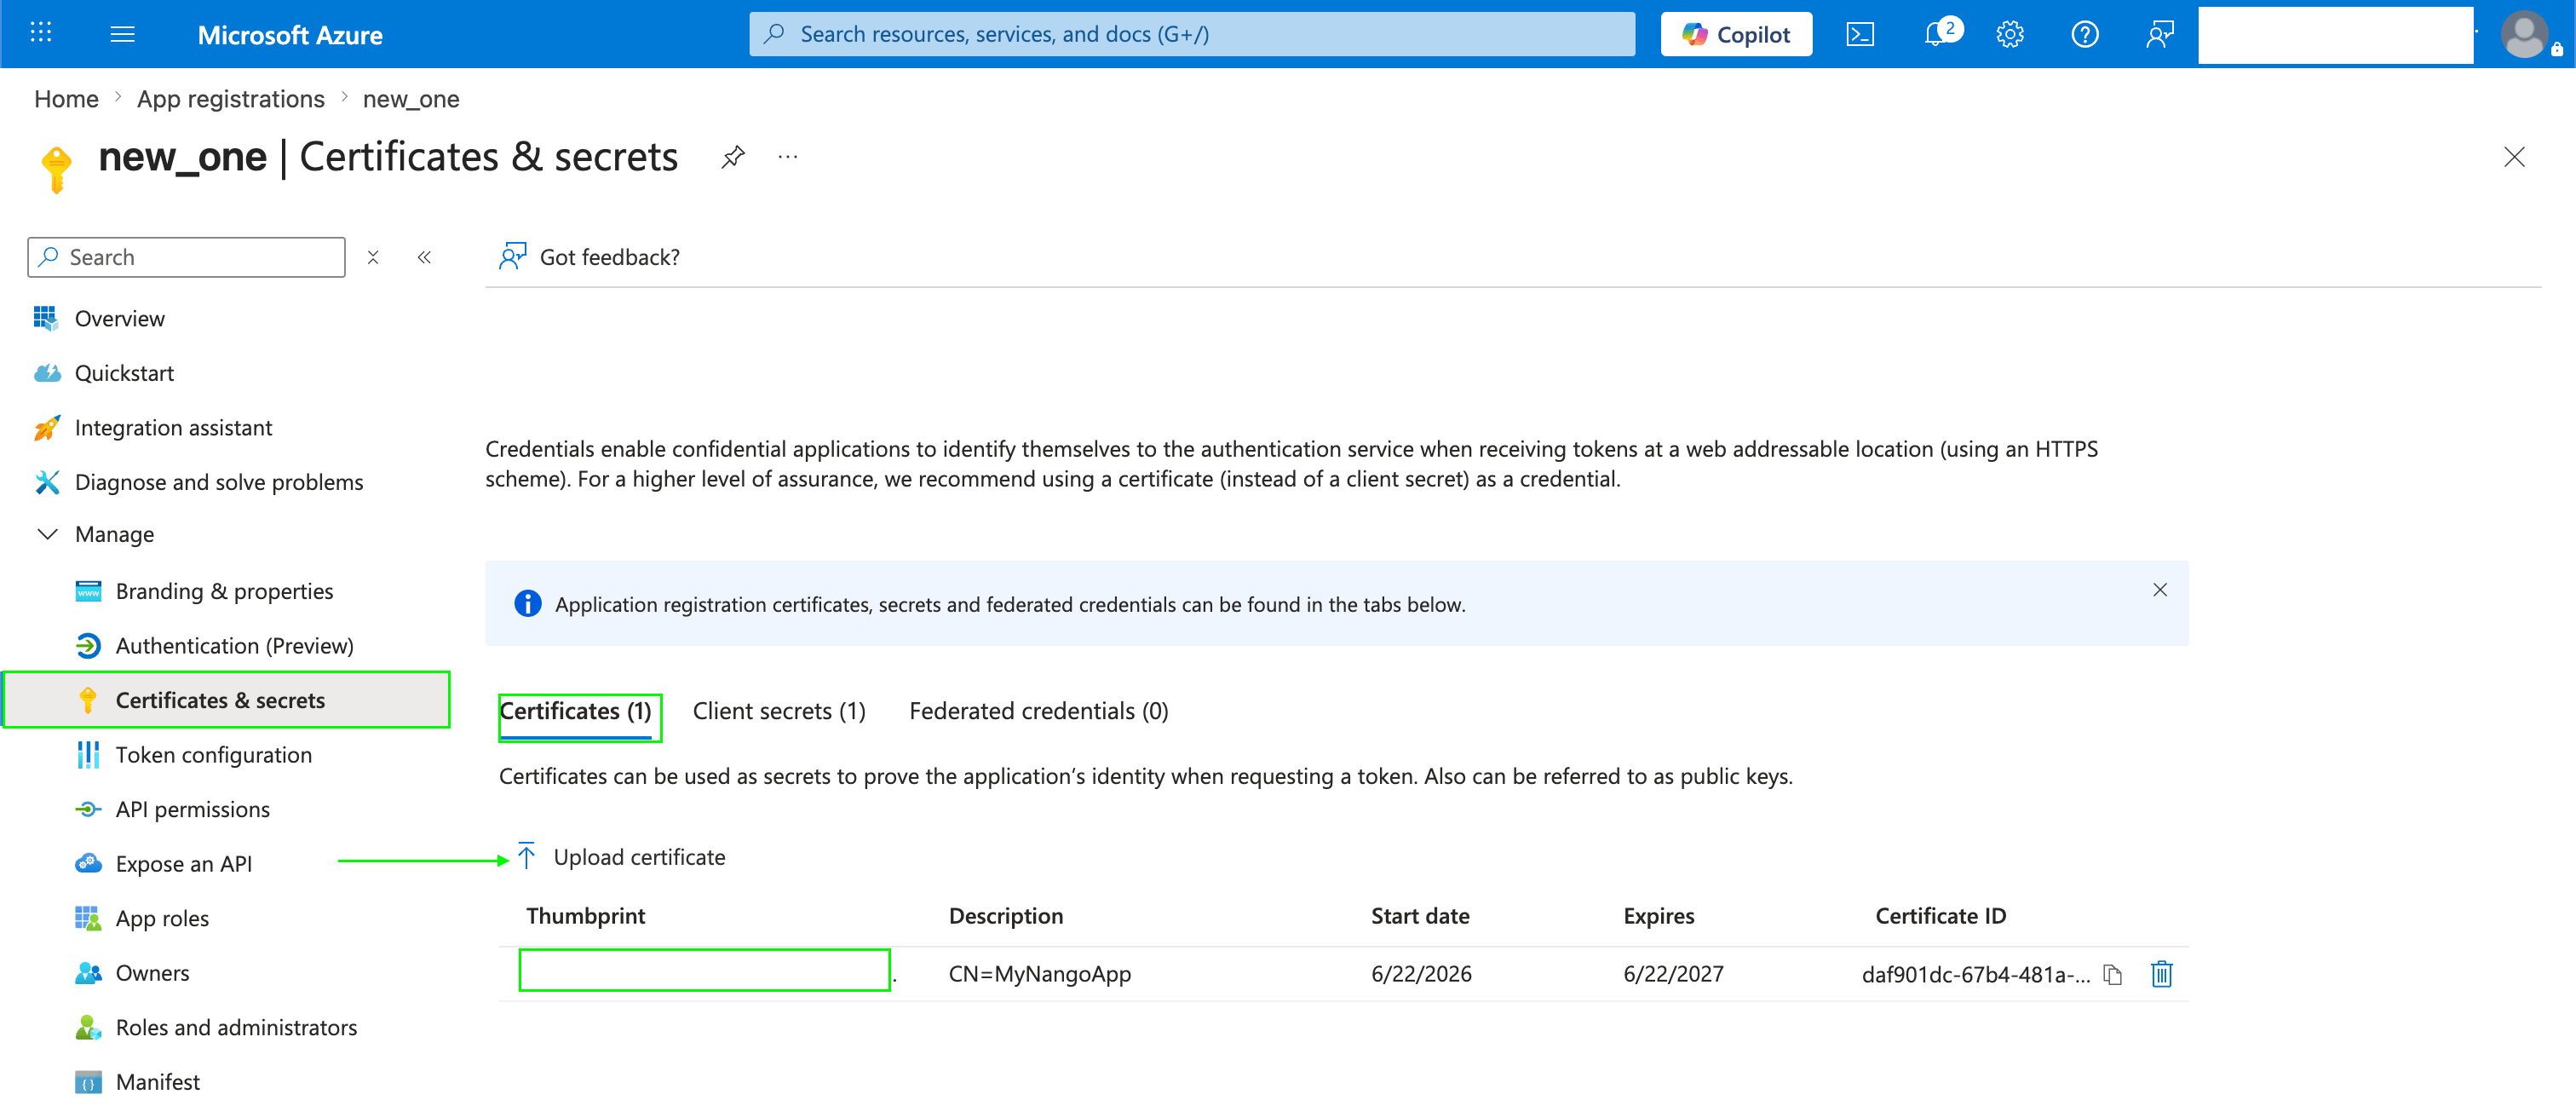
Upload the certificate
- In your app registration, open Certificates & secrets > Certificates and click Upload certificate.
- Select
certificate.pem, add a description and click Add.
5
Add API permissions
- Open API permissions and click Add a permission > Microsoft Graph > Application permissions.
- Select the permissions your app needs, for example
Organization.Read.AllorUser.Read.All, and click Add permissions.
6
Add the credentials in Nango
In your Microsoft (Admin - Certificate) integration in Nango:
- Enter the Application (client) ID as the Client ID.
- Paste the contents of
private_key.pemin the Client secret field. - Paste the contents of
certificate.pemin the Certificate field. - Set the scopes to
https://graph.microsoft.com/.default.
7
Next
Follow the Quickstart.