Overview
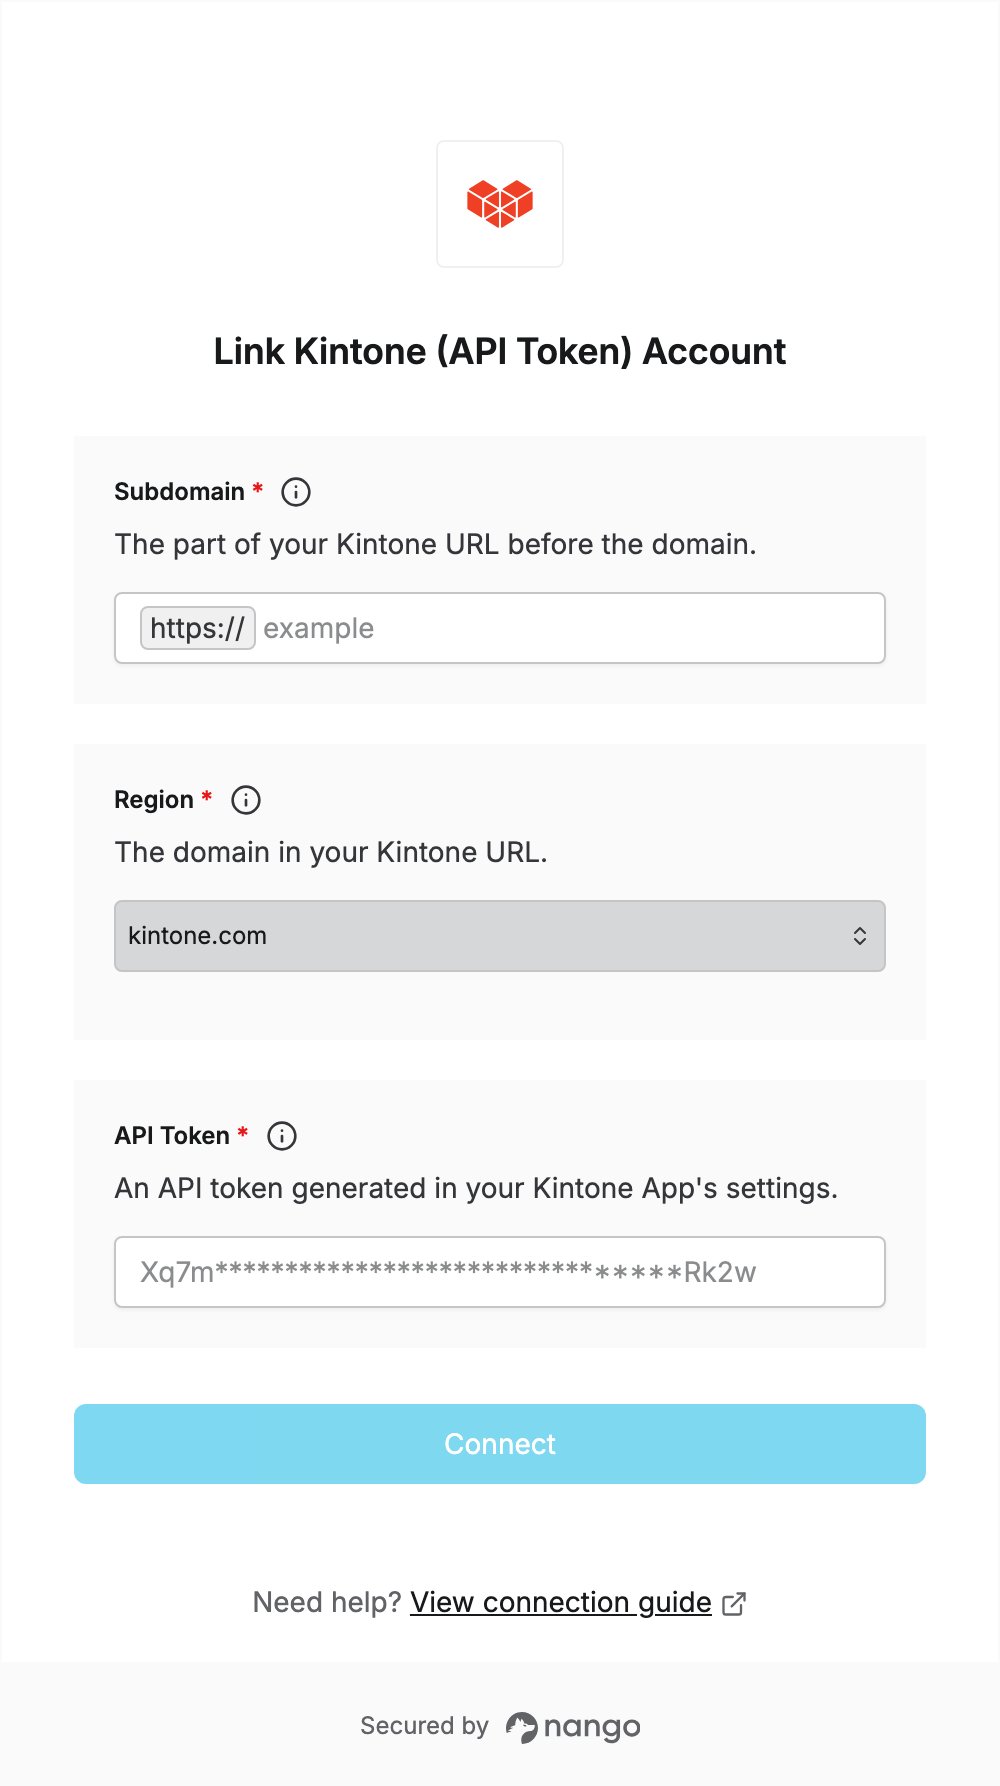
To authenticate with Kintone using an API token, you need:- Subdomain — the first part of your Kintone URL.
- Region — the domain of your Kintone URL.
- API Token — a token generated in the Kintone App you want to connect.
Prerequisites
- A Kintone environment with at least one App. You can get a free Kintone developer license or start a free trial.
Step 1: Find your subdomain and region
Sign in to Kintone and look at the URL in your browser, for examplehttps://example.kintone.com:
- Your subdomain is the part before the domain, here
example. - Your region is the domain:
kintone.com, orcybozu.comif your URL ends in.cybozu.com.
Step 2: Generate an API token
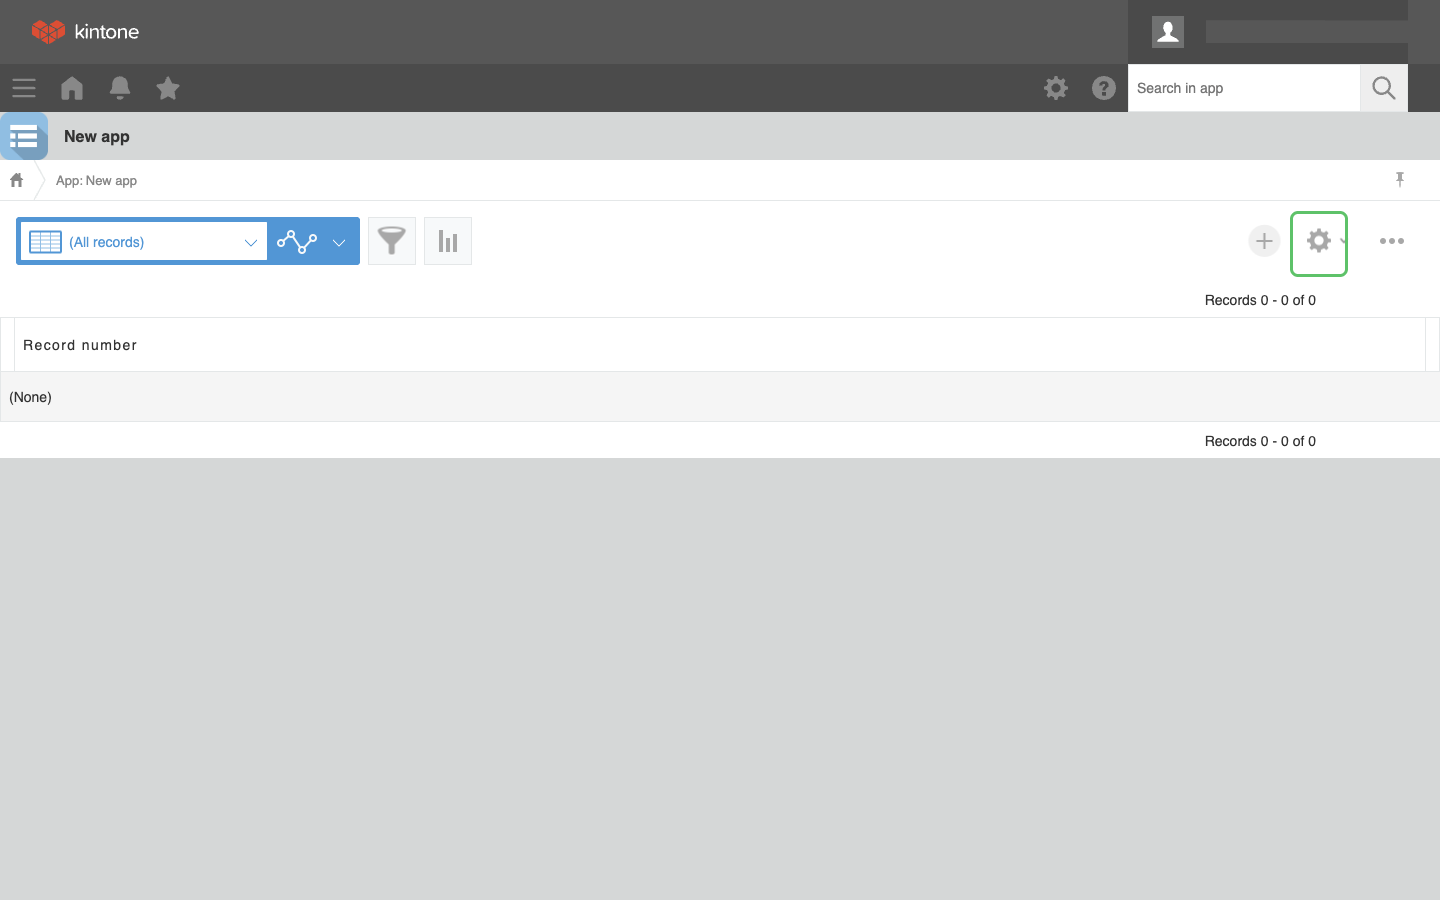
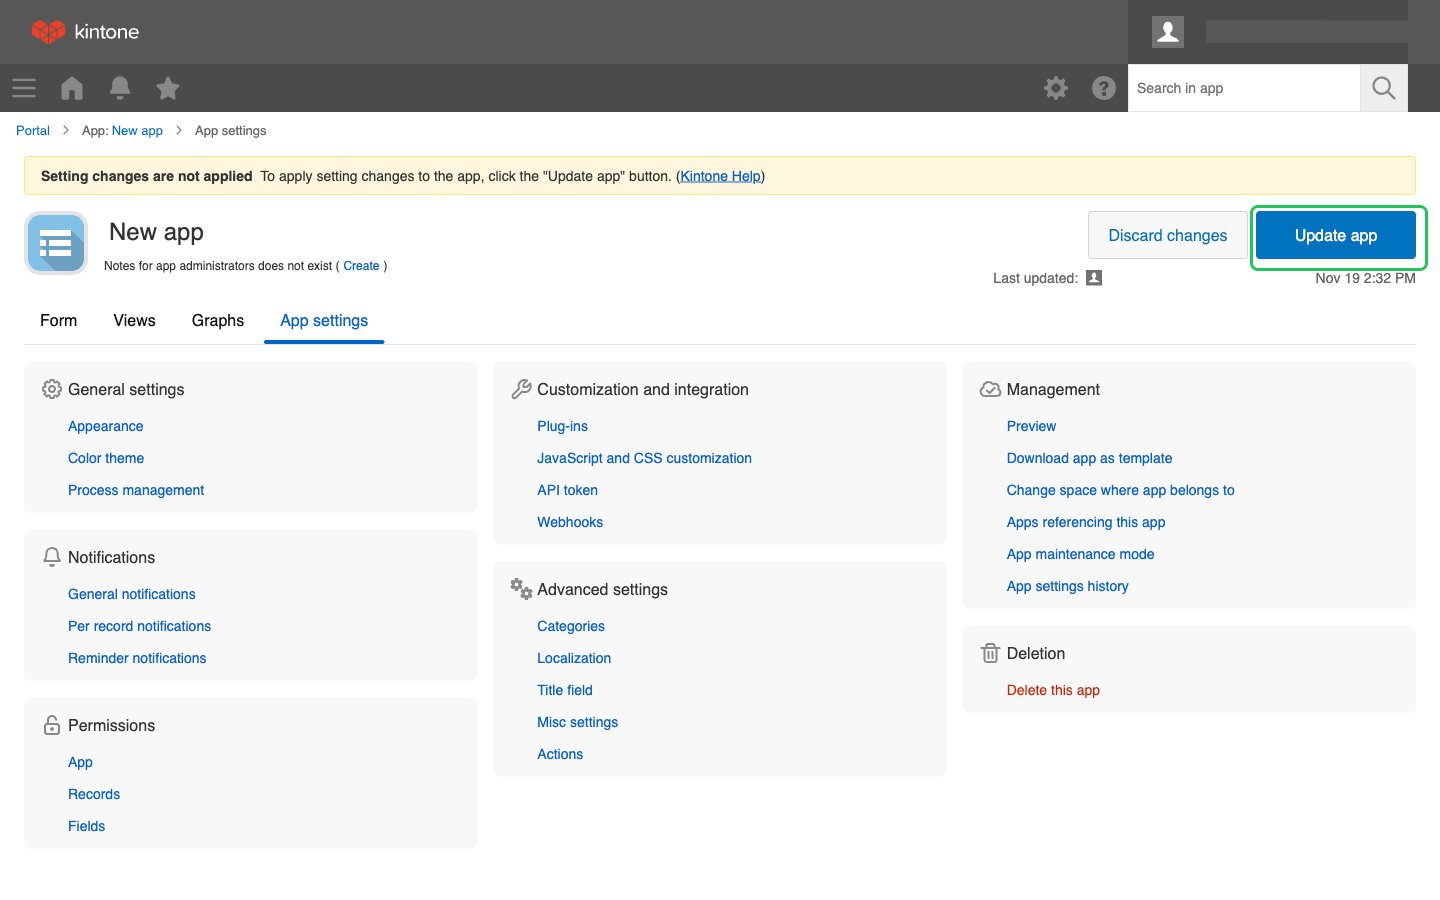
An API token only works with the App it was generated in, and only for the permissions you tick.- Open the Kintone App you want to connect and click the App settings (gear) icon at the upper right of the View screen.
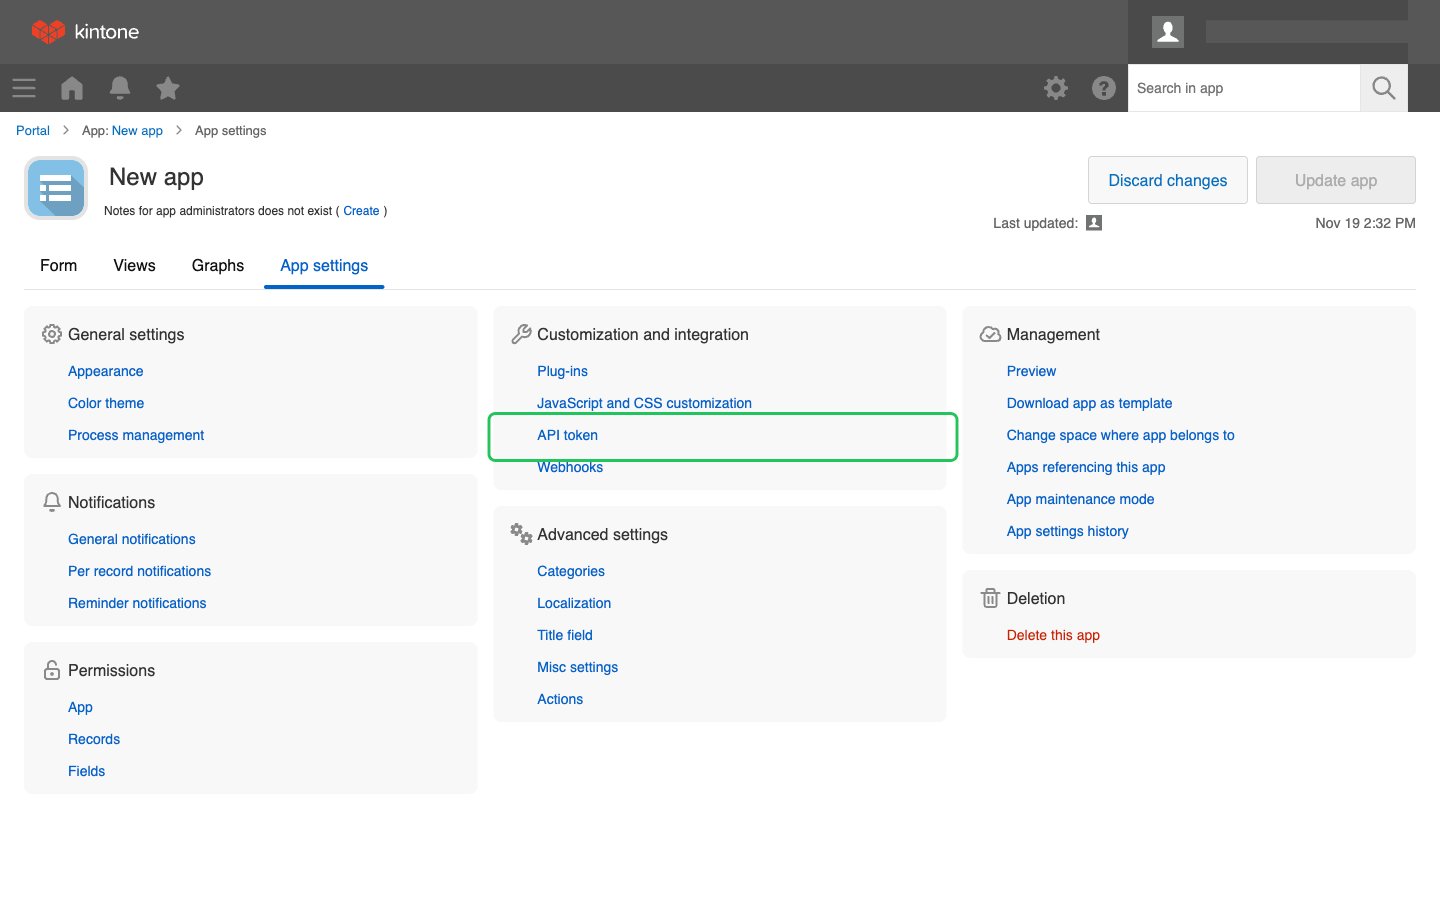
- On the App settings tab, click API token under Customization and integration.
- Click Generate, tick only the permissions you need (View records alone gives read-only access), copy the token, then click Save.
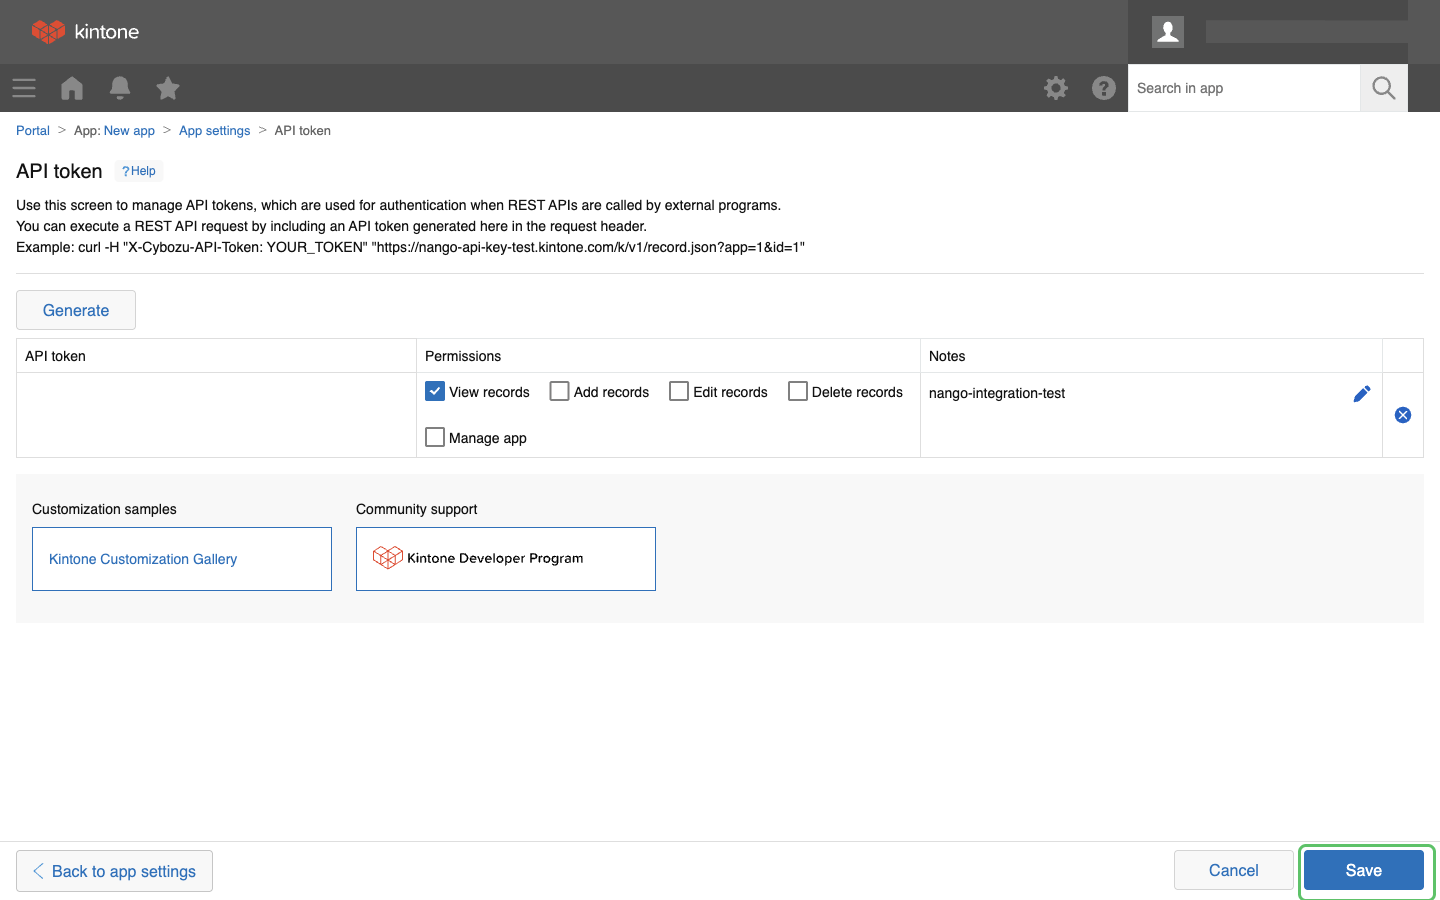
- Click Update app at the upper right and confirm. The token only works after the App is updated.
Step 3: Enter your credentials in the Connect UI
- Open the form where you need to authenticate with Kintone (API Token).
- Enter your Subdomain, select your Region, and enter your API Token.
- Submit the form. The connection is saved without checking the token: if the token is wrong, the first API request returns an authentication error.