Overview
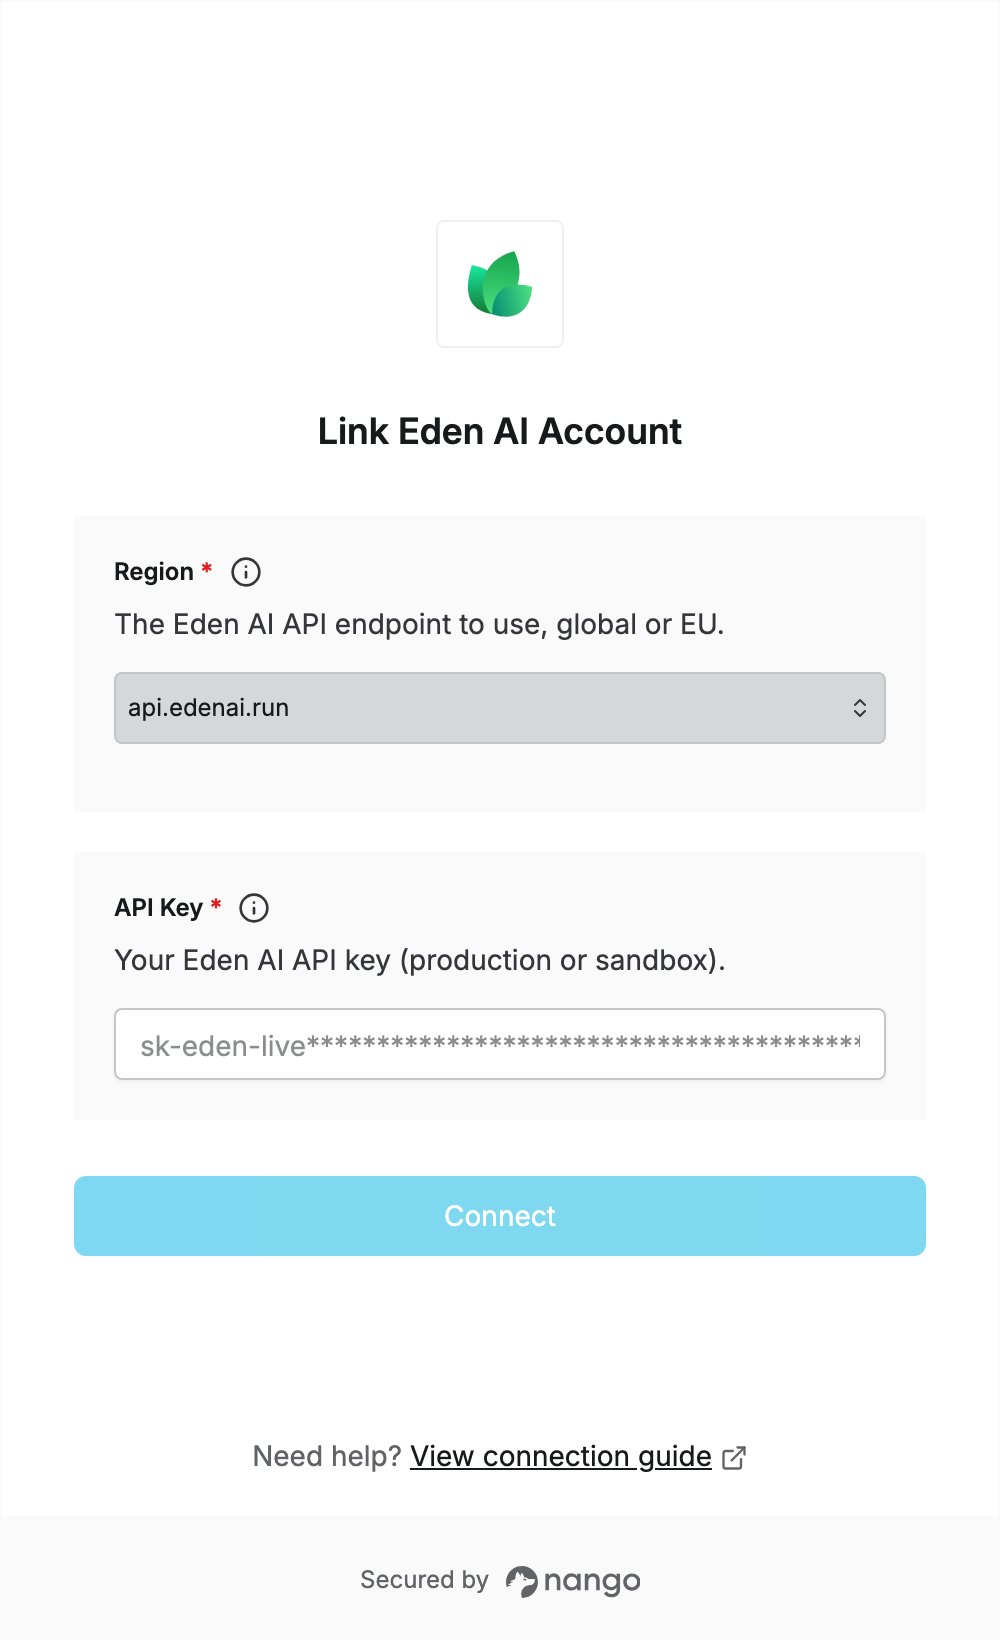
To authenticate with Eden AI, you need:- Region — the Eden AI API endpoint to send requests to.
- API Key — an Eden AI API key, production or sandbox.
Prerequisites
- An Eden AI account. You can sign up for free.
Step 1: Choose your region
Eden AI has two API endpoints, and the same API key works on both. Pick the one your requests should go through:
If you have no EU data residency requirement, use
api.edenai.run. See EU Data Residency Endpoint for details.
Step 2: Create an API key
- Sign in to Eden AI.
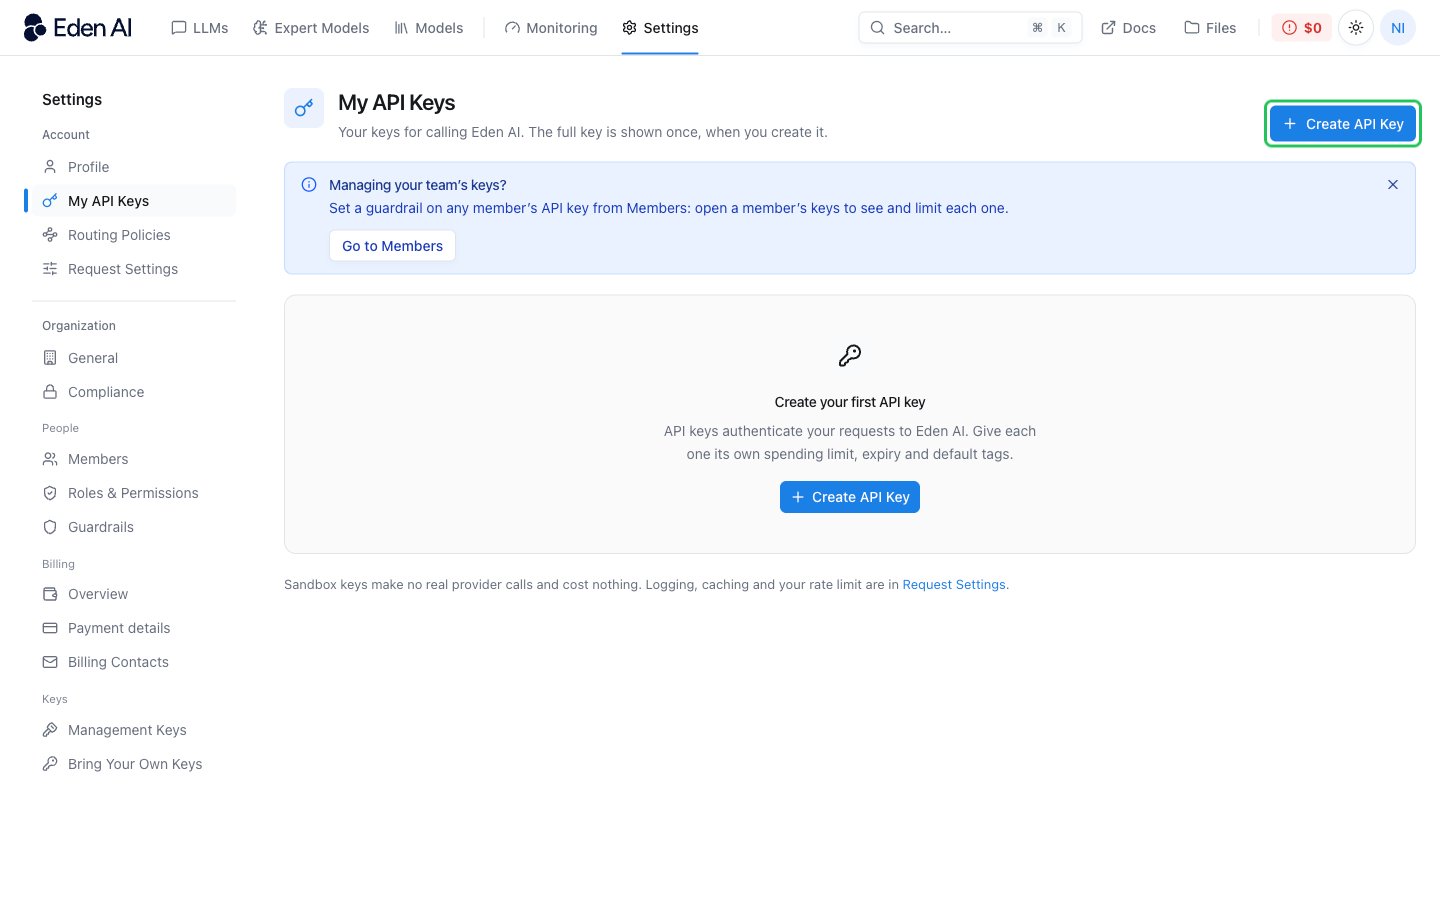
- Go to Settings > My API Keys, then click Create API Key.
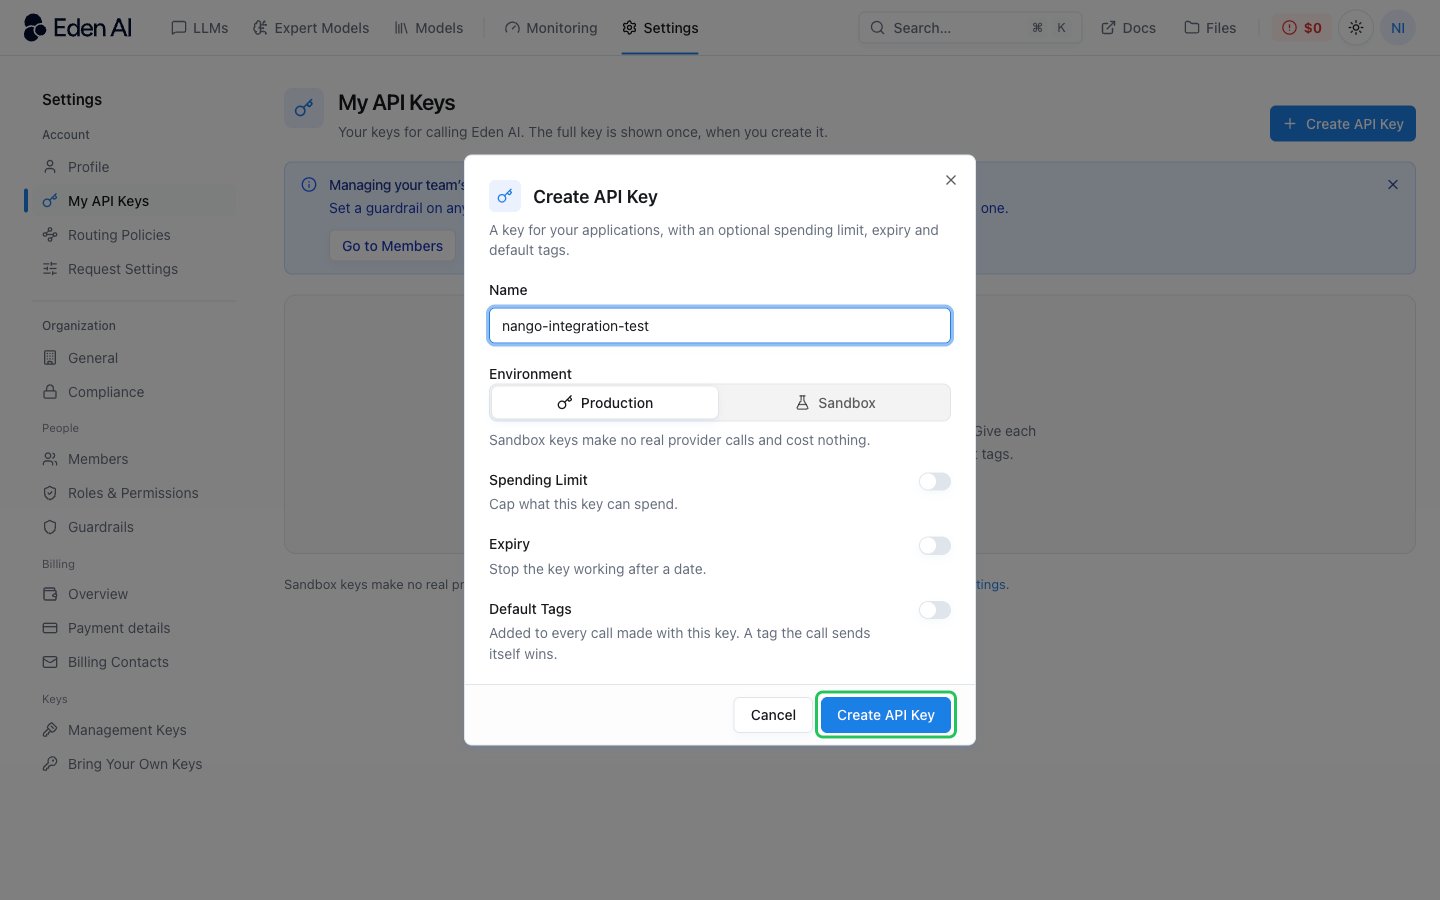
- Enter a name for the key and choose the Environment: Production for real model calls, or Sandbox for mock responses at no cost. Spending limit, expiry and default tags are optional. Click Create API Key.
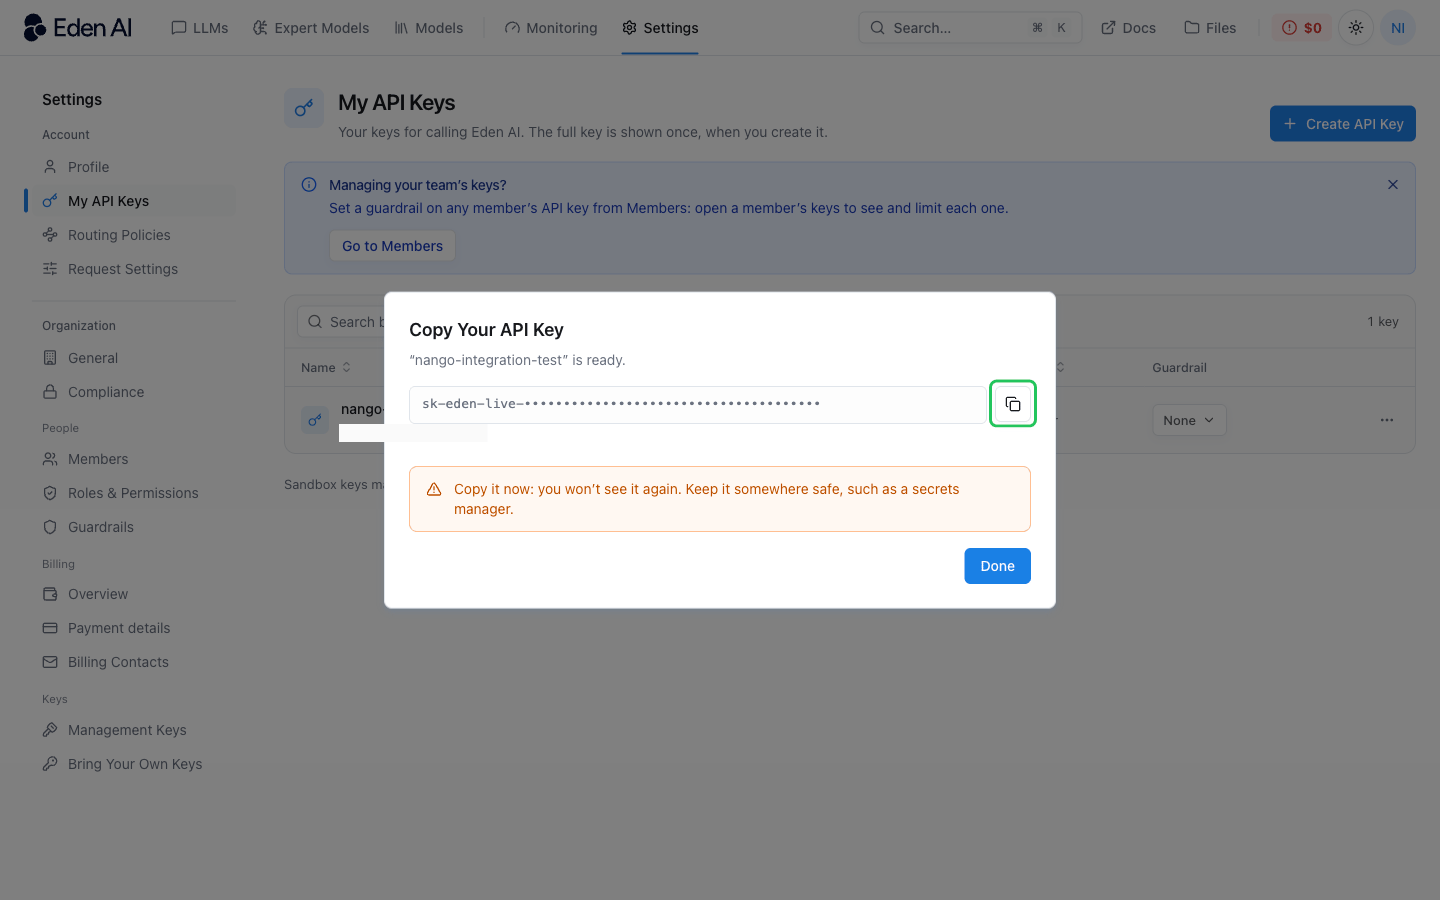
- Copy the key (it starts with
sk-eden-). Eden AI shows it only once.
Step 3: Enter your credentials in the Connect UI
- Open the form where you need to authenticate with Eden AI.
- Select your Region and enter your API Key in the designated fields.
- Submit the form, and you should be successfully authenticated.