Overview
To authenticate with the Apple App Store, you need:- Issuer ID – The unique identifier for your App Store Connect API account.
- Key ID – The identifier for the API key you generate.
- Private Key – The
.p8private key file content downloaded when you create the API key.
Prerequisites
- An App Store Connect account with the Account Holder or Admin role (required to generate API keys).
Instructions
Step 1: Create an API key
- Sign in to App Store Connect and go to Users and Access -> Integrations -> App Store Connect API.
- Click Generate API Key (or the + button), give it a name, and select the access level your integration needs.
- Click Generate, then download the
.p8private key file.
Apple only lets you download the private key file once. Store it somewhere safe — you’ll need its raw content in Step 4.
Step 2: Note your Issuer ID and Key ID
Back on the App Store Connect API page:- Issuer ID is displayed at the top of the page, above the keys table. See Apple’s docs on generating tokens for API requests for details.
- Key ID is listed next to the API key you just created.
Step 3: Scope format
When setting Scope, use the format<HTTP method> <path>, matching the request you want to allow, e.g. GET /v1/apps. To allow more than one request, separate them with commas, e.g. GET /v1/apps,GET /v1/builds. See Apple’s docs on generating tokens for API requests for the full scope syntax, including how to restrict to a specific resource instance with query parameters.
Step 4: Enter credentials in the Connect UI
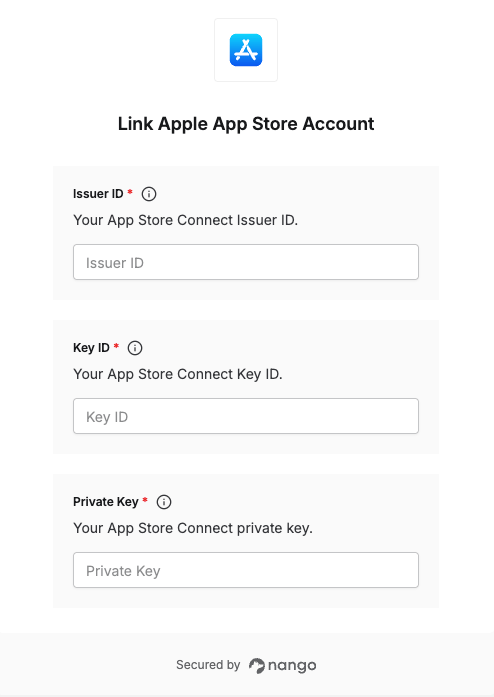
Once you have your Issuer ID, Key ID, and Private Key:- Open the form where you need to authenticate with Apple App Store.
- Enter your Issuer ID and Key ID in their respective fields.
- Paste the raw content of the downloaded
.p8file into the Private Key field, unmodified (Nango encodes it internally — don’t base64-encode it yourself). - Optionally, set Scope to restrict the token to one or more specific API requests. Leave it blank to allow the full set of requests your key has access to.
- Submit the form to complete authentication.