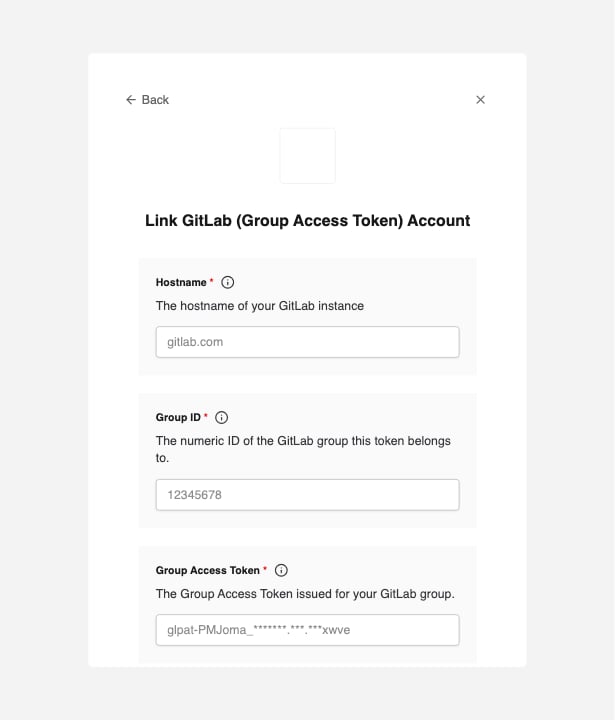
Overview
To authenticate with GitLab using a Group Access Token, you need:- Hostname — the hostname of your GitLab instance, such as
gitlab.comor your self-hosted instance domain. - Group ID — the numeric ID of the GitLab group the token belongs to.
- Group Access Token — a token issued by GitLab that authenticates as an auto-provisioned bot user inside the group.
Prerequisites
- You must have the Owner role in the target GitLab group to create a Group Access Token.
- On GitLab.com, Group Access Tokens require a Premium or Ultimate subscription. On GitLab Self-Managed and GitLab Dedicated, they are available on any tier.
Step 1: Find your hostname
Use the domain where your GitLab instance is hosted:- For GitLab.com, use
gitlab.com. - For GitLab Self-Managed or GitLab Dedicated, use your instance domain, such as
gitlab.example.com.
Step 2: Find your group ID
- Sign in to your GitLab instance.
- Open your group’s overview page.
- Copy the numeric Group ID displayed under the group name.
For agents
For agents
Resolve a group’s numeric ID from its full URL-encoded path by calling GitLab directly. Set Read the numeric
GITLAB_HOSTNAME to the hostname from Step 1. Authenticate with a token that has access to the group. Private groups require a Personal Access Token, Project Access Token, or Group Access Token with read_api or wider scope. Public groups can be looked up without authentication.id field from the JSON response. See the GitLab groups API for the response schema.Step 3: Create a Group Access Token
- From the top bar, select Search or go to and find your group.
- Select Settings > Access tokens.
- Select Add new token.
- Enter a name and expiration date. The name becomes the display name of the auto-provisioned bot user.
- Select the bot user’s Role based on the operations your integration performs. Lower roles may support viewing or commenting. Creating merge requests generally requires Developer. Approval and protected-branch merge permissions depend on the project’s settings.
- Select the scopes you need.
apigrants full read and write access; use narrower scopes such asread_apiandread_repositorywhere possible. - Select Create group access token.
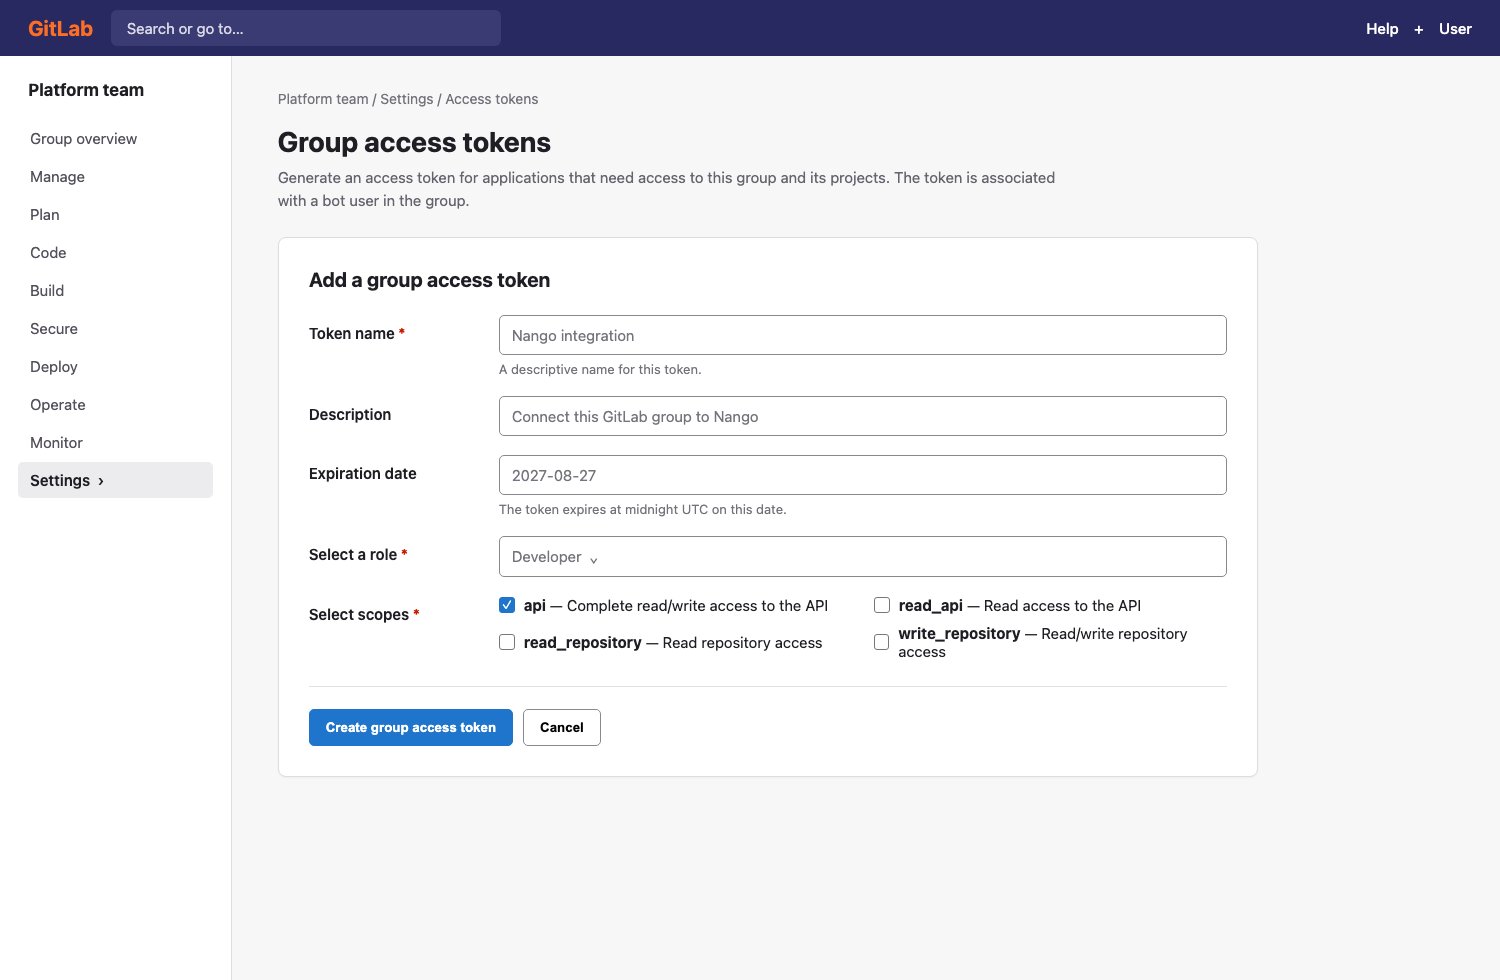
GitLab creates a bot user inside the group when you generate the token. The bot’s username follows the pattern
group_<group_id>_bot_<random>. The bot counts as a group member but not as a licensed seat.For agents
For agents
Create a Group Access Token with the GitLab API. Authenticate with a token belonging to a group Owner, and replace the placeholders with the target group ID and desired token configuration.
access_level=30 creates a Developer bot user. Choose the minimum access level and scopes required for the integration. Save the returned token value immediately because GitLab only returns it once.Step 4: Enter credentials in Nango Connect
- Open the Nango Connect form for GitLab (Group Access Token).
- Enter the Hostname, Group ID, and Group Access Token.
- Submit the form to connect the group.