Overview
To authenticate with Nexthink, you need:- Instance Name - The name of your Nexthink instance.
- Region - Your Nexthink region where your instance is hosted.
- Client ID - Your Nexthink API Client ID.
- Client Secret - Your Nexthink API Client Secret.
Prerequisites
- Admin access to your Nexthink instance
- The Nexthink Infinity platform (Cloud)
Instructions
Step 1: Locate your instance name and region
Your Nexthink instance URL (FQDN) follows one of these patterns depending on your platform type:
For example, if your FQDN is
nxdocs.data.eu.nexthink.cloud, then:
- Instance name:
nxdocs - Region:
eu
us— United Stateseu— European Unionpac— Asia-Pacificmeta— Middle East, Turkey and Africa
Step 2: Create API credentials
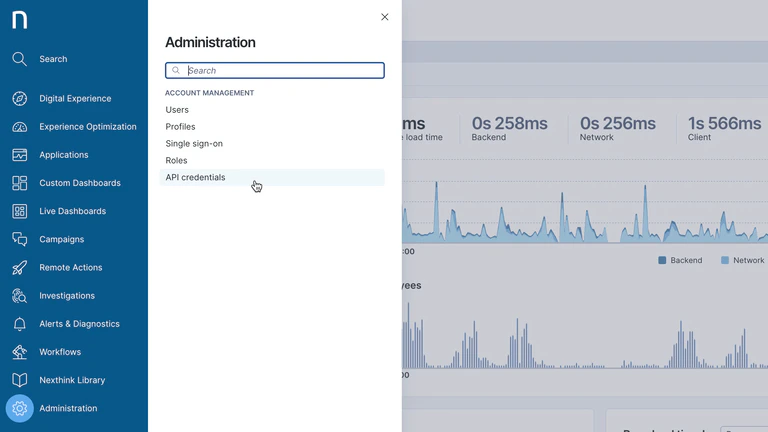
- Log in to the Nexthink web interface.
- Select Administration from the main menu.
- Click API credentials in the navigation panel under the Account Management section.
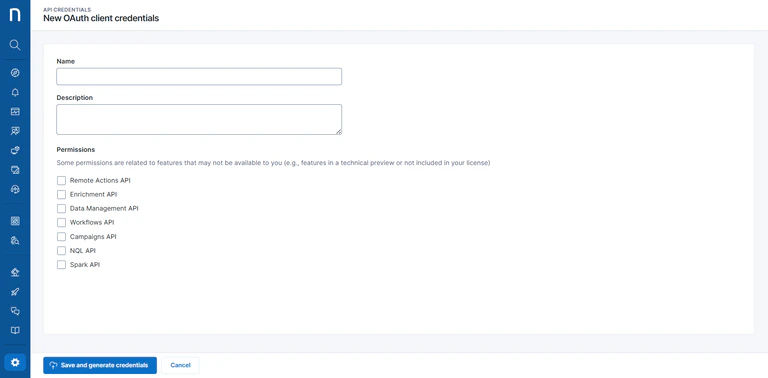
- Click New OAuth client credentials in the top-right corner.
- Fill in the form:
- Name: use the name of the application calling the API.
- Description: describe what service will use these credentials and why.
- Permissions: select the features your integration needs:
- Remote Actions API — trigger and query remote actions
- Enrichment API — operate the enrichment feature
- Data management — manage devices
- Workflows API — trigger and query workflows
- Campaigns API — trigger campaigns
- NQL API — extract data
- Spark API — transfer a live conversation to Spark
- Click Save and generate credentials.
- Copy the Client ID and Secret key using the Copy buttons in the modal that appears.
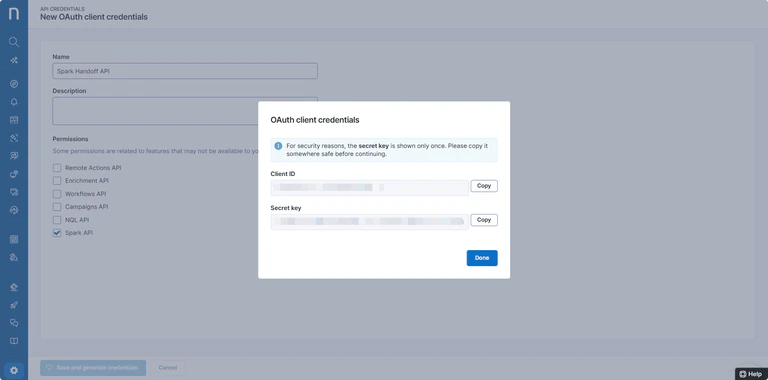
The credentials are shown only once. Copy them immediately and store them in your organization’s secure vault — they cannot be retrieved after you close the modal. If lost, you must generate new credentials.
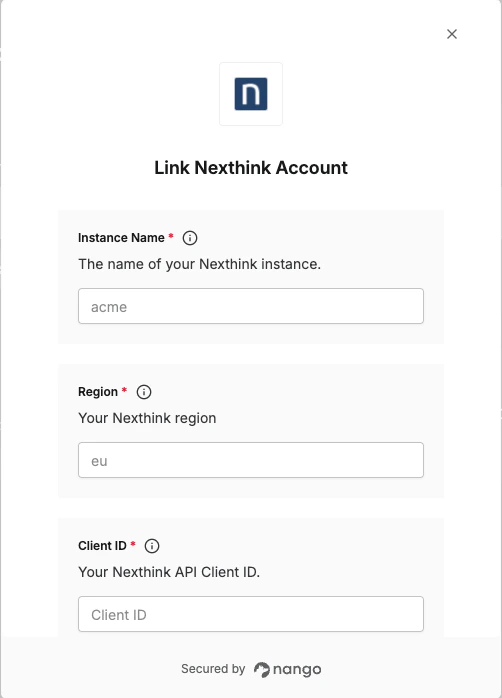
Step 3: Enter credentials in the Connect UI
- Open the form where you need to authenticate with Nexthink.
- Enter your Instance Name, Region, Client ID and Client Secret in their respective fields.
- Submit the form, and you should be successfully authenticated.