Overview
To authenticate with Halo PSA, you need:- Hostname - Your Halo PSA hostname.
- Client ID - The client ID from your Halo API application.
- Client Secret - The client secret from your Halo API application.
Prerequisites
- You must have administrator access to your Halo PSA instance.
- You must be able to create API applications in Halo.
Instructions
Step 1: Find your Halo API details
The Halo API is available on the same site as your Halo web application. For example, if your Halo web application is hosted athttps://example.halopsa.com, enter example.halopsa.com.
- Log in to Halo PSA as an administrator.
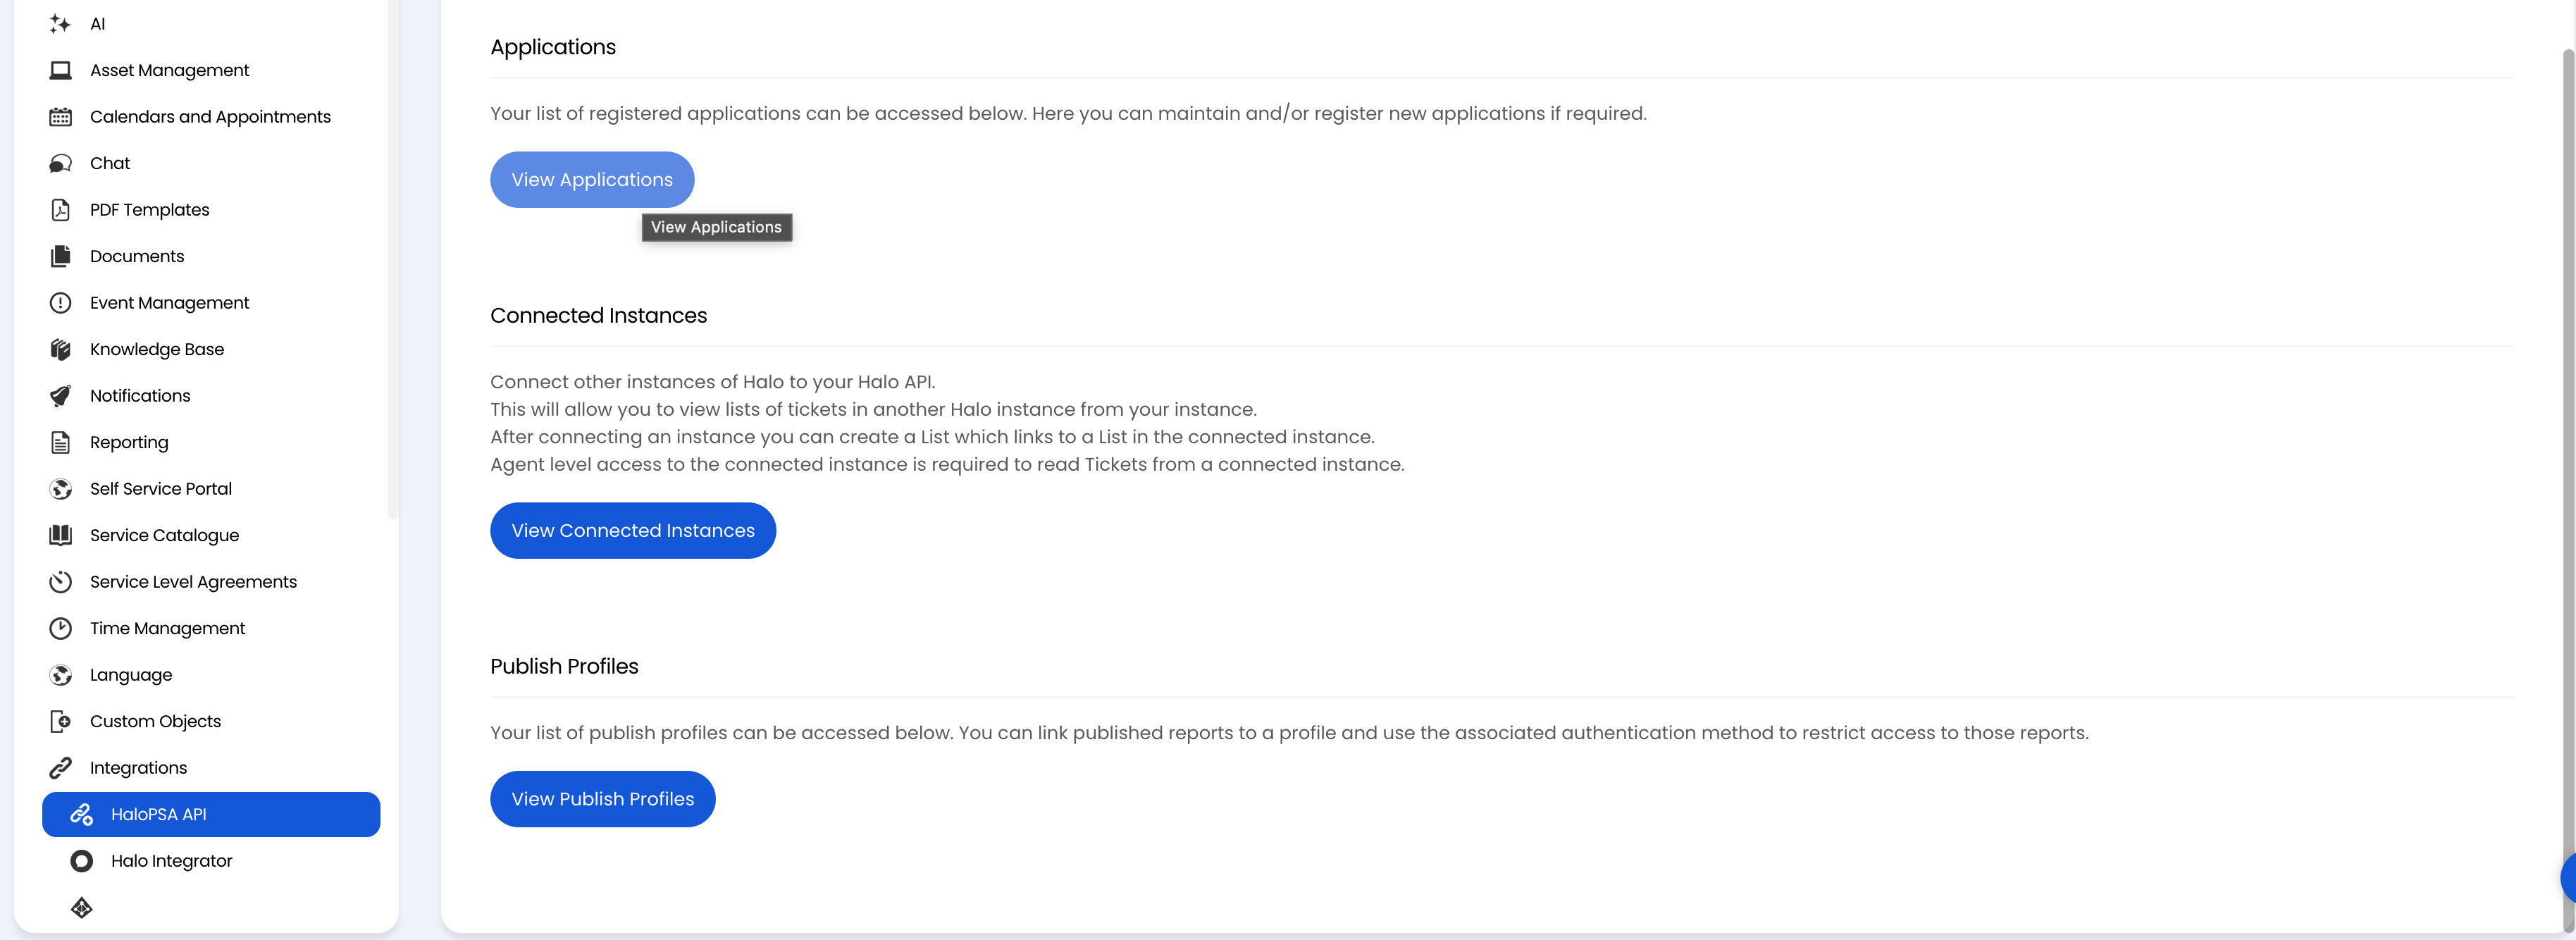
- Go to Configuration > Integrations > Halo API.
- Open API Details.
- Copy the hostname from your Resource Server or Authorisation Endpoint URL.
Step 2: Create an API-only agent
- Go to Configuration > Teams & Agents > Agents.
- Create a new agent for this integration, such as
Nango Integration. - Enable Is an API-only Agent.
- Assign this agent to the teams and departments whose tickets, customers, assets, and other records Nango should access.
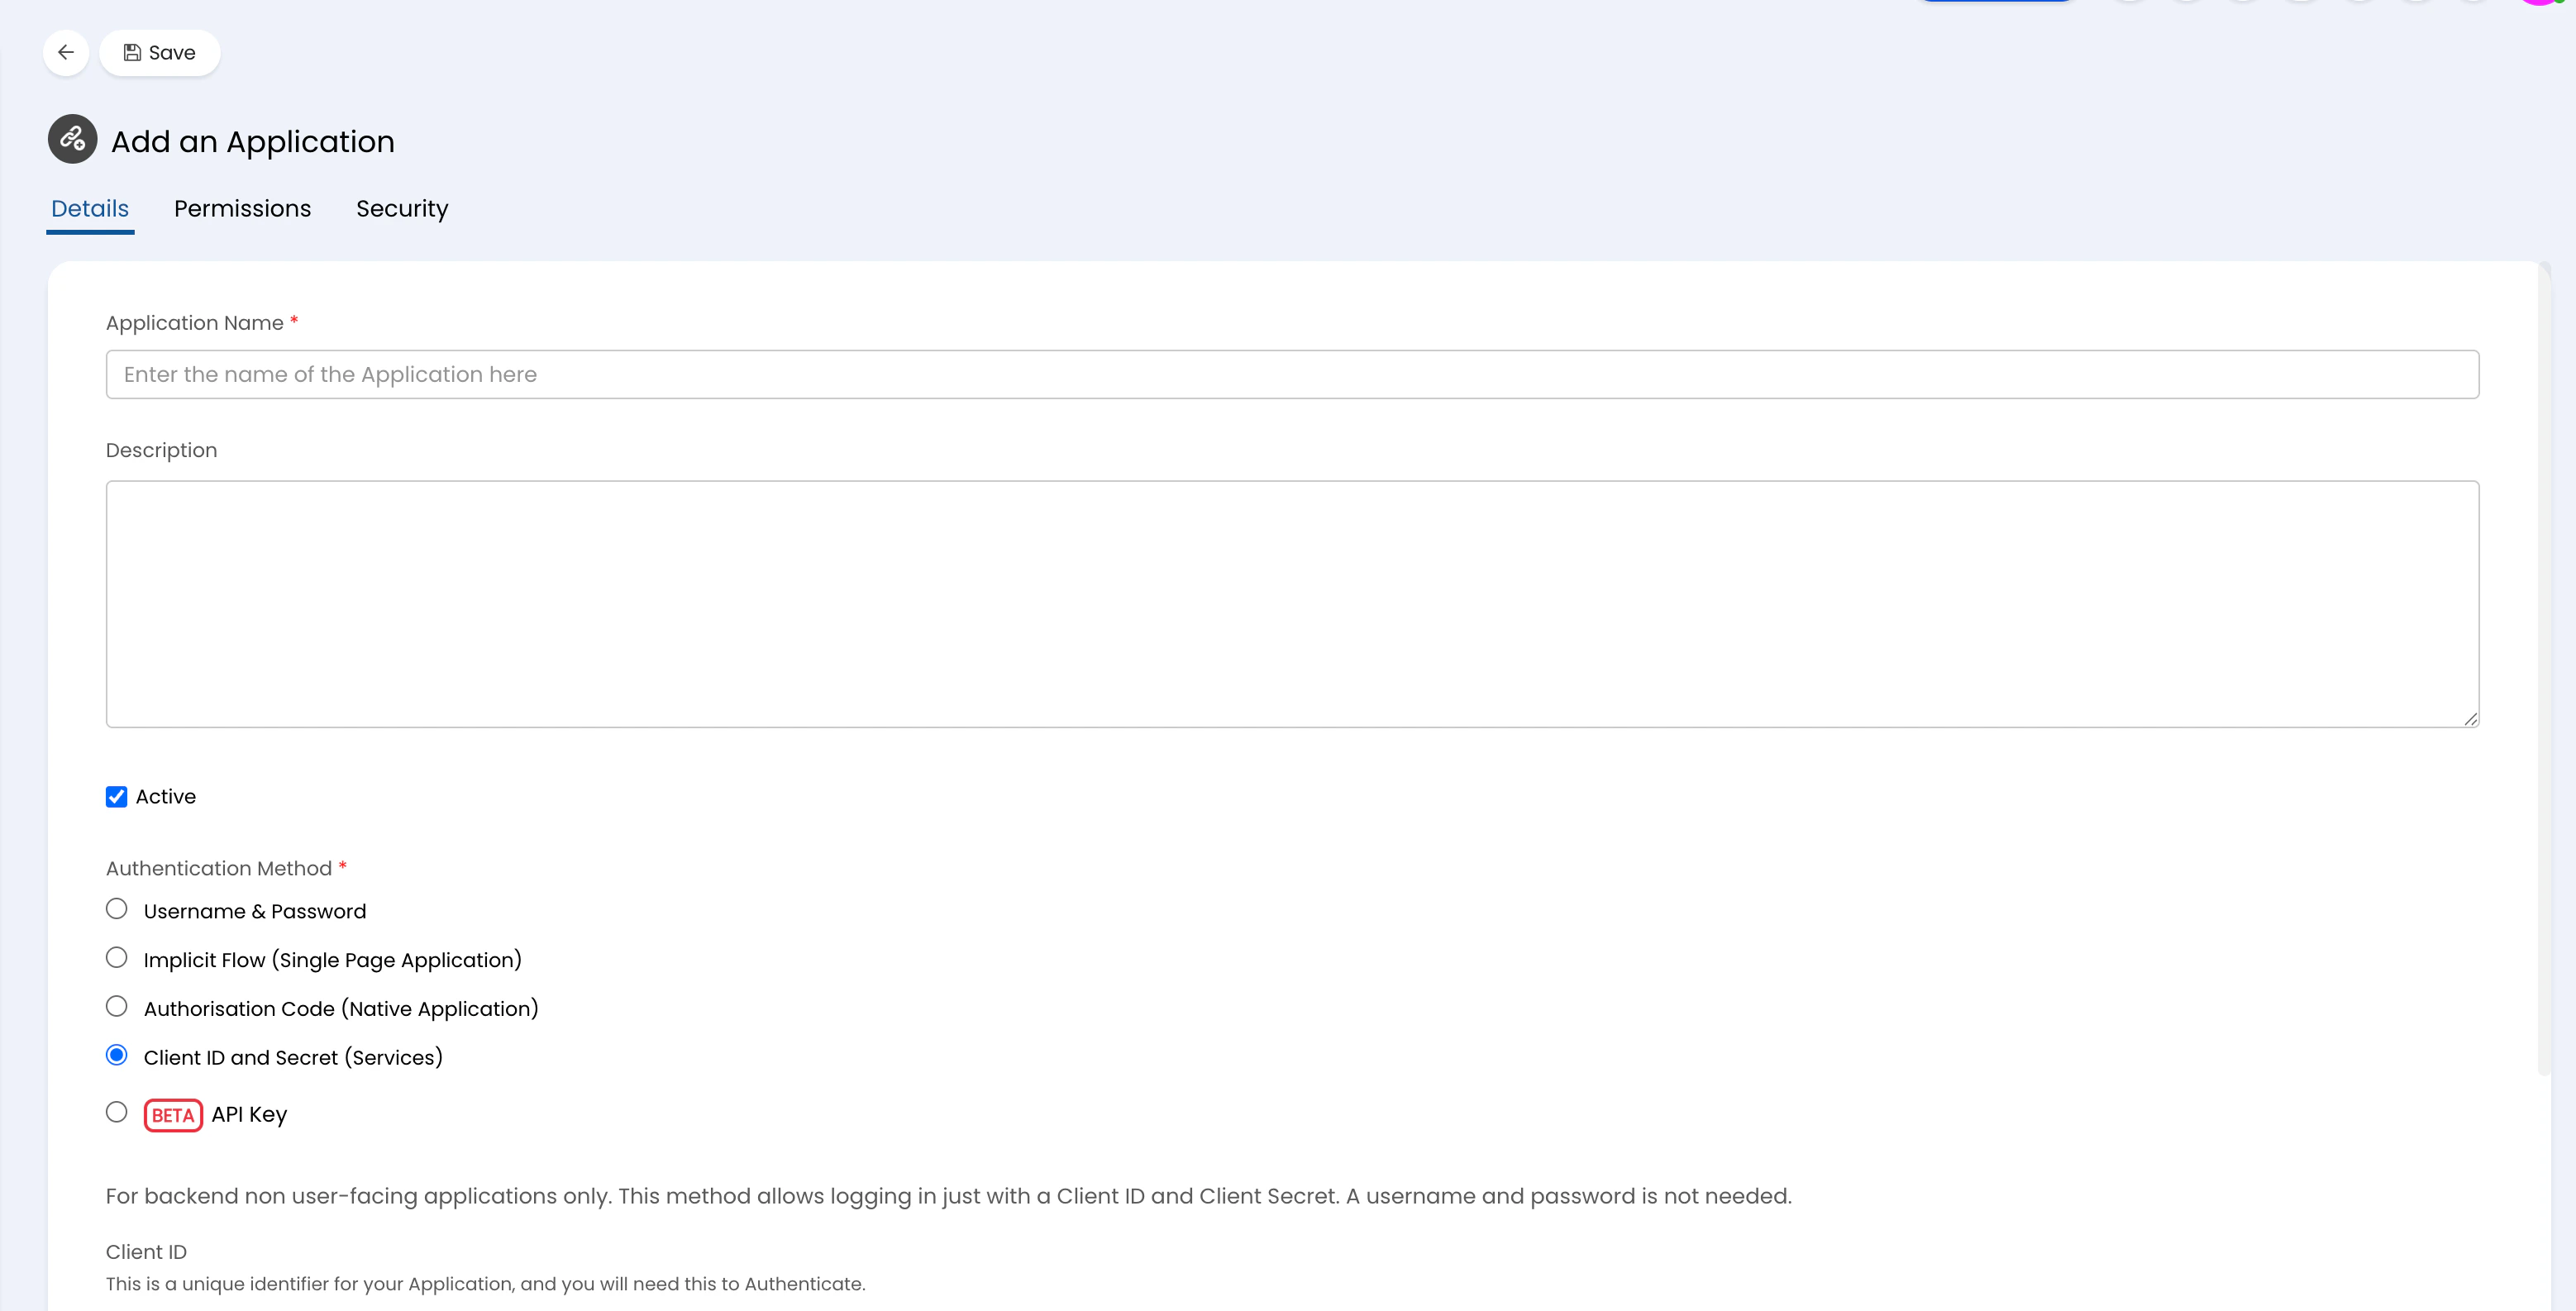
Step 3: Create an API application
- Go to Configuration > Integrations > Halo API > View Applications.
- Create a new application.
- Enable Active.
- Set Authentication Method to Client ID and Secret (Services).
- Set Login Type to Agent.
- Set Agent to log in as to the API-only agent from Step 2.
- Save the application.
- Copy the generated Client ID and Client Secret.
Step 4: Set application permissions
In the API application’s permissions tab, enable the API permissions your application needs.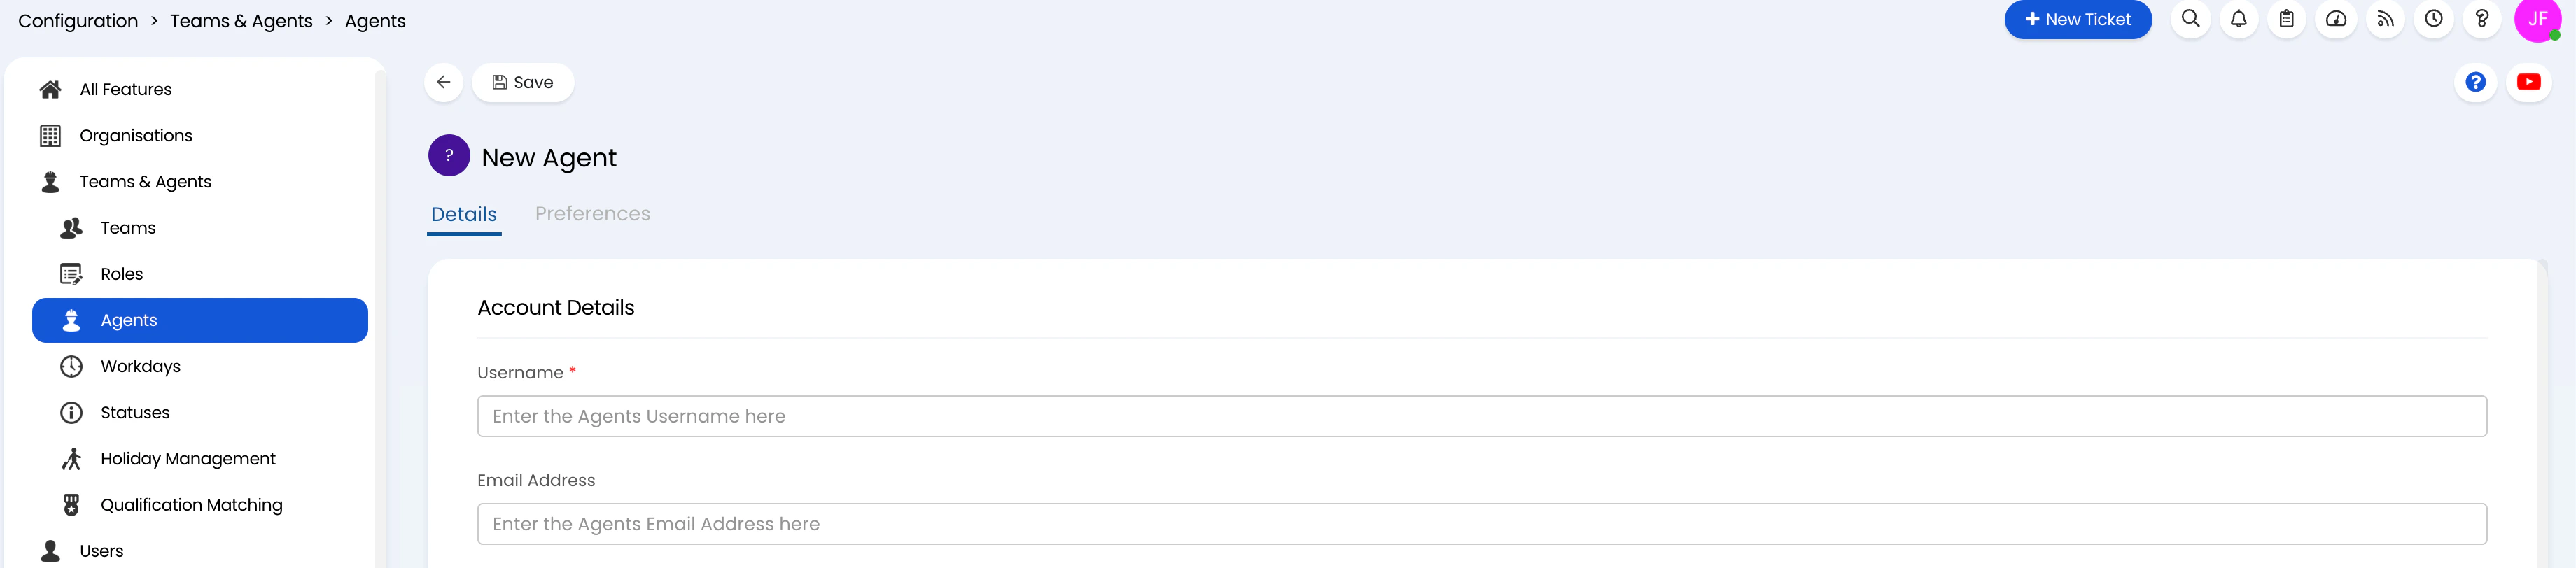
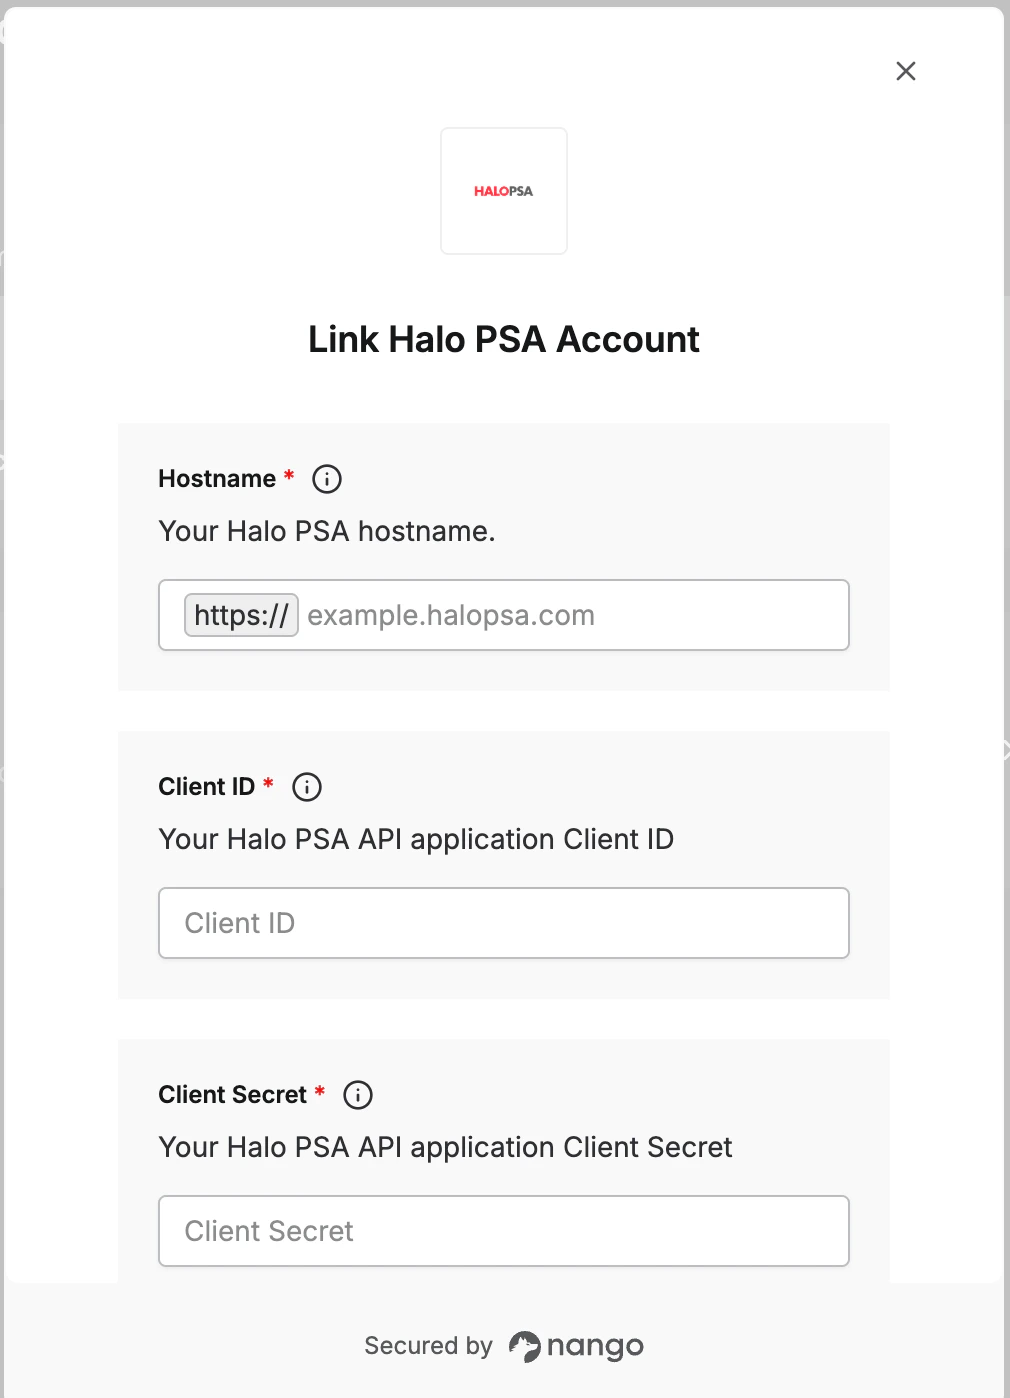
Step 5: Enter credentials in the Connect UI
Once you have your Hostname, Client ID, and Client Secret:- Open the form where you need to authenticate with Halo PSA.
- Enter your Hostname.
- Enter your Client ID.
- Enter your Client Secret.
- Submit the form.