Overview
To authenticate with Stripe using API keys, you will need:- Restricted API Key - Your Stripe restricted API key for authentication (starts with
rk_test_for test mode orrk_live_for live mode). - Stripe Context (Optional) - Only required if you’re using an organization API key. Use the account ID or account path to identify which account the API request should affect.
Prerequisites:
- You must have a Stripe account (sign up for free)
Instructions:
Step 1: Generating your Stripe Restricted API Key
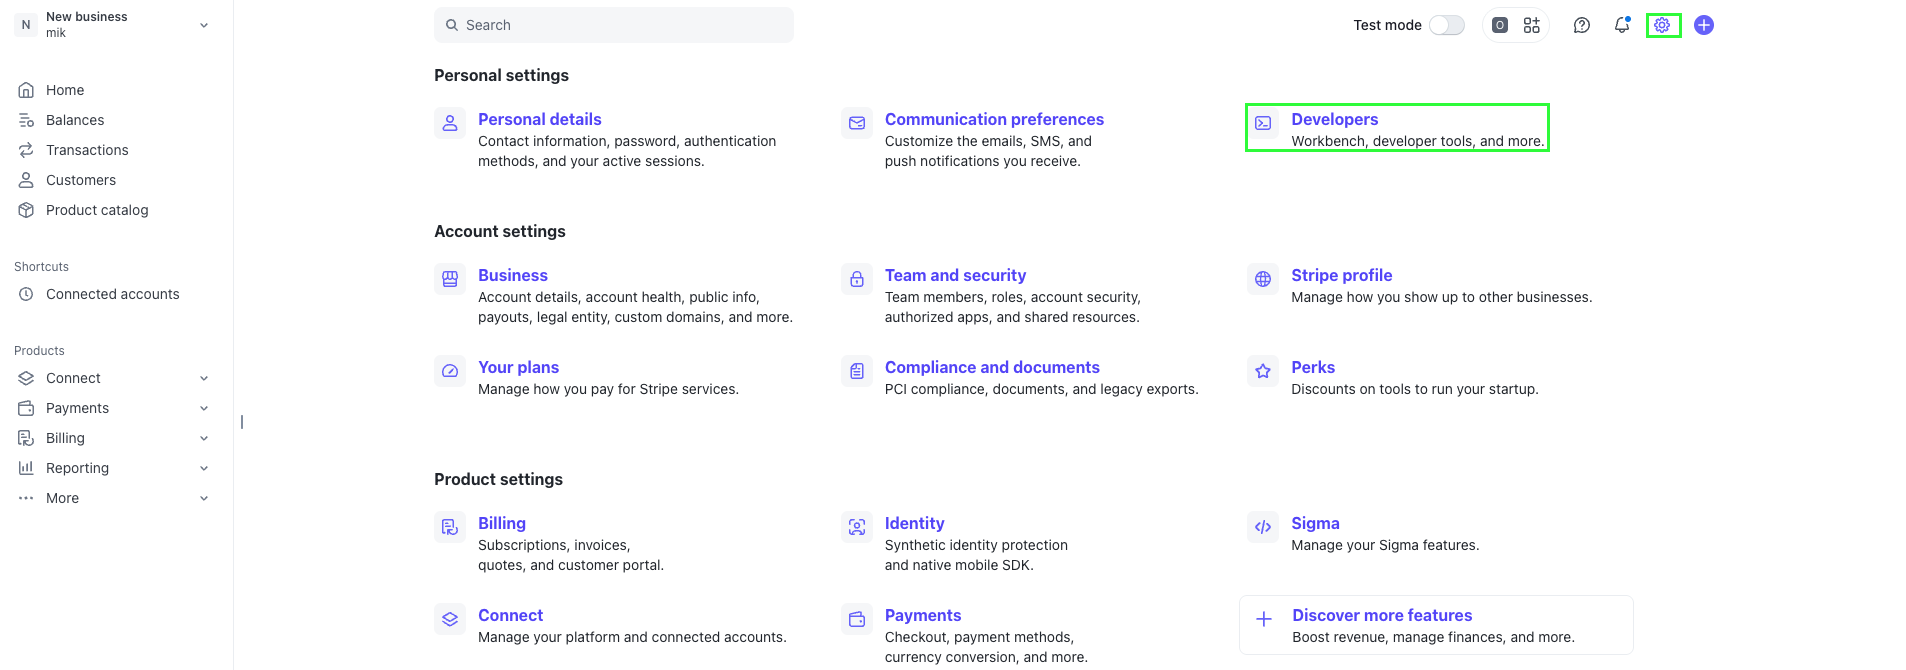
- Log in to your Stripe Dashboard.
- In the upper right corner, click on the Settings icon, then select Developers.
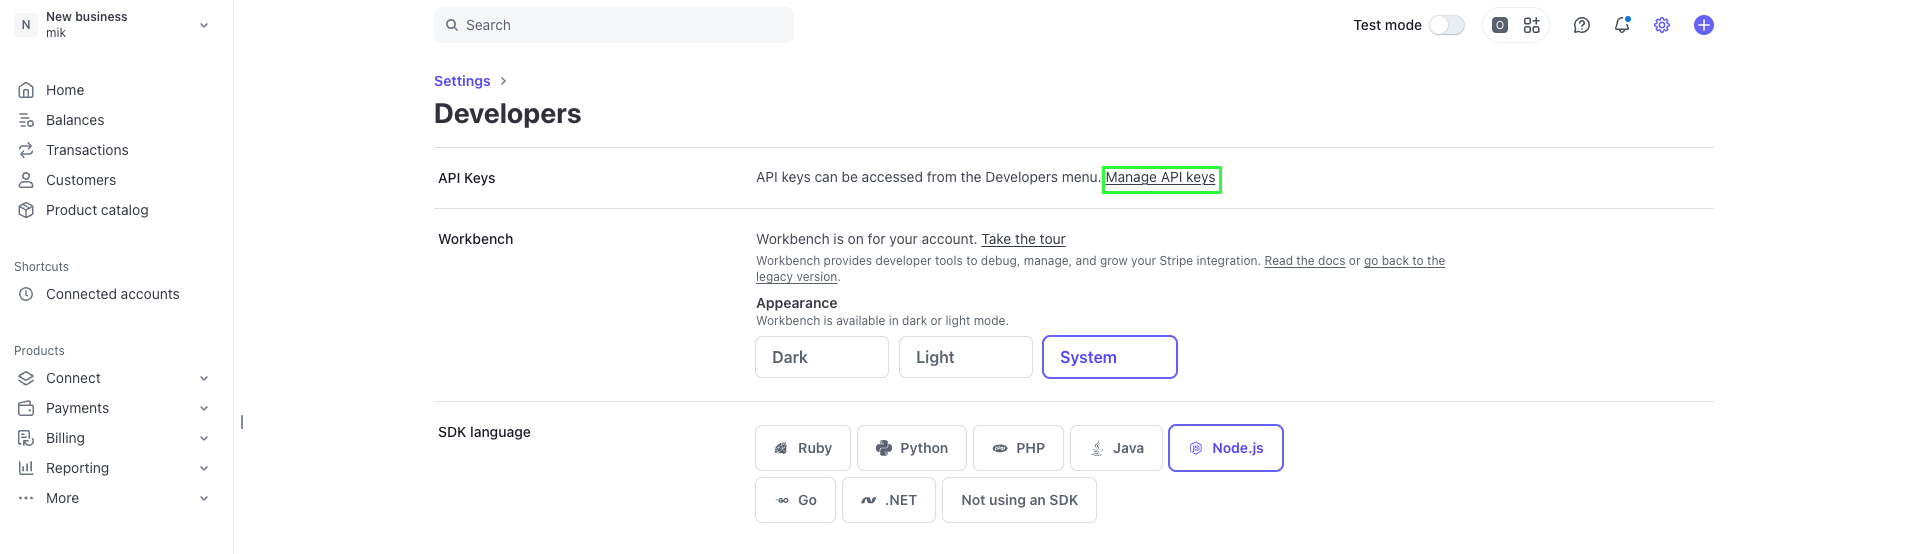
- Click on Manage API Keys.
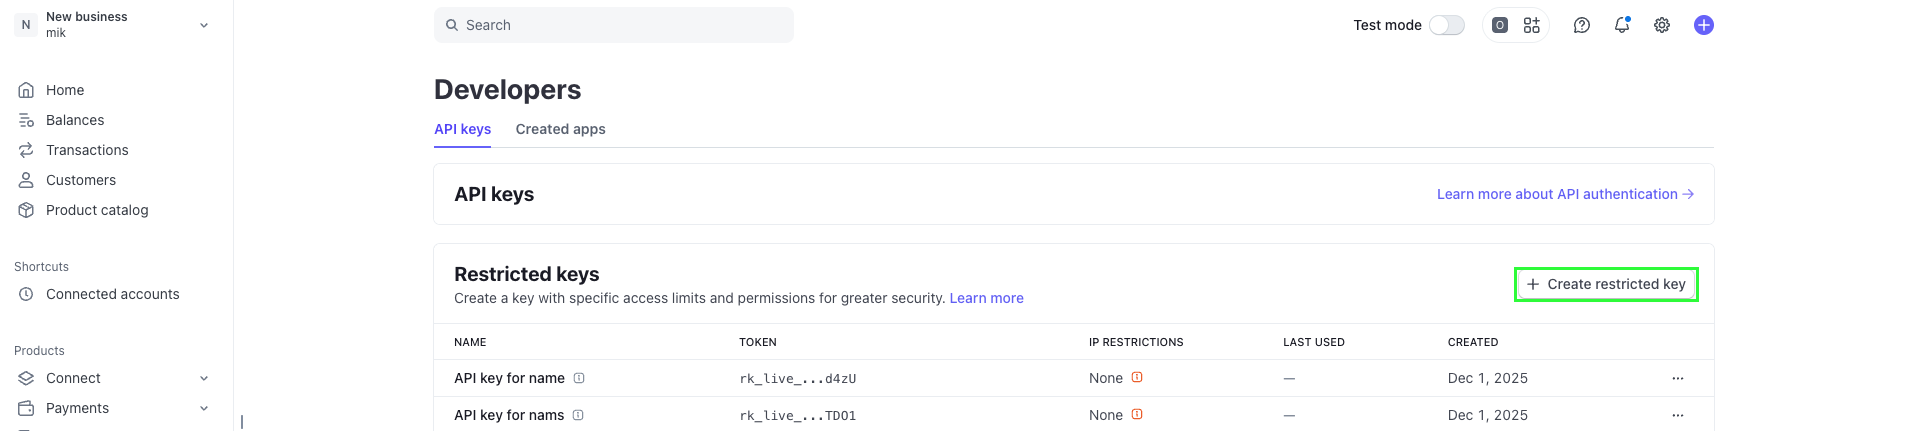
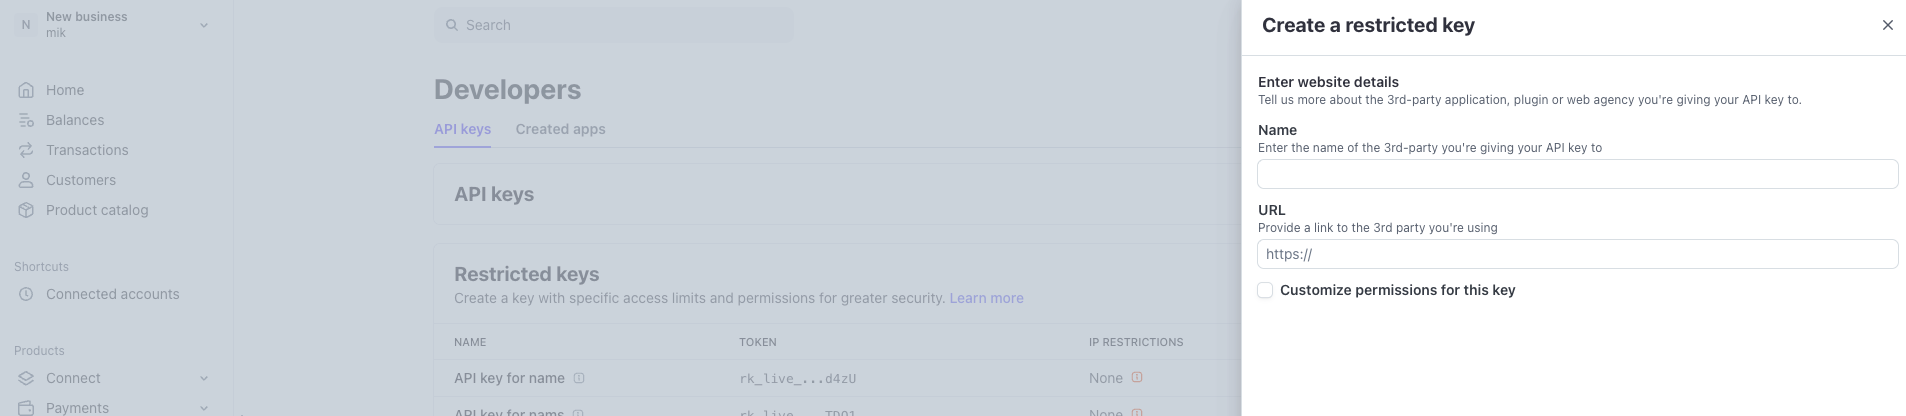
- In the Restricted keys section, click + Create restricted key.
- Select the Providing this key to another website option. Click Continue.
- In the Name field, type a name for your key (e.g., “Nango Integration”). In the URL field, enter
https://nango.dev. Then choose one of the following options: Option A: Create with all permissions- Click Create restricted key to finalize and create an API key that grants access to all permissions. Option B: Customize permissions
- Select Customize permissions for this key, then click Continue.
- Define permissions for your restricted API key, then click Create key.
- Copy the API key value shown and store it in a safe place.
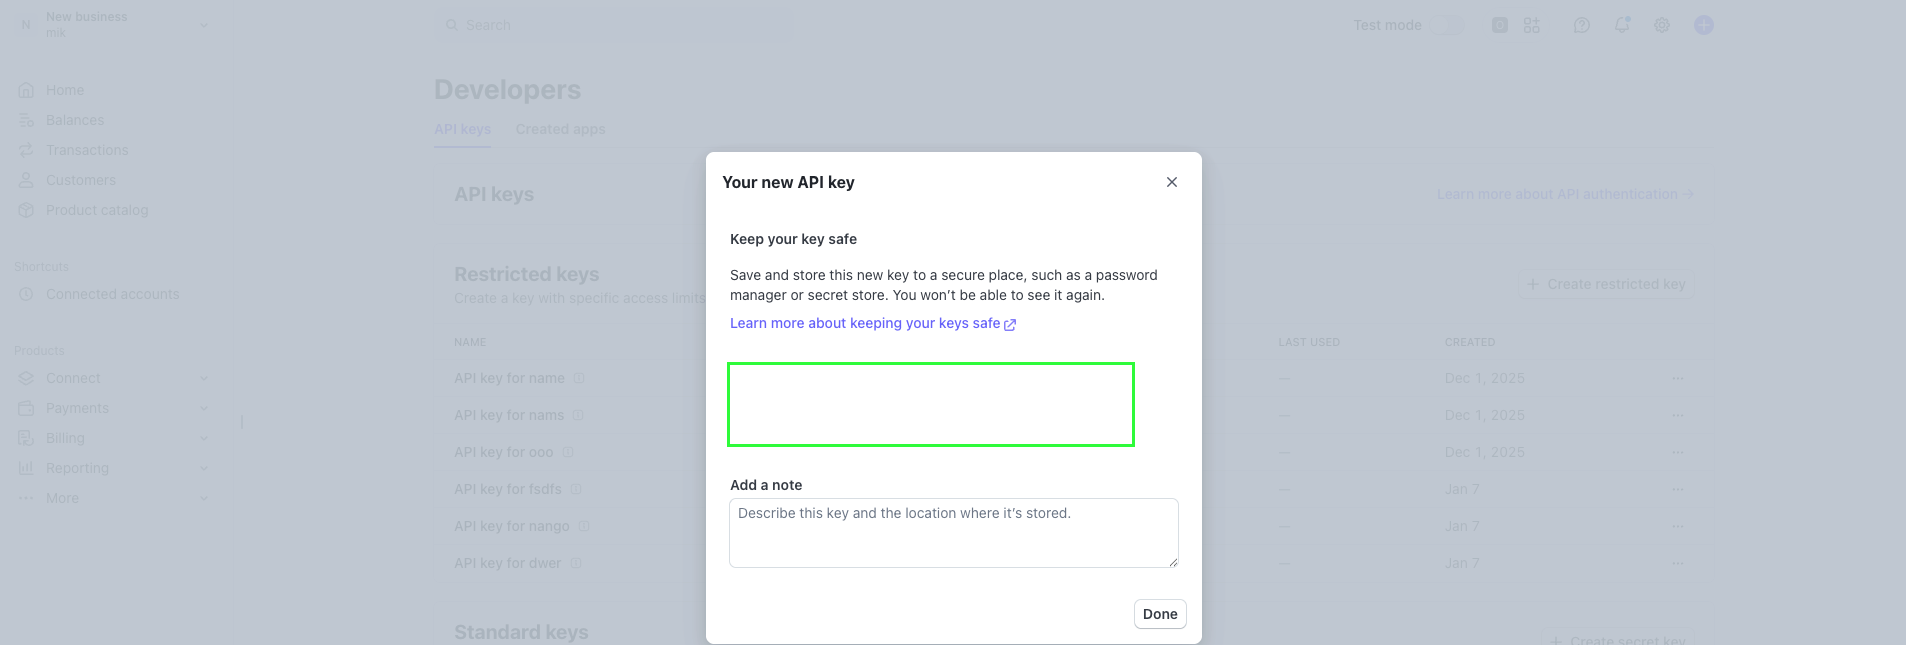
- Click Done.
Key Types: Stripe provides different types of API keys. For Nango integration, use a Restricted key (
rk_test_... or rk_live_...) for better security and access control.Test vs Live Mode: Use test restricted keys (rk_test_...) during development (test mode doesn’t process real payments). Use live restricted keys (rk_live_...) in production. You can toggle between test and live mode using the toggle switch in the top-right corner of the Stripe Dashboard.Step 2: Finding your Stripe Context
Note: This step is only required if you’re using an organization API key. For regular account API keys, you can skip this step.
- Use the account ID directly (e.g.,
acct_1aTnTtAAB0hHJ26p)
- Use the format:
{platform_account_id}/{connected_account_id}(e.g.,acct_1R3fqDP6919yCiFv/acct_1032D82eZvKYlo2C)
- Log in to your Stripe Dashboard.
- Navigate to Settings → Personal Details, then scroll to the bottom of the page to find your Accounts.
- Your account ID is displayed (it starts with
acct_).
- The URL when viewing the connected account in your dashboard
- The connected account’s settings page
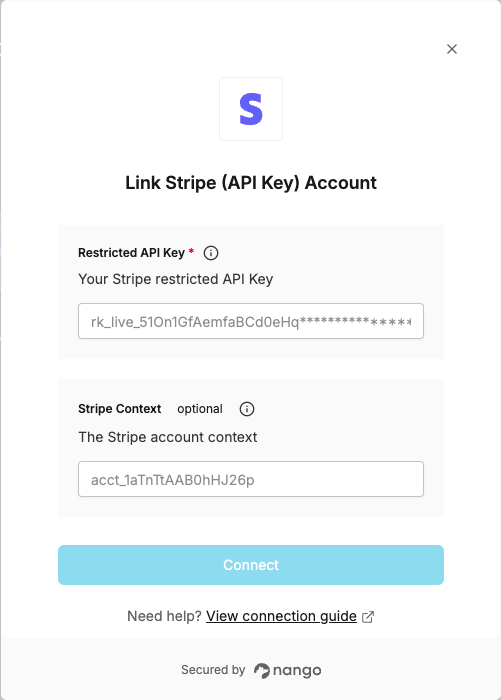
Step 3: Enter credentials in the Connect UI
Once you have your Restricted API Key (and optionally your Context if using organization keys):- Open the form where you need to authenticate with Stripe.
- Enter your Restricted API Key in its respective field.
- (Optional) If you’re using an organization API key, enter your Stripe Context in its respective field.
- Submit the form, and you should be successfully authenticated.