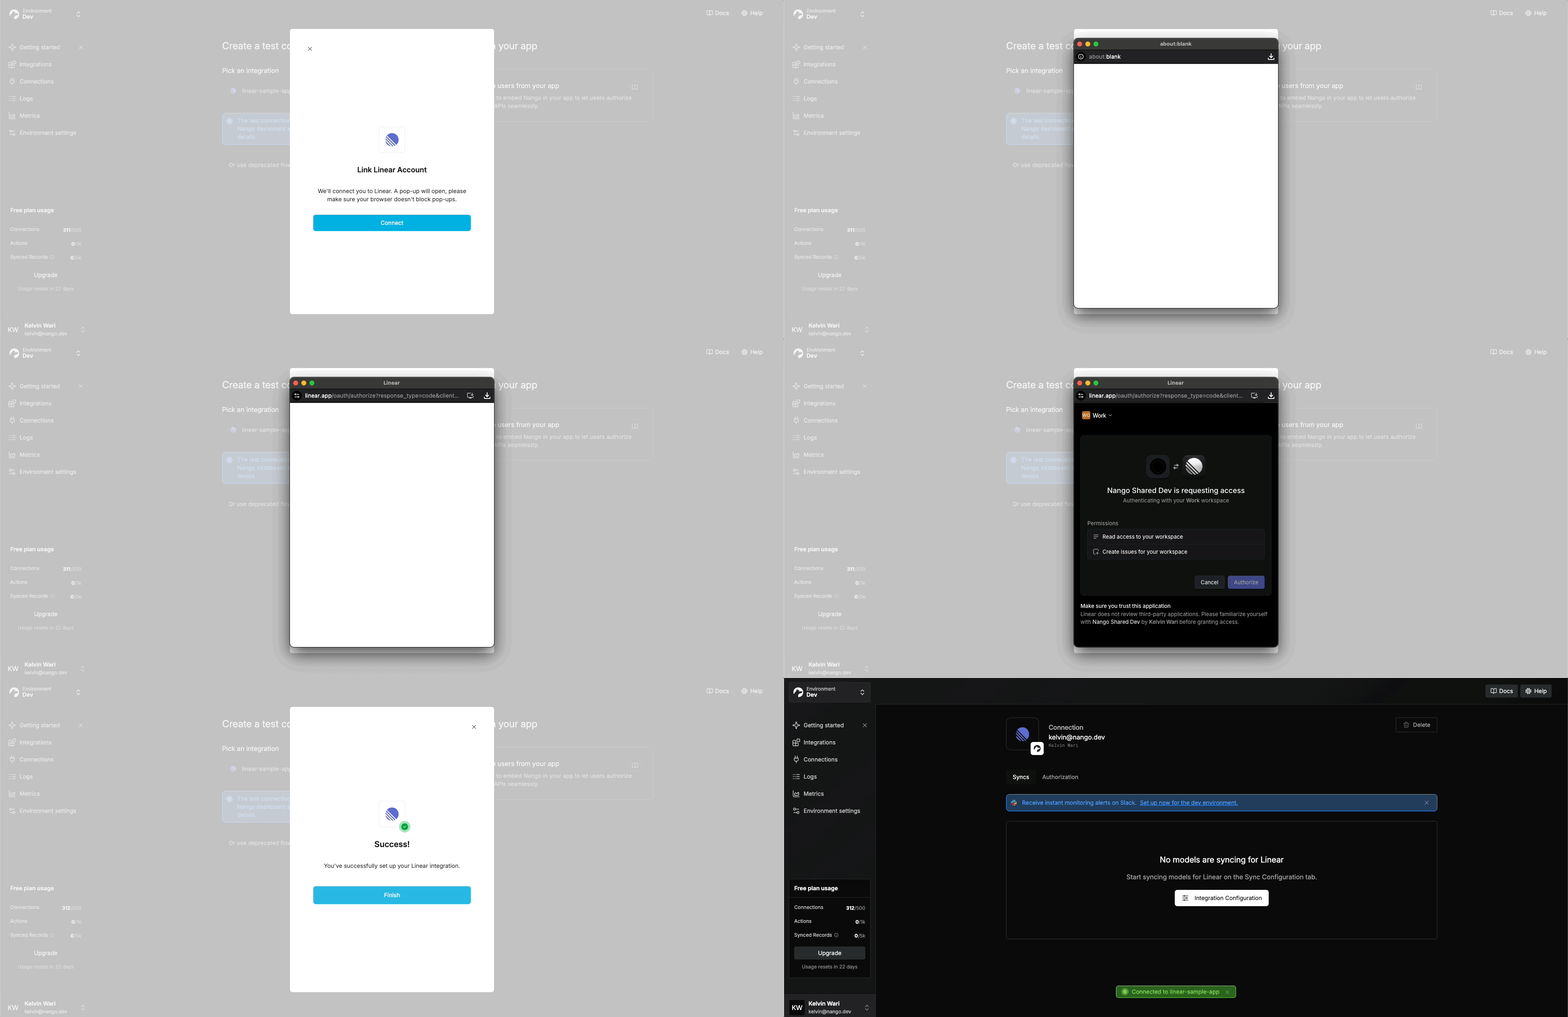
Nango Auth lets your users connect 1,000+ external APIs to your product. You embed a Nango-managed auth flow in your application, and Nango handles authorization, credential storage, refresh, and validation.A Connection is created after each successful authorization. It stores one user’s credentials for one external API and keeps them valid over time. Credentials can be retrieved at scale or used directly by other Nango primitives — without ever passing through your codebase.
Auth schemes — OAuth 2.0, OAuth 1.0a, API keys, basic auth, custom. 1,000+ APIs supported; new ones added on demand within days, by request or self-contributed.
Credential management — Encrypted storage, automatic refresh, retrieval at scale. Combine with Proxy or Functions to avoid handling credentials directly.
Observability — Failure detection, reconnect flow, and per-connection logs.
Using a coding agent? Set up the docs MCP and skills, then copy this page as prompt.
1
Create a Nango account
Sign up for free (no credit card):
For agents
Signup cannot be automated. Ask the user to sign up at app.nango.dev/signup and provide their Nango API key from the Environment settings tab > API Keys. Use it as Authorization: Bearer <NANGO-API-KEY> in API requests.The default API key created on signup has full access and is the simplest option.If the user creates a scoped API key instead, this guide needs environment:integrations:create (step 2) and environment:connect_sessions:write (steps 5 and 8). See API keys.
2
Create an integration
In the dashboard, open the Integrations tab, click Configure New Integration, and pick the API.
OAuth APIs require an OAuth developer app registered with the provider. Register one on the provider’s developer portal, use the Callback URL shown in your Nango integration settings, then paste the Client ID and Client Secret back into Nango. Register any required scopes too.If this integration will be used in production, complete the optional custom callback URL step below before real users connect. Retrofitting a callback URL later requires updating the provider app and can break new authorization or reconnect flows until the provider and Nango settings match.For OAuth 2.0 providers, Nango shows suggested scopes — auto-discovered and refreshed at least monthly. They’re suggestions; you can use any scope the provider supports.
For popular APIs, Nango ships a built-in shared developer app so you can test connections with zero setup. We strongly recommend registering your own OAuth app before going live — see OAuth developer apps below.
For agents
Create the integration with the API. If you need the provider slug first, list providers and use the matching provider’s name field:
For OAuth providers, walk the user through registering an OAuth developer app on the provider’s portal: link them to the provider’s OAuth-app creation page, tell them which Callback URL to paste (visible in the Nango integration settings after creation), and ask them to send back the client_id and client_secret so you can pass them in the request body.
In the Connections tab, click Add Test Connection, pick your integration, and authorize using a test account. The new connection’s credentials appear in its Authorization tab — securely stored and automatically refreshed.
For agents
Skip the dashboard. Create a connect session and share the returned connect_link with the user — they authorize using their test account in the browser, no UI needed on your side:
The response contains a connect_link (valid 30 minutes). Send it to the user; once they complete authorization, confirm with GET /connections. See Share a connect link.
4
Configure a custom OAuth callback URL (optional, recommended)
For production OAuth apps, a callback URL on your own domain is recommended. Some providers show the callback domain to users.To configure a custom callback URL:
Add an endpoint on your domain (e.g. https://example.com/oauth-callback) that 308-redirects to https://api.nango.dev/oauth/callback, preserving all query parameters.
Update the registered callback URL with each API provider — otherwise they’ll reject new authorization flows.
After confirming steps 1 and 2, update the callback URL in Nango’s Environment Settings. Settings are per-environment, so repeat for every environment.
For agents
Ask the user what production callback URL they want to use, then have them add a 308 redirect from that URL to https://api.nango.dev/oauth/callback before they register provider OAuth apps. You can set callback_url when creating an environment from the public endpoint. Ask the user for an Account API key and send it as Authorization: Bearer <NANGO-API-KEY>. Updating an existing environment’s callback URL is dashboard-only — ask the user to paste the final callback URL into Environment Settings > Backend.
5
Generate a session token (backend)
Set up a backend endpoint that your frontend will call before each authorization attempt to retrieve a session token from Nango (API / Node SDK).You’ll need an API key with the environment:connect_sessions:write scope (find it in Environment Settings > API Keys).
Tags reconcile Nango’s auth-success webhook with the right user, org, or entity in your system. Most apps start with: end_user_id, end_user_email, organization_id.Tags are also useful for filtering connections via the API and are displayed in the Nango UI. Set the reserved UI tag keys end_user_display_name and end_user_email to populate the connections list and connection detail page.See Connection tags, configuration, and metadata for more.
allowed_integrations controls what the user sees:
Multiple integrations — Connect UI shows a picker.
Single integration — Connect UI sends the user straight to its auth flow.
6
Trigger the auth flow (frontend)
Load the Nango frontend SDK, fetch the session token from your backend, and open Connect UI:
Connect UI authorization flow
import Nango from '@nangohq/frontend';const nango = new Nango();const connect = nango.openConnectUI({ onEvent: (event) => { if (event.type === 'close') { // Modal closed. } else if (event.type === 'connect') { // Auth flow successful. } },});const res = await fetch('/sessionToken', { method: 'POST' });connect.setSessionToken(res.sessionToken); // A loading indicator shows until this is set.
Listen for webhooks & save the connection ID (backend)
When authorization succeeds, Nango generates a unique connection ID. You use this ID to manage the connection and retrieve its credentials. You must store it on your side, attached to the user/org/project that owns the connection — Nango doesn’t model that ownership.Set up the webhook in Environment Settings:
Specify a Webhook URL in the Nango UI.
Enable Send New Connection Creation Webhooks.
Handle POST requests on that route in your backend.
For agents
Webhook URL configuration is dashboard-only — there is no public API to set environment webhook URLs. Ask the user to paste the webhook URL into Environment Settings and enable Send New Connection Creation Webhooks.
Persist connectionId against whichever entity owns the connection in your app.
8
Build re-authorization
Credentials can become invalid when users revoke access, providers rotate refresh tokens, scopes change, or an app moves from testing to production. Re-authorization updates an existing connection’s credentials while preserving its data and config. Deleting and re-creating the connection wipes that data — prefer re-authorization.Before showing integration settings, check the connection with GET /connections/{connectionId}:
Node
cURL
import { Nango } from '@nangohq/node';const nango = new Nango({ apiKey: process.env.NANGO_API_KEY! });try { await nango.getConnection('<INTEGRATION-ID>', '<CONNECTION-ID>'); // Connection is valid.} catch (error) { if (error.response?.data?.error?.code === 'invalid_credentials') { // Connection is invalid — show a Reconnect button. displayReconnectUI(); }}
An invalid_credentials error means the connection failed credential refresh or validation — show an error state with a Reconnect button.To trigger re-authorization, use the same frontend flow as a new connection, but generate a reconnect session token on the backend. Pass the returned token to the Frontend SDK exactly like a normal session token. On success you’ll receive an auth webhook with operation = override.
Nango ships built-in shared developer apps for some OAuth 2.0 APIs so you can test connections with zero setup.They work in production too, but we strongly recommend registering your own before going live. Most OAuth APIs have a step-by-step setup guide in APIs & Integrations — for example, Gmail.Reasons to register your own:
Whitelabel auth — with Nango’s app, users authorize Nango instead of your product.
Scopes — Nango developer apps have fixed scopes. Your own app supports any scope the provider exposes.
Callback URL — Nango developer apps use Nango’s callback. Your own app supports a custom callback URL on your domain.
Marketplace listings — provider marketplaces require your own developer app.
Advanced API features — some provider features are only available to first-party apps.
Revocation risk — most providers don’t allow shared credentials. Nango developer apps may be revoked by the provider at any time.
Portability — only your own developer app lets you export access and refresh tokens and move off Nango without users re-authorizing.
The same tradeoffs apply to shared OAuth apps provided by other auth platforms.