> ## Documentation Index
> Fetch the complete documentation index at: https://nango.dev/docs/llms.txt
> Use this file to discover all available pages before exploring further.
# Miro - How do I link my account?
# Overview
To authenticate with Miro, you need one key piece of information:
1. **API Key** - Your Miro API Key
This guide will walk you through finding or creating those credentials within Miro.
### Prerequisites:
* You must set up an Enterprise account with Miro.
#### Step 1: Finding Miro API Key
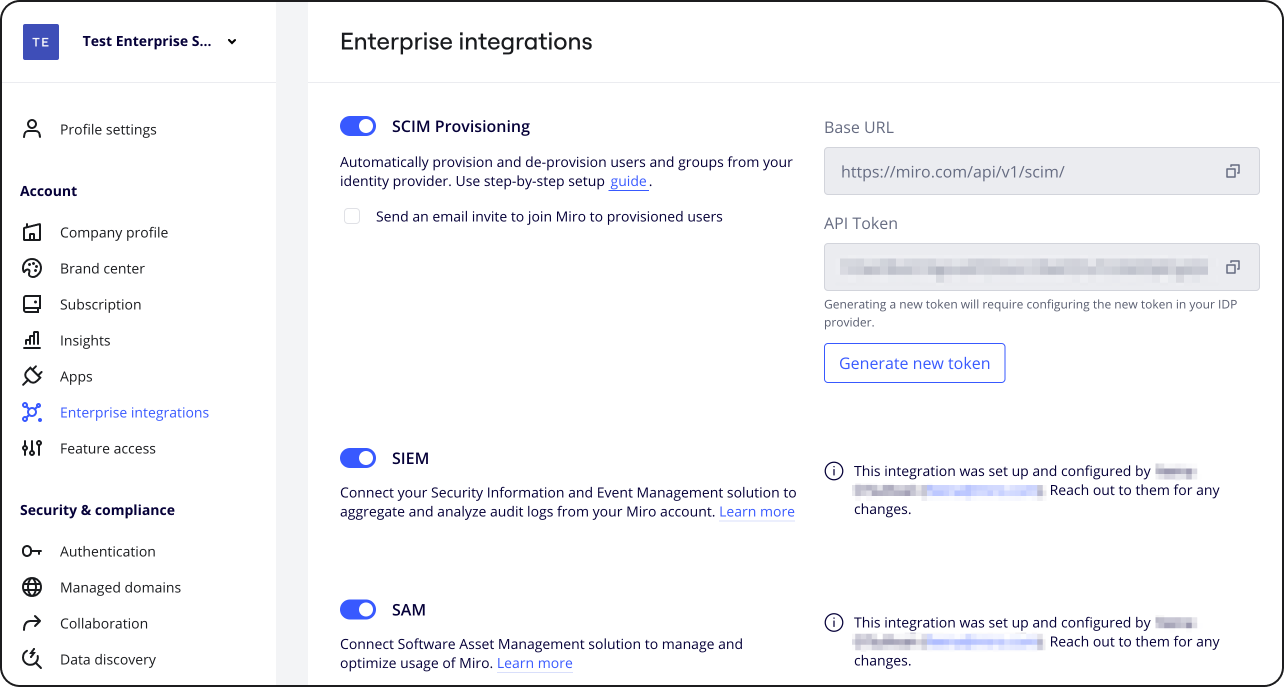
1. Log in to your Enterprise Miro account. Once logged in, navigate to **Company** settings > **Enterprise integrations**, enable the SCIM Provisioning feature.
 2. Configure your Identity Provider
The setup will depend on the Identity Provider you use.
Miro supports preconfigured Okta and Entra ID however you can use any Identity Provider of your choice for as long as it allows setting up SCIM.
* OKTA setup **[https://help.miro.com/hc/en-us/articles/360036768134-Setting-up-automated-provisioning-with-OKTA](https://help.miro.com/hc/en-us/articles/360036768134-Setting-up-automated-provisioning-with-OKTA)**
* Entra ID setup **[https://help.miro.com/hc/articles/360036777814](https://help.miro.com/hc/articles/360036777814)**
3. If you already have an existing API Key you can skip this step and copy the existing key. To generate a new API Key (Token), navigate to **Company** settings > **Enterprise integrations** and click the "Generate new token"
The **Generate new SCIM token** modal will appear, click **Generate**
2. Configure your Identity Provider
The setup will depend on the Identity Provider you use.
Miro supports preconfigured Okta and Entra ID however you can use any Identity Provider of your choice for as long as it allows setting up SCIM.
* OKTA setup **[https://help.miro.com/hc/en-us/articles/360036768134-Setting-up-automated-provisioning-with-OKTA](https://help.miro.com/hc/en-us/articles/360036768134-Setting-up-automated-provisioning-with-OKTA)**
* Entra ID setup **[https://help.miro.com/hc/articles/360036777814](https://help.miro.com/hc/articles/360036777814)**
3. If you already have an existing API Key you can skip this step and copy the existing key. To generate a new API Key (Token), navigate to **Company** settings > **Enterprise integrations** and click the "Generate new token"
The **Generate new SCIM token** modal will appear, click **Generate**

 4. After generating a new token, and copy your API Key.
Note: you must configure the new token in your Identity provider.
#### Step 2: Connect Your Miro Account
4. After generating a new token, and copy your API Key.
Note: you must configure the new token in your Identity provider.
#### Step 2: Connect Your Miro Account
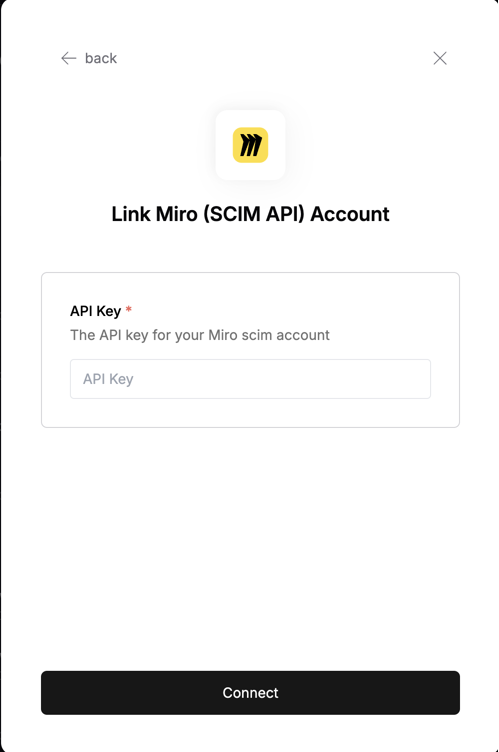 To authenticate using your API credentials, navigate to the Miro authentication form.
Enter your credentials as follows:
* API Key: Your API key
Click "Connect" to complete the authentication.
To authenticate using your API credentials, navigate to the Miro authentication form.
Enter your credentials as follows:
* API Key: Your API key
Click "Connect" to complete the authentication.