> ## Documentation Index
> Fetch the complete documentation index at: https://nango.dev/docs/llms.txt
> Use this file to discover all available pages before exploring further.
# LastPass - How do I link my account?
# Overview
To authenticate with LastPass, you will need:
1. **CID** - The **CID** (Company ID) is your LastPass account number, which uniquely identifies your company.
2. **Provhash** - The API secret, also known as the provisioning hash, is referred to as **Provhash**. It is used alongside the **CID** to authenticate your API requests.
This guide will walk you through finding or generating the **CID** and **Provhash** within LastPass.
### Prerequisites:
* You must have a registered Enterpise account with LastPass.
### Instructions:
#### Step 1: Finding Your CID
1. Login to your [LastPass](https://admin.lastpass.com/) admin console.
2. If prompted, complete steps for multifactor authentication (if it is enabled for your account).
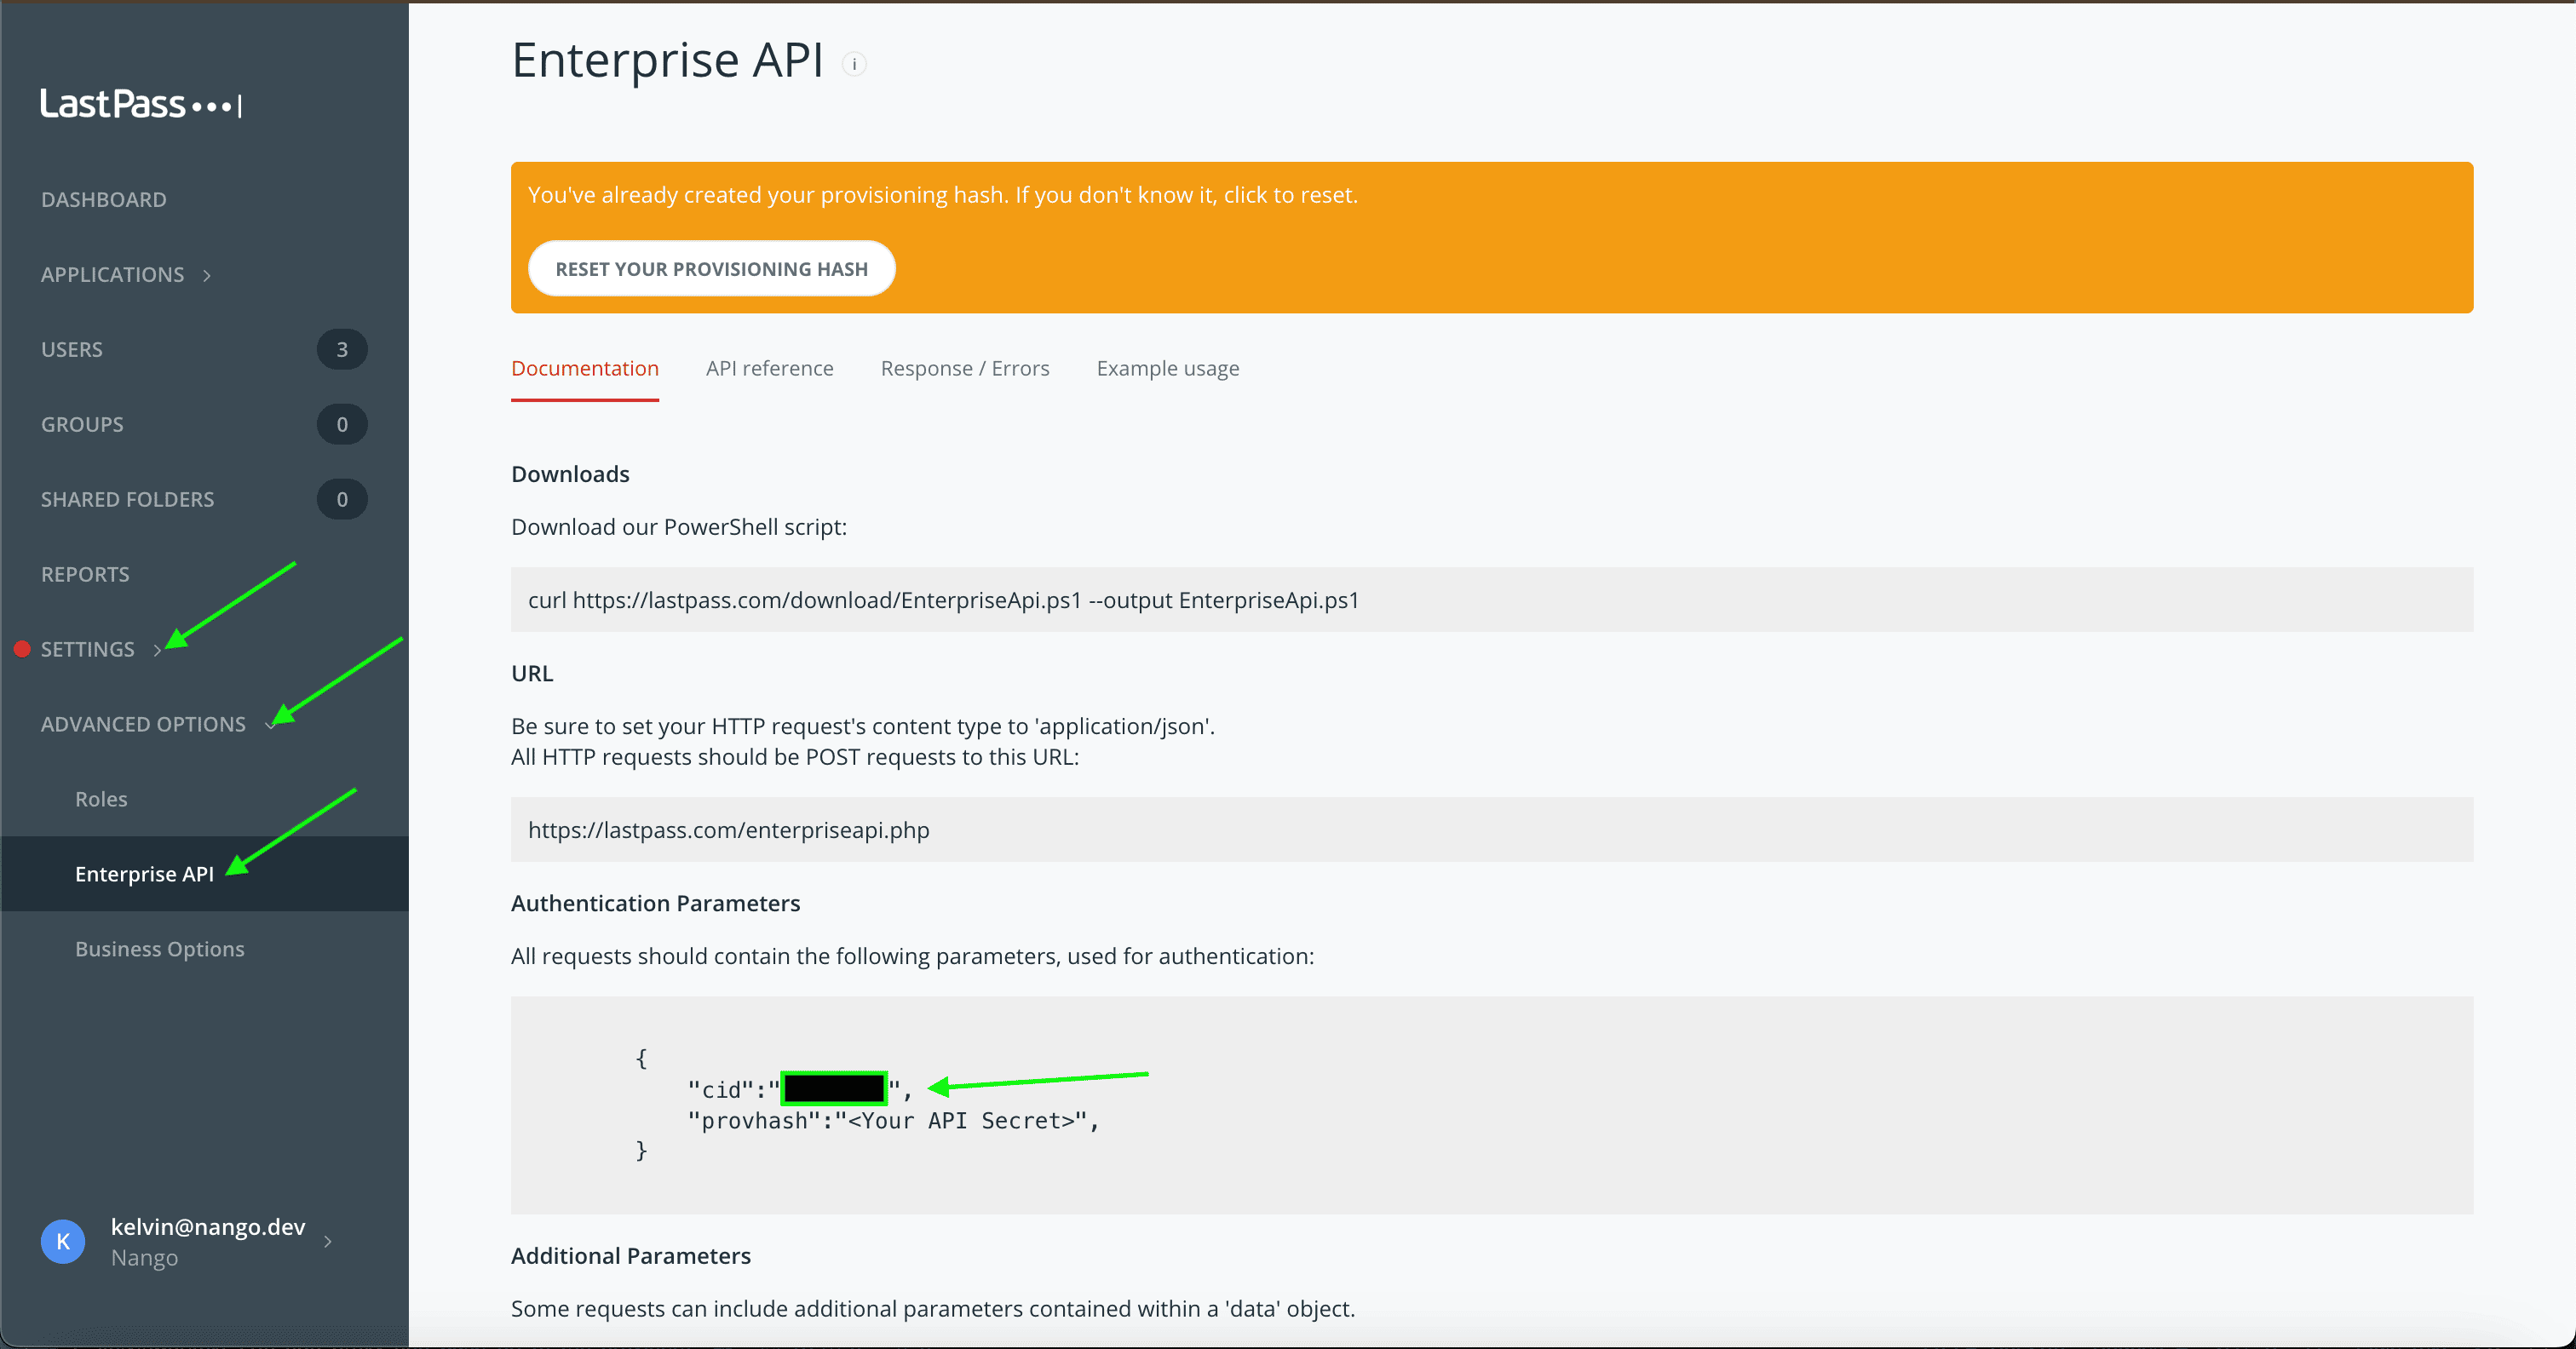
3. Depending on your account type, you might be able to find the **CID** under the profile name dropdown, or on the header of the new **Admin Console**. You can also view the **CID** in the header of **Advanced** > **Enterprise API** if this page is available to your admin account.
 #### Step 2: Generating your Provhash
1. Login to your [LastPass](https://admin.lastpass.com/) admin console.
2. If prompted, complete steps for multifactor authentication (if it is enabled for your account).
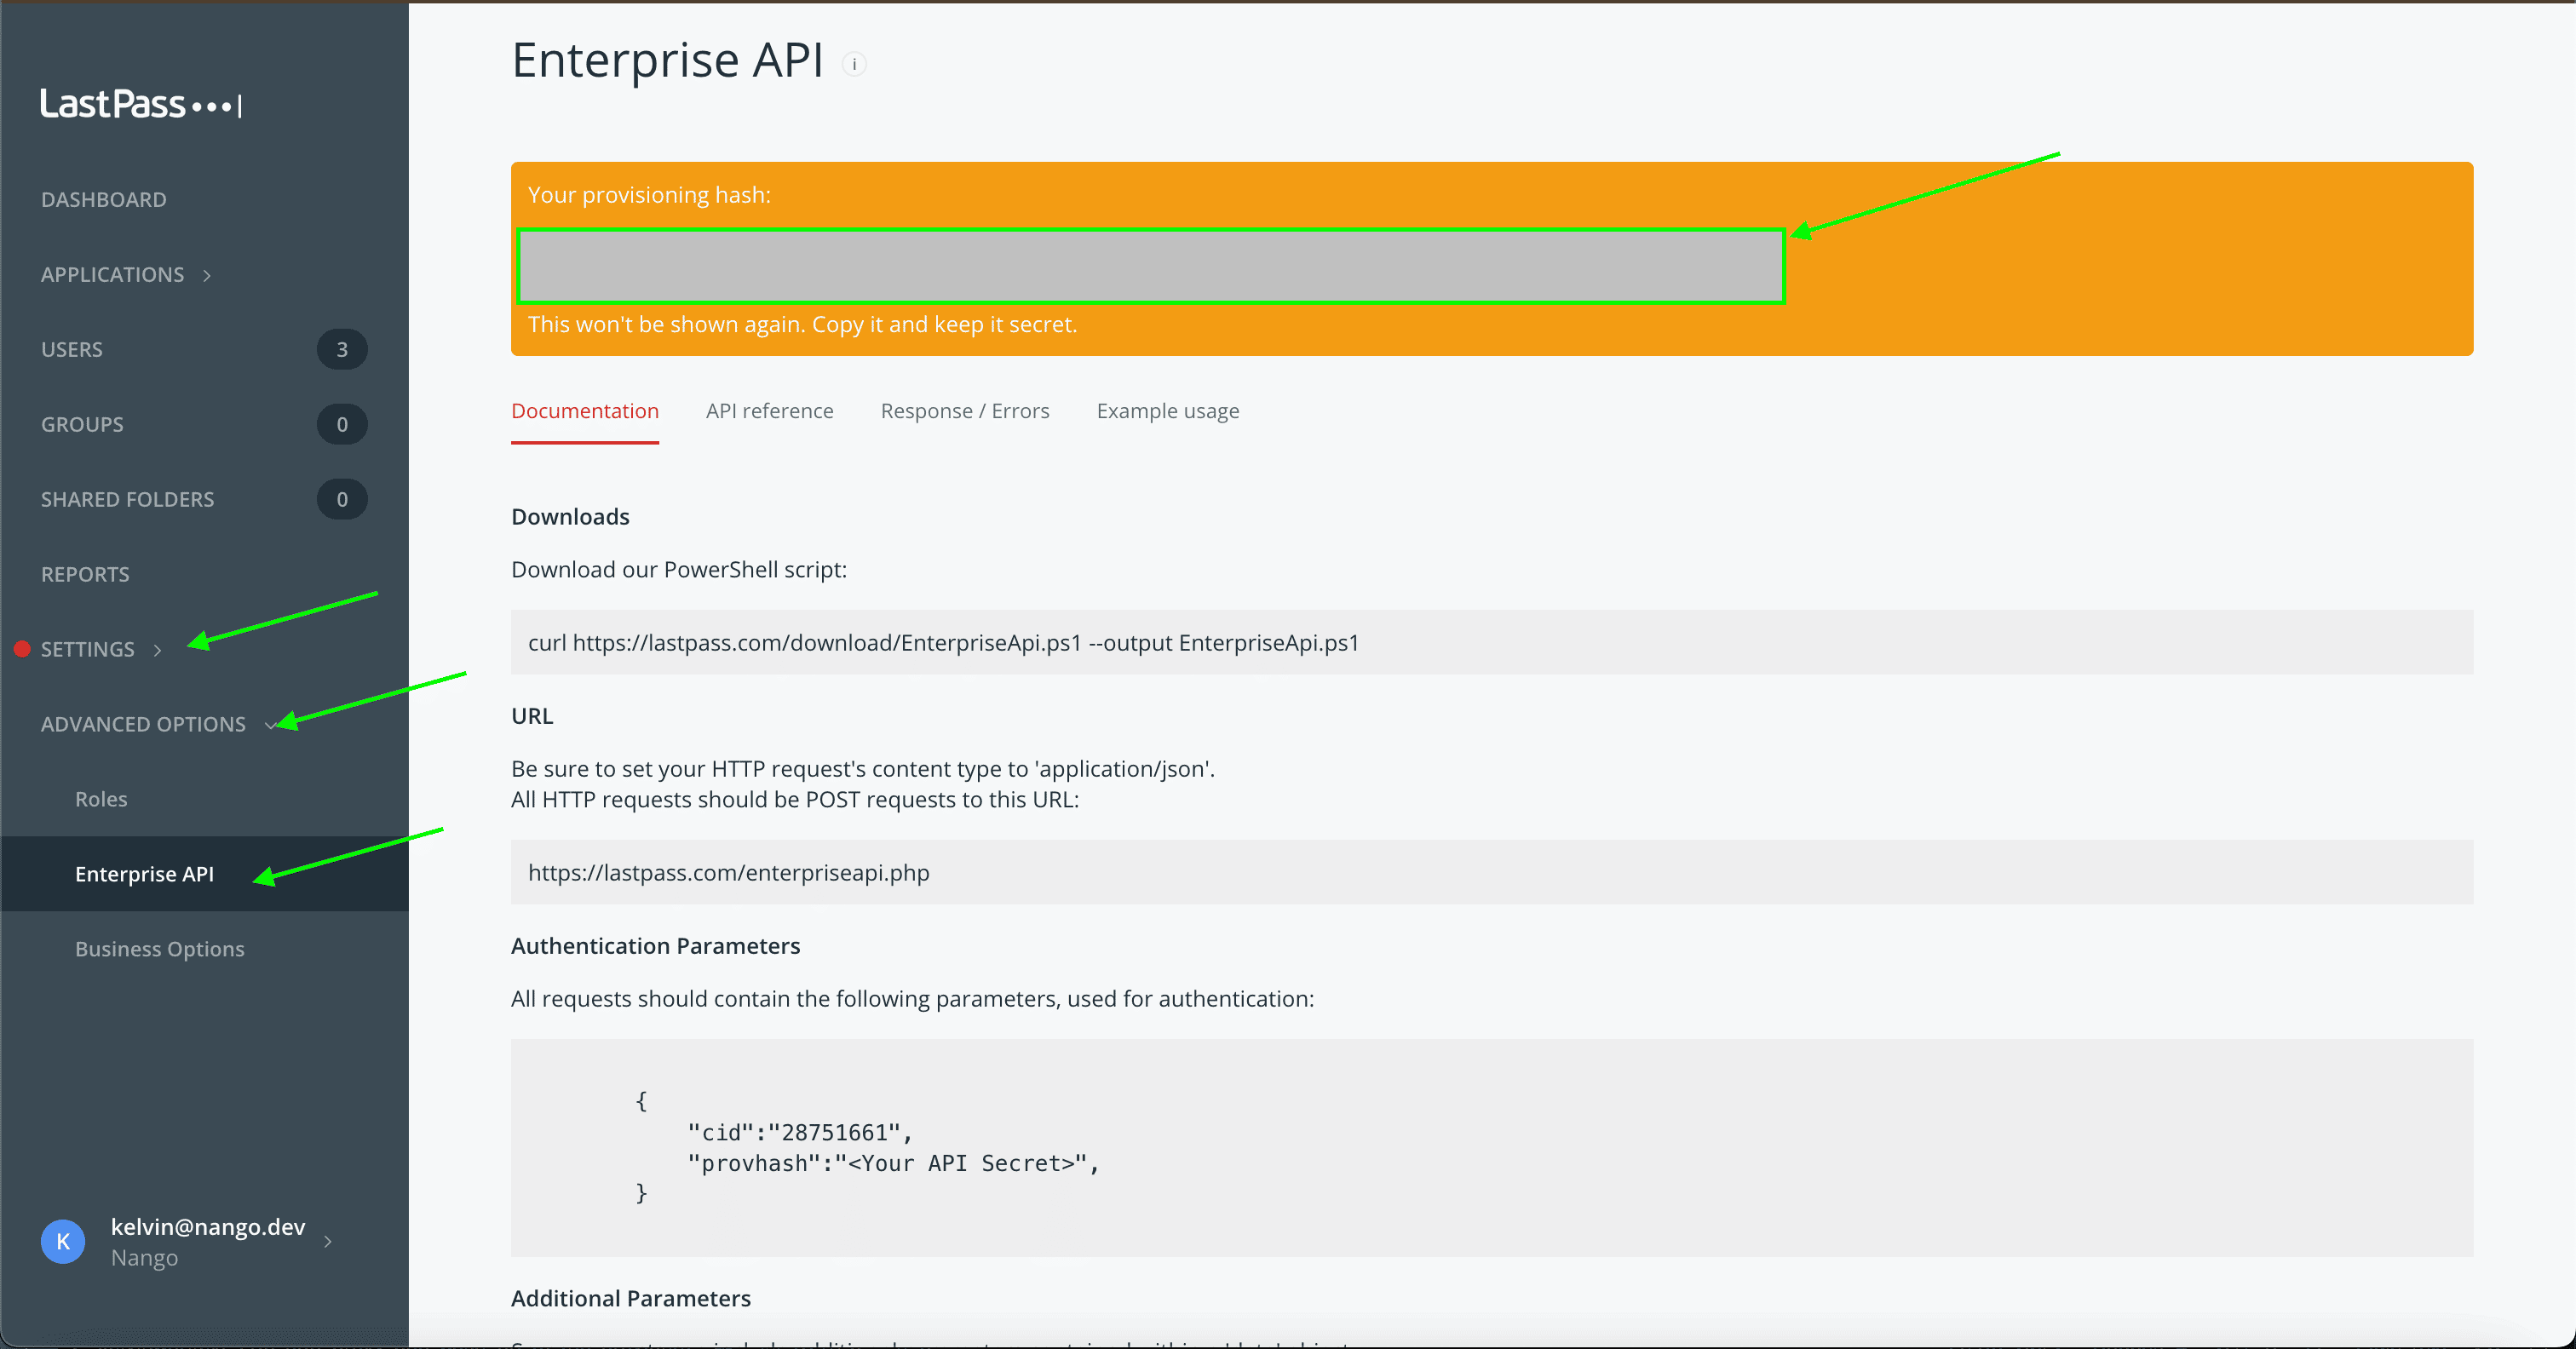
3. Go to **Advanced** > **Enterprise API**.
4. Choose from the following options:
* If you have not previously created your provisioning hash, select **Create provisioning hash** > **OK**, then your provisioning hash is shown at the top of the page.
* If you previously created your provisioning hash but have since forgotten it, you can generate a new one.
* **Warning**: If you have already created a provisioning hash, then generating a new one will invalidate the previous hash, and will require you to update all integrations with the newly generated hash.
* To proceed with creating a new provisioning hash, select **Reset your provisioning hash** > **OK**, then your new provisioning hash is shown at the top of the page.
* **Remember**: Be sure to update all integrations that were using the previous provisioning hash.
#### Step 2: Generating your Provhash
1. Login to your [LastPass](https://admin.lastpass.com/) admin console.
2. If prompted, complete steps for multifactor authentication (if it is enabled for your account).
3. Go to **Advanced** > **Enterprise API**.
4. Choose from the following options:
* If you have not previously created your provisioning hash, select **Create provisioning hash** > **OK**, then your provisioning hash is shown at the top of the page.
* If you previously created your provisioning hash but have since forgotten it, you can generate a new one.
* **Warning**: If you have already created a provisioning hash, then generating a new one will invalidate the previous hash, and will require you to update all integrations with the newly generated hash.
* To proceed with creating a new provisioning hash, select **Reset your provisioning hash** > **OK**, then your new provisioning hash is shown at the top of the page.
* **Remember**: Be sure to update all integrations that were using the previous provisioning hash.
 #### Step 3: Enter credentials in the Connect UI
Once you have your **CID** and **Provhash**:
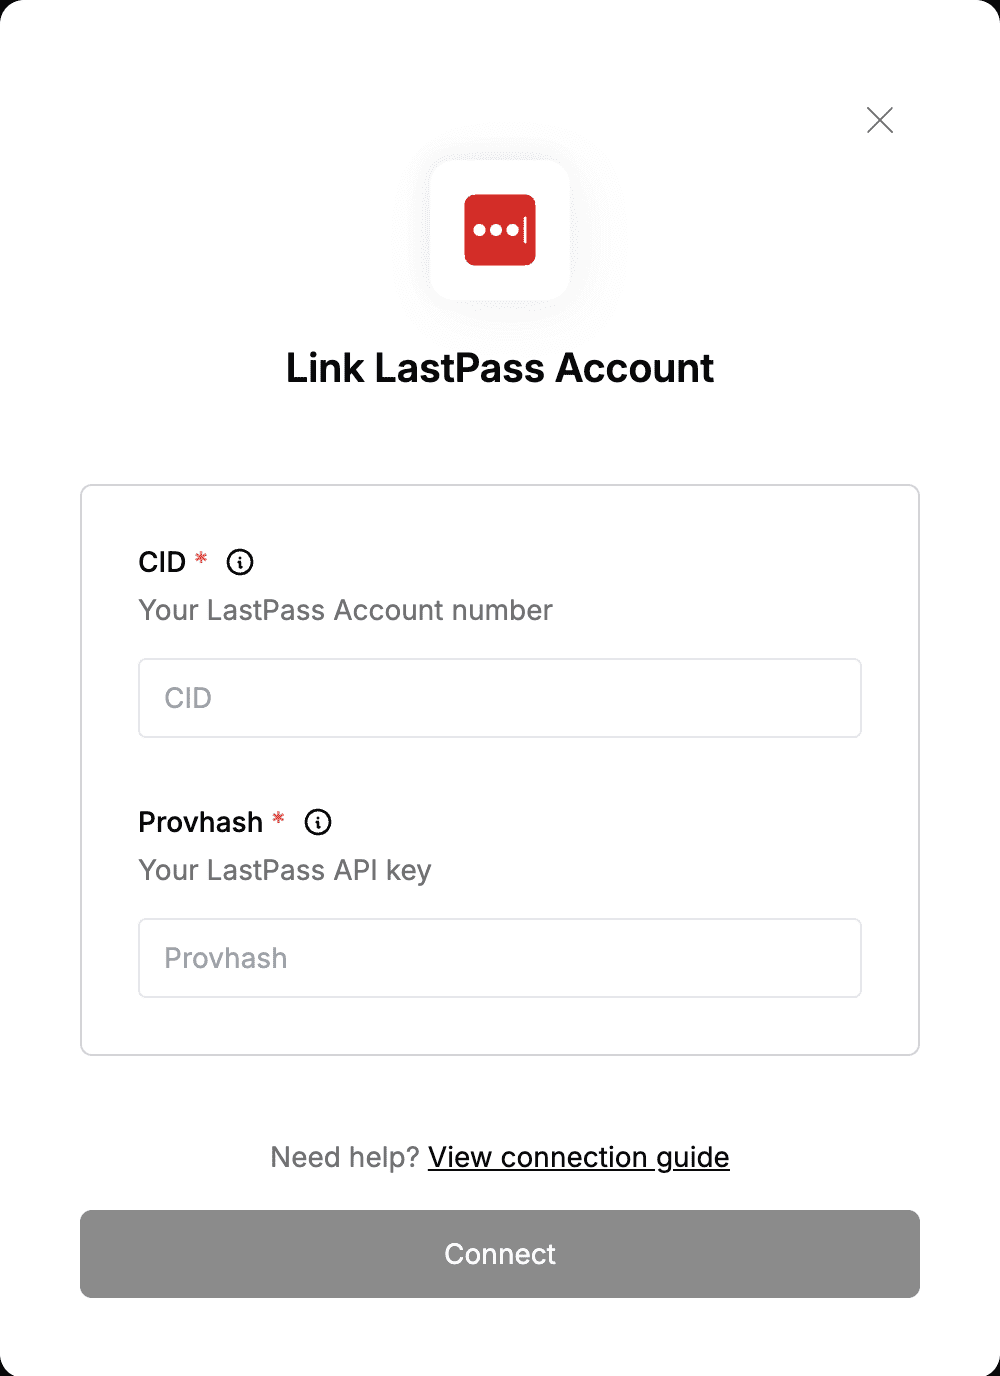
1. Open the form where you need to authenticate with LastPass.
2. Enter the **CID**, **Provhash** in their respective fields.
3. Submit the form, and you should be successfully authenticated.
#### Step 3: Enter credentials in the Connect UI
Once you have your **CID** and **Provhash**:
1. Open the form where you need to authenticate with LastPass.
2. Enter the **CID**, **Provhash** in their respective fields.
3. Submit the form, and you should be successfully authenticated.
 You are now connected to LastPass.