> ## Documentation Index
> Fetch the complete documentation index at: https://nango.dev/docs/llms.txt
> Use this file to discover all available pages before exploring further.
# JumpCloud - How do I link my account?
# Overview
To authenticate with JumpCloud, you need:
1. **API Key** - A key that grants Nango permission to interact with JumpCloud's API resources and services.
This guide will walk you through obtaining your **API Key** within JumpCloud.
### Prerequisites:
* You must have a valid JumpCloud Administrator account
* Your account must have appropriate permissions to generate API keys
### Instructions:
#### Step 1: Generate Your JumpCloud API Key
1. Log in to the [JumpCloud Admin Portal](https://console.jumpcloud.com/)
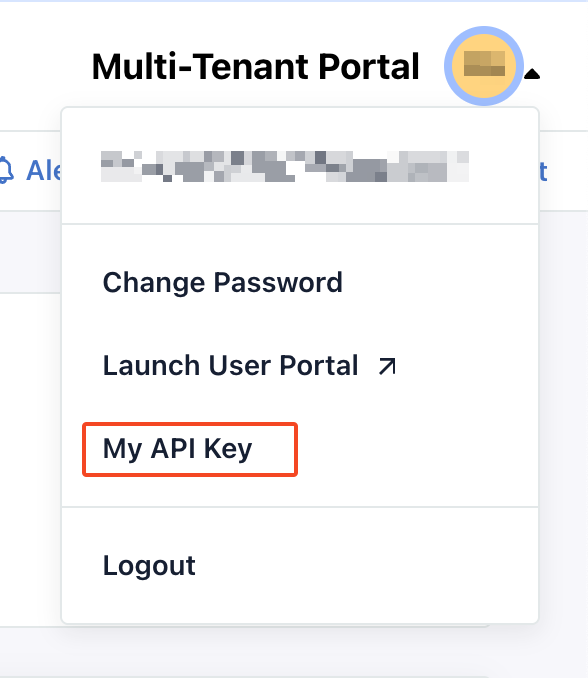
2. In the top-right corner, click on your account initials
3. Select **My API Key** from the dropdown menu
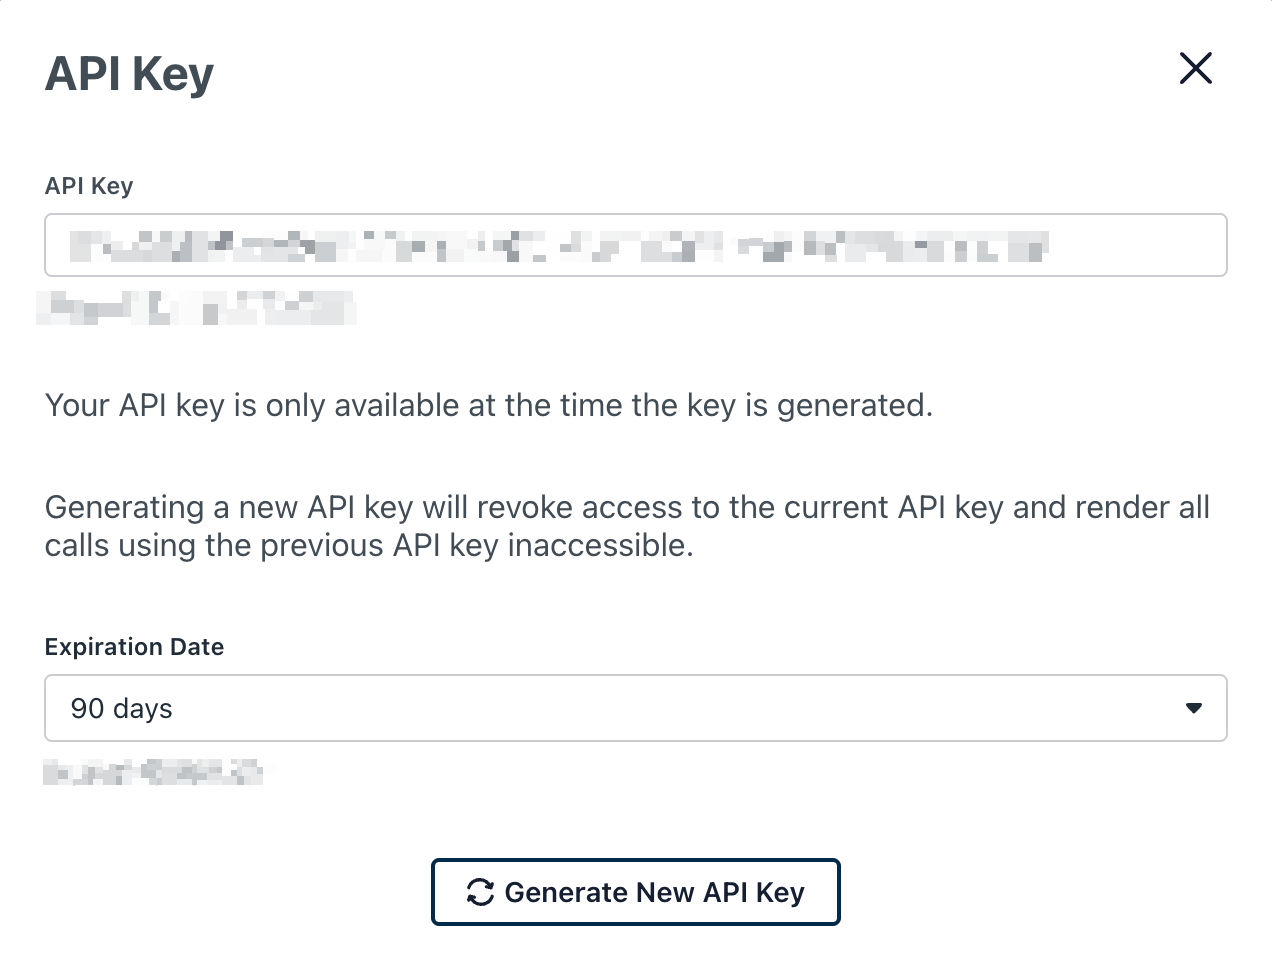
 4. Click **Generate New API Key** to create a new API key
 **Important Security Notes:**
* Generating a new API key will revoke access to the current API key
* This will render all existing integrations using the previous API key inaccessible
* Only administrators with appropriate roles can access the API
* Keep your API key secure and do not share it, as it grants full access to your JumpCloud instance
#### Step 2: Enter credentials in the Connect UI
Once you have your **API Key**:
1. Open the form where you need to authenticate with JumpCloud
2. Enter your **API Key** in the respective field
3. Submit the form, and you should be successfully authenticated
**Important Security Notes:**
* Generating a new API key will revoke access to the current API key
* This will render all existing integrations using the previous API key inaccessible
* Only administrators with appropriate roles can access the API
* Keep your API key secure and do not share it, as it grants full access to your JumpCloud instance
#### Step 2: Enter credentials in the Connect UI
Once you have your **API Key**:
1. Open the form where you need to authenticate with JumpCloud
2. Enter your **API Key** in the respective field
3. Submit the form, and you should be successfully authenticated
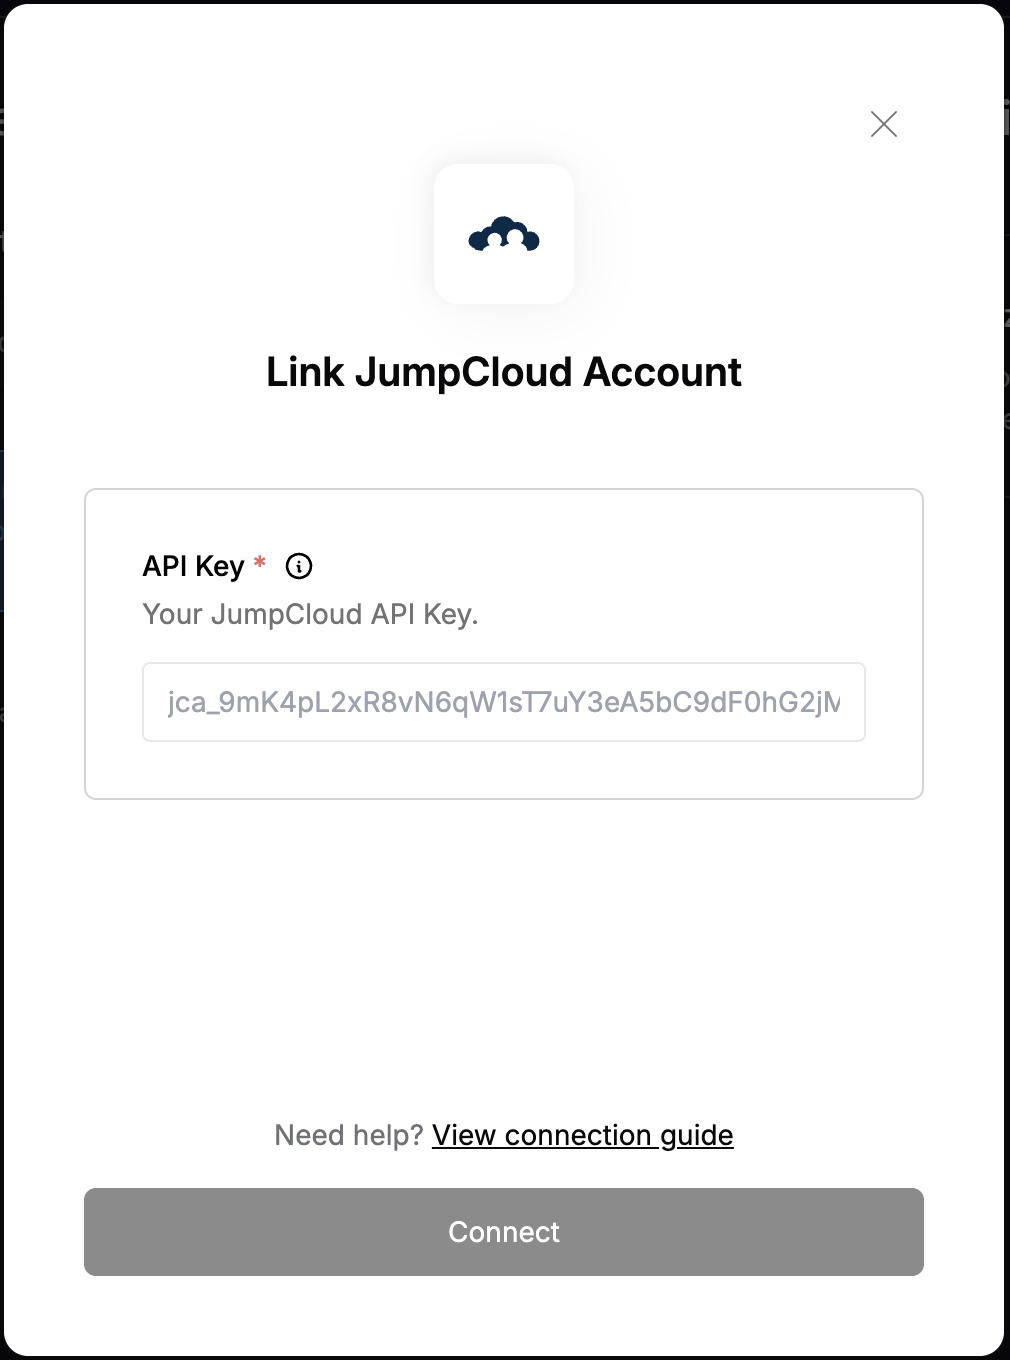 You are now connected to JumpCloud and can access both v1 and v2 API endpoints.