> ## Documentation Index
> Fetch the complete documentation index at: https://nango.dev/docs/llms.txt
> Use this file to discover all available pages before exploring further.
# Grafana - How do I link my account?
# Overview
To authenticate with Grafana, you need:
1. **Domain** - The domain for your Grafana instance account.
2. **Token** - The service account token, a randomly generated string that serves as an alternative to a password when authenticating with Grafana's HTTP API.
This guide will walk you through generating your service account token and finding your domain within Grafana.
### Prerequisites:
* You must have a registered Grafana account.
* You must have a service account within Grafana. To learn how to create one, visit [Create a Service Account](https://grafana.com/docs/grafana/latest/administration/service-accounts/#to-create-a-service-account).
#### Step 1: Finding your Domain
1. Login to your **Grafana** account. On you address bar, The URL will be similar to: `https://nango.grafana.net/a/cloud-home-app`. Your domain is the text between `https://` and the first forward slash `/`, which in this case would be `nango.grafana.net`.
#### Step 2: Generating Your Service Account Token
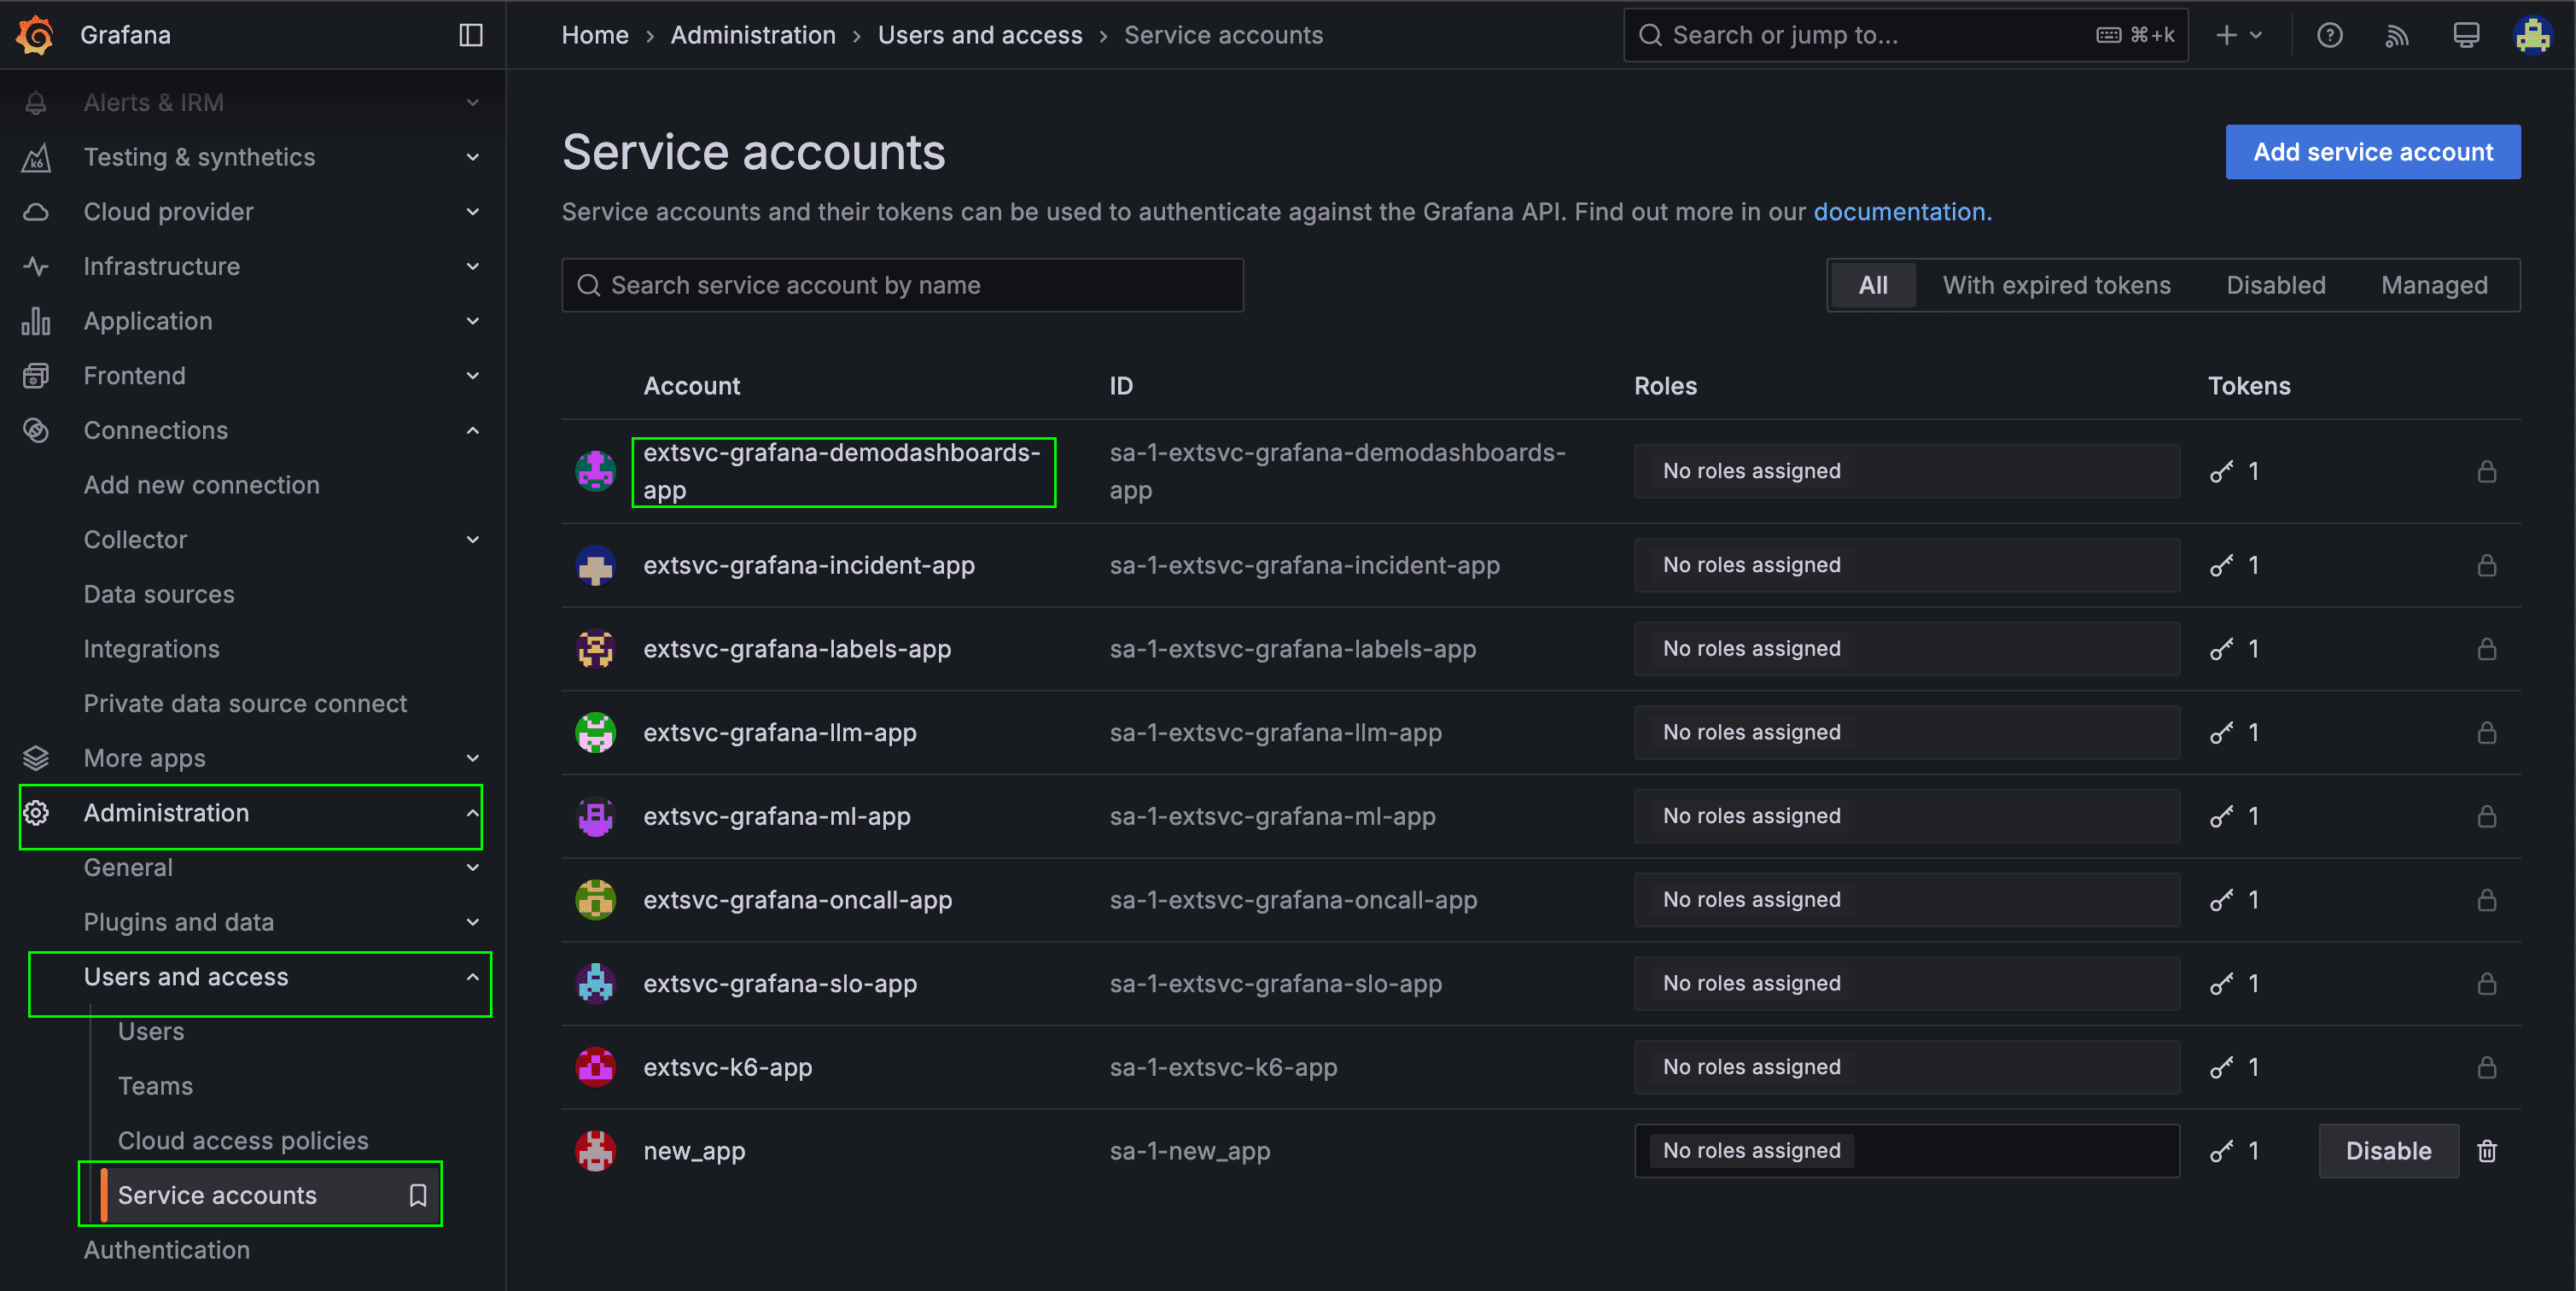
1. Sign in to Grafana and click **Administration** in the left-side menu.
2. Click **Users and access**.
3. Click **Service accounts**.
4. Click the service account to which you want to add a token.
 5. Click **Add service account token**.
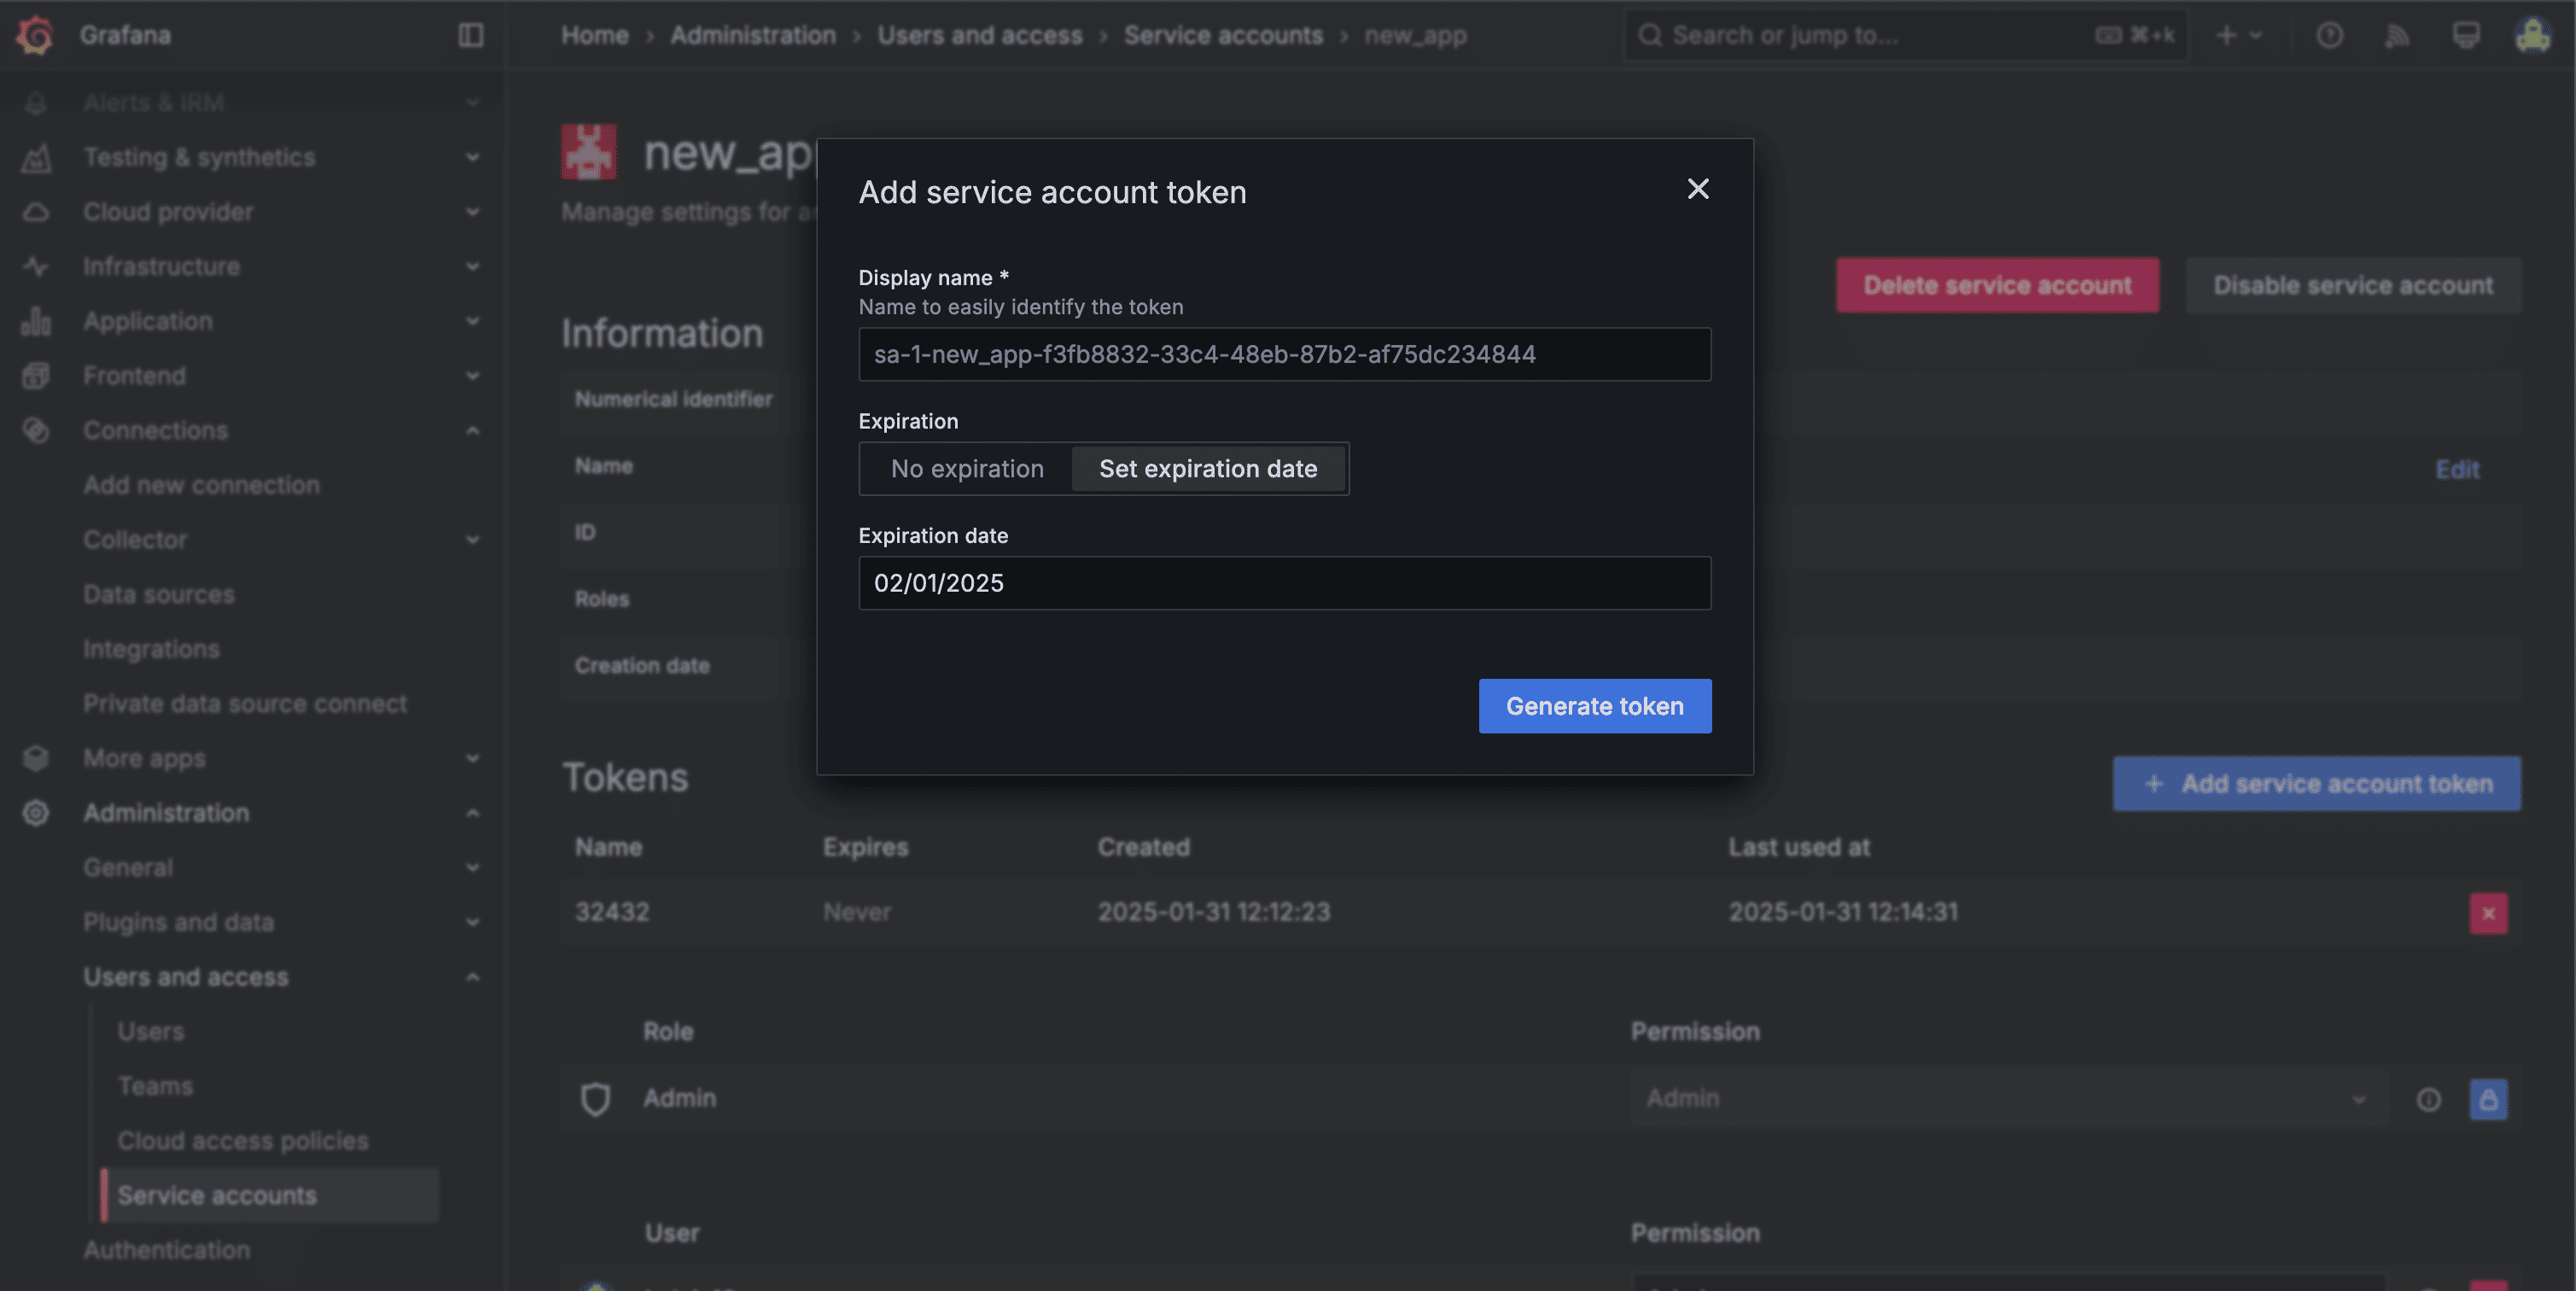
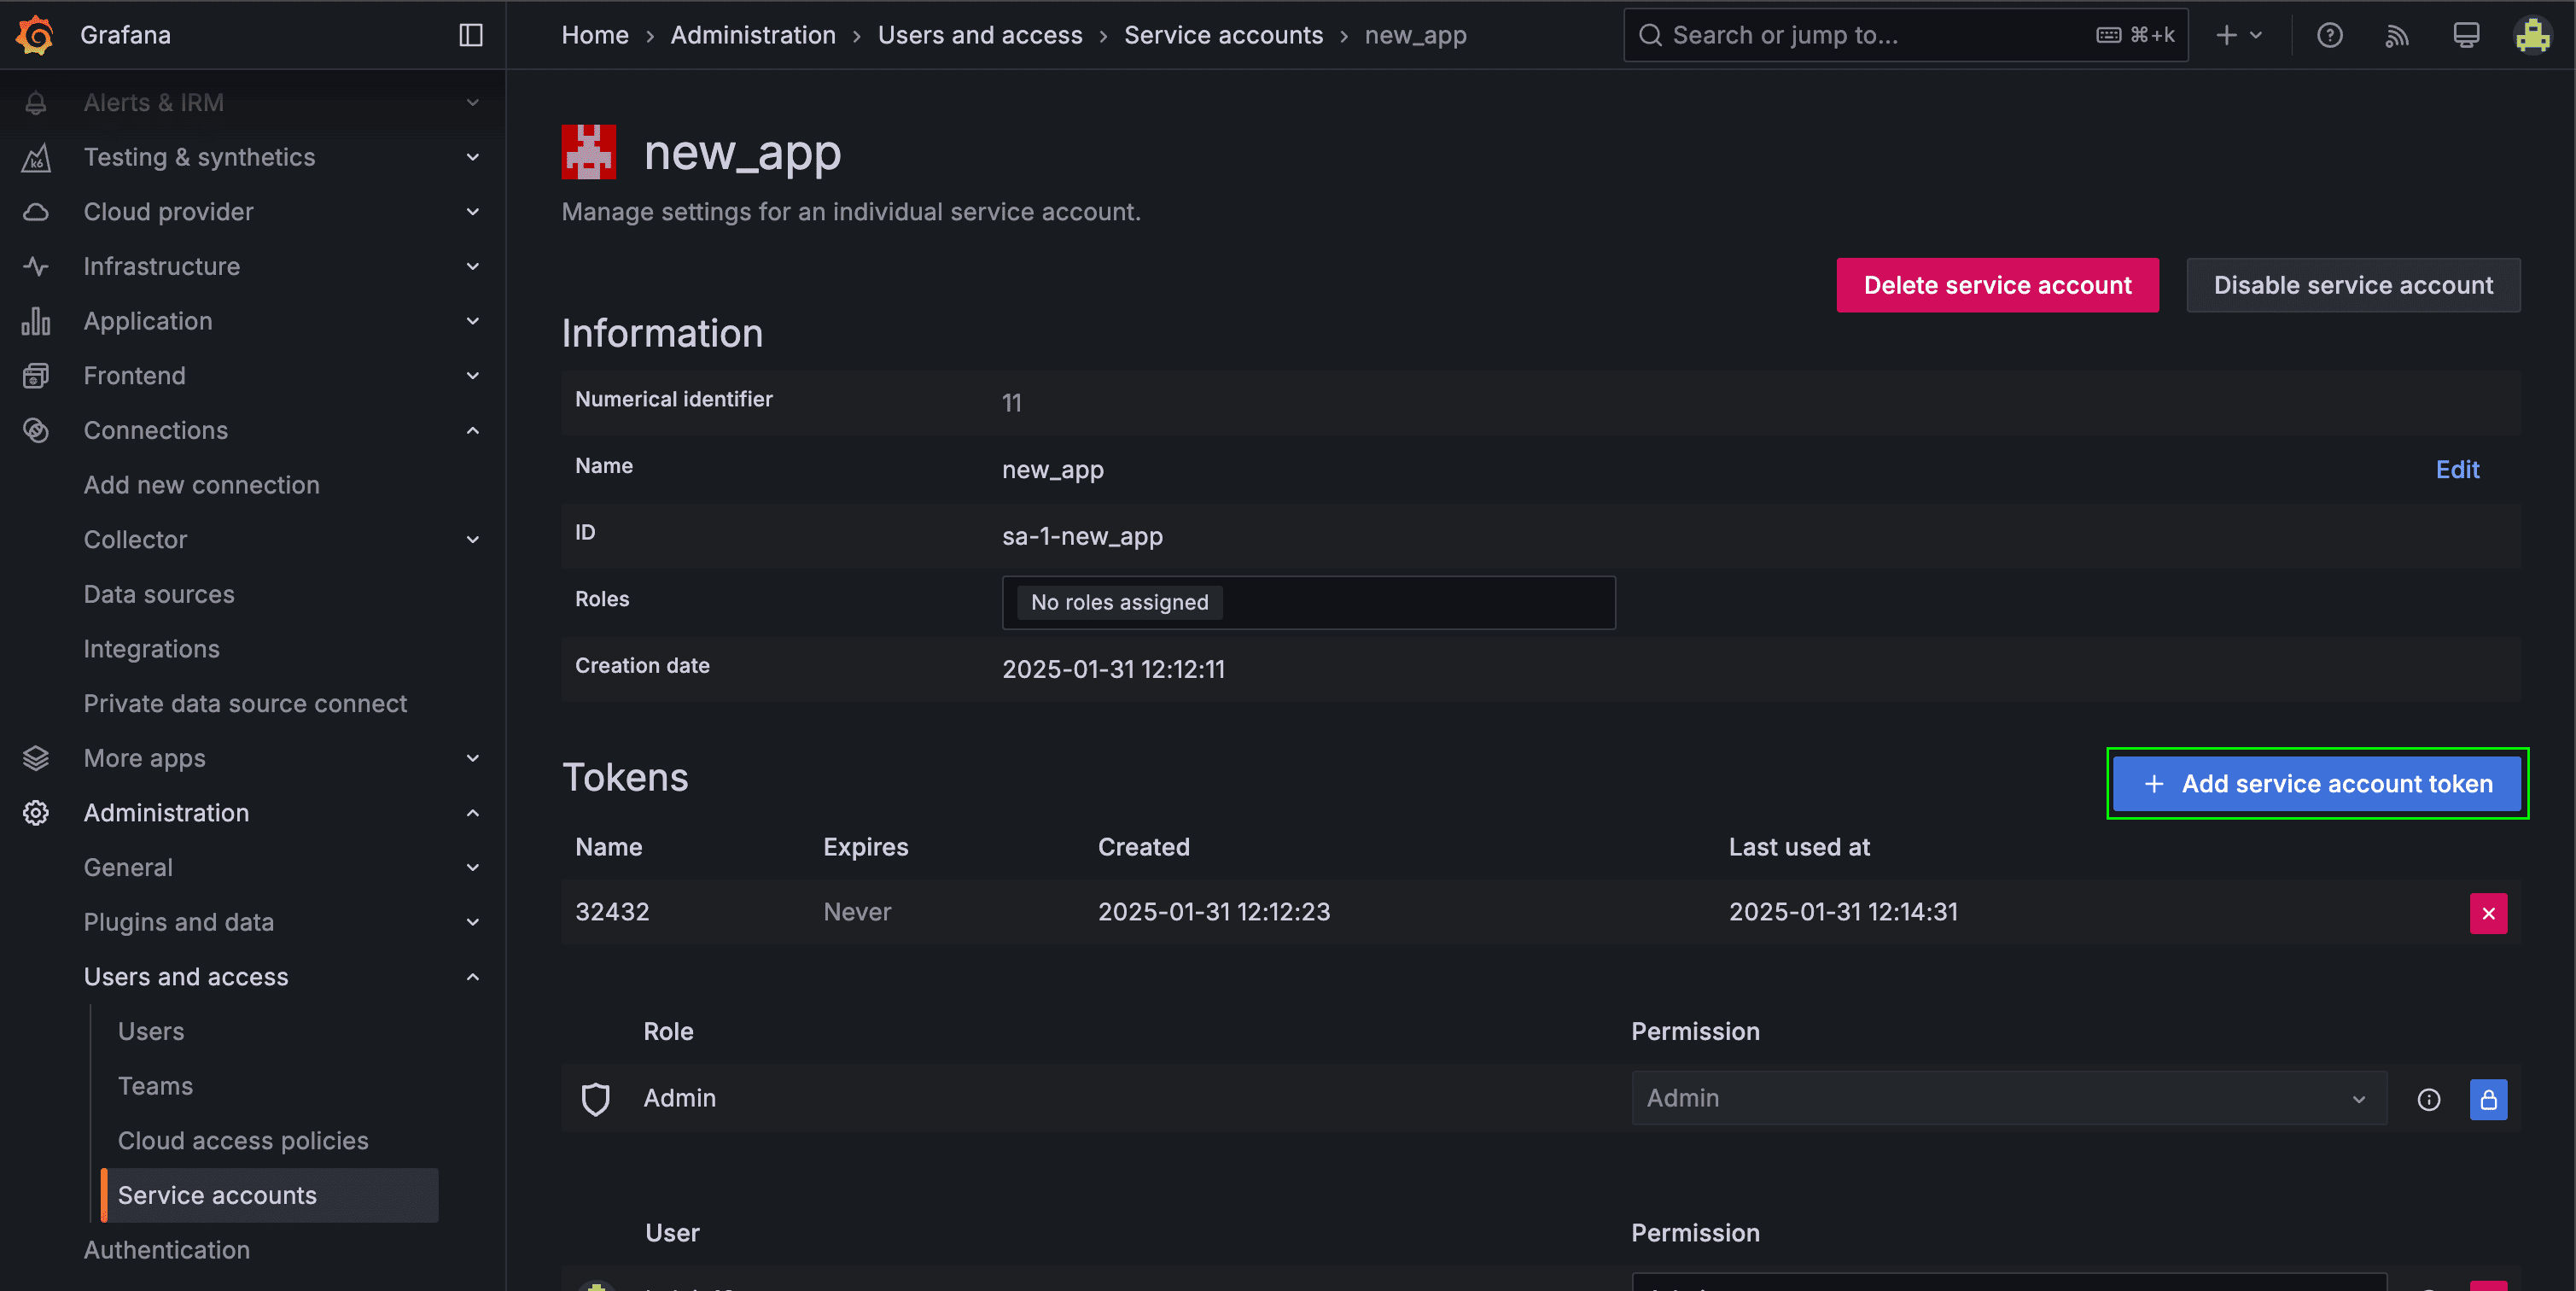 6. Enter a name for the token.
7. (recommended) Select Set expiration date and enter an expiry date for the token.
* The expiry date specifies how long you want the key to be valid.
* If you are unsure of an expiration date, Grafana recommends that you set the token to expire after a short time, such as a few hours or less. This limits the risk associated with a token that is valid for a long time.
8. Click **Generate token**.
6. Enter a name for the token.
7. (recommended) Select Set expiration date and enter an expiry date for the token.
* The expiry date specifies how long you want the key to be valid.
* If you are unsure of an expiration date, Grafana recommends that you set the token to expire after a short time, such as a few hours or less. This limits the risk associated with a token that is valid for a long time.
8. Click **Generate token**.
 #### Step 3: Enter credentials in the Connect UI
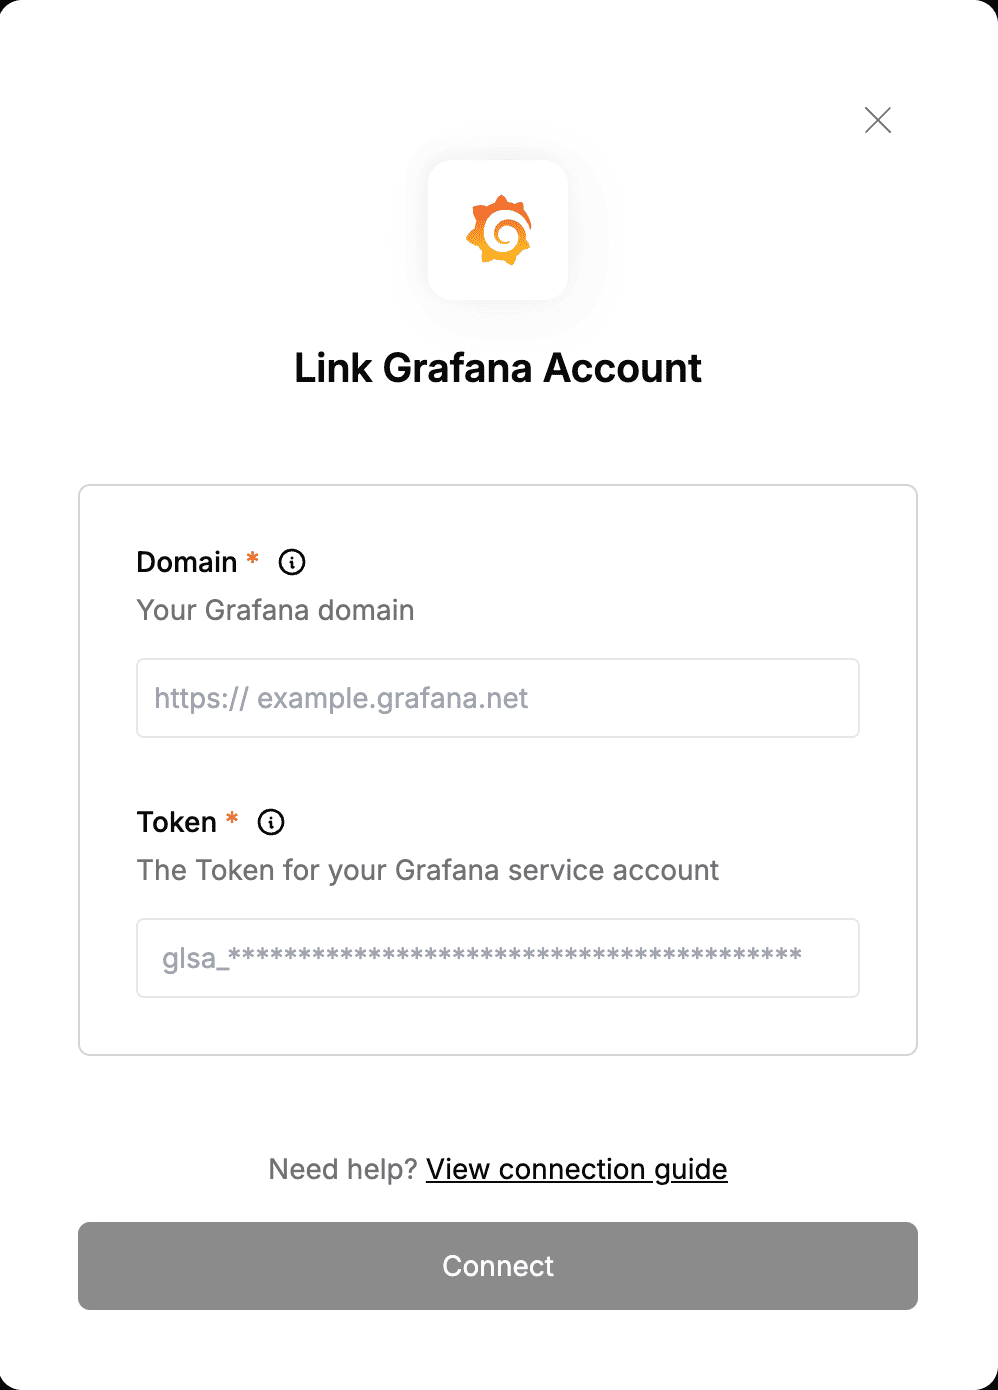
Once you have your **Domain** and **Token**:
1. Open the form where you need to authenticate with Grafana.
2. Enter your **Domain** and **Token** in their respective fields.
3. Submit the form, and you should be successfully authenticated.
#### Step 3: Enter credentials in the Connect UI
Once you have your **Domain** and **Token**:
1. Open the form where you need to authenticate with Grafana.
2. Enter your **Domain** and **Token** in their respective fields.
3. Submit the form, and you should be successfully authenticated.
 You are now connected to Grafana.