> ## Documentation Index
> Fetch the complete documentation index at: https://nango.dev/docs/llms.txt
> Use this file to discover all available pages before exploring further.
# GitLab (Personal Access Token) - How do I link my account?
# Overview
To authenticate with GitLab (Personal Access Token), you will need:
1. **Hostname** - The hostname of your GitLab instance (e.g., `gitlab.com` for GitLab.com or your self-hosted instance domain).
2. **Personal Access Token** - A token that grants Nango permission to interact with GitLab's API resources and services.
This guide will walk you through finding your hostname and creating your Personal Access Token within GitLab.
### Prerequisites:
* You must have a registered GitLab account.
### Instructions:
#### Step 1: Finding Your Hostname
1. Determine your GitLab instance hostname:
* For GitLab.com (Cloud), use: `gitlab.com`
* For self-hosted GitLab instances, use your instance's domain (e.g., `gitlab.example.com`)
The hostname is the domain where your GitLab instance is hosted.
#### Step 2: Creating Your Personal Access Token
1. Log in to your GitLab instance.
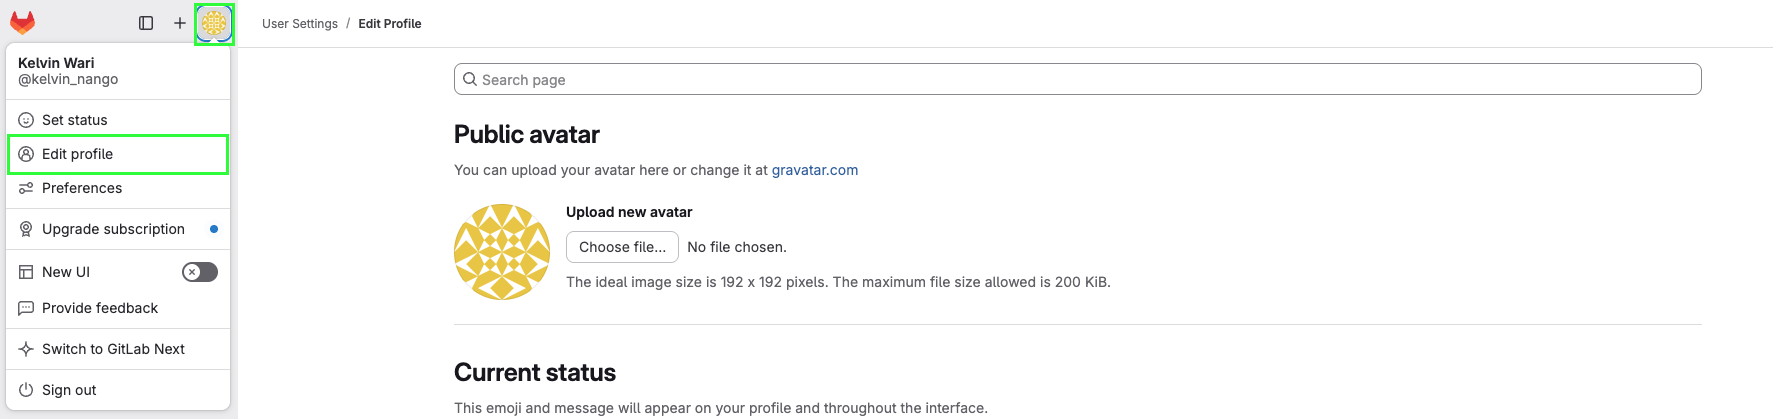
2. On the left sidebar, select your avatar. If you've [turned on the new navigation](https://docs.gitlab.com/user/interface_redesign/#turn-new-navigation-on-or-off), this button is in the upper-right corner.
3. Select **Edit profile**.
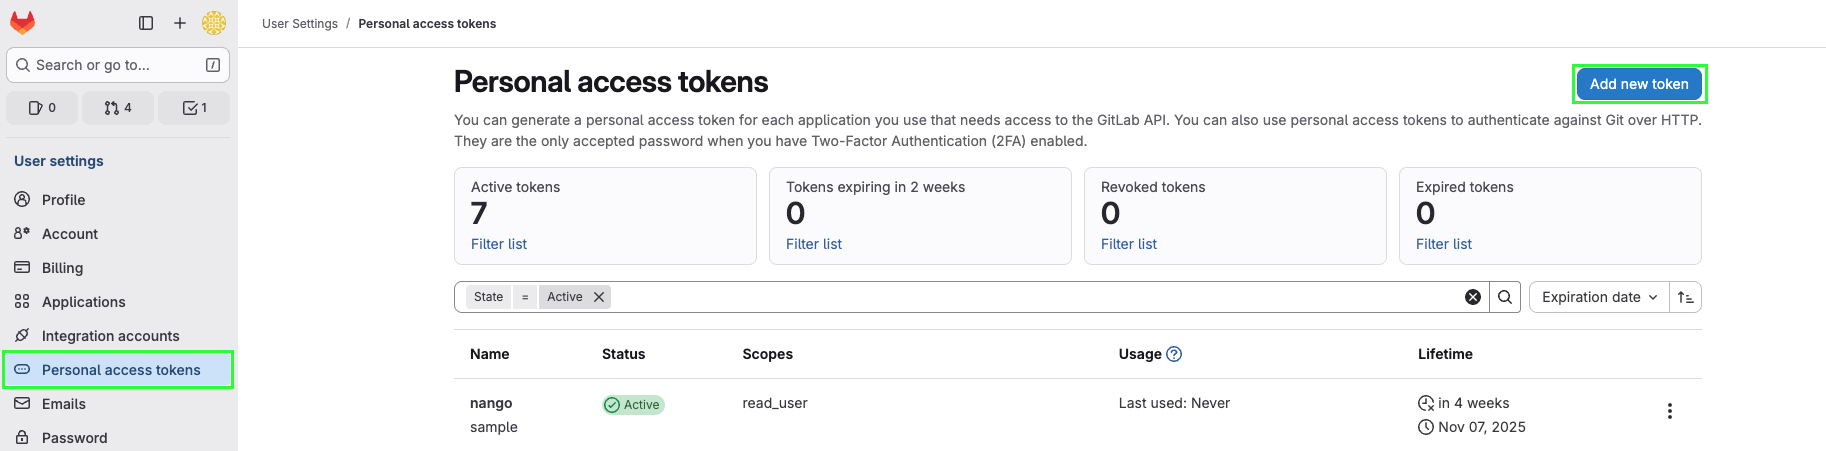
 4. On the left sidebar, select **Personal access tokens** and click **Add new token**.
 5. In the Personal Access Token form, fill it out by entering a name, selecting the expiration date, and selecting the [scopes](https://docs.gitlab.com/user/profile/personal_access_tokens/#personal-access-token-scopes) you need.
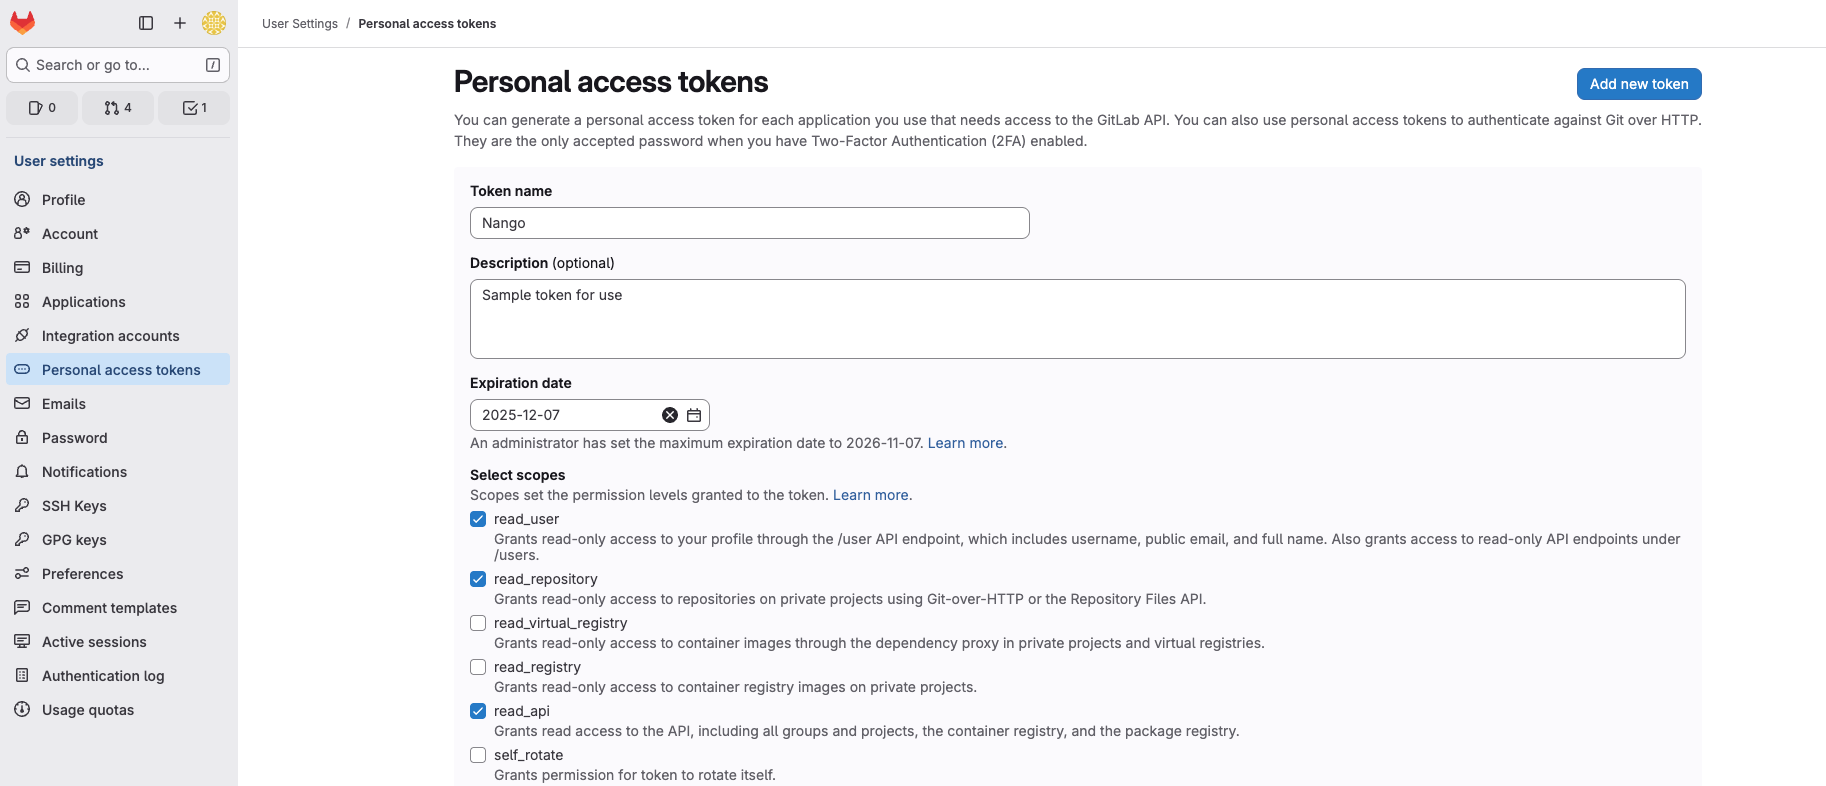 By default, the expiration date can be a maximum of 365 days later than the current date. In GitLab 17.6 or later, you can extend this limit to 400 days. Select a longer period to avoid having to regenerate your token frequently.
6\. Click **Create Token** to submit the form and generate your **Personal Access Token**.
By default, the expiration date can be a maximum of 365 days later than the current date. In GitLab 17.6 or later, you can extend this limit to 400 days. Select a longer period to avoid having to regenerate your token frequently.
6\. Click **Create Token** to submit the form and generate your **Personal Access Token**.
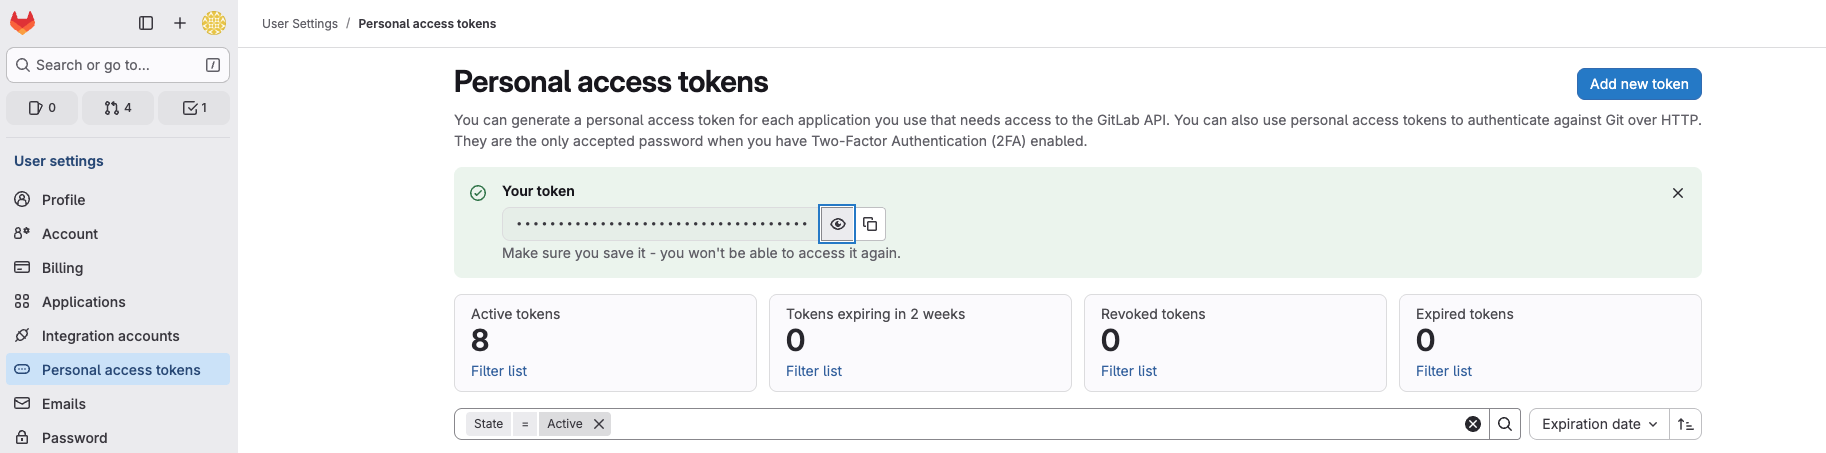 Copy your token immediately. You won't be able to see it again after you leave this page.
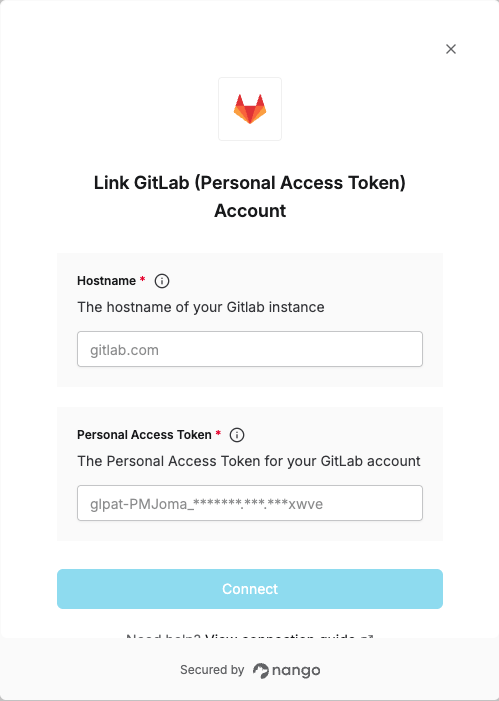
#### Step 3: Enter credentials in the Connect UI
Once you have your **Hostname** and **Personal Access Token**:
1. Open the form where you need to authenticate with GitLab (Personal Access Token).
2. Enter your **Hostname** and **Personal Access Token** in their designated fields.
3. Submit the form, and you should be successfully authenticated.
Copy your token immediately. You won't be able to see it again after you leave this page.
#### Step 3: Enter credentials in the Connect UI
Once you have your **Hostname** and **Personal Access Token**:
1. Open the form where you need to authenticate with GitLab (Personal Access Token).
2. Enter your **Hostname** and **Personal Access Token** in their designated fields.
3. Submit the form, and you should be successfully authenticated.
 You are now connected to GitLab (Personal Access Token).