> ## Documentation Index
> Fetch the complete documentation index at: https://nango.dev/docs/llms.txt
> Use this file to discover all available pages before exploring further.
# Github (Personal Access Token) - How do I link my account?
# Overview
To authenticate with Github (Personal Access Token), you need:
1. **Personal Access Token** - A key that grants Nango permission to interact with Github's APIs resources and services.
This guide will walk you through obtaining your Personal Access Token within Github.
### Prerequisites:
* You must have an account with Github.
### Instructions:
#### Step 1: Finding Your Personal Access Token
GitHub provides two types of tokens for authentication: Classic Personal Access Tokens (PATs) and Fine-Grained Personal Access Tokens. This guide will focus on generating Fine-grained PATs as Github recommends this over the other since it provides better security.
1. Log in to your [Github](http://github.com/) account.
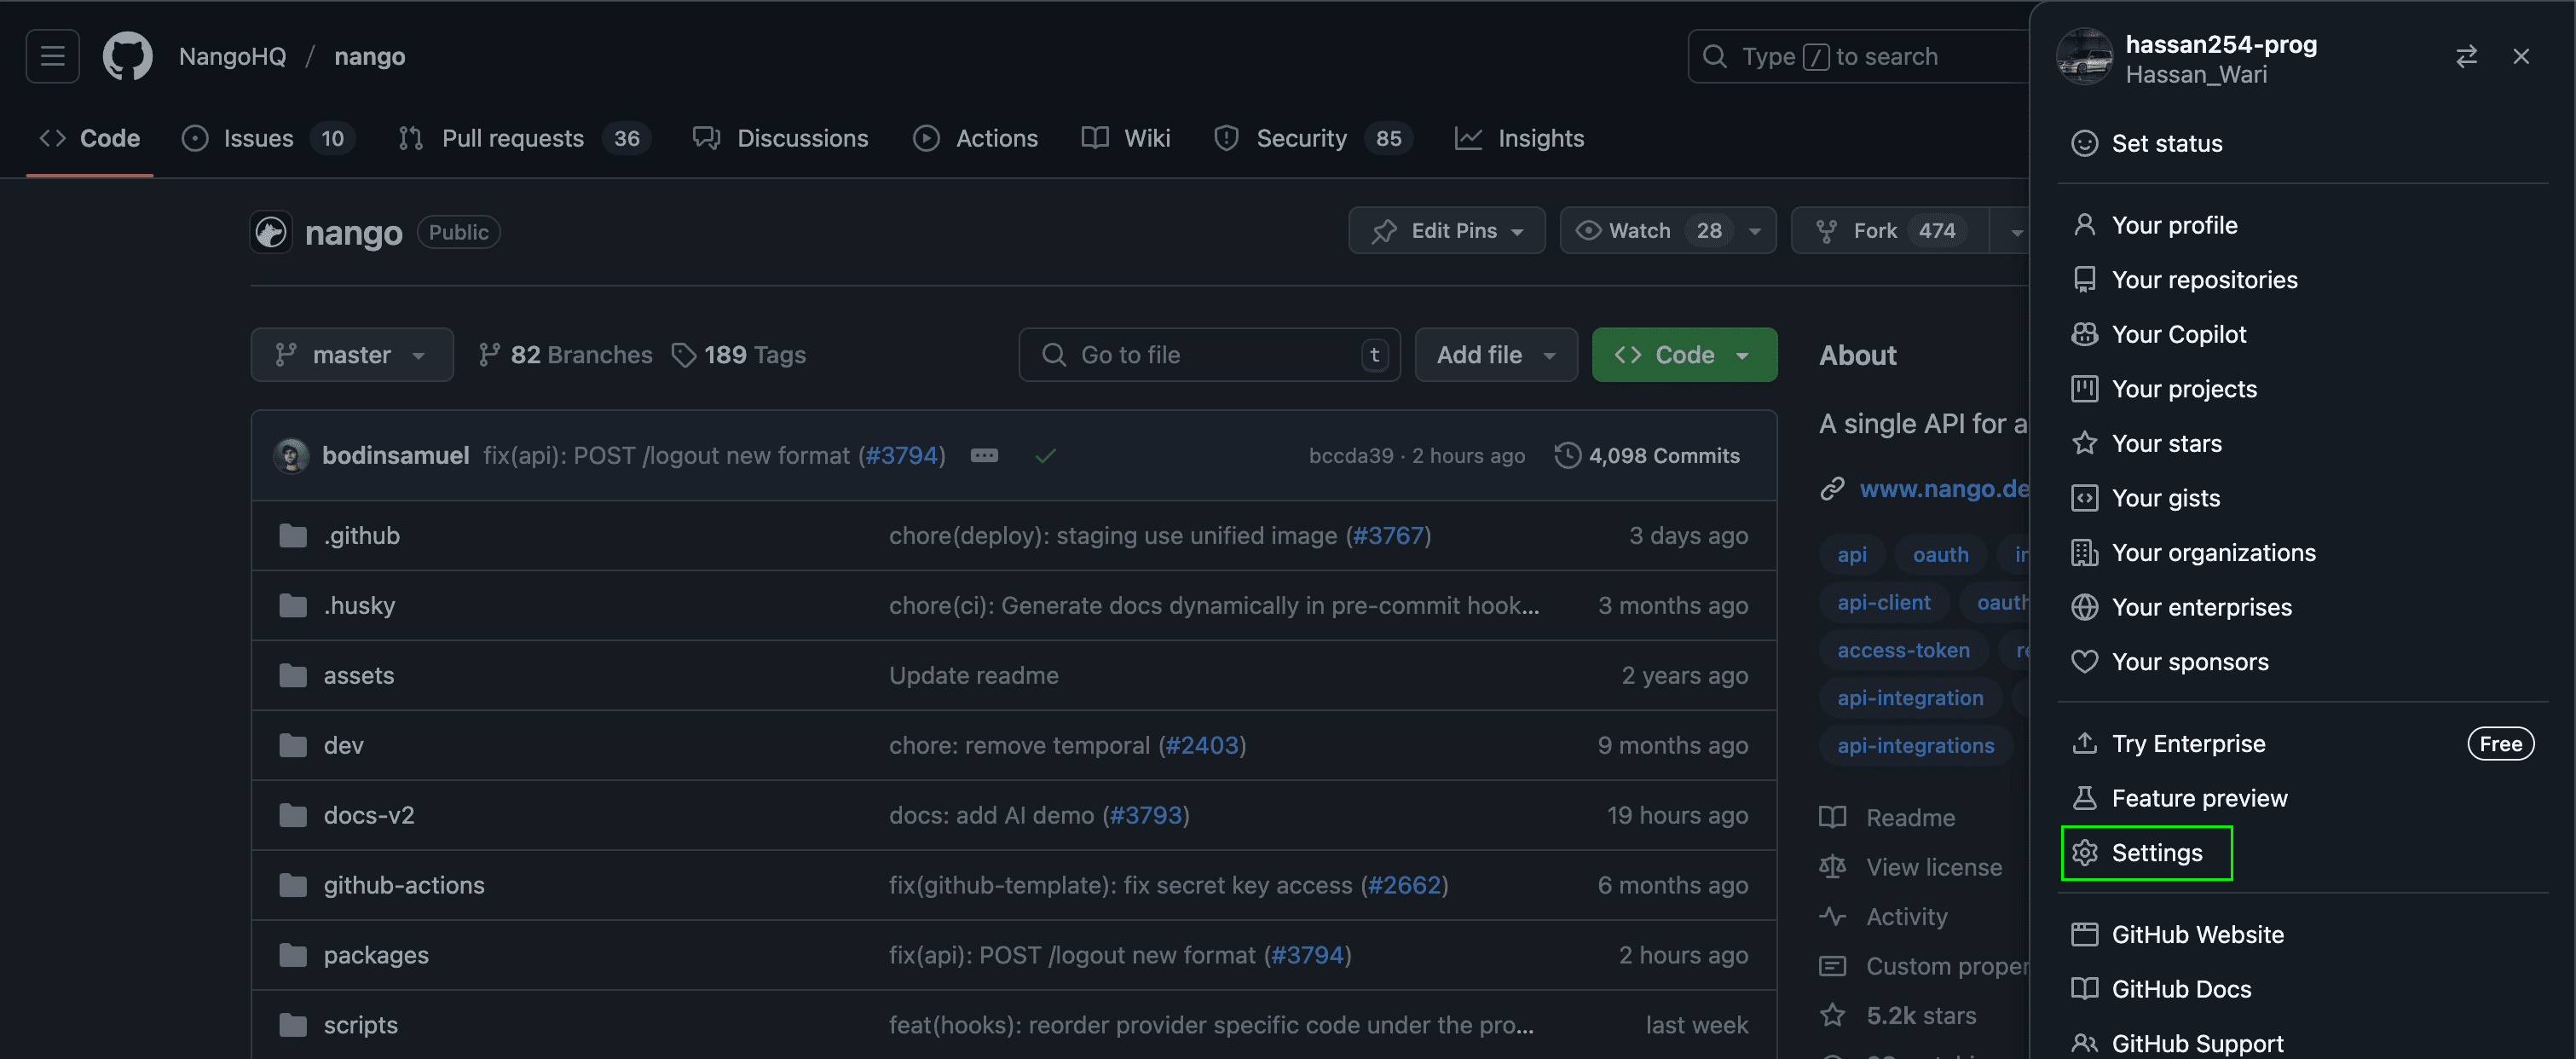
2. In the upper-right corner of any page on GitHub, click your profile photo, then click Settings.
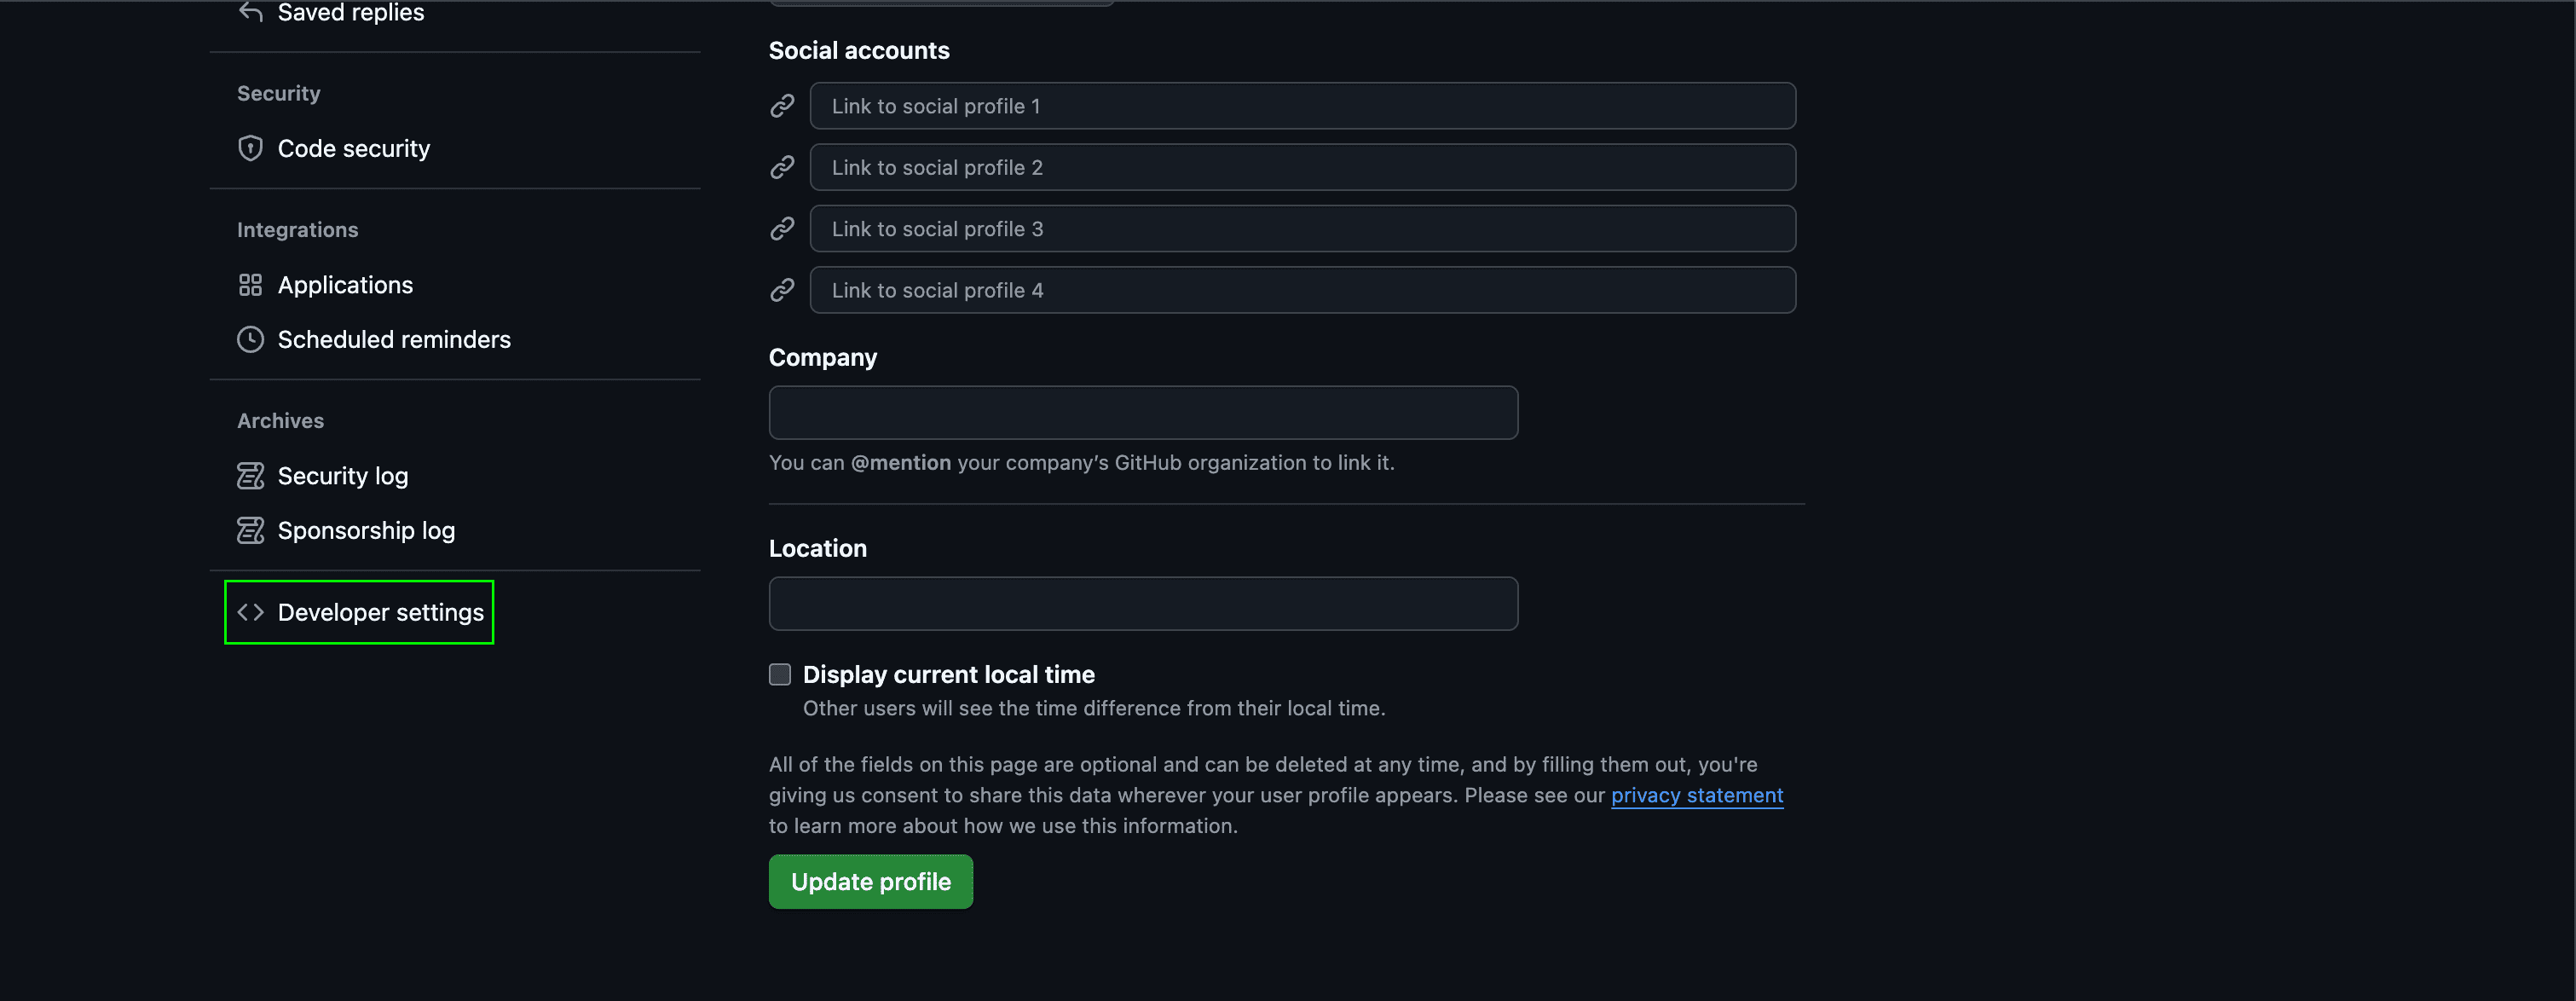
 3. In the left sidebar, click **Developer settings**.
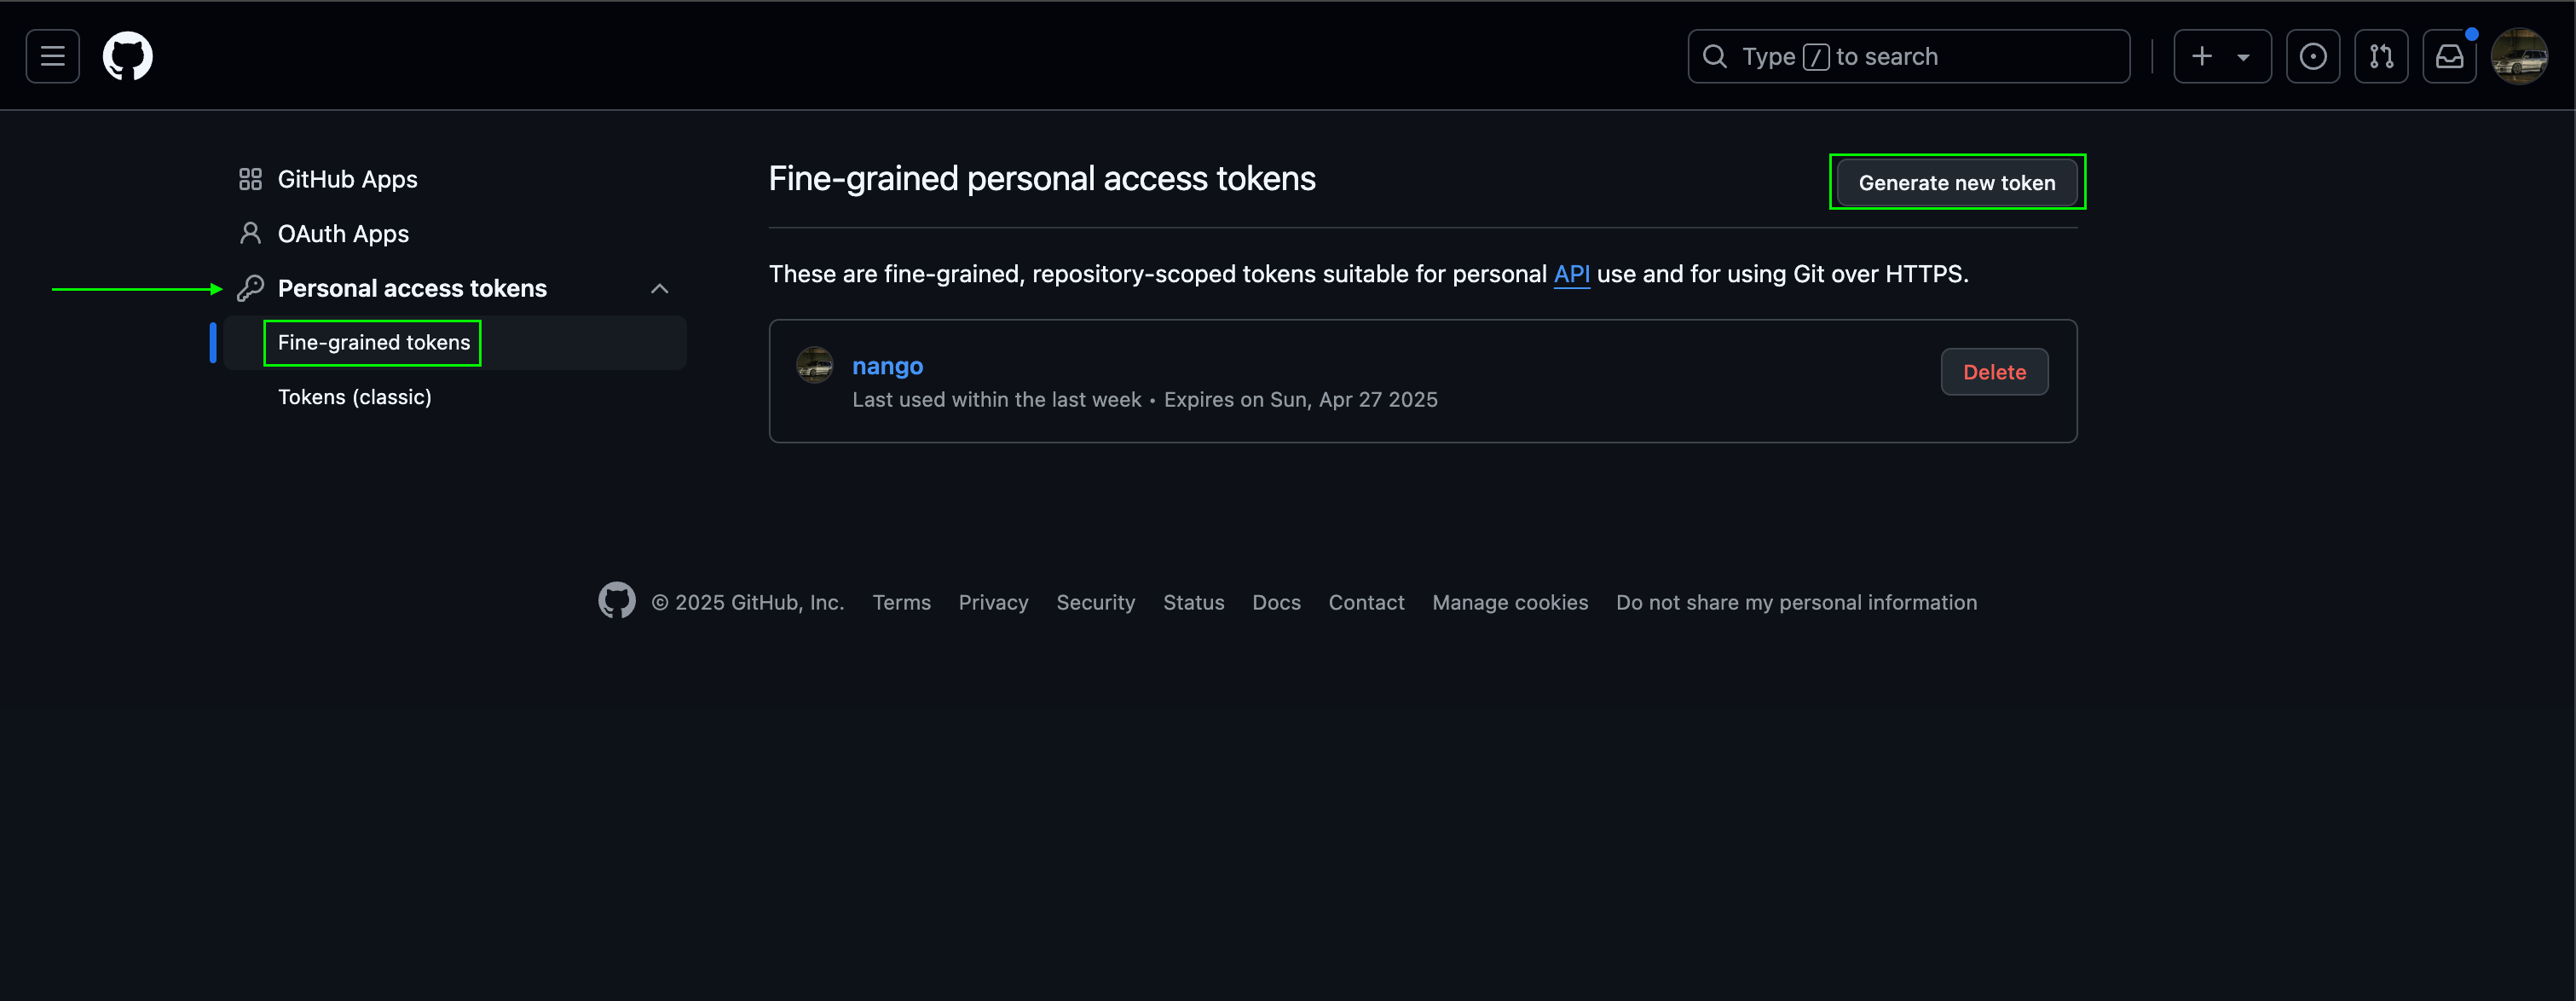
 4. In the left sidebar, under **Personal access tokens**, click **Fine-grained tokens**.
5. Click **Generate new token**.
4. In the left sidebar, under **Personal access tokens**, click **Fine-grained tokens**.
5. Click **Generate new token**.
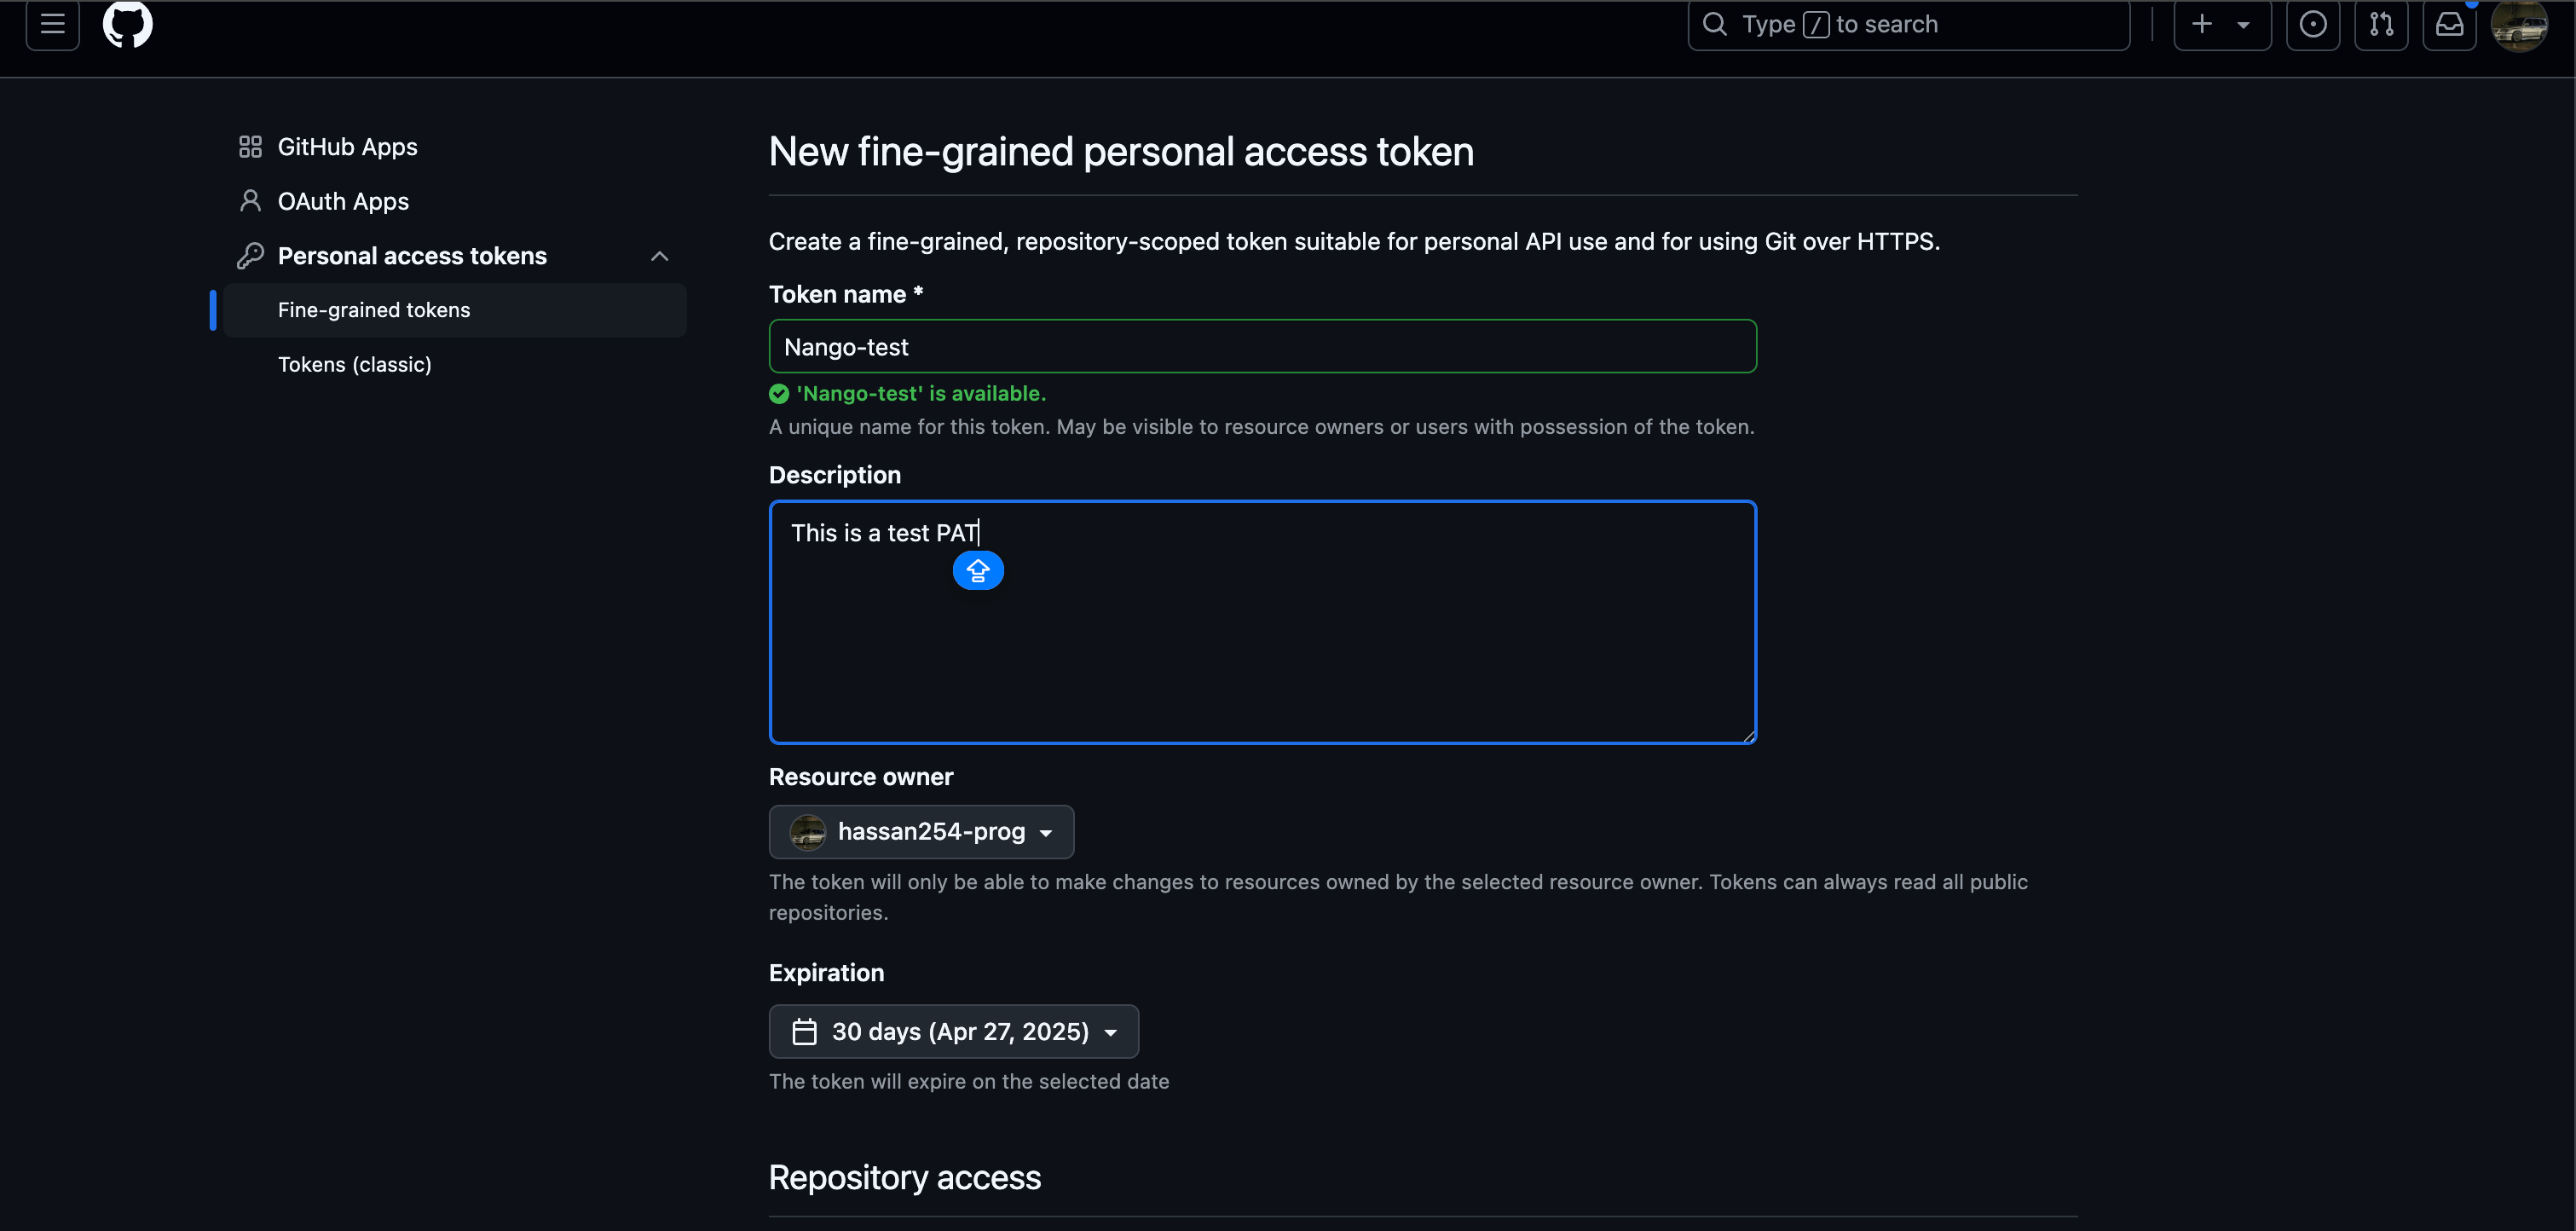
 6. Under **Token name**, enter a name for the token.
7. Under **Expiration**, select an expiration for the token. Infinite lifetimes are allowed but may be blocked by a maximum lifetime policy set by your organization or enterprise owner.
Optionally, under **Description**, add a note to describe the purpose of the token
8. Under **Resource owner**, select a resource owner. The token will only be able to access resources owned by the selected resource owner.
Optionally, if the resource owner is an organization that requires approval for fine-grained personal access tokens, below the **resource owner**, in the box, enter a justification for the request.
9. Under **Repository access**, select which repositories you want the token to access.
10. If you selected **Only select repositories** in the previous step, under the **Selected repositories** dropdown, select the repositories that you want the token to access.
11. Under **Permissions**, select which permissions to grant the token.
12. Click **Generate token**.
6. Under **Token name**, enter a name for the token.
7. Under **Expiration**, select an expiration for the token. Infinite lifetimes are allowed but may be blocked by a maximum lifetime policy set by your organization or enterprise owner.
Optionally, under **Description**, add a note to describe the purpose of the token
8. Under **Resource owner**, select a resource owner. The token will only be able to access resources owned by the selected resource owner.
Optionally, if the resource owner is an organization that requires approval for fine-grained personal access tokens, below the **resource owner**, in the box, enter a justification for the request.
9. Under **Repository access**, select which repositories you want the token to access.
10. If you selected **Only select repositories** in the previous step, under the **Selected repositories** dropdown, select the repositories that you want the token to access.
11. Under **Permissions**, select which permissions to grant the token.
12. Click **Generate token**.
 #### Step 2: Enter credentials in the Connect UI
Once you have your **Personal Access Token**:
1. Open the form where you need to authenticate with Github (Personal Access Token).
2. Enter your **Personal Access Token** in its respective field.
3. Submit the form, and you should be successfully authenticated.
#### Step 2: Enter credentials in the Connect UI
Once you have your **Personal Access Token**:
1. Open the form where you need to authenticate with Github (Personal Access Token).
2. Enter your **Personal Access Token** in its respective field.
3. Submit the form, and you should be successfully authenticated.
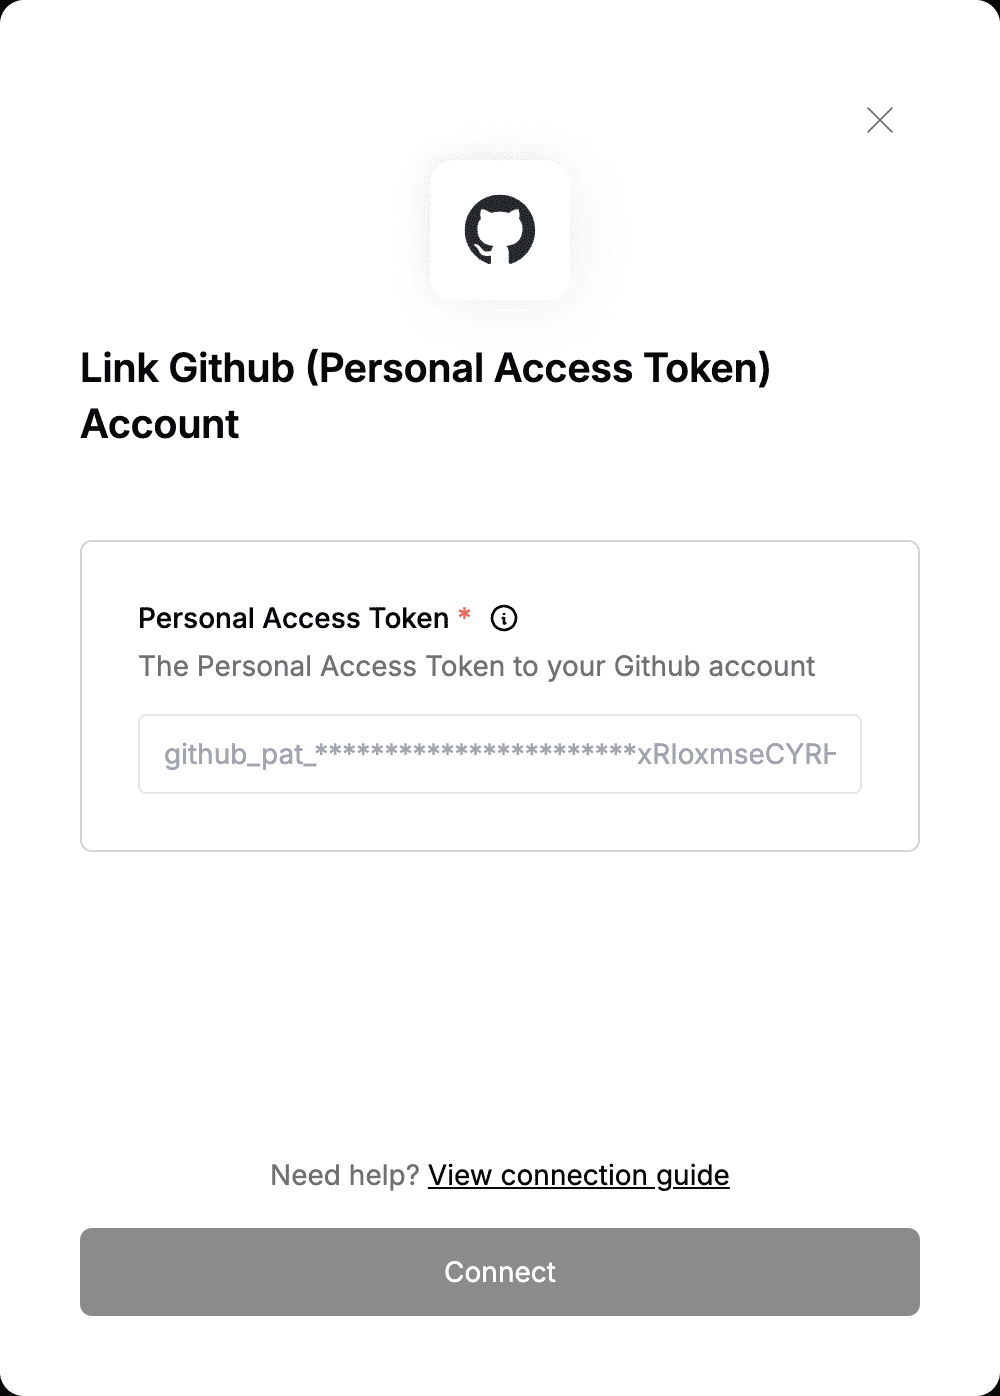 You are now connected to Github (Personal Access Token).