> ## Documentation Index
> Fetch the complete documentation index at: https://nango.dev/docs/llms.txt
> Use this file to discover all available pages before exploring further.
# Braze - How do I link my account?
# Overview
To authenticate with Braze, you need two key pieces of information:
1. **Instance URL** - The REST API URL to your Braze instance.
2. **API key** - A key that grants Nango permission to interact with Braze's APIs resources and services.
This guide will walk you through obtaining both the API key and Instance Url within Braze.
### Prerequisites:
* You must have an active subscription with Braze.
### Instructions:
#### Step 1: Finding Your Instance URL
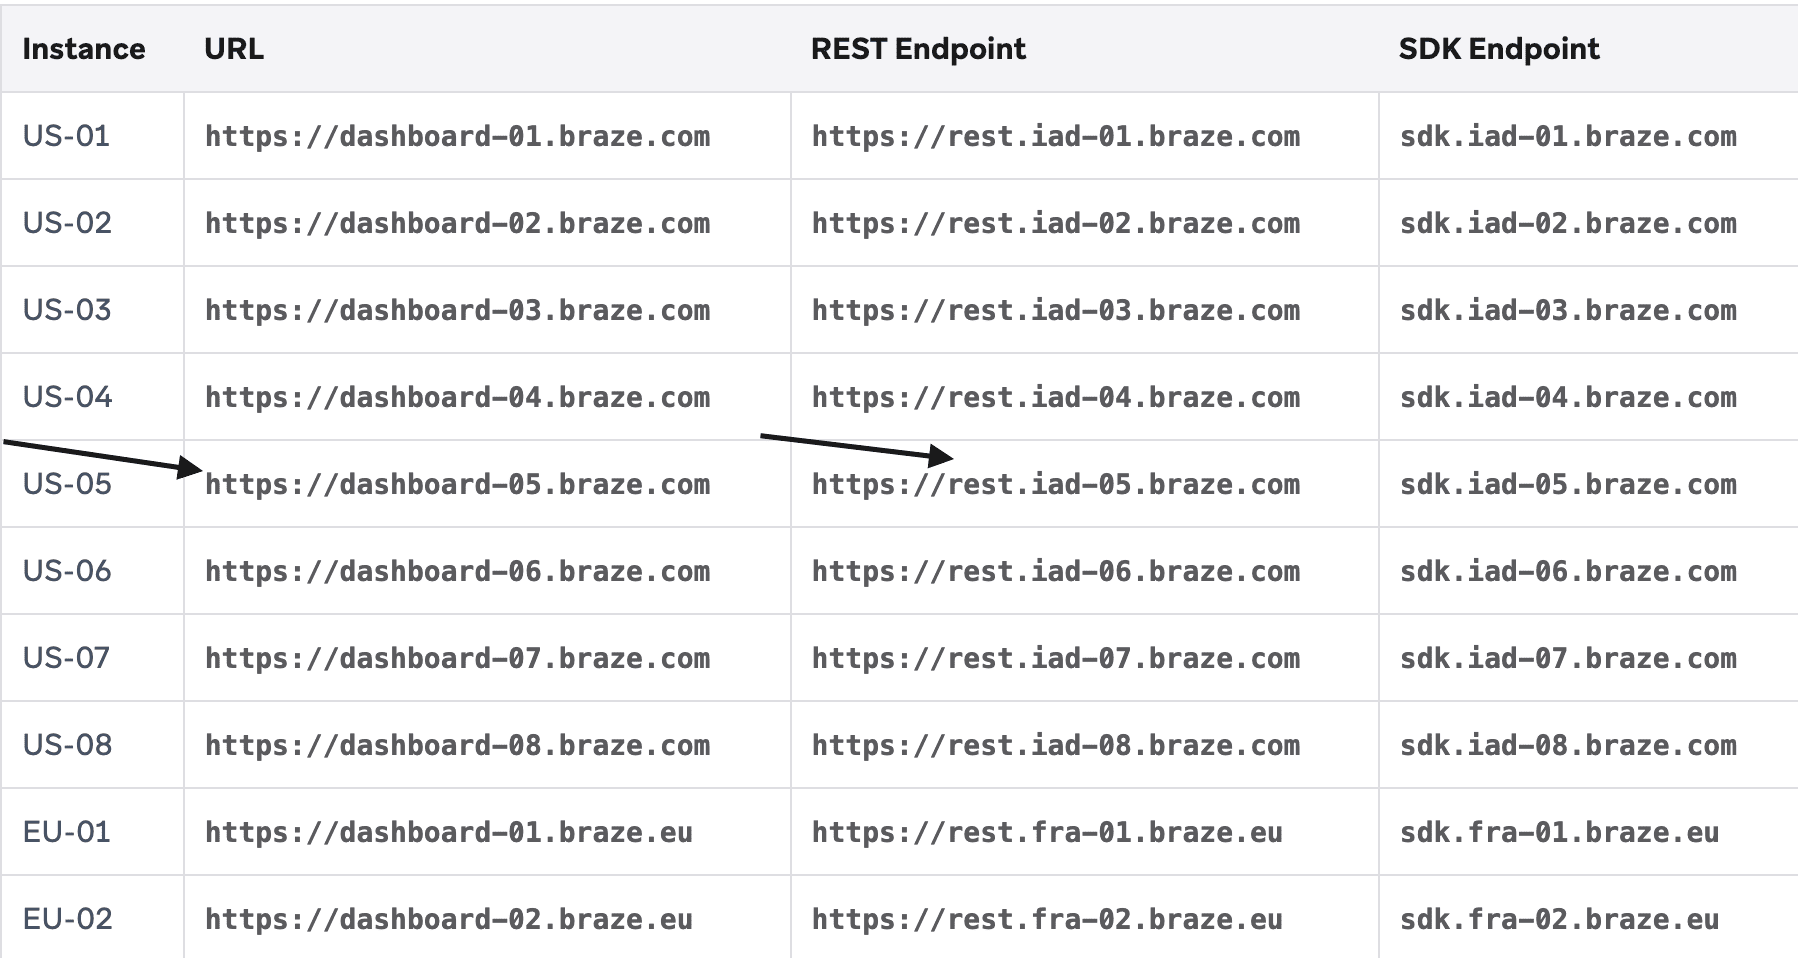
1. Visit Braze [Endpoints](https://www.braze.com/docs/api/basics/#endpoints) to match your dashboard URL with your Instance URL.
* In our example below, our dashboard URL (displayed on the address bar when signed in) is `https://dashboard-05.braze.com` and thus we will have `iad-05.braze.com` as our **Instance URL**.
 #### Step 2: Finding Your API Key
1. **Log in** to your Braze account.
2. Navigate to **Settings** > **APIs and Identifiers**.
#### Step 2: Finding Your API Key
1. **Log in** to your Braze account.
2. Navigate to **Settings** > **APIs and Identifiers**.
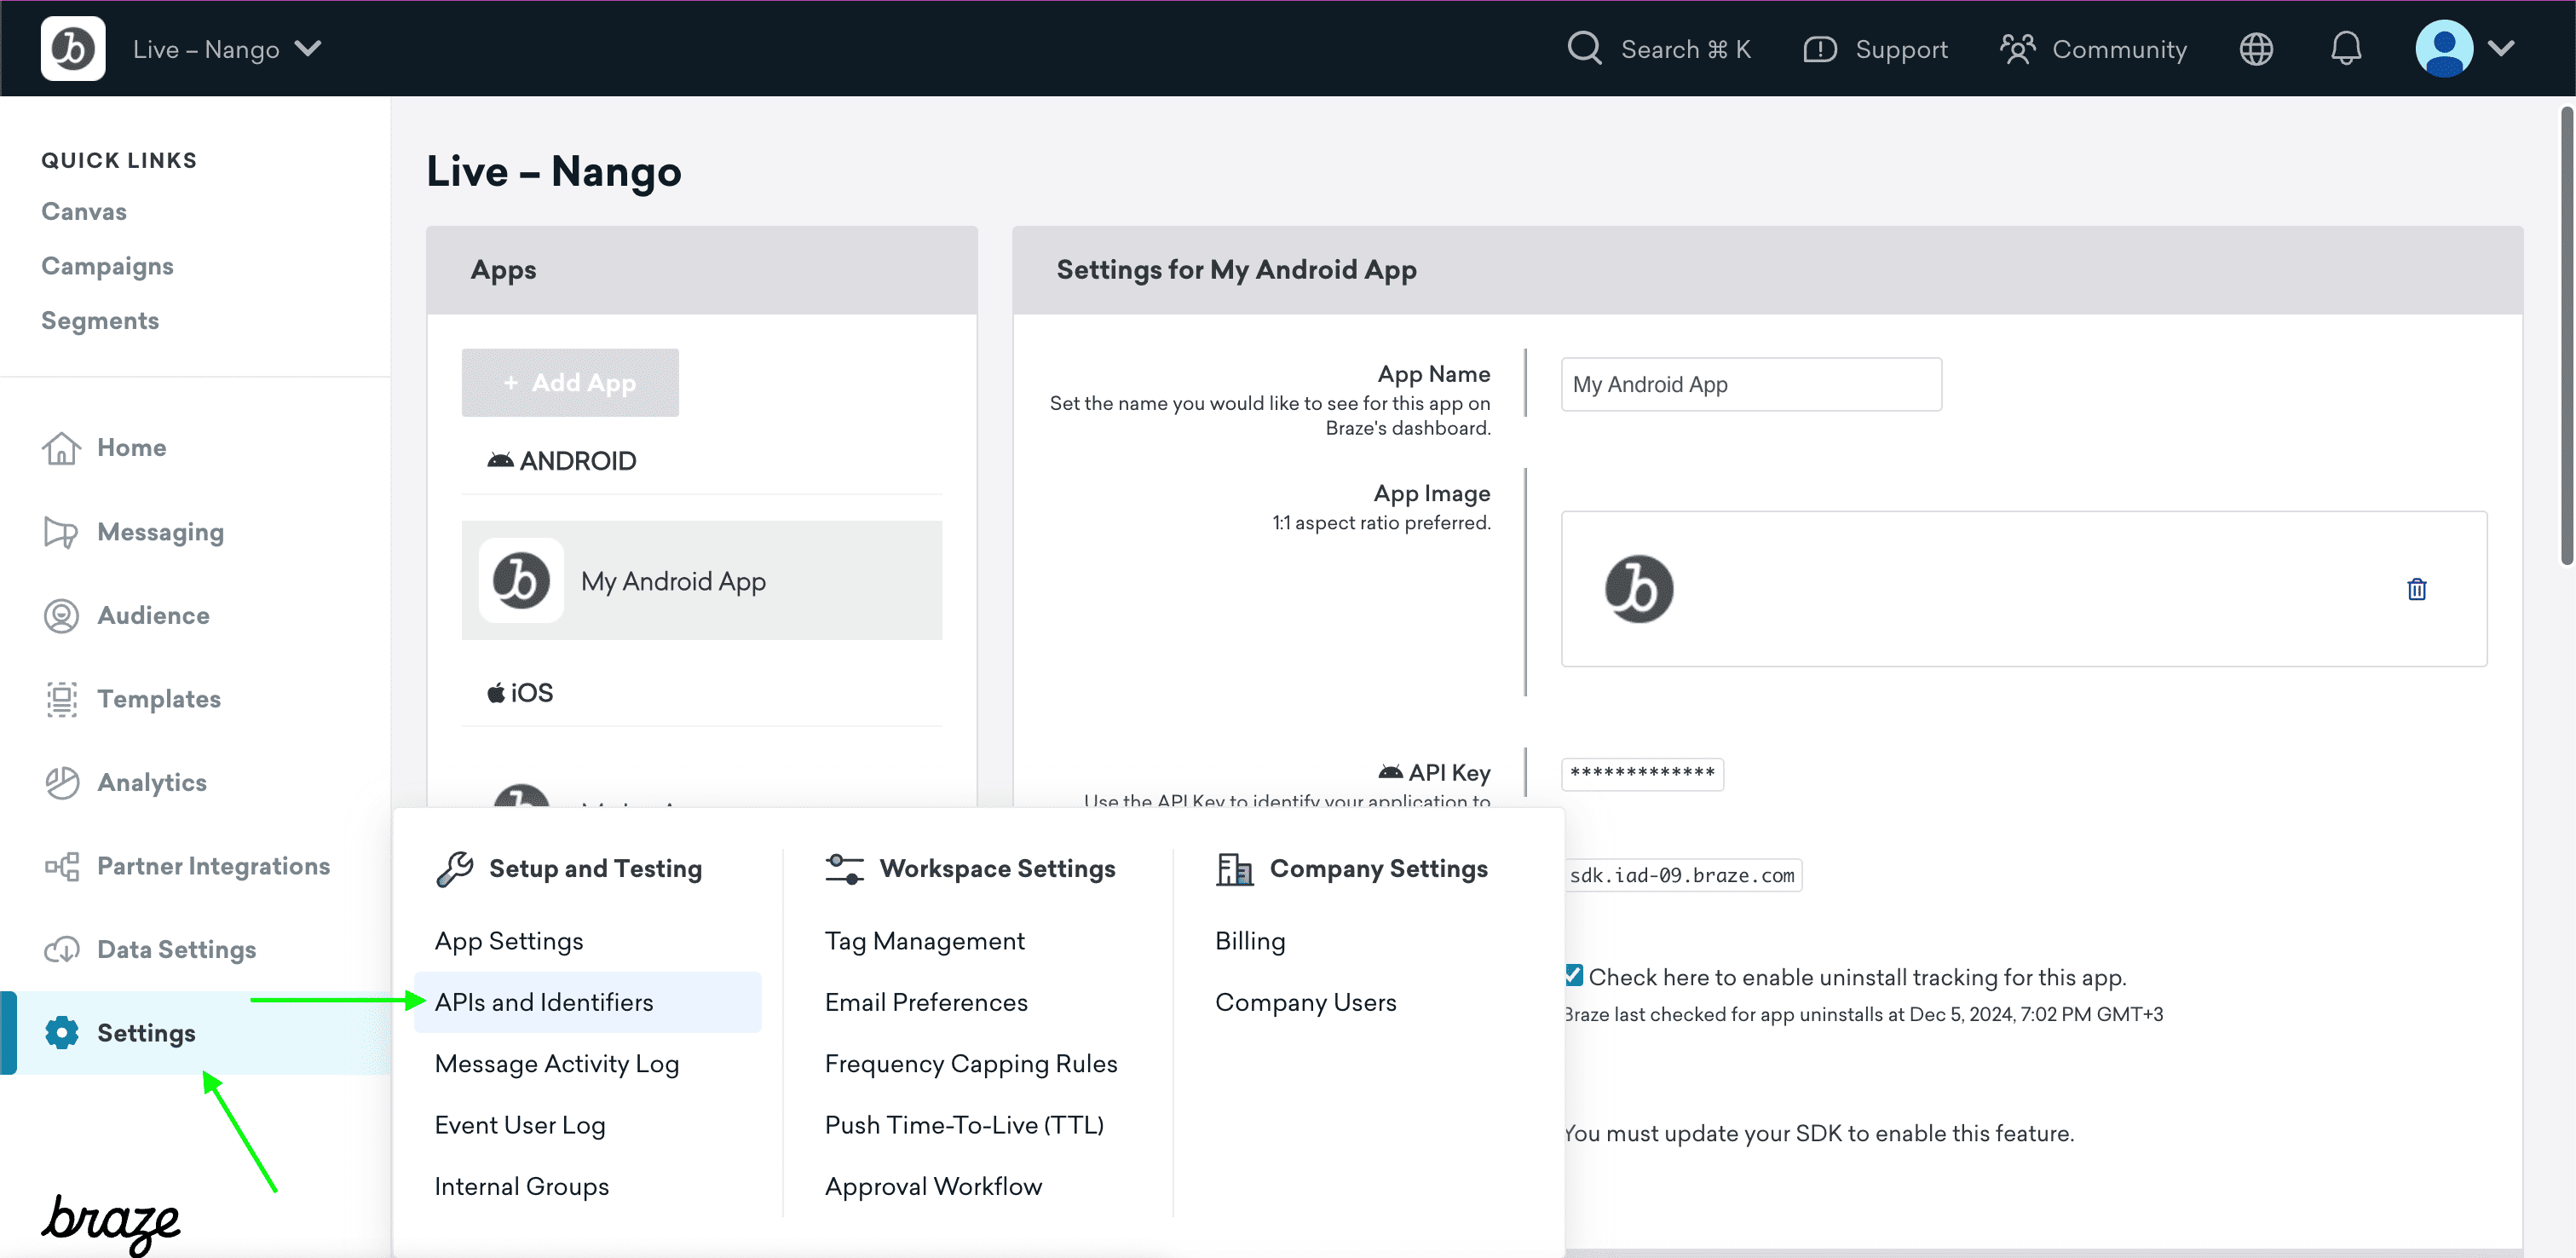 * If you’re using the **older navigation**, you can create an API key from **Developer Console** > **API Settings**.
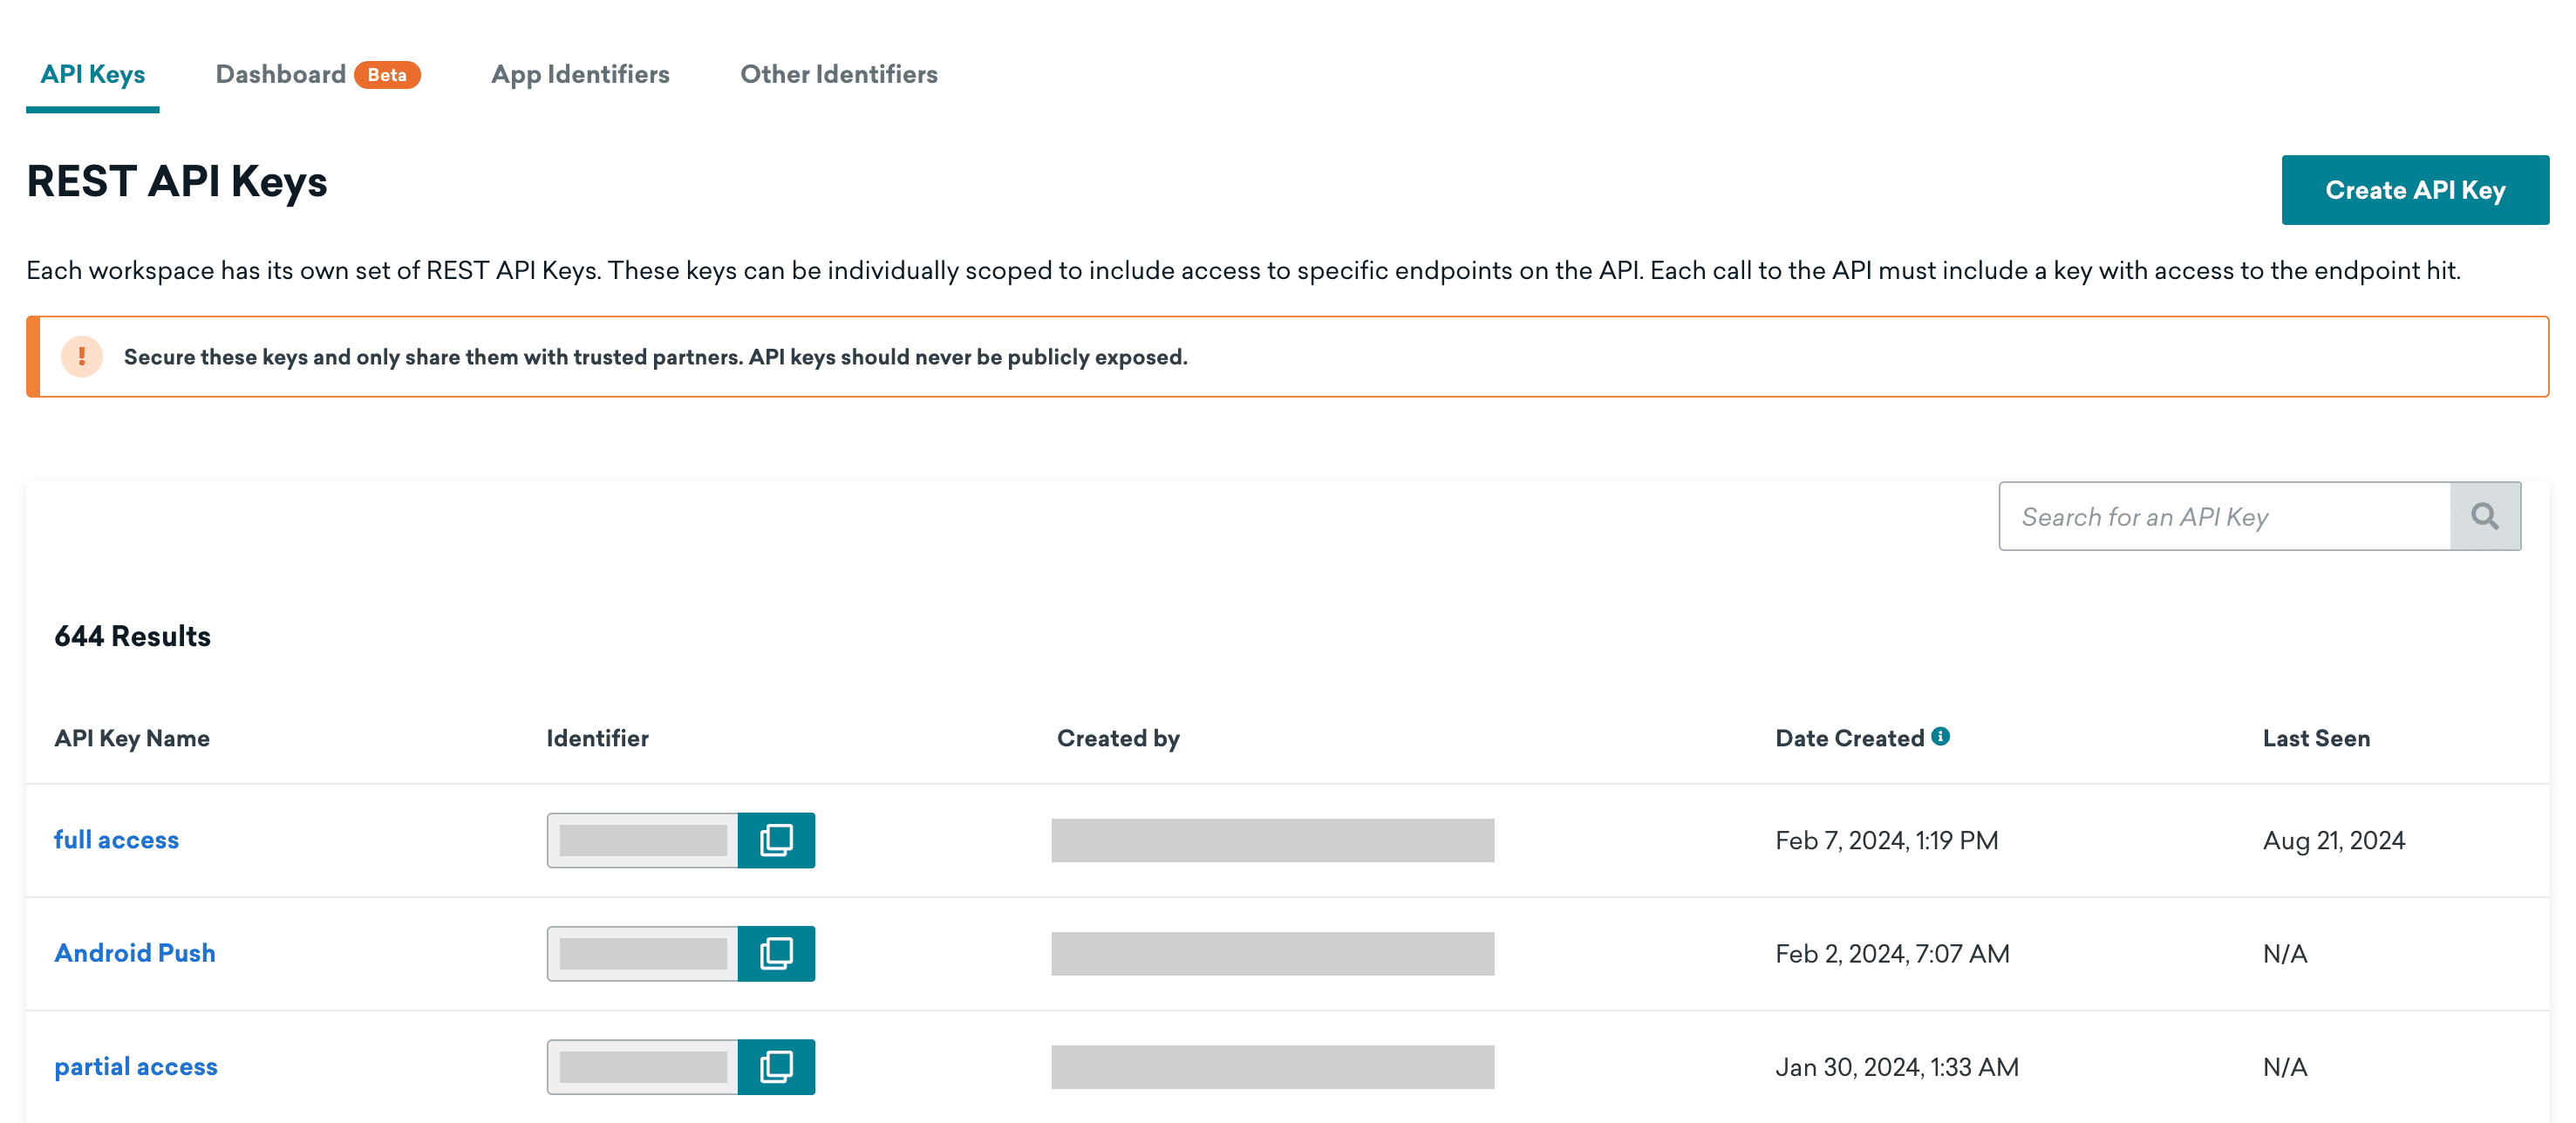
3. Select **Create API Key**.
4. Give your new key a name for identification at a glance.
5. Specify **allowlisted IP** addresses and subnets for the new key.
6. Select which **permissions** you want to be associated with your new key. Once you are done your api key is generated for you.
* Keep in mind that after you create a new **API key**, you cannot edit the scope of permissions or the allowlisted IPs. If you need to change the scope of a key, create a new key with the updated permissions and implement that key in place of the old one.
* If you’re using the **older navigation**, you can create an API key from **Developer Console** > **API Settings**.
3. Select **Create API Key**.
4. Give your new key a name for identification at a glance.
5. Specify **allowlisted IP** addresses and subnets for the new key.
6. Select which **permissions** you want to be associated with your new key. Once you are done your api key is generated for you.
* Keep in mind that after you create a new **API key**, you cannot edit the scope of permissions or the allowlisted IPs. If you need to change the scope of a key, create a new key with the updated permissions and implement that key in place of the old one.
 #### Step 3: Enter credentials in the Connect UI
Once you have both the **Instance URL** and **API key**:
1. Open the form where you need to authenticate with Braze.
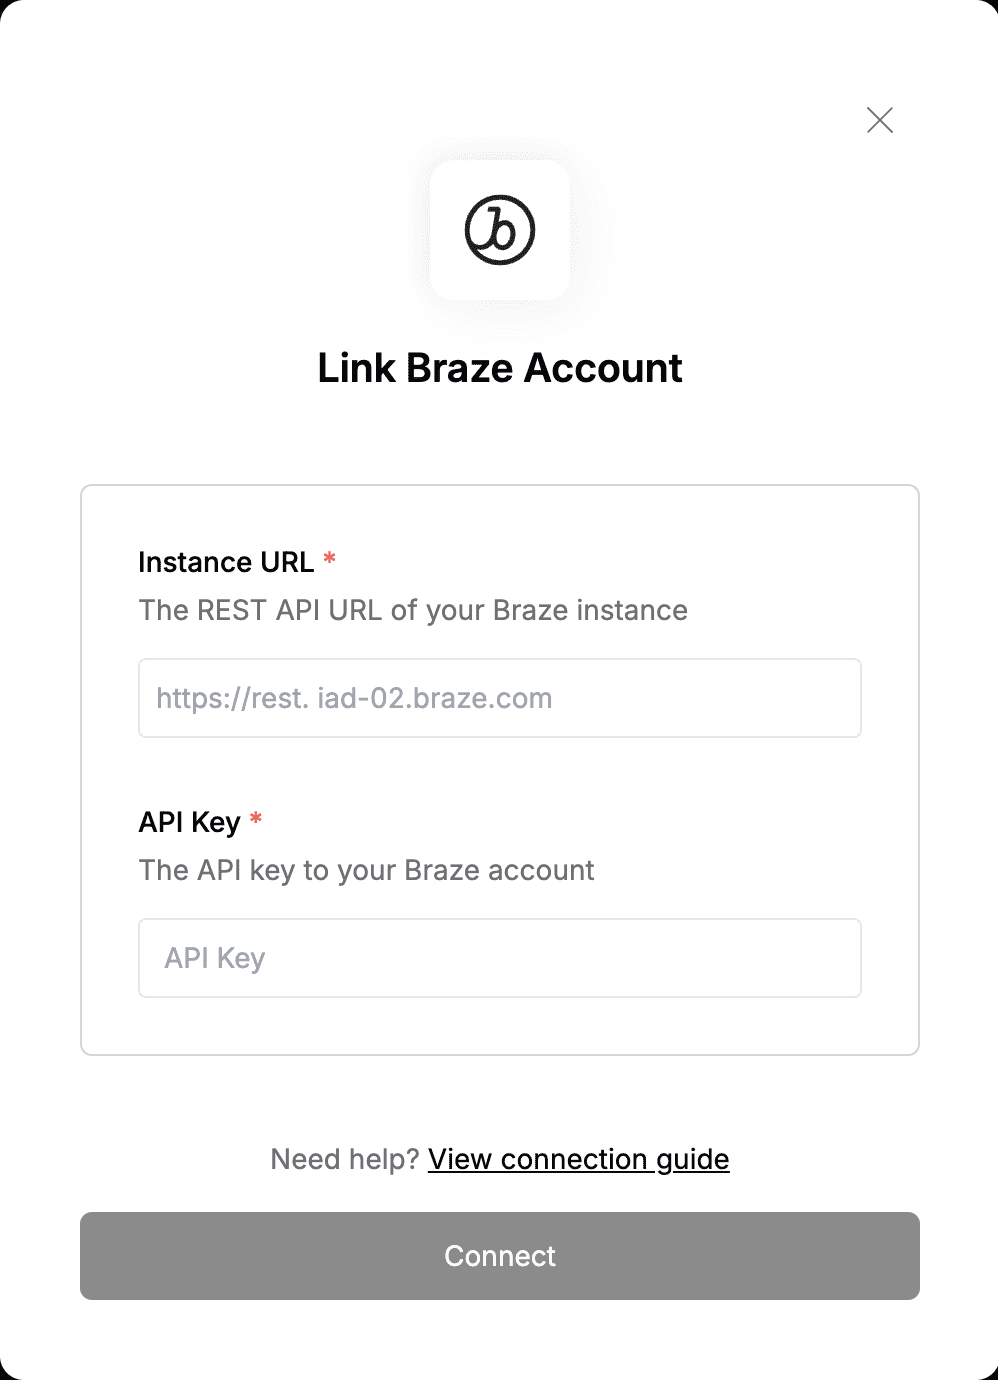
2. Enter the **Instance URL** and **API key** in their respective fields.
3. Submit the form, and you should be successfully authenticated.
#### Step 3: Enter credentials in the Connect UI
Once you have both the **Instance URL** and **API key**:
1. Open the form where you need to authenticate with Braze.
2. Enter the **Instance URL** and **API key** in their respective fields.
3. Submit the form, and you should be successfully authenticated.
 You are now connected to Braze.