> ## Documentation Index
> Fetch the complete documentation index at: https://nango.dev/docs/llms.txt
> Use this file to discover all available pages before exploring further.
# Avalara - How do I link my account?
# Overview
To authenticate with Avalara, you will need:
1. **User Name** - The User Name associated with your Avalara AvaTax account, used to authenticate API requests. Alternatively, you can use your **AccountID** instead of a **User Name**.
2. **Password** - The password linked to your Avalara AvaTax account, required for secure authentication. Alternatively, you can use your **License Key** instead of a **Password**.
3. **AvalaraClient** - A key that can help you diagnose and resolve issues with your software.
This guide will walk you through finding or generating the **Account ID/License Key** pair within Avalara.
### Prerequisites:
* You must have a registered account with Avalara.
* Only account administrators can generate the **Account ID/License Key** pair.
### Instructions:
#### Step 1: Finding Your Pair Keys
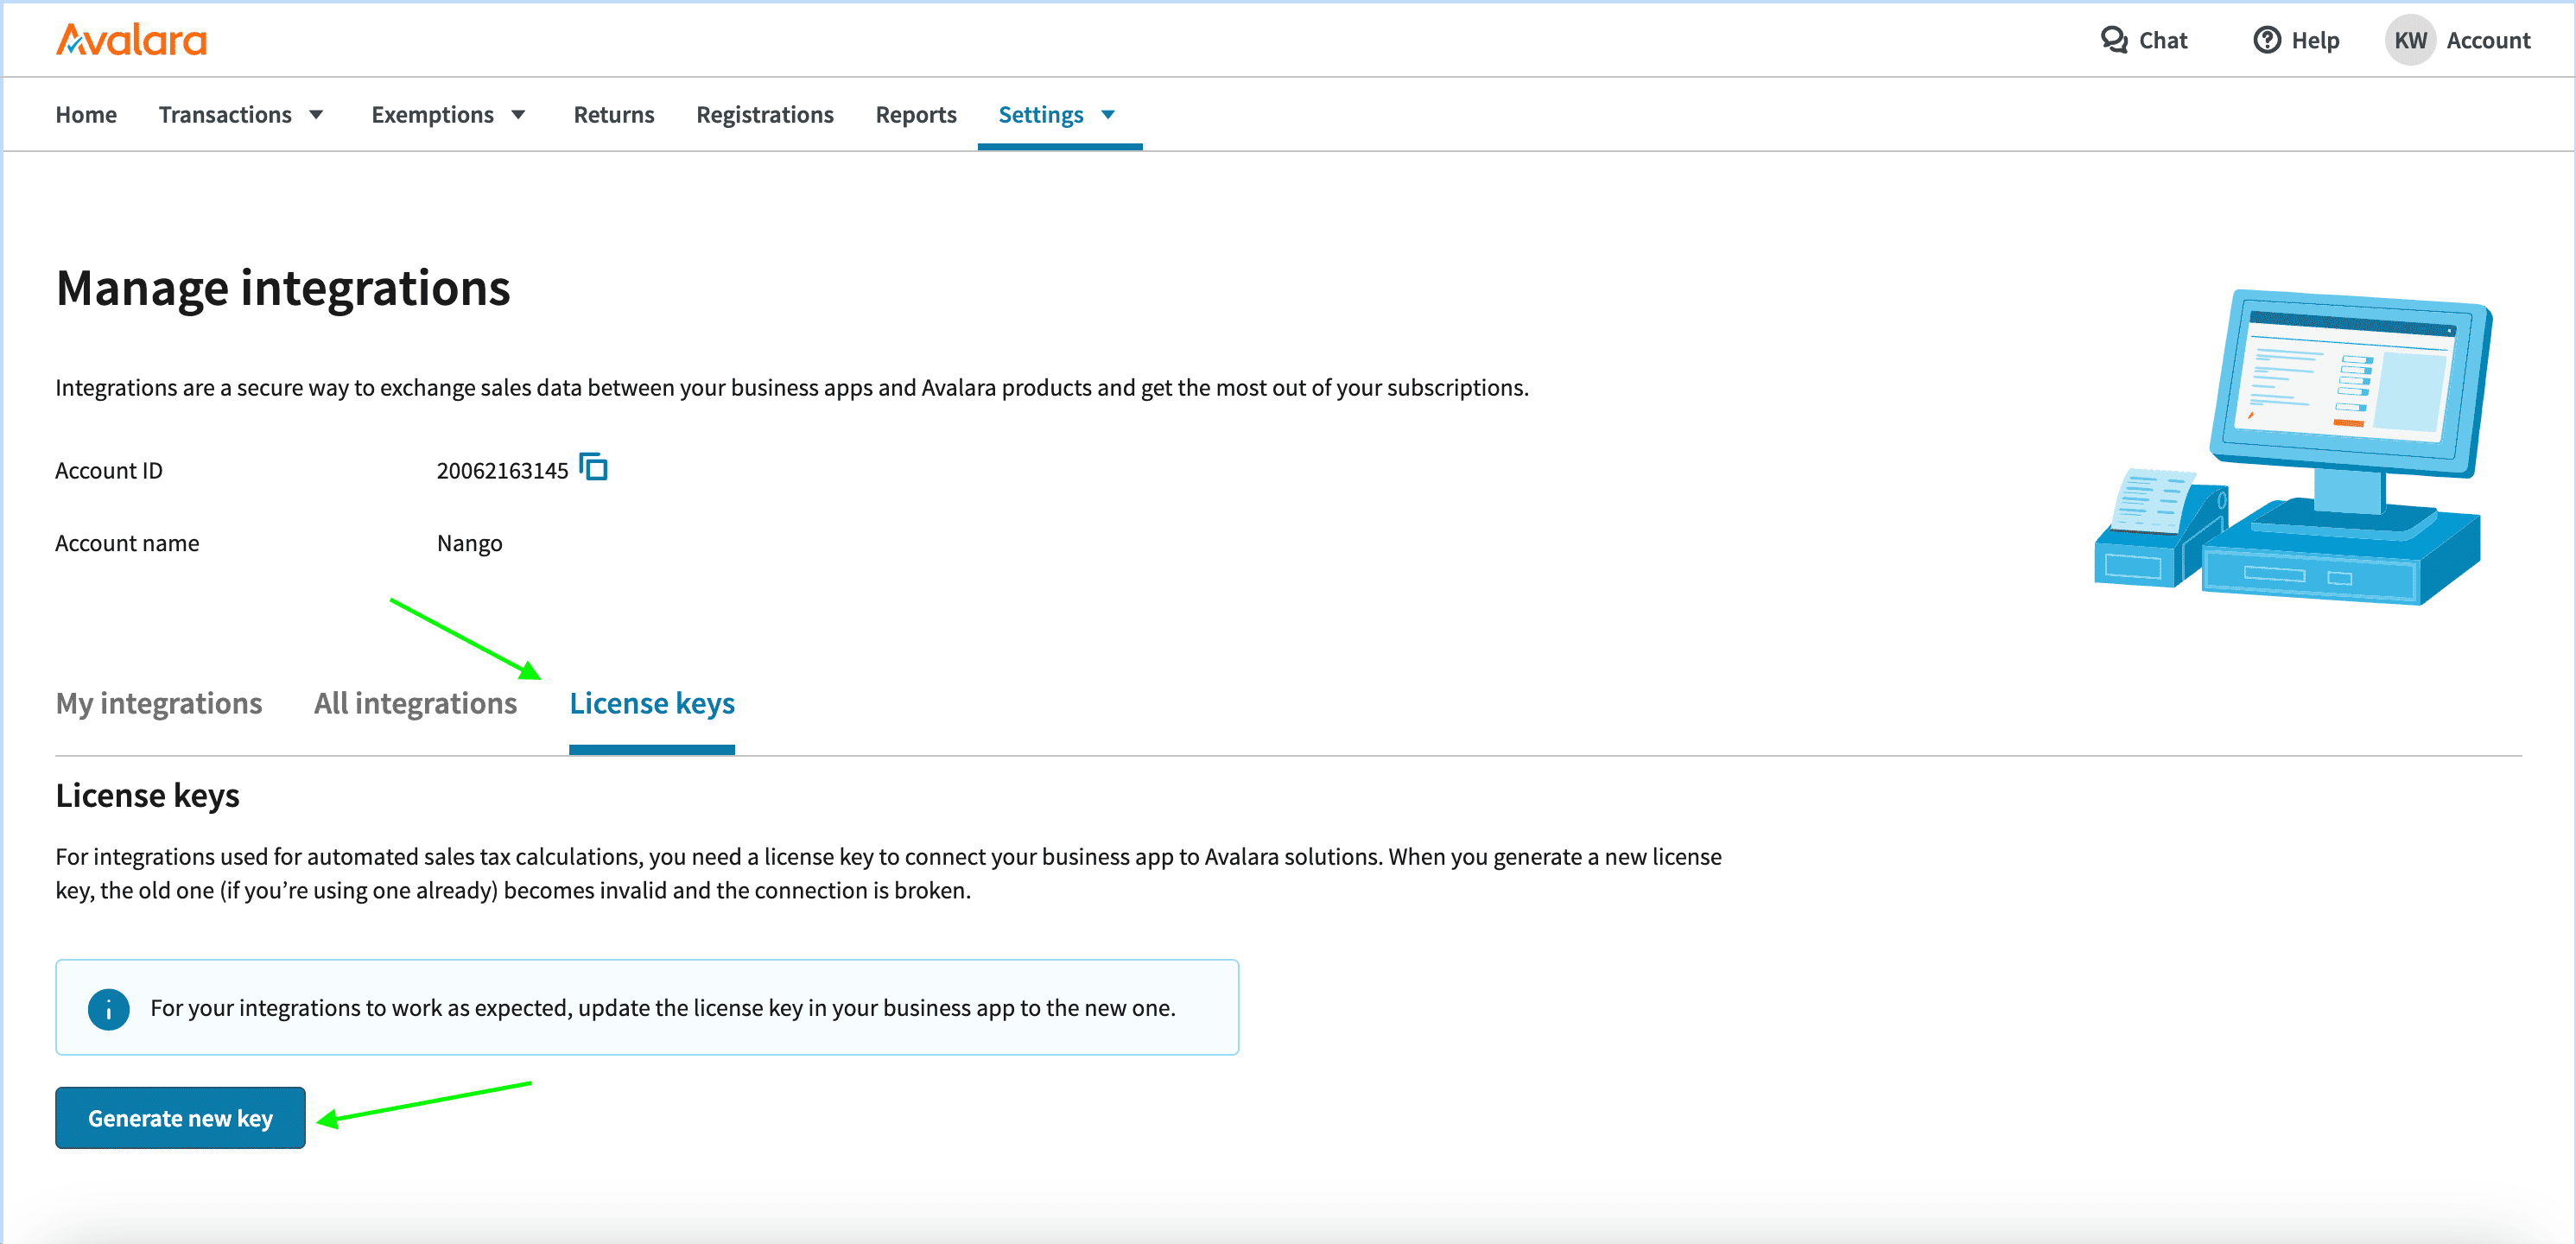
1. You can use your **username/password** pair for authentication, or alternatively, opt for the **Account ID/License Key** pair. To obtain the later credentials, **log in** to your Avalara dashboard.
2. Navigate to **Settings** and select **License and API Keys** to obtain both the **Account ID** and the **License Key**. Under the License Keys tab, click on **Generate New Keys** to create new credentials.
 #### Step 2: Generating an Avalara Client
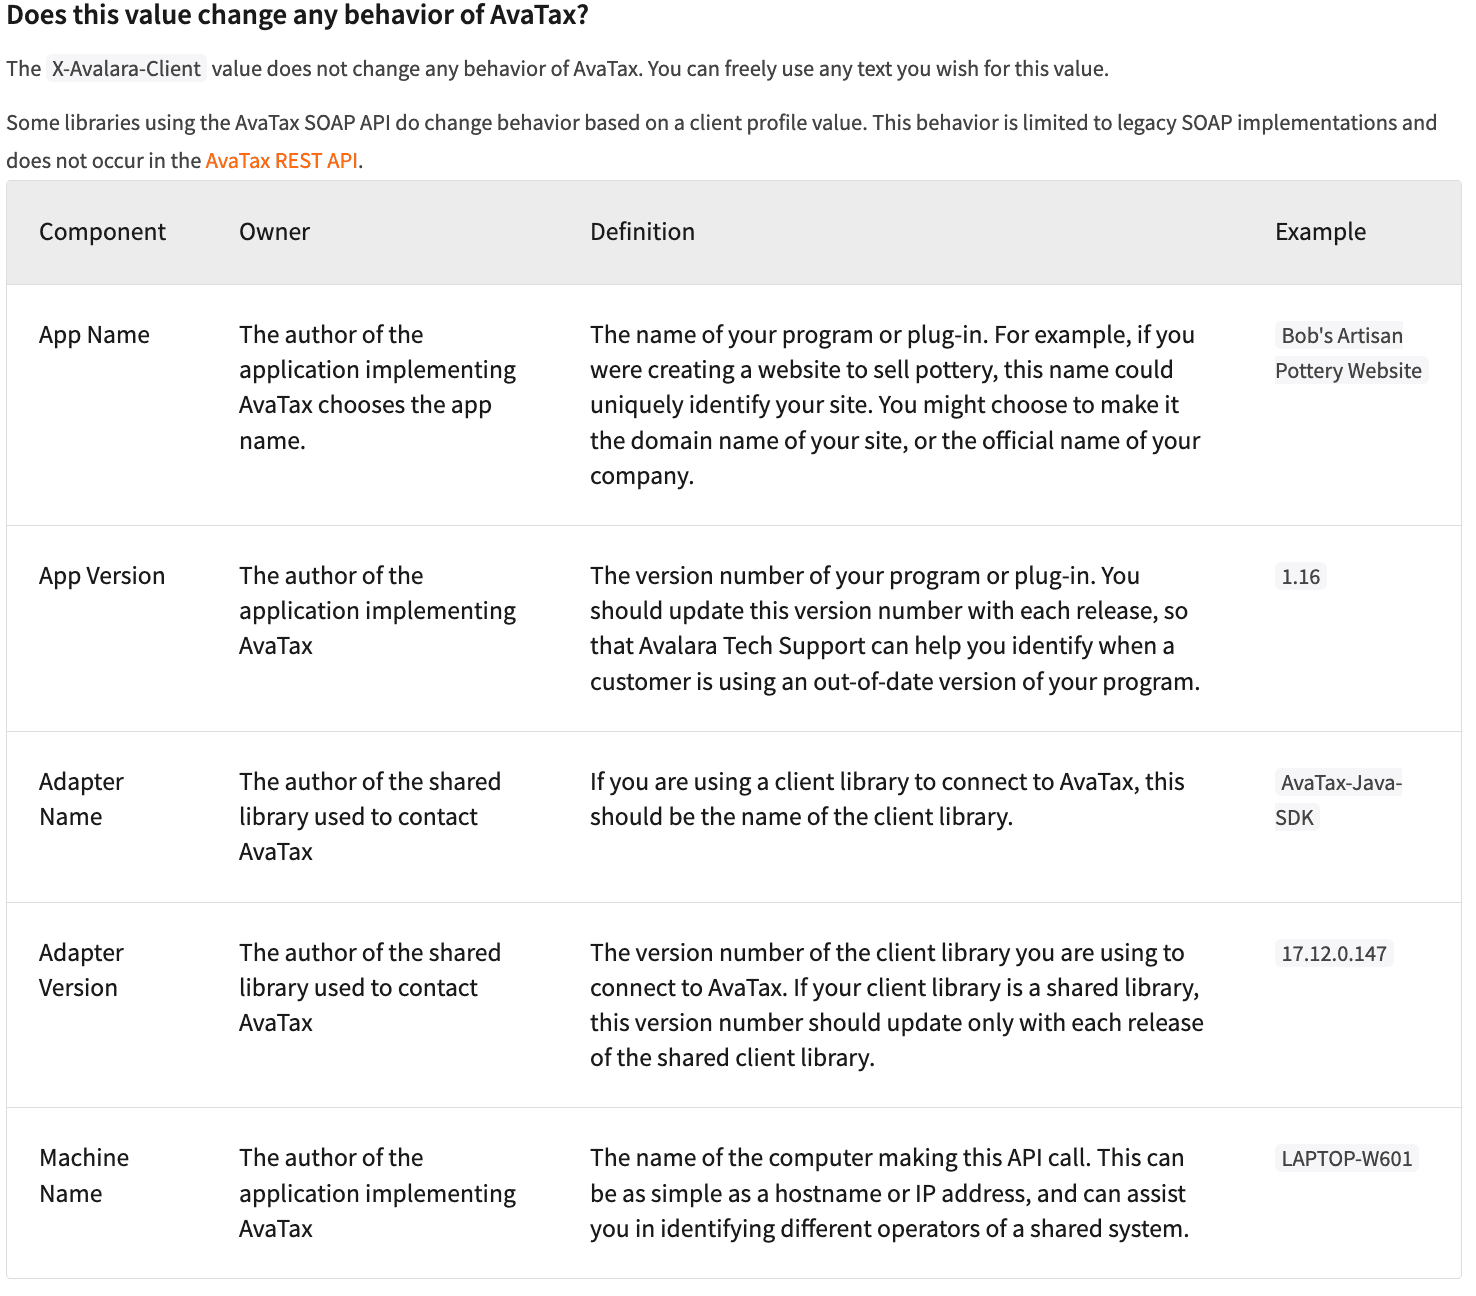
1. You can generate an Avalara Client by having a combination of **(app name); (app version); (library name); (library version); (machine name)**
#### Step 2: Generating an Avalara Client
1. You can generate an Avalara Client by having a combination of **(app name); (app version); (library name); (library version); (machine name)**
 #### Step 3: Enter credentials in the Connect UI
Once you have these keys:
1. Open the form where you need to authenticate with Avalara.
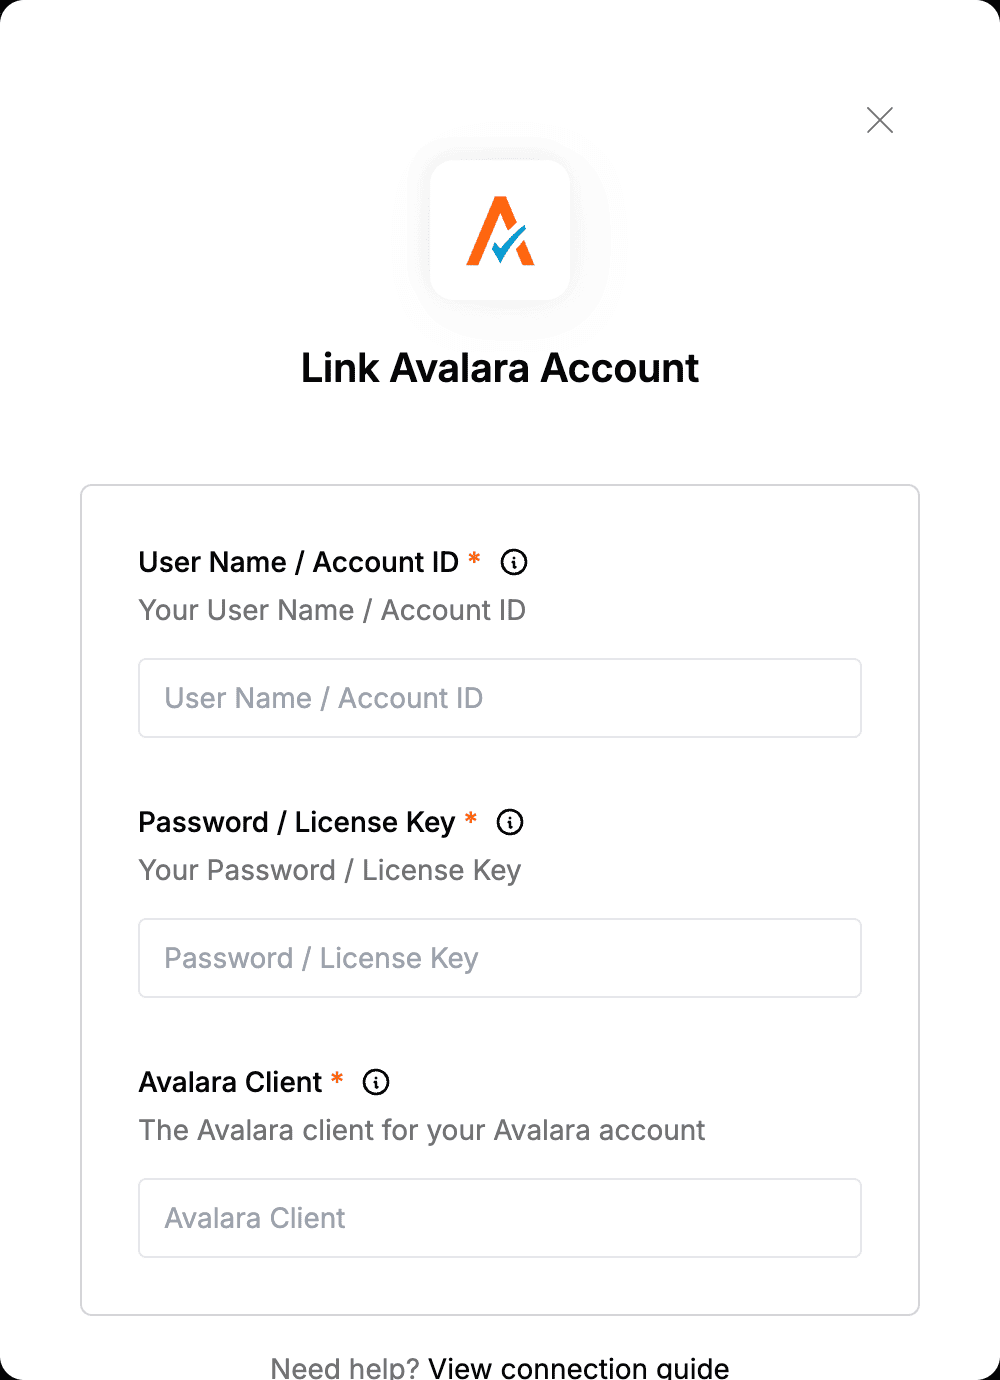
2. Enter the **User Name**, **Password** and **Avalara Client** in their respective fields.
3. Submit the form, and you should be successfully authenticated.
#### Step 3: Enter credentials in the Connect UI
Once you have these keys:
1. Open the form where you need to authenticate with Avalara.
2. Enter the **User Name**, **Password** and **Avalara Client** in their respective fields.
3. Submit the form, and you should be successfully authenticated.
 You are now connected to Avalara.