> ## Documentation Index
> Fetch the complete documentation index at: https://nango.dev/docs/llms.txt
> Use this file to discover all available pages before exploring further.
# AutoTask - How do I link my account?
# Overview
To authenticate with AutoTask, you need:
1. **API Zone** - The zone subdomain for your Autotask instance (e.g., webservices3, webservices1, etc.)
2. **API Integration Code** - A 27-character tracking identifier assigned to your API-only user
3. **API Username** - The email address of your API-only user account
4. **API Secret** - The secret for your API-only user account
This guide will walk you through obtaining these credentials within AutoTask.
### Prerequisites:
* You must have a valid AutoTask Administrator account
* Your account must have appropriate permissions to create API-only users
* You need to know your AutoTask API zone
### Instructions:
#### Step 1: Finding Your AutoTask API Zone
Your AutoTask API zone determines which endpoint your instance uses. Common zones include:
* `webservices1` - for webservices1.autotask.net
* `webservices2` - for webservices2.autotask.net
You can find your zone by checking your AutoTask URL when logged in, or contact your AutoTask administrator.
#### Step 2: Creating an API-Only User
1. Log in to your AutoTask instance as an administrator
2. Navigate to **Admin** → **Features & Settings** → **Application Integration (API)**
3. Click **API Users** in the left menu
4. Click **New** to create a new API-only user
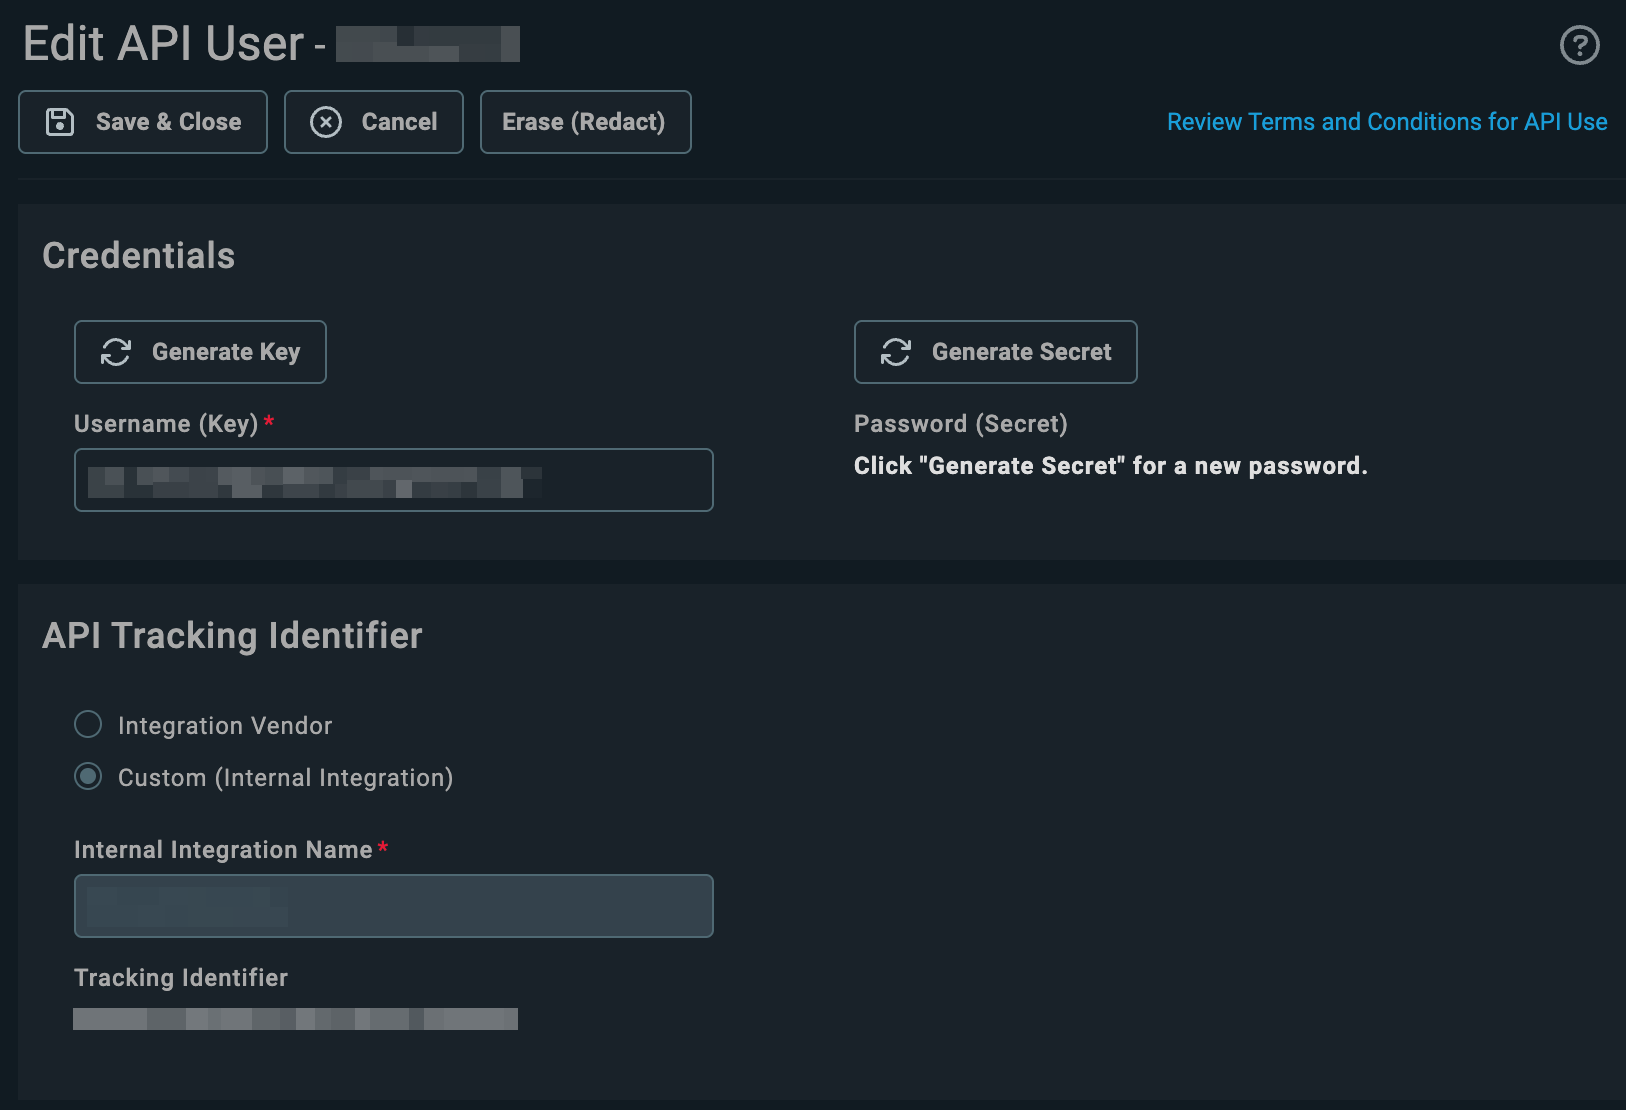 #### Step 3: Configure the API User
1. **Username**: Enter a descriptive username (this will be your API Username)
2. **Email**: Enter an email address for the API user
3. **First Name** and **Last Name**: Enter descriptive names
4. **Security Level**: Select appropriate security level (usually API User (system))
5. **Integration Vendor**: Select your integration vendor or create a new one
6. **API Tracking Identifier**: This generates your **API Integration Code** (27 characters)
#### Step 4: Generate API Secret
1. After creating the user, you'll be prompted to generate an API secret
2. **Important**: Copy and save this secret immediately - you cannot retrieve it later
3. This secret is your **API Secret**
#### Step 5: Configure API Permissions
1. Navigate to **Admin** → **Features & Settings** → **Application Integration (API)**
2. Click **API Security** in the left menu
3. Ensure your API user has the necessary permissions for the resources you need to access
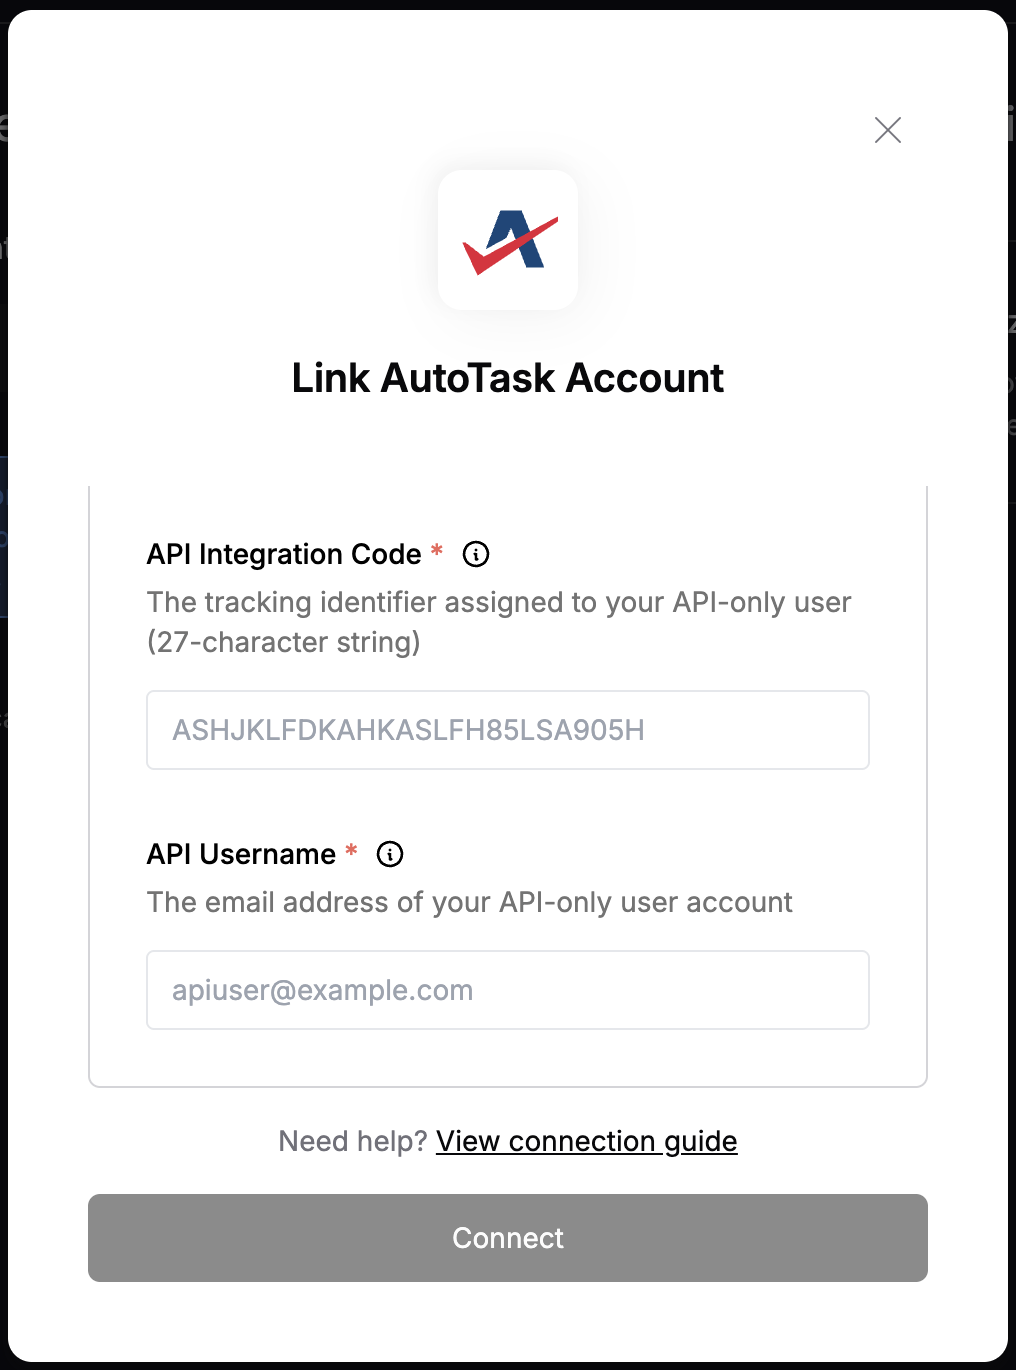
#### Step 6: Enter credentials in the Connect UI
Once you have all four pieces of information:
1. **AutoTask API Zone**: Your zone subdomain (e.g., webservices3)
2. **API Integration Code**: The 27-character tracking identifier
3. **API Username**: The email address of your API-only user
4. **API Secret**: The secret you generated
Enter these in the respective fields in the connection form.
#### Step 3: Configure the API User
1. **Username**: Enter a descriptive username (this will be your API Username)
2. **Email**: Enter an email address for the API user
3. **First Name** and **Last Name**: Enter descriptive names
4. **Security Level**: Select appropriate security level (usually API User (system))
5. **Integration Vendor**: Select your integration vendor or create a new one
6. **API Tracking Identifier**: This generates your **API Integration Code** (27 characters)
#### Step 4: Generate API Secret
1. After creating the user, you'll be prompted to generate an API secret
2. **Important**: Copy and save this secret immediately - you cannot retrieve it later
3. This secret is your **API Secret**
#### Step 5: Configure API Permissions
1. Navigate to **Admin** → **Features & Settings** → **Application Integration (API)**
2. Click **API Security** in the left menu
3. Ensure your API user has the necessary permissions for the resources you need to access
#### Step 6: Enter credentials in the Connect UI
Once you have all four pieces of information:
1. **AutoTask API Zone**: Your zone subdomain (e.g., webservices3)
2. **API Integration Code**: The 27-character tracking identifier
3. **API Username**: The email address of your API-only user
4. **API Secret**: The secret you generated
Enter these in the respective fields in the connection form.
 You are now connected to AutoTask and can access the REST API endpoints.