> ## Documentation Index
> Fetch the complete documentation index at: https://nango.dev/docs/llms.txt
> Use this file to discover all available pages before exploring further.
# UMAPI (Adobe User Management API) - How do I link my account?
# Overview
To authenticate with UMAPI (Adobe User Management API), you need:
1. **Client ID** - A unique identifier for your client.
2. **Client Secret** - A confidential key used to authenticate the identity of the application (client).
This guide will walk you through obtaining these credentials within Adobe.
### Prerequisites:
* You must have an [Enterprise Plan](https://community.adobe.com/t5/enterprise-teams-discussions/is-the-user-management-api-available-only-for-enterprise-customers/td-p/12159610) to access UMAPI.
* You must be a member of the organization with the **SYSTEM ADMIN** role to create the Integration for UMAPI. You can use the Adobe Admin Console to grant the administrative privilege to users.
### Instructions:
#### Step 1: Generating Client Credentials
1. **Log in** to [Adobe Developer Console](https://developer.adobe.com/console).
2. From the bottom left corner, click on **"Create new project"**.
3. Click on the newly created project name and click on **"Add API"**.
4. In the **"Filter by product"** field, select the **"Adobe Services"** and choose the appropriate API, **"User Management API"**.
5. Click on **"Next"** at the bottom right corner.
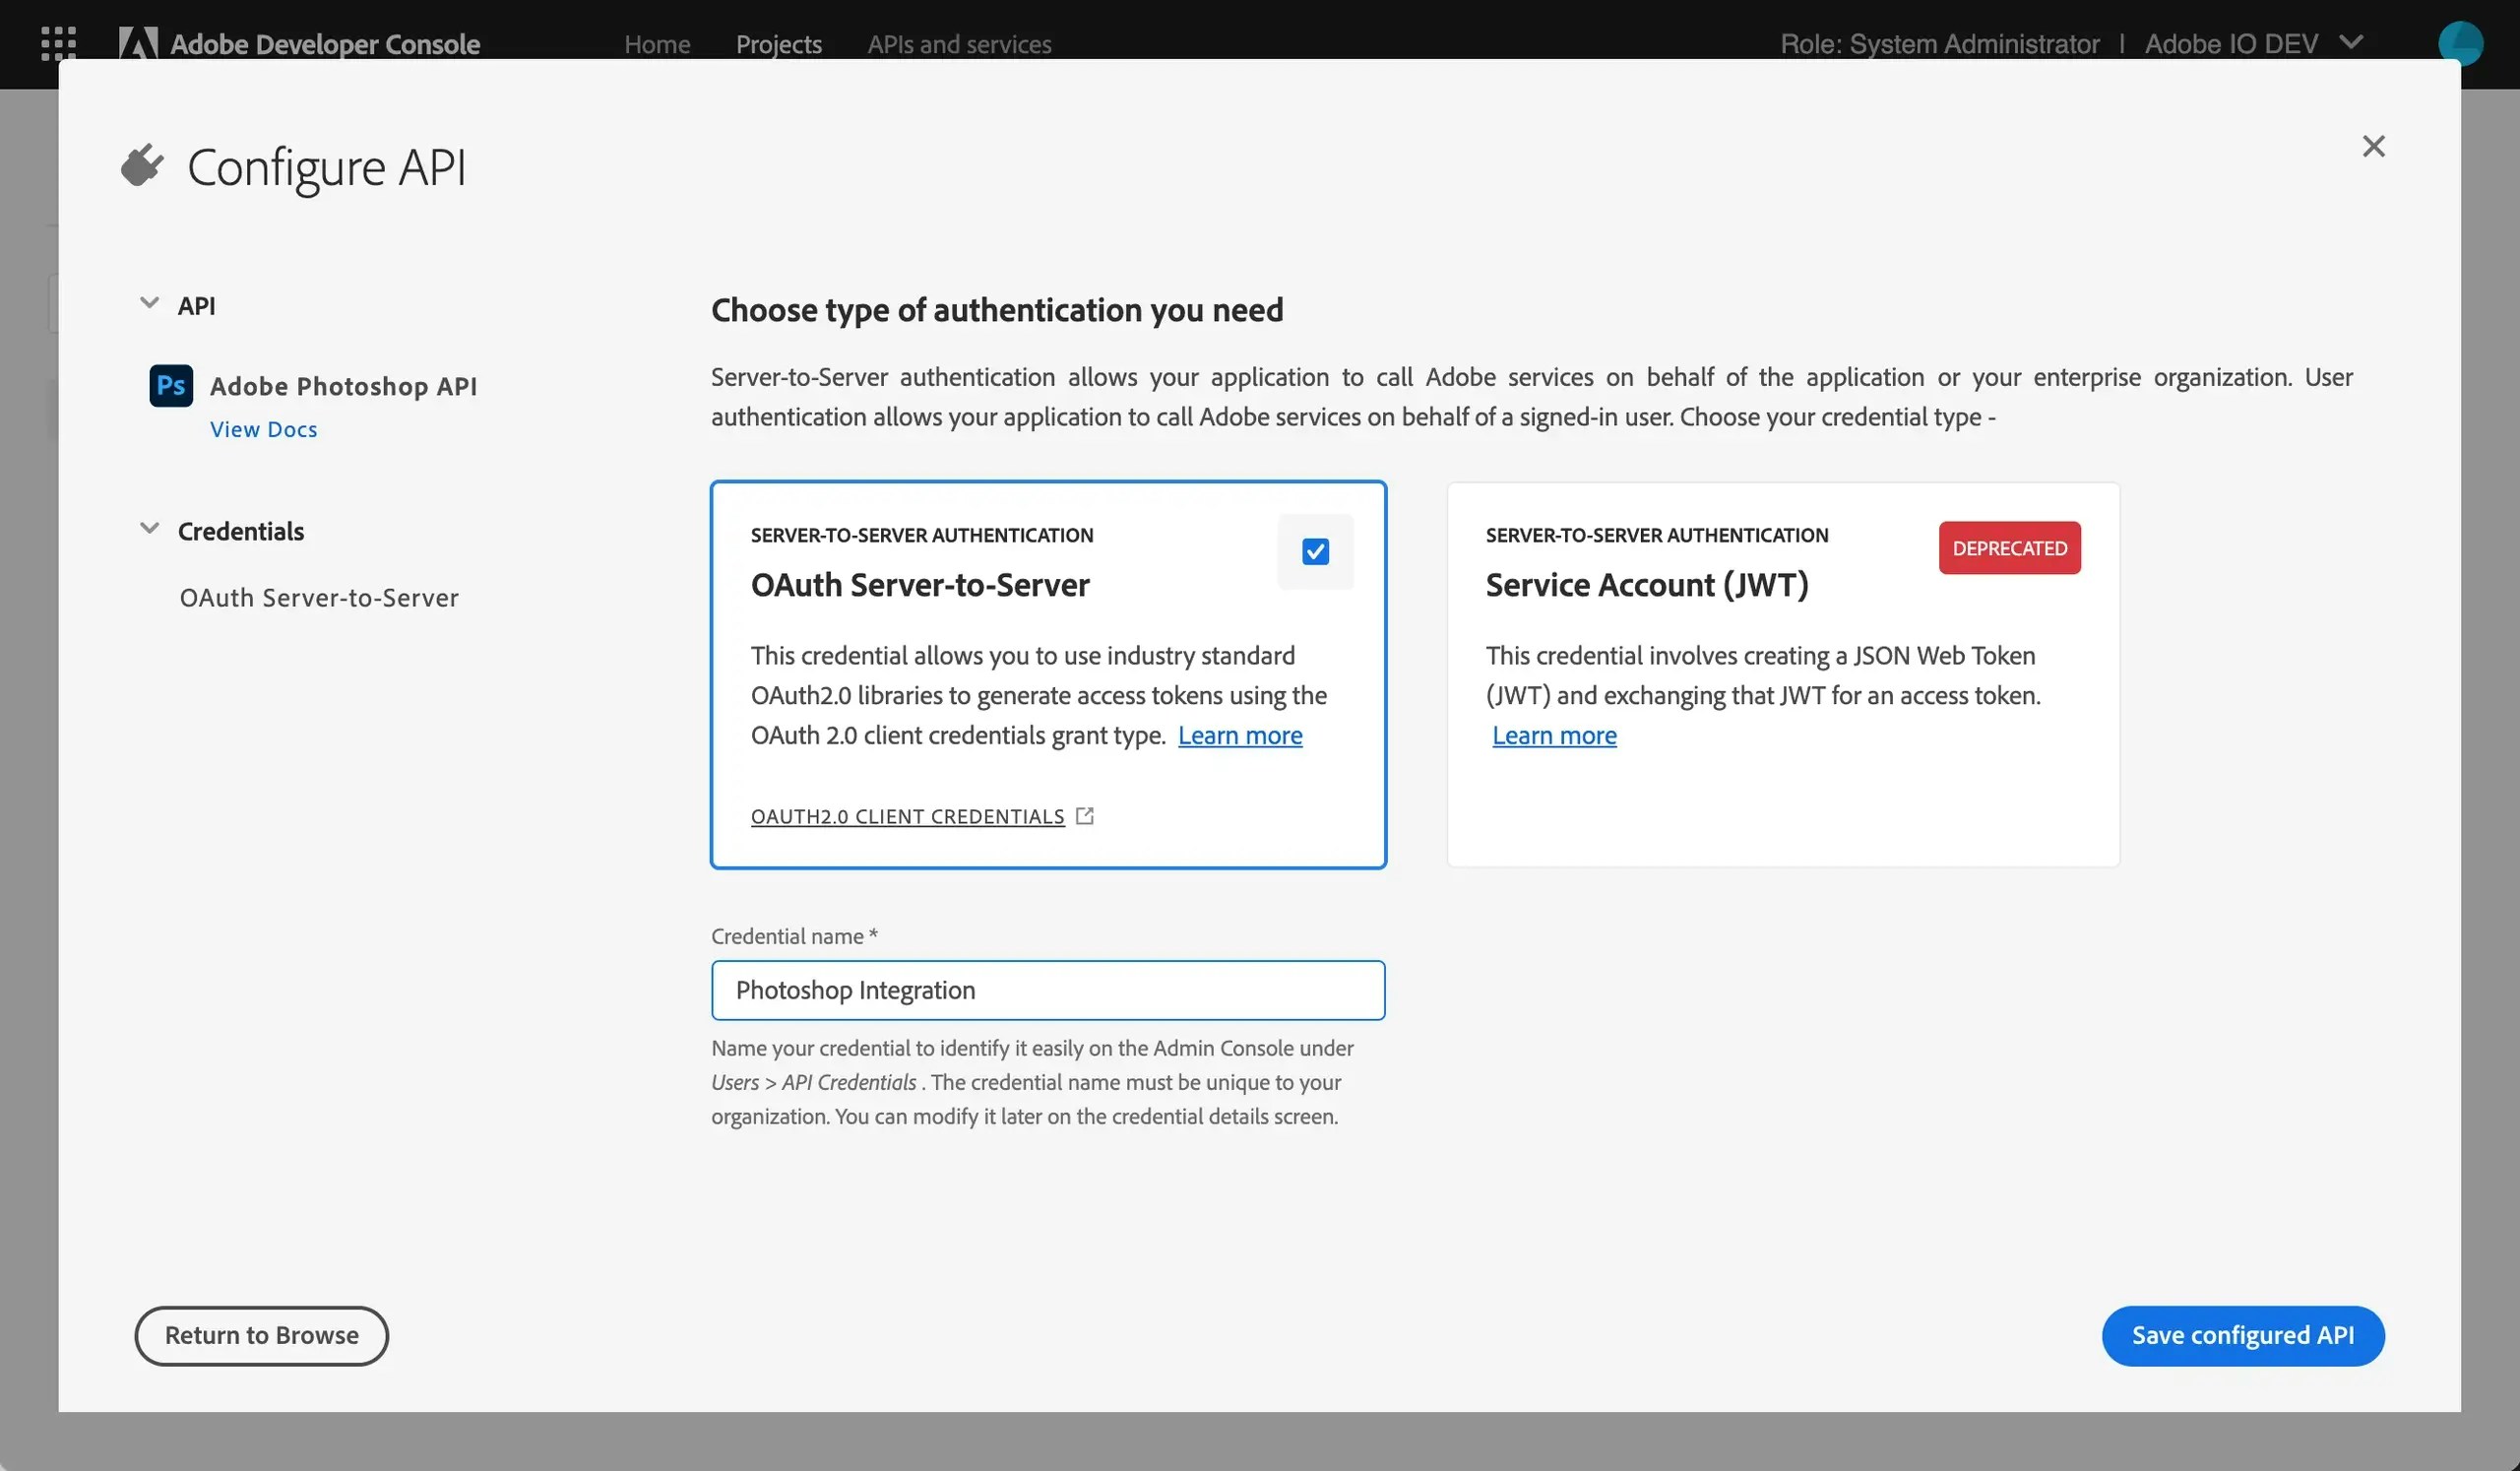
6. Select the **OAuth Server-to-Server** credential for your project.
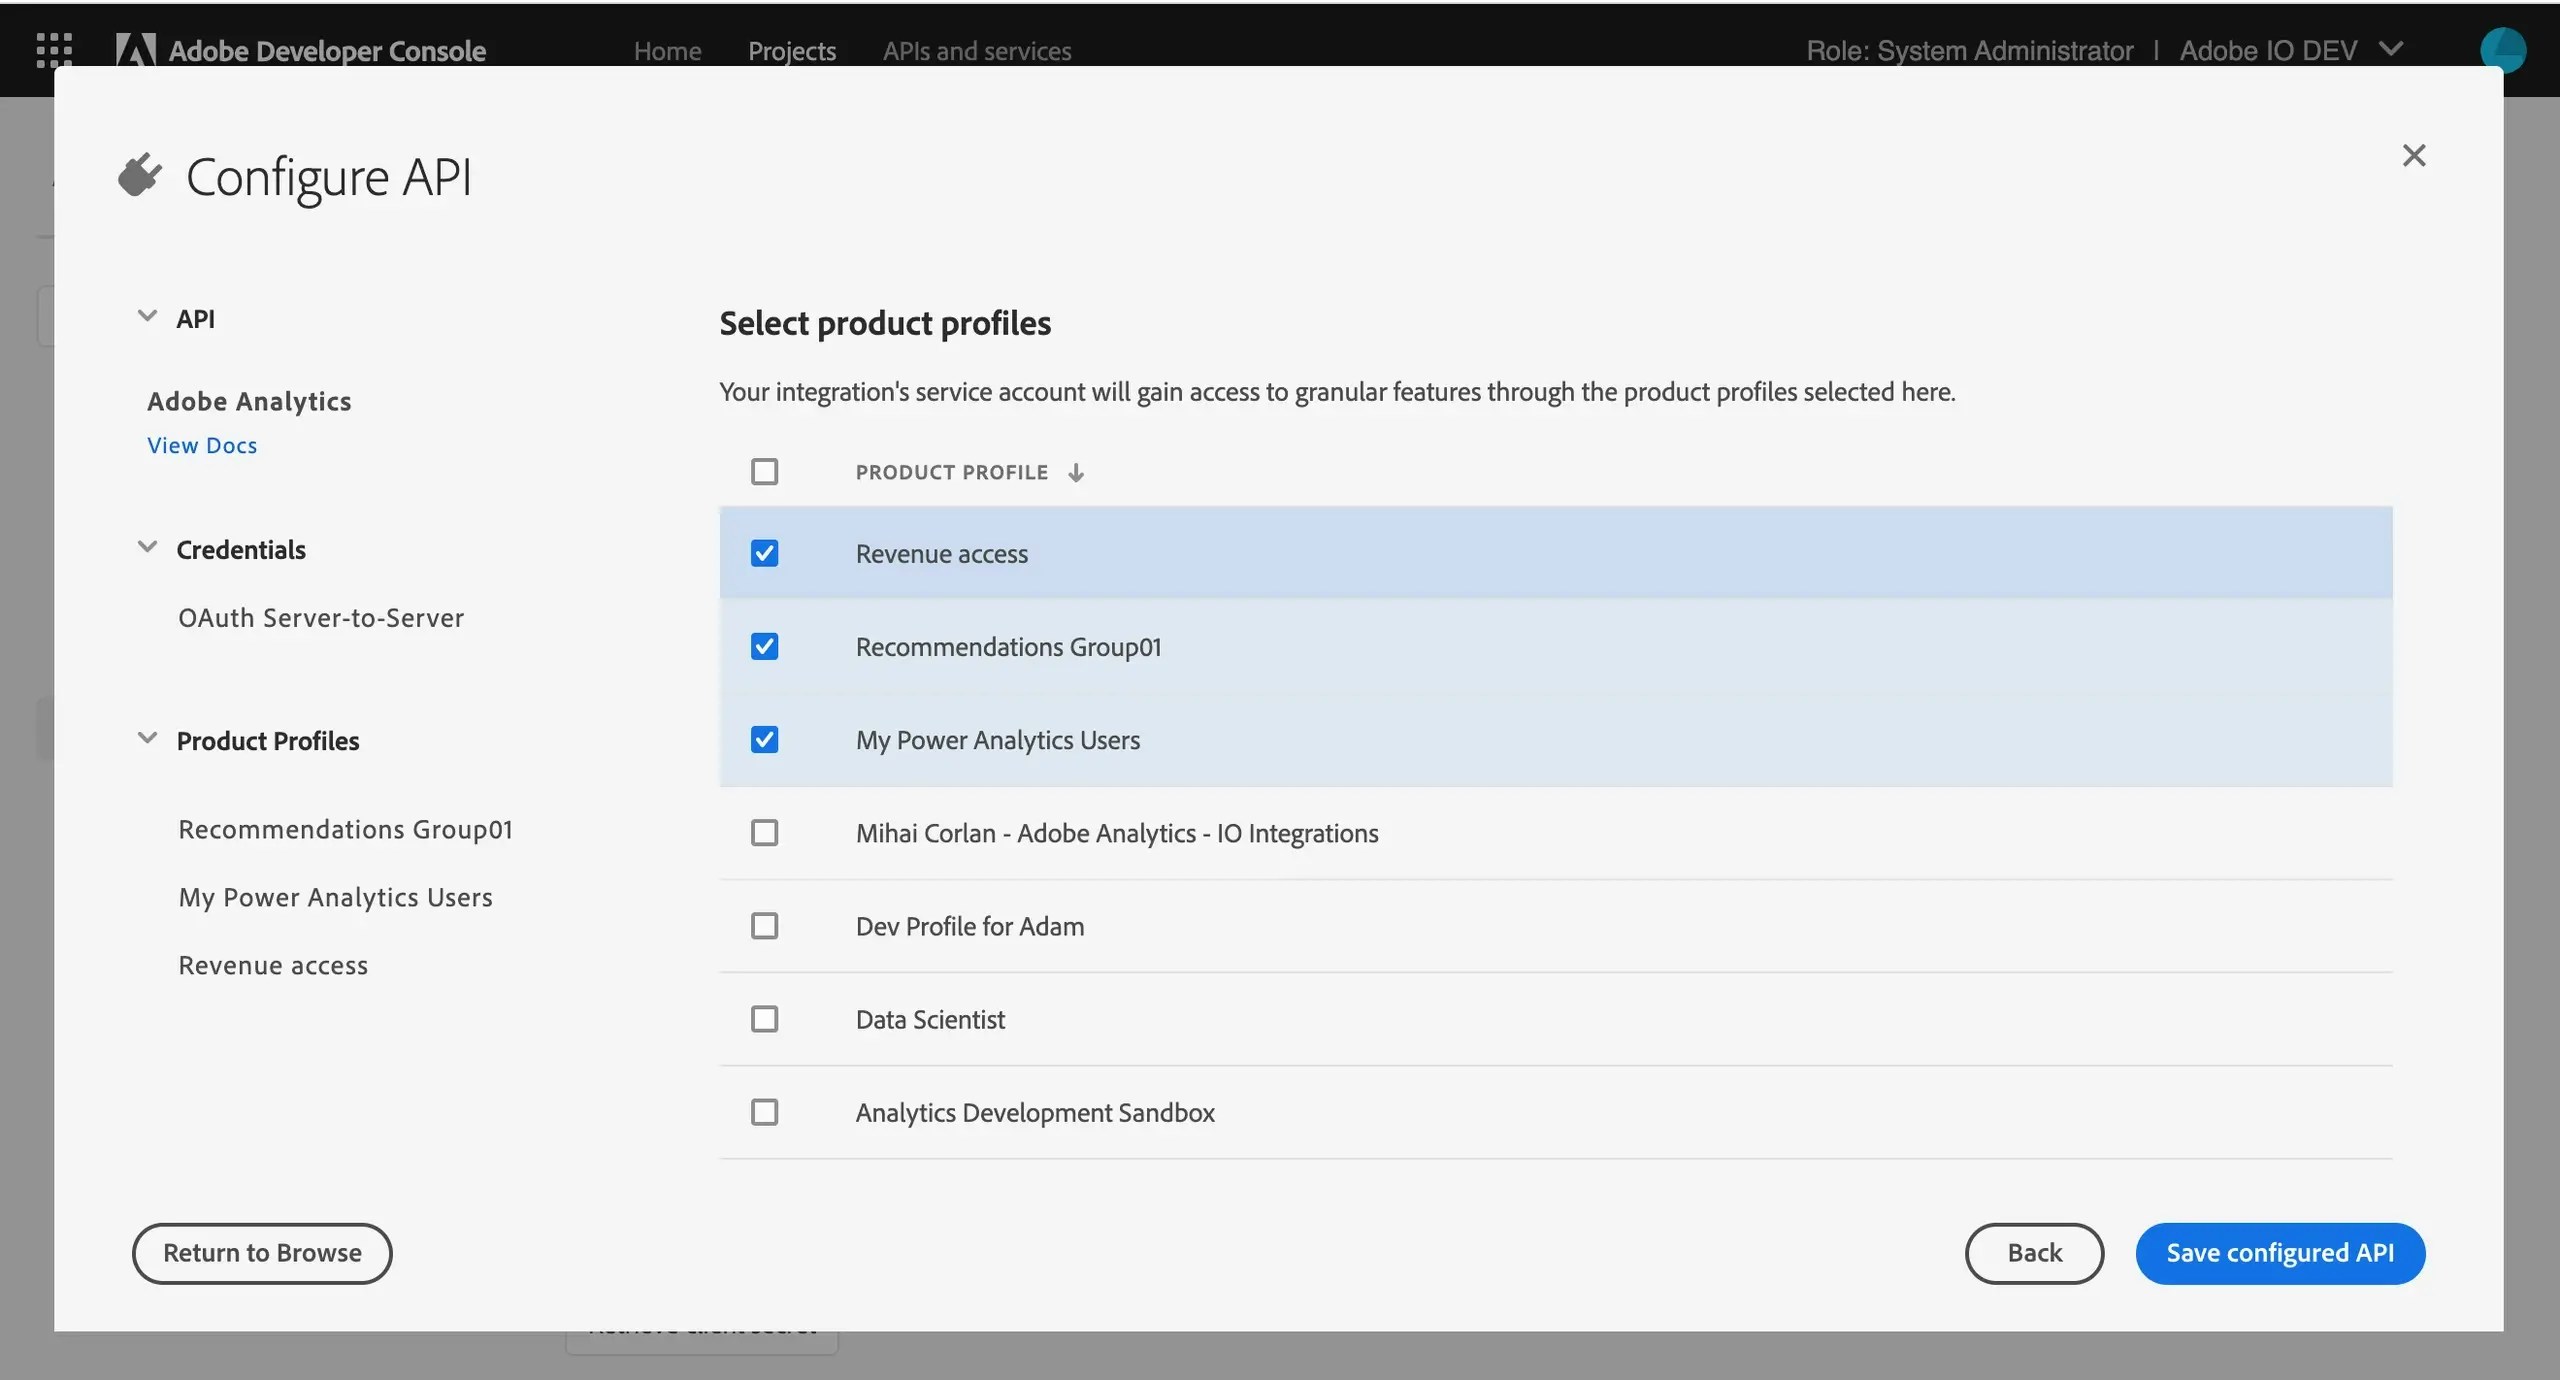
 7. Select the product profiles that define the data your application can access.
 8. Click Save to generate your **Client ID** and **Client Secret**.
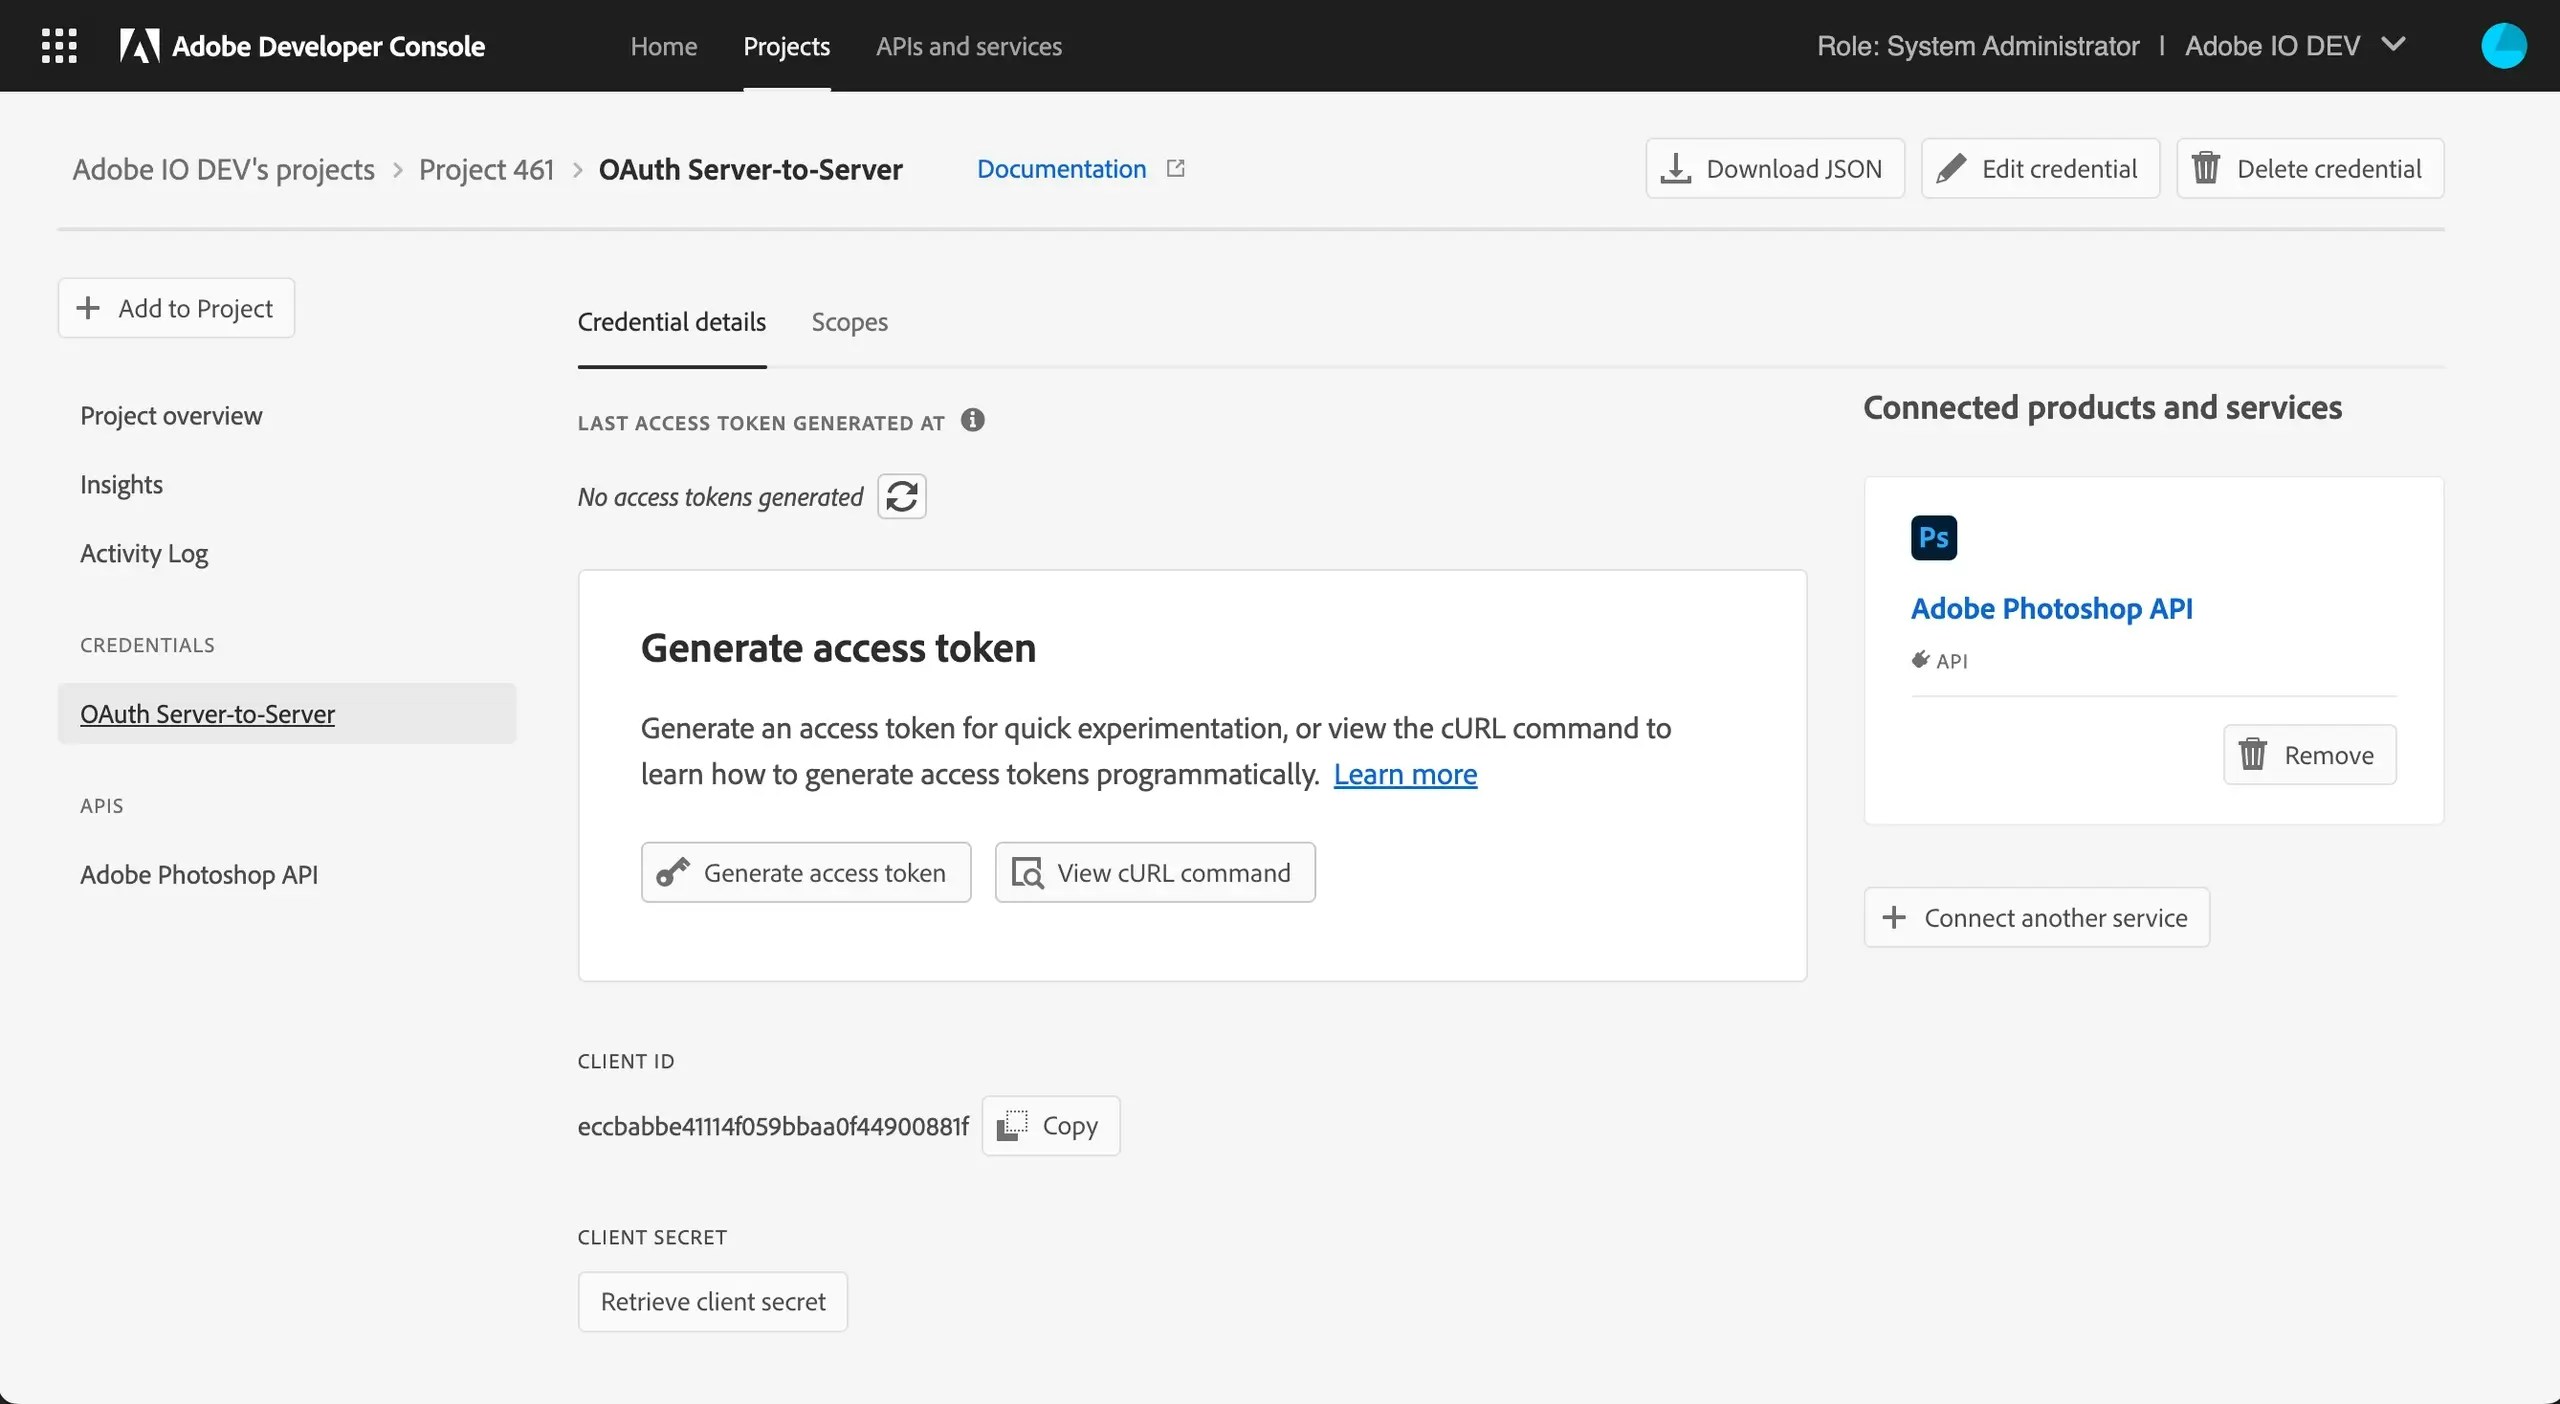 #### Step 2: Enter credentials in the Connect UI
Once you have both the **Client ID** and **Client Secret**:
1. Open the form where you need to authenticate with Adobe User Management API (UMAPI).
2. Enter both **Client ID** and **Client Secret** in their respective fields.
3. Submit the form, and you should be successfully authenticated.
#### Step 2: Enter credentials in the Connect UI
Once you have both the **Client ID** and **Client Secret**:
1. Open the form where you need to authenticate with Adobe User Management API (UMAPI).
2. Enter both **Client ID** and **Client Secret** in their respective fields.
3. Submit the form, and you should be successfully authenticated.
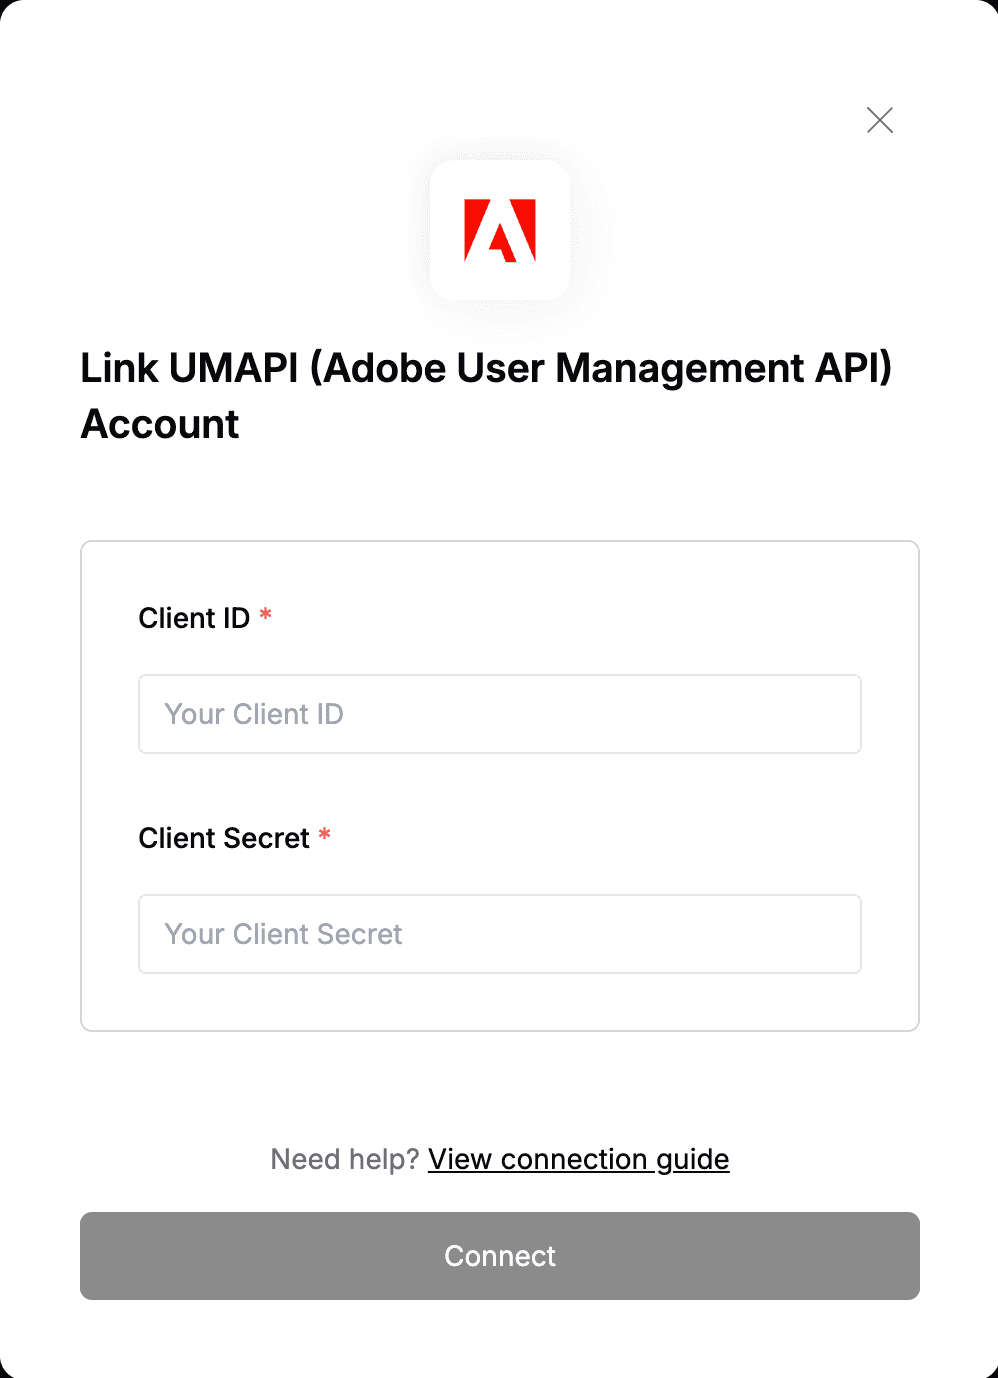 You are now connected to Adobe User Management API (UMAPI).