> ## Documentation Index
> Fetch the complete documentation index at: https://nango.dev/docs/llms.txt
> Use this file to discover all available pages before exploring further.
# Sample app
> A practical demonstration of integrating Nango in your codebase.
The sample app contains:
* **A frontend**: lets users connect an integration using the Nango frontend SDK.
* **A backend**: listens to Nango webhooks and consumes the Nango API to read & write data.
The sample app uses Slack, Google Drive, OneDrive for Business, and OneDrive Personal as example integrations and is showcased in this [demo video](https://youtu.be/oTpWlmnv7dM).
### Access the repository
### Run the sample app
* Go to [nango.dev](https://app.nango.dev?source=sample-app) and create an account (free).
* Go to [Integrations](https://app.nango.dev/dev/integrations?source=sample-app) and create a Slack integration.
* Set up a Slack app:
1. Go to [Slack Dev Center](https://api.slack.com/apps) and click **Create New App**.
2. Select **From scratch** for a simpler flow.
3. Enter your **App Name** and select a workspace to develop your app in, then click **Create App**.
4. In the **Basic Information** tab, copy your **Client ID** and **Client Secret**.
5. Go to **OAuth & Permissions** in the left sidebar.
6. Under **Redirect URLs**, add `https://api.nango.dev/oauth/callback` and click **Save URLs**.
7. Under **Scopes** > **Bot Token Scopes**, add:
* `users:read`
* `chat:write`
* Go back to Nango. In the *Authorization* tab, add:
* `client_id`: from step 4
* `client_secret`: from step 4
* In the *Endpoints* tab, activate `GET /users` and `POST /send-message`.
* Go to [Integrations](https://app.nango.dev/dev/integrations?source=sample-app) and create a Google Drive integration.
* Set up a Google Cloud project:
1. Go to the [Google Cloud Console](https://console.cloud.google.com/) and create a new project (or select an existing one).
2. Go to the [API Library](https://console.cloud.google.com/apis/library), search for **Google Drive API**, and click **Enable**.
3. Go to **APIs & Services** > **OAuth consent screen** and configure it:
* Select **External** user type (or **Internal** for users within your Google Workspace organization).
* Fill in the required app information and contact information.
* Add the scope: `https://www.googleapis.com/auth/drive.readonly`.
* Add test users if using External user type.
4. Go to **APIs & Services** > **Credentials** > **Create Credentials** > **OAuth client ID**.
5. Select **Web application**, enter a name, and add `https://api.nango.dev/oauth/callback` under **Authorized redirect URIs**.
6. Click **Create** and copy the **Client ID** and **Client Secret**.
7. Copy the **Project Number** from the Google Cloud console under **IAM & Admin** > **Settings** > **Project Number**.
* Go back to the Google Drive integration in Nango. In the *Authorization* tab, add:
* `client_id`: from step 6
* `client_secret`: from step 6
* `scopes`: `https://www.googleapis.com/auth/drive.readonly`
* In the *Endpoints* tab, activate `GET /documents` endpoint.
* Go to [Integrations](https://app.nango.dev/dev/integrations?source=sample-app) and create a OneDrive for Business integration.
* Register an application in [Microsoft Entra admin center](https://entra.microsoft.com):
1. Sign in to the Microsoft Entra admin center and search for **App registrations** > **New registration**.
2. Enter a name (e.g., "Nango OneDrive Integration").
3. Under **Supported account types**, select **Accounts in any organizational directory** for multitenant apps.
4. Click **Register** and note the **Application (client) ID** from the Overview page.
5. Go to **Authentication** > **Add a platform** > **Web** and add `https://api.nango.dev/oauth/callback` as the Redirect URI.
6. Go to **API permissions** > **Add a permission** > **Microsoft Graph** > **Delegated permissions** and add `Files.Read.All`.
7. Go to **Certificates & secrets** > **New client secret**, create a secret, and copy the value immediately (you won't see it again).
* Go back to the OneDrive for Business integration in Nango. In the *Authorization* tab, add:
* `client_id`: Application (client) ID from step 4
* `client_secret`: Client secret value from step 7
* `scopes`: Add `offline_access` and `.default`
* In the *Endpoints* tab, activate `GET /user-files/selected` endpoint.
* Go to [Integrations](https://app.nango.dev/dev/integrations?source=sample-app) and create a OneDrive Personal integration.
* Register an application in [Microsoft Entra admin center](https://entra.microsoft.com):
1. Sign in to the Microsoft Entra admin center and search for **App registrations** > **New registration**.
2. Enter a name (e.g., "Nango OneDrive Personal Integration").
3. Under **Supported account types**, select **Accounts in any organizational directory and personal Microsoft accounts**.
4. Click **Register** and note the **Application (client) ID** from the Overview page.
5. Go to **Authentication** > **Add a platform** > **Web** and add `https://api.nango.dev/oauth/callback` as the Redirect URI.
6. Go to **Certificates & secrets** > **New client secret**, create a secret, and copy the value immediately (you won't see it again).
* Go back to the OneDrive Personal integration in Nango. In the *Authorization* tab, add:
* `client_id`: Application (client) ID from step 4
* `client_secret`: Client secret value from step 6
* `scopes`: Add `offline_access` and `onedrive.readonly`
* In the *Endpoints* tab, activate `GET /user-files/selected` endpoint.
* Install: `NodeJS`, `Docker`. Then run:
```sh theme={null}
git clone https://github.com/NangoHQ/sample-app.git
cd sample-app
nvm use
npm i
```
* Copy your Nango Secret Key, found in [Environment Settings > API Keys](https://app.nango.dev/dev/environment-settings#api-keys?source=sample-app).
* Create a file to store environment variables and fill in the Nango Secret Key:
```sh theme={null}
cp .env.example .env
```
* Paste the **Project Number** you copied in step 7 of the Google Drive integration setup into the .env file as `GOOGLE_PROJECT_NUMBER=your_project_number_here`:
```
cd front-end
cp .env.example .env
```
* This command should be running at all time:
```sh theme={null}
npm run webhooks-proxy
```
* Copy the URL the command gave you and go to [Environment Settings](https://app.nango.dev/dev/environment-settings?source=sample-app). Set Webhook URL to `${URL}/webhooks-from-nango`, e.g: `https://tame-socks-warn.loca.lt/webhooks-from-nango`.
* Run:
```sh theme={null}
npm run start
```
* Go to: [http://localhost:3011](http://localhost:3011)
The above sample app uses template functions, but you can also use custom ones.
* Set up the Nango CLI:
```sh theme={null}
npm install -g nango
cd nango-integrations/
nango init
```
* Add your Nango Secret Key in NANGO\_SECRET\_KEY\_PROD in `./nango-integrations/.env`.
* Optionally customize the functions using [this guide](/guides/functions/functions-guide).
* Deploy the custom functions:
```sh theme={null}
nango deploy prod
```
## File Integration Guide
The sample app includes a complete implementation for integrating file storage providers (Google Drive, OneDrive) with your application. This guide walks you through using and understanding the file integration features.
### Overview
Nango's template file functions allow you to:
1. **OAuth Flow**: Handle authentication using Nango's SDK
2. **File Picker**: Let users select specific files and folders to sync
3. **Document Sync**: Sync metadata for selected files and folders
4. **Document Fetching**: Download individual file contents as needed
### Requirements
* Docker (desktop) installed & running
* NodeJS & NPM installed
* A Nango account (sign up at [nango.dev](https://nango.dev))
* Integration setup completed (see steps above)
### Using the File Integration
After setting up and running the sample app (see steps above), follow these instructions to test the file integration:
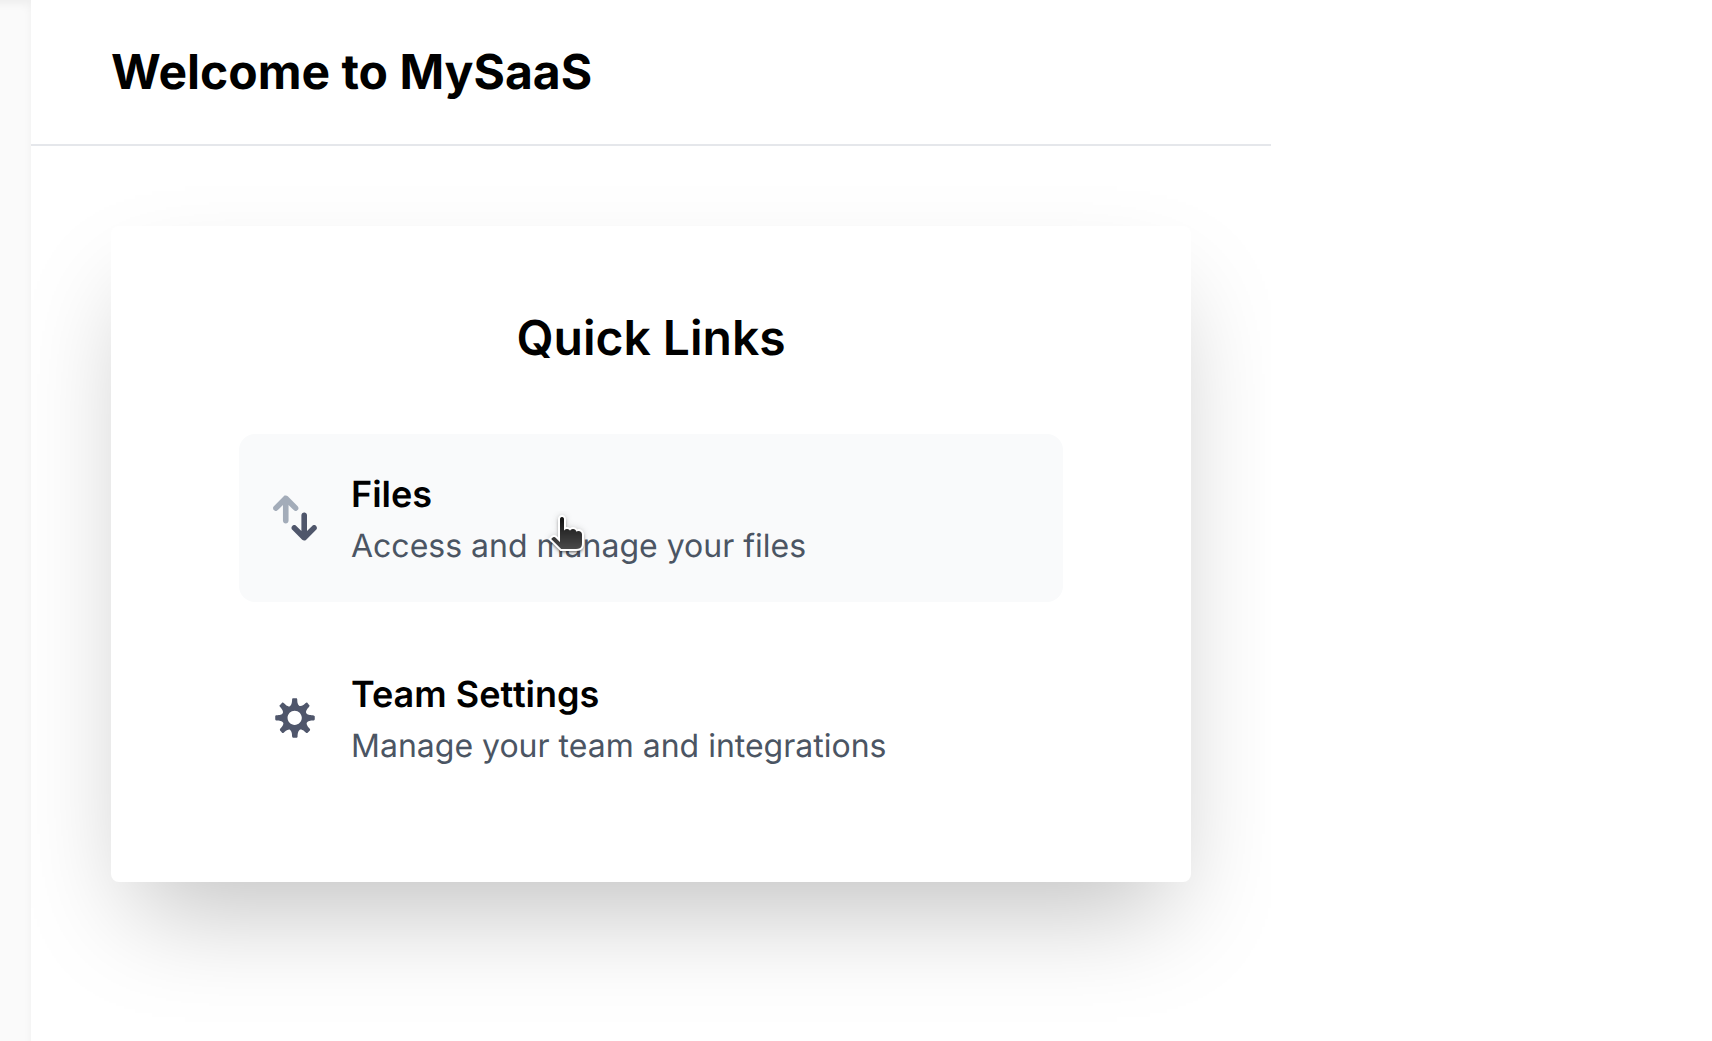
1. **Access the sample app**:
* Open [http://localhost:3011](http://localhost:3011/)
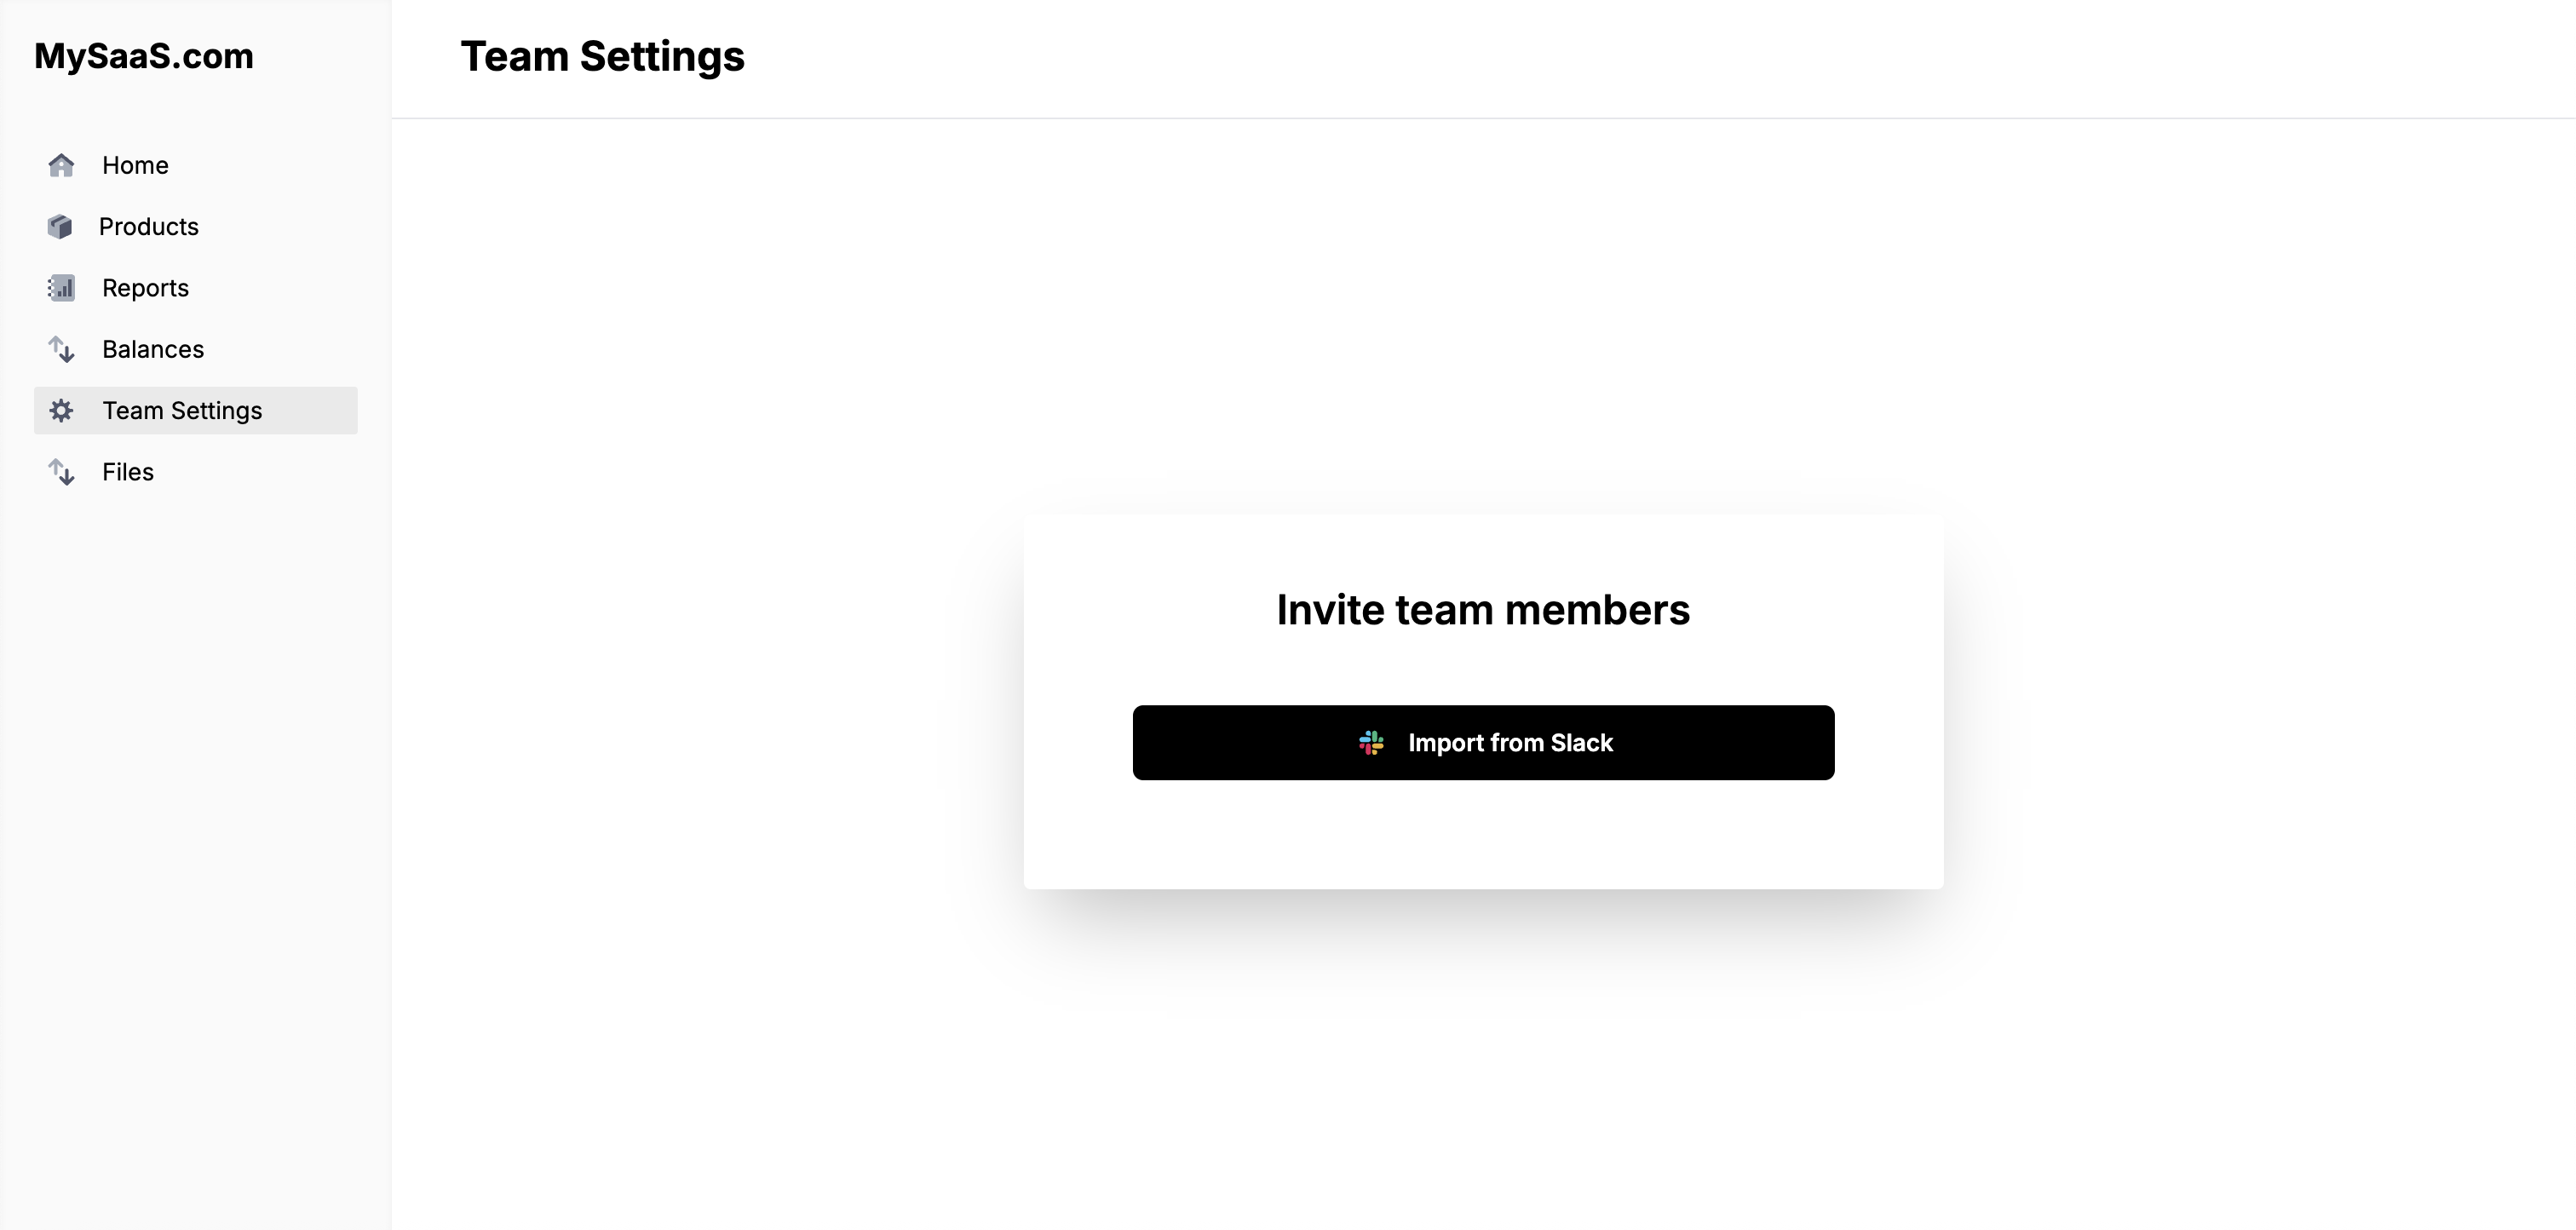
* Click *Files* to start the file integration
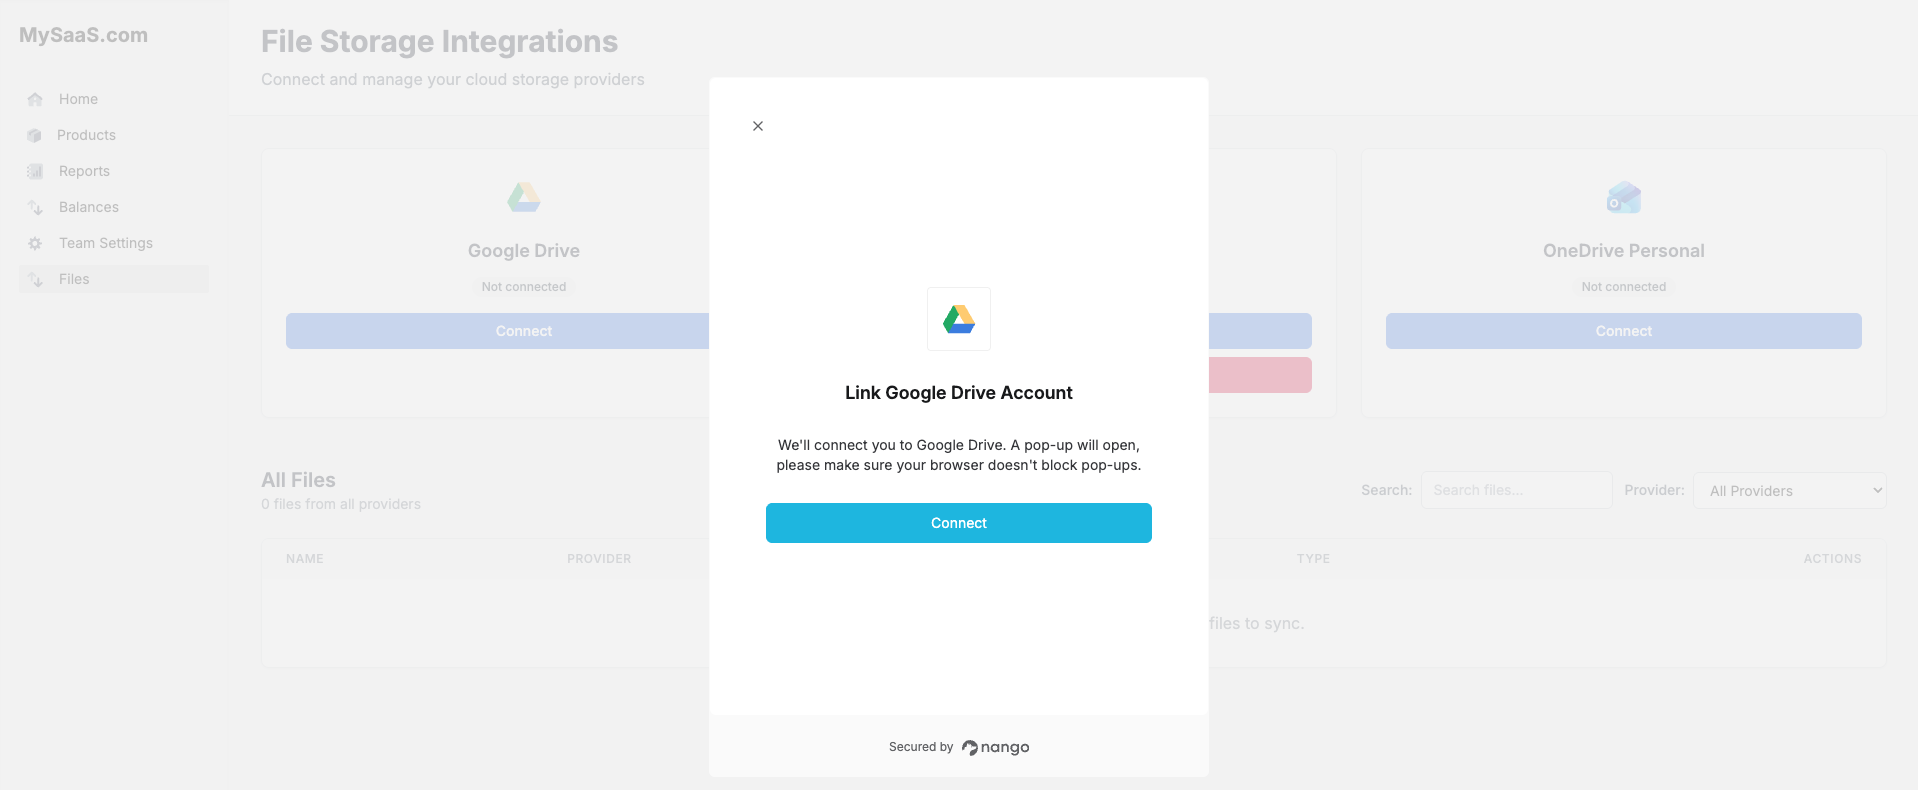
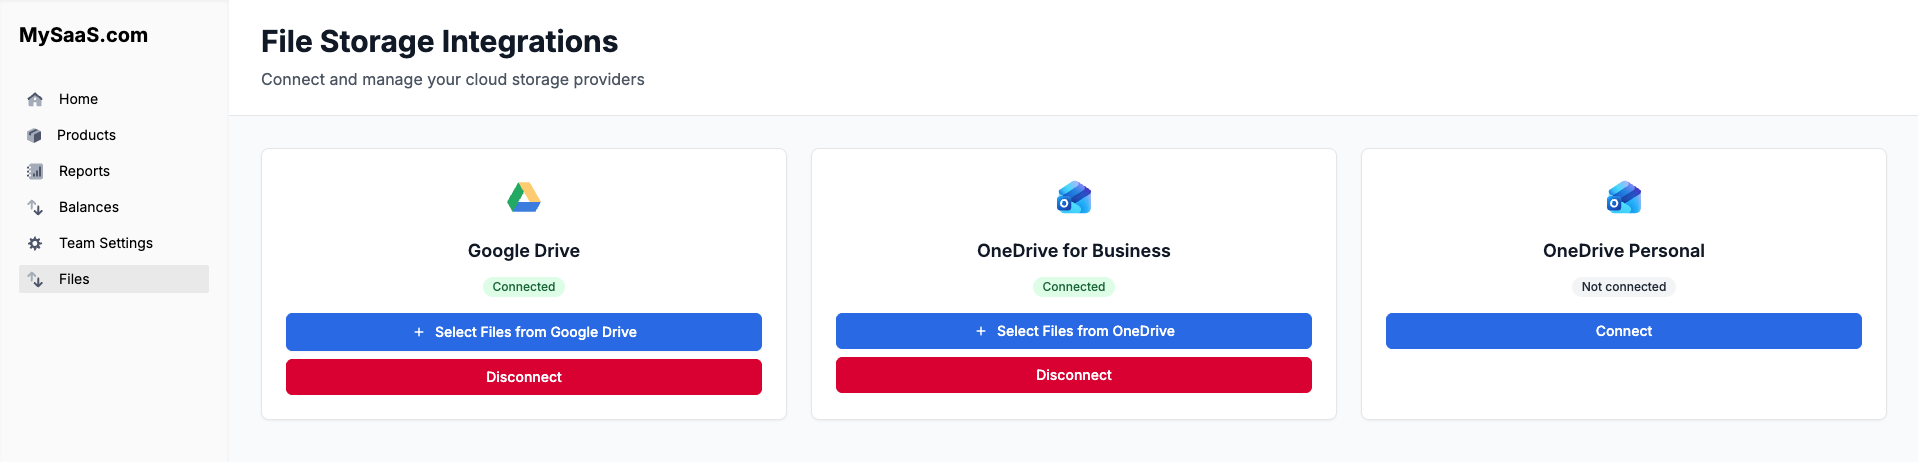
2. **Connect your account** (Google Drive, OneDrive, etc.):
* Click the *Connect* button on the provider's card
* In the connection popup, click the *Connect* button
* Select your account and authorize the app
* Click the *Finish* button to close the modal
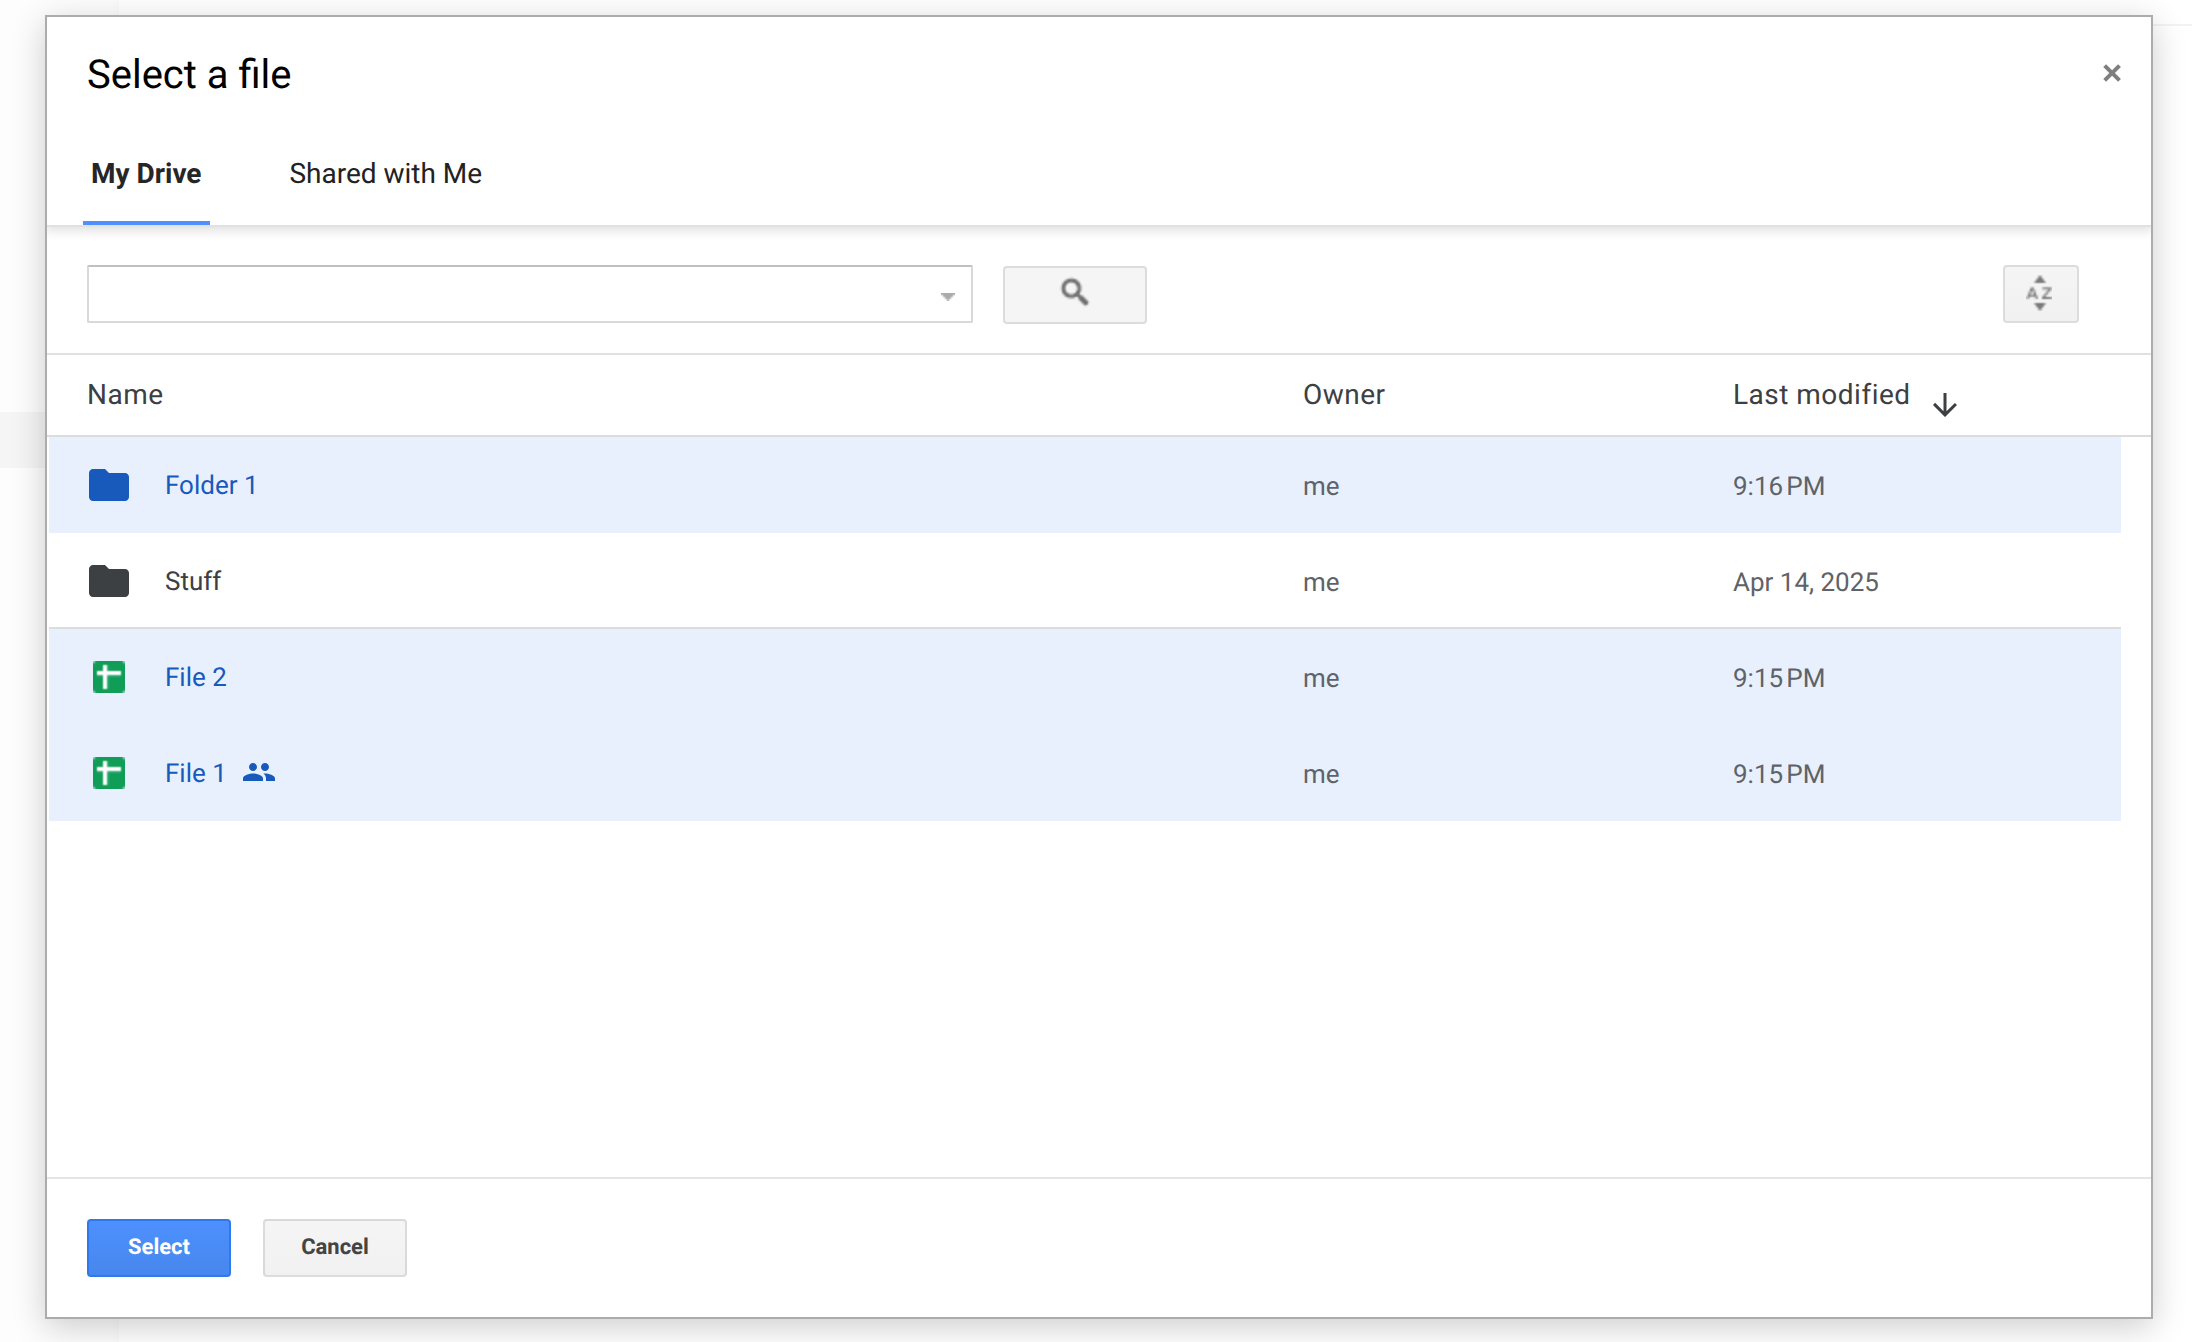
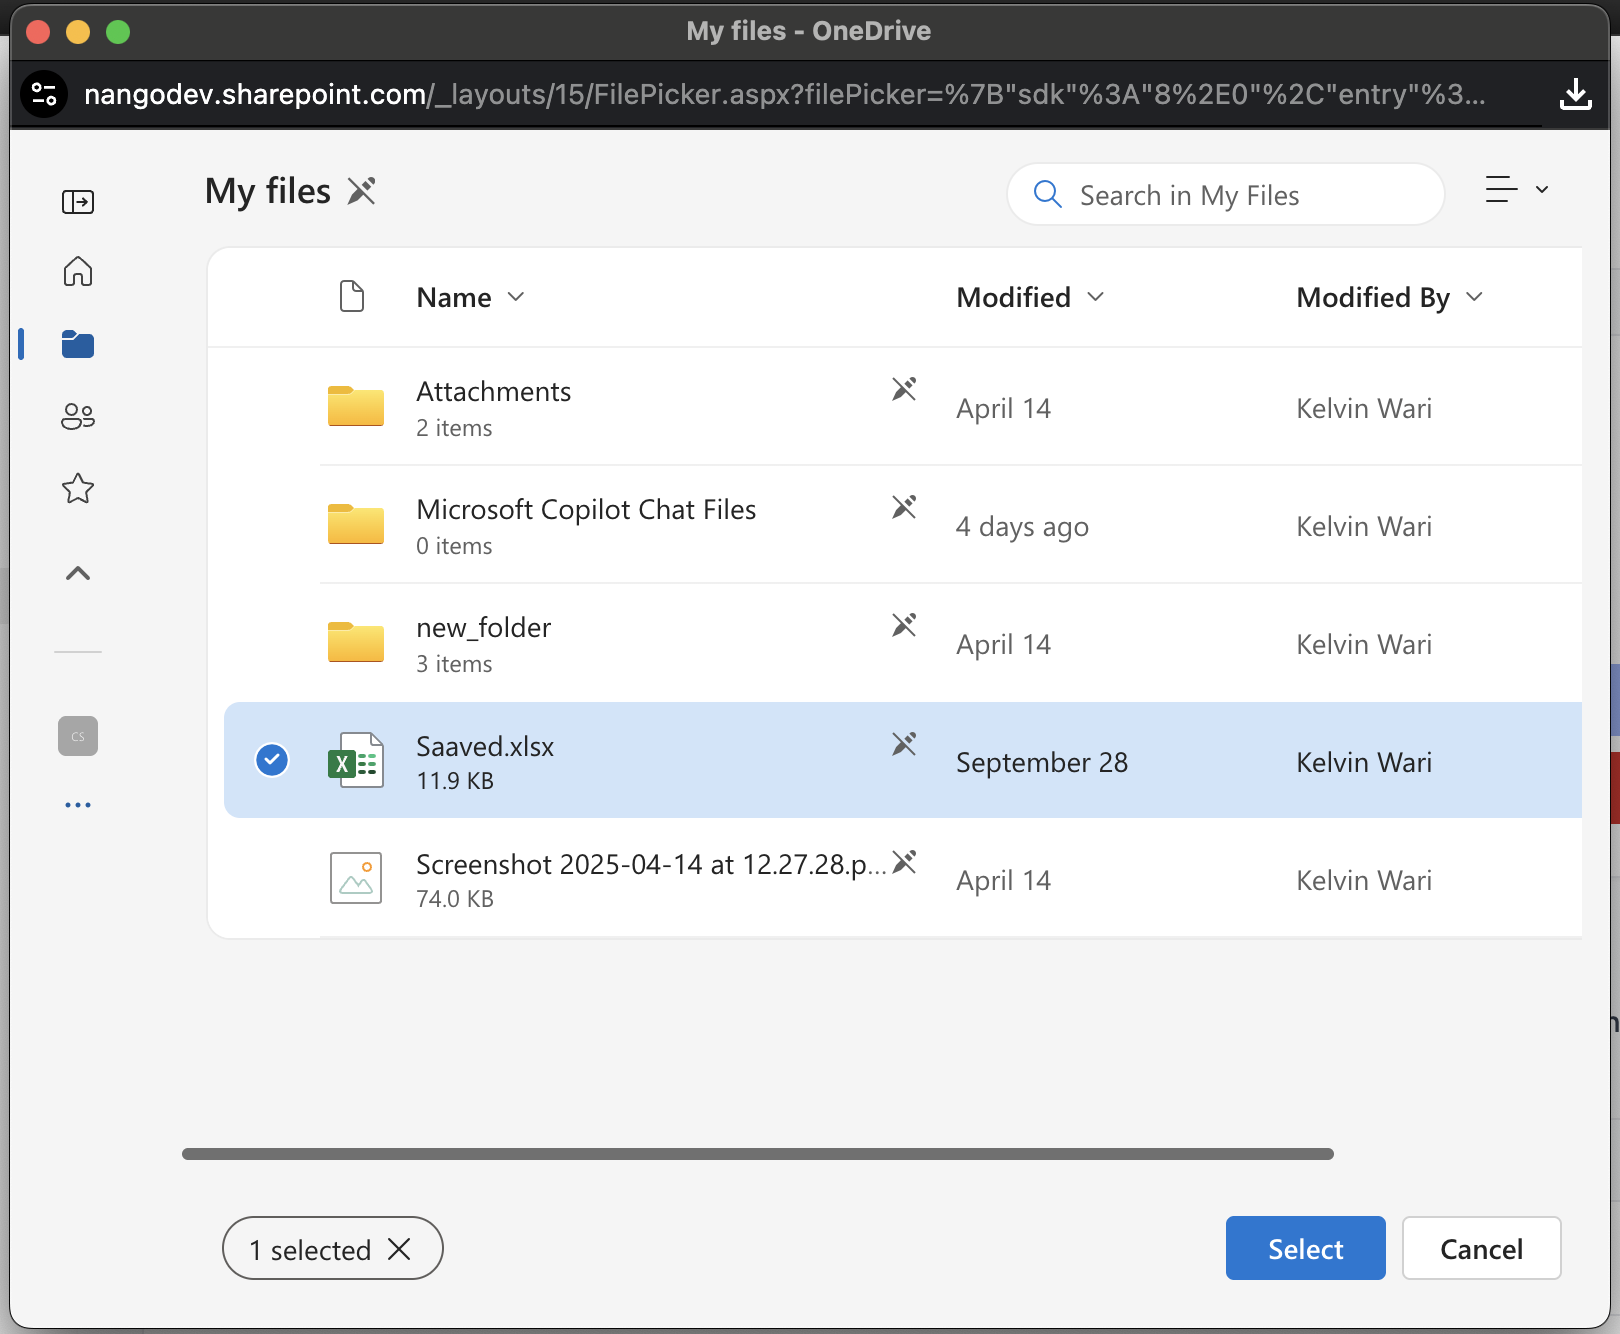
3. **Select files and folders to sync**:
* Click the *Select Files from \[Provider]* button
* A file picker modal will appear - **note that each provider has its own native file picker**:
* **Google Drive**: Uses Google's Drive Picker UI
* **OneDrive for Business**: Uses Microsoft's file picker for organizational accounts
* **OneDrive Personal**: Uses Microsoft's file picker for personal accounts
* Select the files and folders you want to sync using the provider's file picker
* Click the *Select* button to confirm your selection
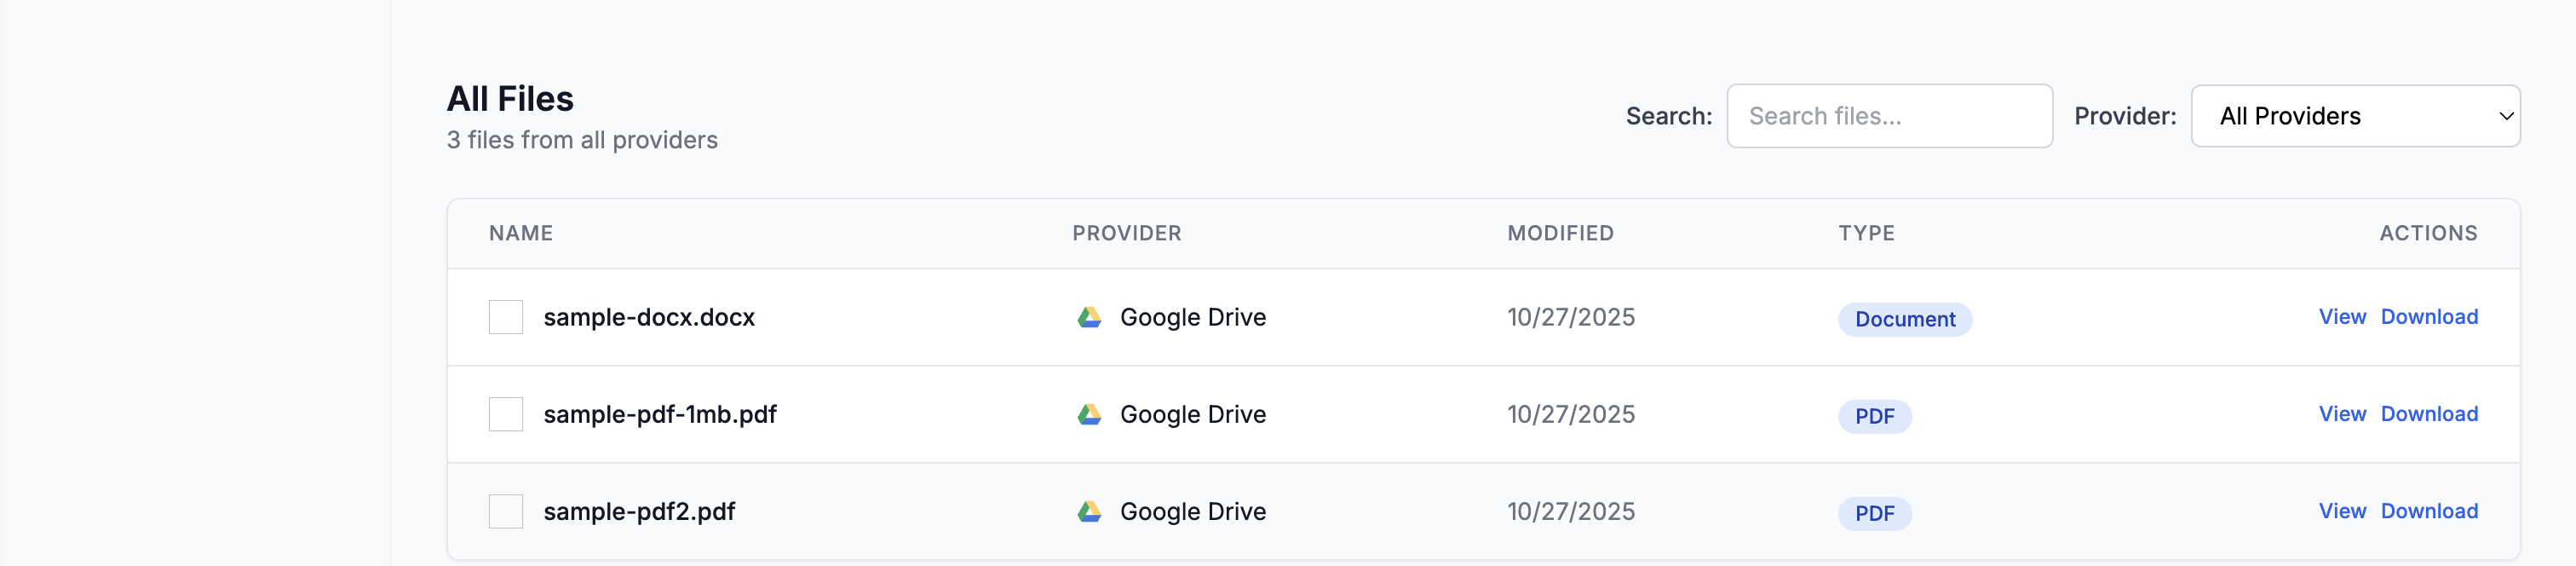
4. **View synced files**:
* The files and folders will be synced to your Nango account and displayed in the UI
5. **Download a file**:
* Click the *Download* button to download the file to your computer
6. **Disconnect your account**:
* Click the *Disconnect* button to disconnect your account and delete your connection from your Nango account
### What Happens Under the Hood
The sample app uses Nango to:
1. **Authentication**
* Authenticate users with file storage providers
* Show the file picker
* Handle OAuth flow automatically
2. **File Syncing**
* Sync selected files & folders
* Initial sync on selection
* Periodic updates
3. **File Download**
* Download raw file content
* Handle different file types
* Use Nango's proxy for reliable downloads
### Key Components
#### Frontend Implementation
1. **Authorization Flow**
The authorization process is implemented in [`front-end/src/api.ts`](https://github.com/NangoHQ/sample-app/blob/main/front-end/src/api.ts):
* `postConnectSession`: Initiates the OAuth connection
* `getNangoCredentials`: Retrieves credentials after successful authorization
The flow works as follows:
1. Frontend initiates connection via `postConnectSession`
2. Backend creates a Nango connection session
3. User is redirected to provider OAuth consent screen
4. After authorization, user is redirected back to the app
5. User is shown the provider-specific file picker (Google Drive Picker, OneDrive for Business picker, or OneDrive Personal picker)
6. Frontend can fetch credentials using `getNangoCredentials`
#### Backend Implementation
1. **Webhook Handler & Data Sync**
The webhook handling and data sync logic is implemented in [`back-end/src/routes/postWebhooks.ts`](https://github.com/NangoHQ/sample-app/blob/main/back-end/src/routes/postWebhooks.ts):
Key components:
* Main webhook handler that verifies signatures and routes requests
* `handleNewConnectionWebhook`: Processes new file provider connections
* `handleSyncWebhook`: Handles sync completion and data processing
The sync process:
1. Nango syncs files from the provider
2. Webhook notifies backend of sync completion
3. Backend fetches records using `nango.listRecords`
4. File metadata is stored in the database
5. Deletions are tracked and handled appropriately
2. **File Download with Proxy**
File download functionality is implemented in [`back-end/src/routes/downloadFile.ts`](https://github.com/NangoHQ/sample-app/blob/main/back-end/src/routes/downloadFile.ts):
The download process:
1. Frontend requests file download with file ID and connection ID
2. Backend uses Nango proxy to fetch file from provider
3. File is streamed to client with proper headers
4. Error handling ensures graceful failure
Key features:
* Uses Nango proxy for secure file access
* Proper content type and disposition headers
* Streaming response for efficient file transfer
* Comprehensive error handling
### Nango Dashboard
Explore these sections in your Nango account:
1. **Integration Settings**
* [View Integrations](https://app.nango.dev/dev/integrations)
* Configure sync settings
* View integration status
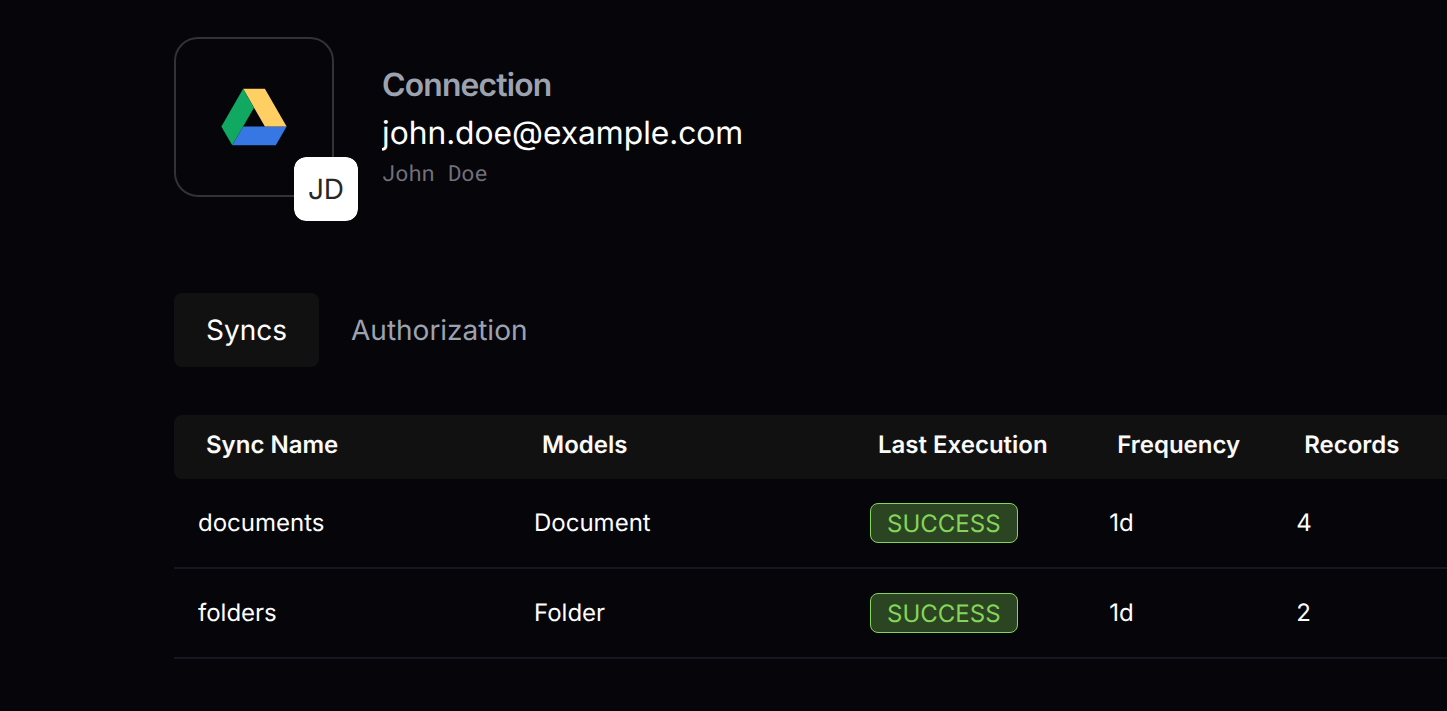
2. **Connections**
* [View Connections](https://app.nango.dev/dev/connections)
* Monitor sync status
* Check connection health
3. **Logs**
* [View Logs](https://app.nango.dev/dev/logs)
* Track sync operations
* Debug issues
### Common Issues and Solutions
1. **Connection Issues**
* Check Docker is running
* Verify webhook URL is correct
* Ensure provider credentials are valid
2. **Sync Problems**
* Check Nango logs
* Verify file permissions
* Monitor sync status
### File Type Support
The sample app supports all file types through Nango's proxy:
* **Regular files** (PDFs, images, documents, etc.)
* **Google Workspace files** (Docs, Sheets, Slides)
* **Microsoft Office files** (Word, Excel, PowerPoint)
* **Other cloud storage file types**
**Questions, problems, feedback?** Please reach out in the [Slack community](https://nango.dev/slack).
## Next steps
* [Auth guide](/guides/auth/auth-guide) - understand the authorization flow used by the sample app.
* [Sync functions](/guides/functions/syncs/sync-functions) - customize the data sync logic.
* [Webhooks from Nango](/guides/platform/webhooks-from-nango) - process sync and auth notifications.
 The sample app uses Slack, Google Drive, OneDrive for Business, and OneDrive Personal as example integrations and is showcased in this [demo video](https://youtu.be/oTpWlmnv7dM).
### Access the repository
The sample app uses Slack, Google Drive, OneDrive for Business, and OneDrive Personal as example integrations and is showcased in this [demo video](https://youtu.be/oTpWlmnv7dM).
### Access the repository
 2. **Connect your account** (Google Drive, OneDrive, etc.):
* Click the *Connect* button on the provider's card
* In the connection popup, click the *Connect* button
* Select your account and authorize the app
* Click the *Finish* button to close the modal
2. **Connect your account** (Google Drive, OneDrive, etc.):
* Click the *Connect* button on the provider's card
* In the connection popup, click the *Connect* button
* Select your account and authorize the app
* Click the *Finish* button to close the modal
 3. **Select files and folders to sync**:
* Click the *Select Files from \[Provider]* button
* A file picker modal will appear - **note that each provider has its own native file picker**:
* **Google Drive**: Uses Google's Drive Picker UI
* **OneDrive for Business**: Uses Microsoft's file picker for organizational accounts
* **OneDrive Personal**: Uses Microsoft's file picker for personal accounts
* Select the files and folders you want to sync using the provider's file picker
* Click the *Select* button to confirm your selection
3. **Select files and folders to sync**:
* Click the *Select Files from \[Provider]* button
* A file picker modal will appear - **note that each provider has its own native file picker**:
* **Google Drive**: Uses Google's Drive Picker UI
* **OneDrive for Business**: Uses Microsoft's file picker for organizational accounts
* **OneDrive Personal**: Uses Microsoft's file picker for personal accounts
* Select the files and folders you want to sync using the provider's file picker
* Click the *Select* button to confirm your selection
 4. **View synced files**:
* The files and folders will be synced to your Nango account and displayed in the UI
4. **View synced files**:
* The files and folders will be synced to your Nango account and displayed in the UI
 5. **Download a file**:
* Click the *Download* button to download the file to your computer
6. **Disconnect your account**:
* Click the *Disconnect* button to disconnect your account and delete your connection from your Nango account
5. **Download a file**:
* Click the *Download* button to download the file to your computer
6. **Disconnect your account**:
* Click the *Disconnect* button to disconnect your account and delete your connection from your Nango account
 ### What Happens Under the Hood
The sample app uses Nango to:
1. **Authentication**
* Authenticate users with file storage providers
* Show the file picker
* Handle OAuth flow automatically
2. **File Syncing**
* Sync selected files & folders
* Initial sync on selection
* Periodic updates
### What Happens Under the Hood
The sample app uses Nango to:
1. **Authentication**
* Authenticate users with file storage providers
* Show the file picker
* Handle OAuth flow automatically
2. **File Syncing**
* Sync selected files & folders
* Initial sync on selection
* Periodic updates
 3. **File Download**
* Download raw file content
* Handle different file types
* Use Nango's proxy for reliable downloads
### Key Components
#### Frontend Implementation
1. **Authorization Flow**
The authorization process is implemented in [`front-end/src/api.ts`](https://github.com/NangoHQ/sample-app/blob/main/front-end/src/api.ts):
* `postConnectSession`: Initiates the OAuth connection
* `getNangoCredentials`: Retrieves credentials after successful authorization
The flow works as follows:
1. Frontend initiates connection via `postConnectSession`
2. Backend creates a Nango connection session
3. User is redirected to provider OAuth consent screen
4. After authorization, user is redirected back to the app
5. User is shown the provider-specific file picker (Google Drive Picker, OneDrive for Business picker, or OneDrive Personal picker)
6. Frontend can fetch credentials using `getNangoCredentials`
#### Backend Implementation
1. **Webhook Handler & Data Sync**
The webhook handling and data sync logic is implemented in [`back-end/src/routes/postWebhooks.ts`](https://github.com/NangoHQ/sample-app/blob/main/back-end/src/routes/postWebhooks.ts):
Key components:
* Main webhook handler that verifies signatures and routes requests
* `handleNewConnectionWebhook`: Processes new file provider connections
* `handleSyncWebhook`: Handles sync completion and data processing
The sync process:
1. Nango syncs files from the provider
2. Webhook notifies backend of sync completion
3. Backend fetches records using `nango.listRecords`
4. File metadata is stored in the database
5. Deletions are tracked and handled appropriately
2. **File Download with Proxy**
File download functionality is implemented in [`back-end/src/routes/downloadFile.ts`](https://github.com/NangoHQ/sample-app/blob/main/back-end/src/routes/downloadFile.ts):
The download process:
1. Frontend requests file download with file ID and connection ID
2. Backend uses Nango proxy to fetch file from provider
3. File is streamed to client with proper headers
4. Error handling ensures graceful failure
Key features:
* Uses Nango proxy for secure file access
* Proper content type and disposition headers
* Streaming response for efficient file transfer
* Comprehensive error handling
### Nango Dashboard
Explore these sections in your Nango account:
1. **Integration Settings**
* [View Integrations](https://app.nango.dev/dev/integrations)
* Configure sync settings
* View integration status
2. **Connections**
* [View Connections](https://app.nango.dev/dev/connections)
* Monitor sync status
* Check connection health
3. **Logs**
* [View Logs](https://app.nango.dev/dev/logs)
* Track sync operations
* Debug issues
### Common Issues and Solutions
1. **Connection Issues**
* Check Docker is running
* Verify webhook URL is correct
* Ensure provider credentials are valid
2. **Sync Problems**
* Check Nango logs
* Verify file permissions
* Monitor sync status
### File Type Support
The sample app supports all file types through Nango's proxy:
* **Regular files** (PDFs, images, documents, etc.)
* **Google Workspace files** (Docs, Sheets, Slides)
* **Microsoft Office files** (Word, Excel, PowerPoint)
* **Other cloud storage file types**
3. **File Download**
* Download raw file content
* Handle different file types
* Use Nango's proxy for reliable downloads
### Key Components
#### Frontend Implementation
1. **Authorization Flow**
The authorization process is implemented in [`front-end/src/api.ts`](https://github.com/NangoHQ/sample-app/blob/main/front-end/src/api.ts):
* `postConnectSession`: Initiates the OAuth connection
* `getNangoCredentials`: Retrieves credentials after successful authorization
The flow works as follows:
1. Frontend initiates connection via `postConnectSession`
2. Backend creates a Nango connection session
3. User is redirected to provider OAuth consent screen
4. After authorization, user is redirected back to the app
5. User is shown the provider-specific file picker (Google Drive Picker, OneDrive for Business picker, or OneDrive Personal picker)
6. Frontend can fetch credentials using `getNangoCredentials`
#### Backend Implementation
1. **Webhook Handler & Data Sync**
The webhook handling and data sync logic is implemented in [`back-end/src/routes/postWebhooks.ts`](https://github.com/NangoHQ/sample-app/blob/main/back-end/src/routes/postWebhooks.ts):
Key components:
* Main webhook handler that verifies signatures and routes requests
* `handleNewConnectionWebhook`: Processes new file provider connections
* `handleSyncWebhook`: Handles sync completion and data processing
The sync process:
1. Nango syncs files from the provider
2. Webhook notifies backend of sync completion
3. Backend fetches records using `nango.listRecords`
4. File metadata is stored in the database
5. Deletions are tracked and handled appropriately
2. **File Download with Proxy**
File download functionality is implemented in [`back-end/src/routes/downloadFile.ts`](https://github.com/NangoHQ/sample-app/blob/main/back-end/src/routes/downloadFile.ts):
The download process:
1. Frontend requests file download with file ID and connection ID
2. Backend uses Nango proxy to fetch file from provider
3. File is streamed to client with proper headers
4. Error handling ensures graceful failure
Key features:
* Uses Nango proxy for secure file access
* Proper content type and disposition headers
* Streaming response for efficient file transfer
* Comprehensive error handling
### Nango Dashboard
Explore these sections in your Nango account:
1. **Integration Settings**
* [View Integrations](https://app.nango.dev/dev/integrations)
* Configure sync settings
* View integration status
2. **Connections**
* [View Connections](https://app.nango.dev/dev/connections)
* Monitor sync status
* Check connection health
3. **Logs**
* [View Logs](https://app.nango.dev/dev/logs)
* Track sync operations
* Debug issues
### Common Issues and Solutions
1. **Connection Issues**
* Check Docker is running
* Verify webhook URL is correct
* Ensure provider credentials are valid
2. **Sync Problems**
* Check Nango logs
* Verify file permissions
* Monitor sync status
### File Type Support
The sample app supports all file types through Nango's proxy:
* **Regular files** (PDFs, images, documents, etc.)
* **Google Workspace files** (Docs, Sheets, Slides)
* **Microsoft Office files** (Word, Excel, PowerPoint)
* **Other cloud storage file types**