> ## Documentation Index
> Fetch the complete documentation index at: https://nango.dev/docs/llms.txt
> Use this file to discover all available pages before exploring further.
# Tripletex - How do I link my account?
# Overview
To authenticate with Tripletex you need:
1. **Consumer Token** — provided to you by the developer of the integration. It identifies the integration, not your account.
2. **Employee Token** — generated by you inside your Tripletex tenant. It controls which data the integration can read or write on your behalf.
This guide walks you through generating the employee token within Tripletex.
### Prerequisites
* A Tripletex account. Nango supports both the production environment (`tripletex.no`) and the sandbox (`api-test.tripletex.tech`); you choose which one to connect to in Step 1.
* The consumer token and the integration's application name, both supplied by the developer.
### Instructions
The steps are identical for both environments — only the host differs. Generate the tokens inside the tenant you plan to connect (production at `tripletex.no` or the sandbox at `api-test.tripletex.tech`), then select that same environment in Step 1. The production consumer token comes from a Tripletex-registered partner application rather than a free test account.
#### Step 1: Selecting your environment
Pick the Tripletex host you want to connect to from the **Environment** dropdown:
* **`tripletex.no`** — production.
* **`api-test.tripletex.tech`** — sandbox / test accounts.
Both the session-token exchange and every subsequent API call are routed to the host you choose here, so it must match the tenant where your consumer and employee tokens were issued.
#### Step 2: Obtain the consumer token
The consumer token is shared once across all customers of an integration. The developer of the integration sends it to you, along with the **application name** registered with Tripletex.
#### Step 3: Generate an employee token
1. Log in to your Tripletex tenant.
2. Click the avatar in the top-right corner and pick **My profile**.
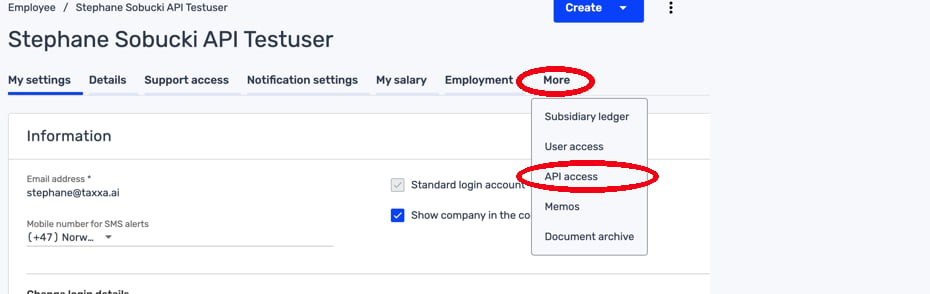
3. Above the profile pane, click **More ▾** and choose **API access**.
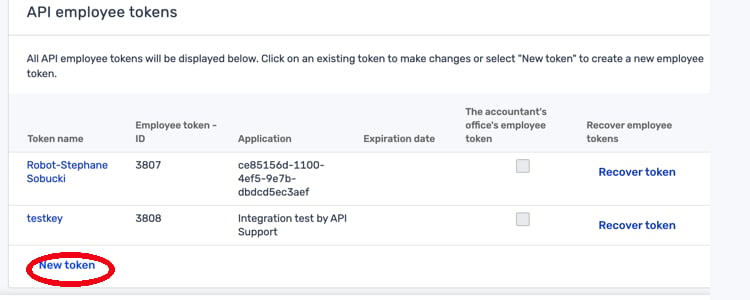
 4. On the **API employee tokens** page, click **New token** at the bottom of the list.
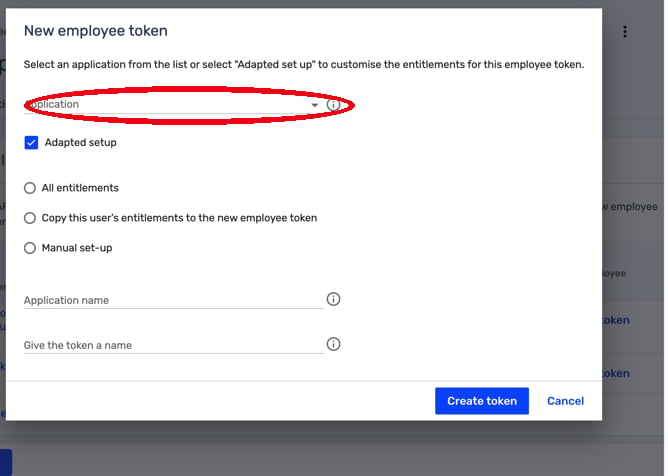
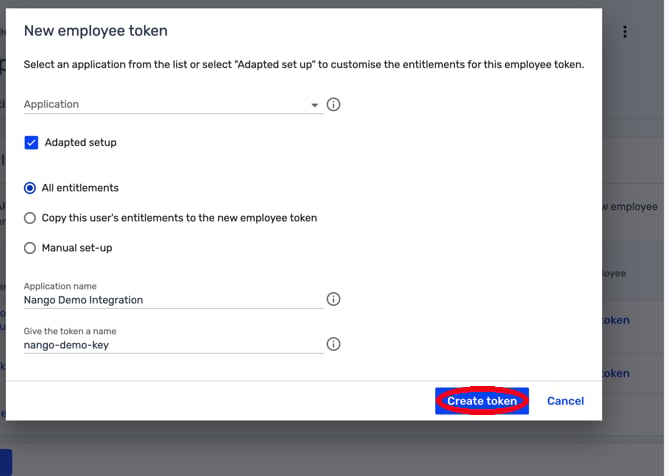
 5. In the **New employee token** dialog, pick the developer's integration from the **Application** dropdown, or tick **Adapted setup** to configure the token yourself.
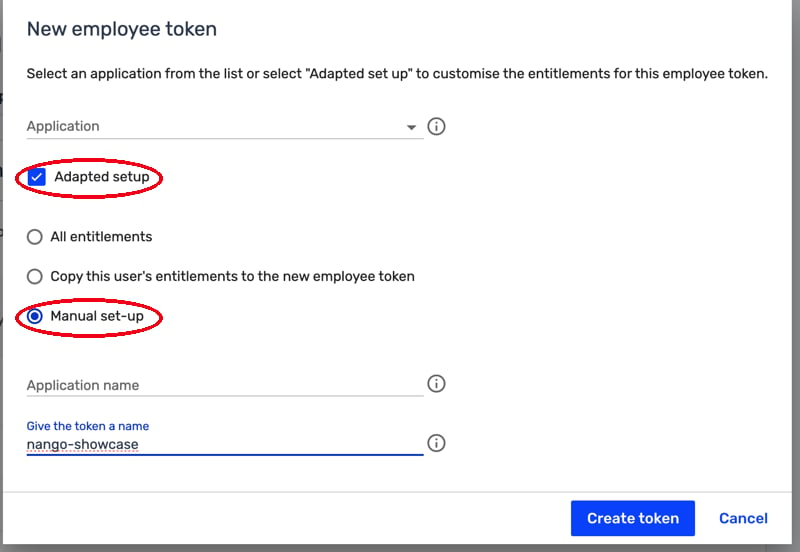
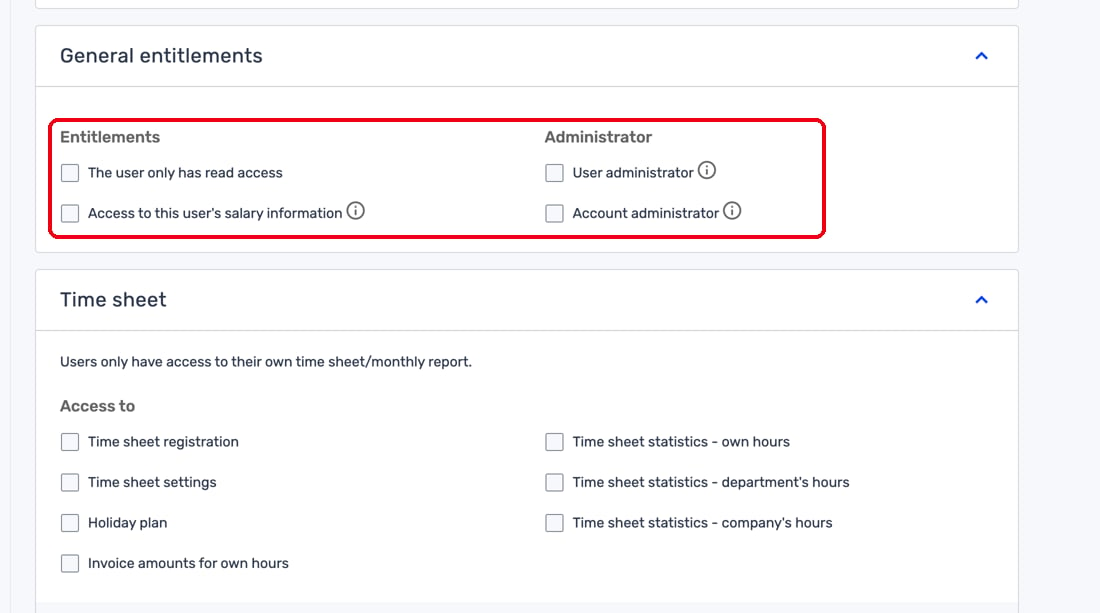
 6. To control exactly what the integration can access, tick **Adapted setup** and select **Manual set-up**. This grants granular, per-module entitlements instead of all-or-nothing access.
 7. Tripletex groups entitlements by module (general access, time sheet, invoicing, accounting, salary, and more). Enable only the scopes the integration needs.
 8. Give the token a memorable name and click **Create token**.
 If you see *"The application could not be found"*, the application name does not match what the developer registered with Tripletex. The name is case-sensitive and must match exactly.
9. Tripletex shows the generated employee token in a one-time popup. **Copy it immediately** — it cannot be recovered. If you misplace it, generate a new one (which invalidates the old one).
#### Step 4: Set the proxy company ID
Leave this at `0` unless the integration developer specifically told you otherwise. A non-zero value is only required for accountant-token flows where one token spans multiple client tenants.
#### Step 5: Enter credentials in the Connect UI
Once you have your **Environment**, **Consumer Token**, **Employee Token**, and **Proxy Company ID**:
1. Open the form where you need to authenticate with Tripletex.
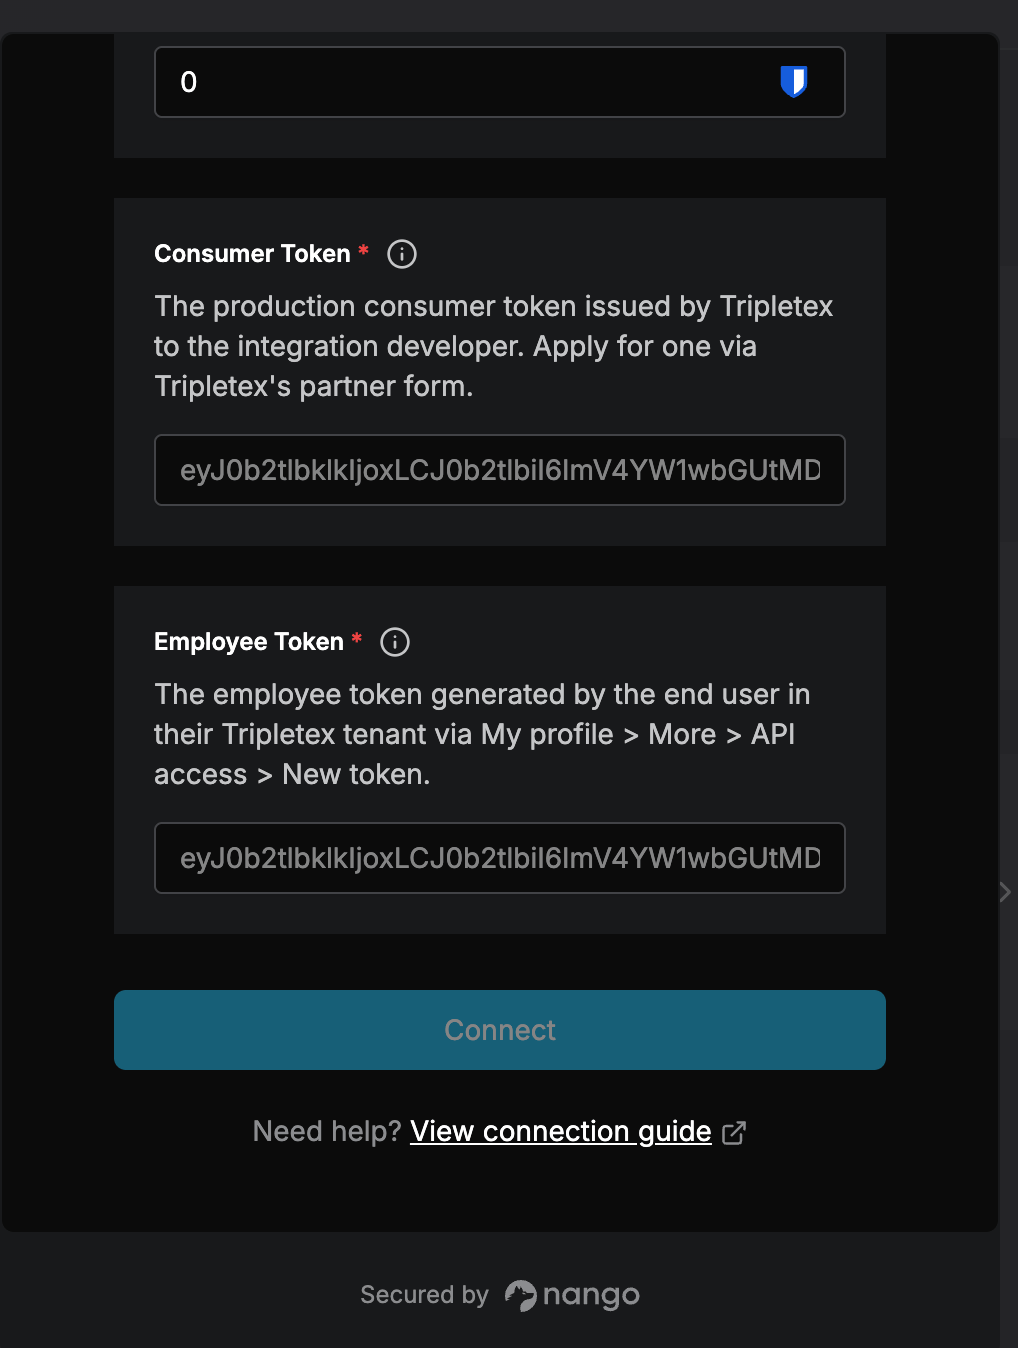
2. Select your **Environment**, enter your **Consumer Token** and **Employee Token**, and set the **Proxy Company ID** in their respective fields.
3. Submit the form, and you should be successfully authenticated.
If you see *"The application could not be found"*, the application name does not match what the developer registered with Tripletex. The name is case-sensitive and must match exactly.
9. Tripletex shows the generated employee token in a one-time popup. **Copy it immediately** — it cannot be recovered. If you misplace it, generate a new one (which invalidates the old one).
#### Step 4: Set the proxy company ID
Leave this at `0` unless the integration developer specifically told you otherwise. A non-zero value is only required for accountant-token flows where one token spans multiple client tenants.
#### Step 5: Enter credentials in the Connect UI
Once you have your **Environment**, **Consumer Token**, **Employee Token**, and **Proxy Company ID**:
1. Open the form where you need to authenticate with Tripletex.
2. Select your **Environment**, enter your **Consumer Token** and **Employee Token**, and set the **Proxy Company ID** in their respective fields.
3. Submit the form, and you should be successfully authenticated.
 You are now connected to Tripletex.