> ## Documentation Index
> Fetch the complete documentation index at: https://nango.dev/docs/llms.txt
> Use this file to discover all available pages before exploring further.
# Timify - How do I link my account?
# Overview
To authenticate with Timify, you will need:
1. **App ID** - The identifier for your app in the Developer Platform.
2. **App Secret** - The secret used with your App ID to obtain access tokens for API authentication.
This guide will walk you through creating an app, getting these credentials, and connecting in Nango.
### Prerequisites
* Access to the TIMIFY Developer Platform. Request this from your Account Manager; they will arrange a developer account. You receive an invitation by email and must accept it within 7 days.
* Access to a Company or Enterprise account where the app can be installed.
### Instructions:
#### Step 1: Finding your subdomain
1. The subdomain is the first part of your API base URL, for example, in `https://api.timify.com` the subdomain is `api`.
#### Step 2: Create and install the app
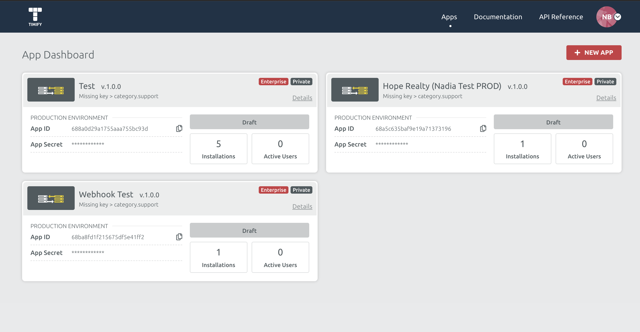
1. Log in to the [Timify Developer Platform](https://api.timify.com) and go to **Apps** to see the **App Dashboard** → **+ NEW APP**.
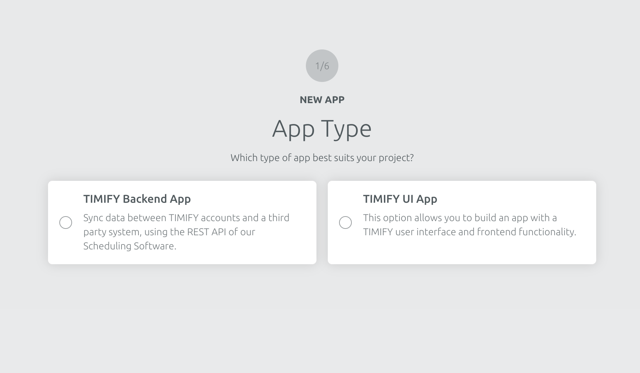
 2. Choose app type: **TIMIFY Backend App** (for data sync).
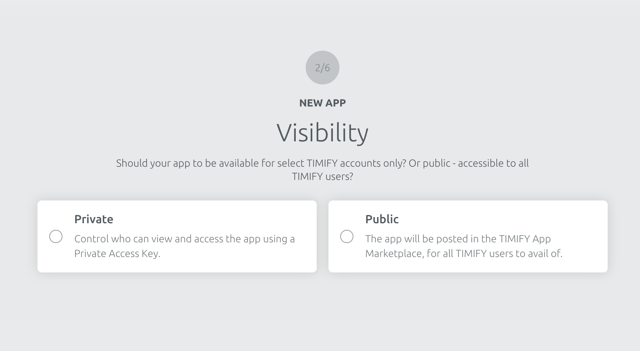
 3. Set **Visibility** and **Country Visibility** if needed.
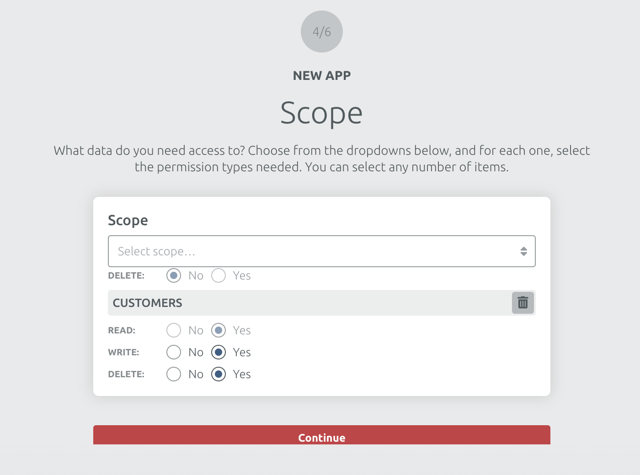
 4. Select **Scopes** for your integration (you can change these while the app is in Draft).
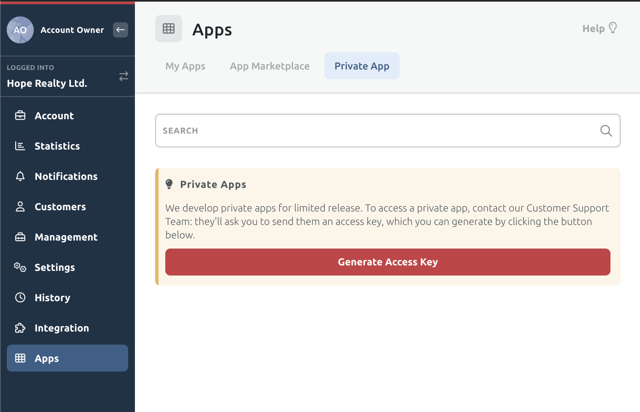
 5. Authorise your app using the Private Access Key, which can be found in your TIMIFY Company or Enterprise account.
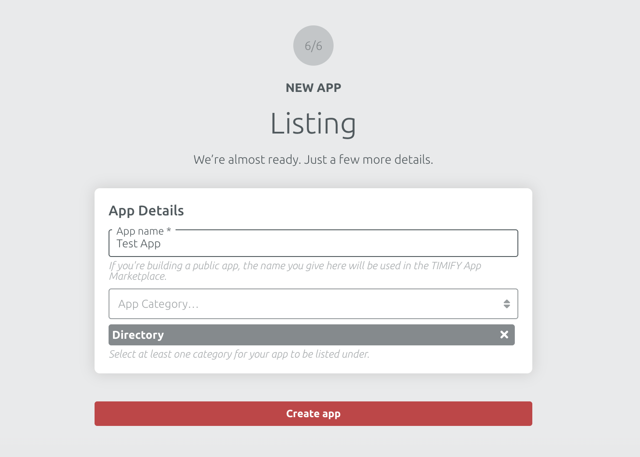
 6. Enter your **App Name** and **Category** then **Create App**.
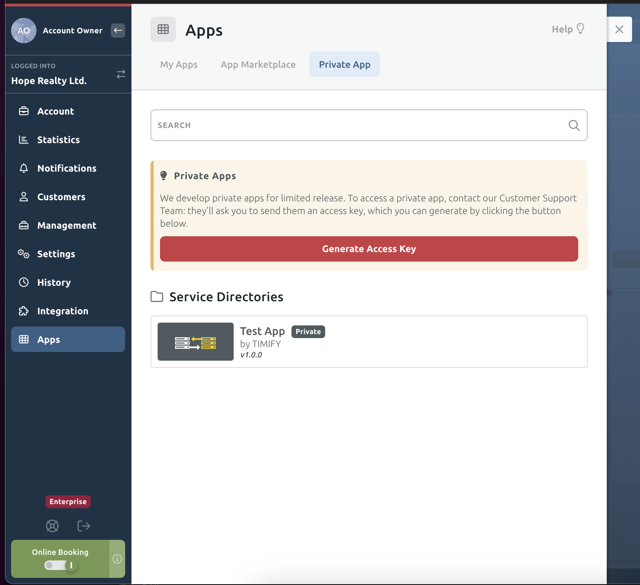
 7. In your Company or Enterprise account go to **Apps** → **Private Apps** → find your app → **Install**.
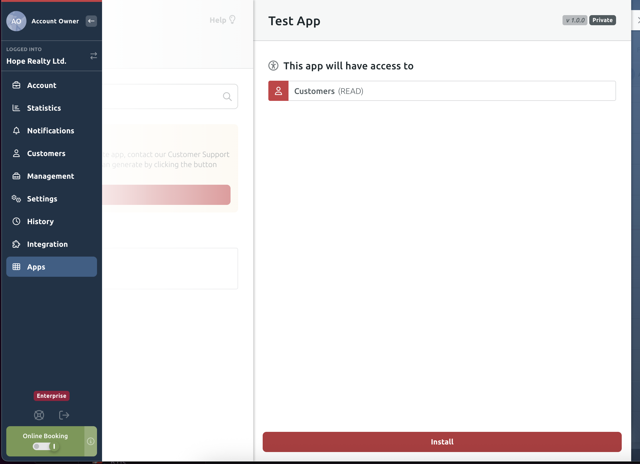 Install the app on your **Enterprise** account if you need it across multiple companies/branches. One app can be installed on only one account (company or enterprise).
***
#### Step 3: Getting your credentials
1. In the Developer Platform, open your app and go to **App Overview** (right-hand panel).
2. Copy **App ID** and **App Secret**.
Install the app on your **Enterprise** account if you need it across multiple companies/branches. One app can be installed on only one account (company or enterprise).
***
#### Step 3: Getting your credentials
1. In the Developer Platform, open your app and go to **App Overview** (right-hand panel).
2. Copy **App ID** and **App Secret**.
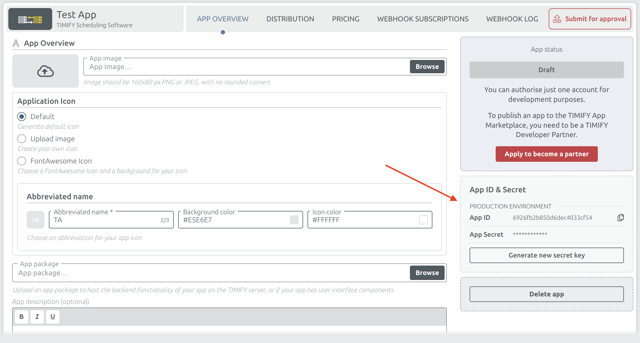 Each app has a lifecycle status (Draft, Pending, Approved, etc.) that affects editability and usage. See [App Status](https://docs.timify.dev/docs/first-steps#app-status) in the Timify docs.
#### Step 4: Enter credentials in the Connect UI
Once you have your **Subdomain**, **App ID**, and **App Secret**:
1. Open the form where you need to authenticate with Timify.
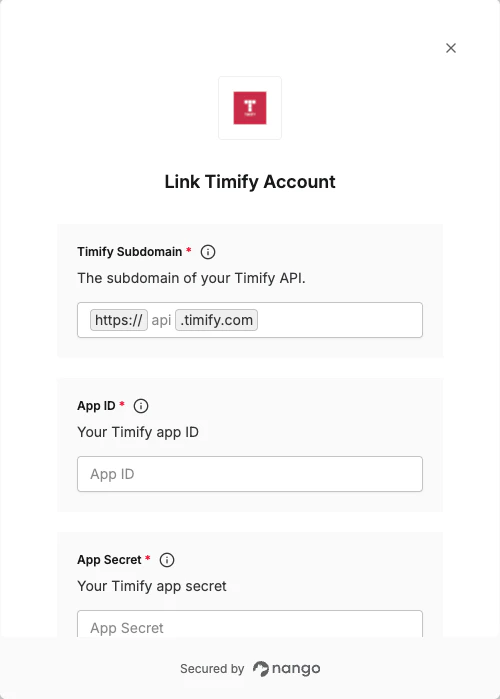
2. Enter your **Subdomain** (e.g. `api` for [https://api.timify.com](https://api.timify.com)), **App ID**, and **App Secret** in their respective fields.
3. Submit the form, and you should be successfully authenticated.
Each app has a lifecycle status (Draft, Pending, Approved, etc.) that affects editability and usage. See [App Status](https://docs.timify.dev/docs/first-steps#app-status) in the Timify docs.
#### Step 4: Enter credentials in the Connect UI
Once you have your **Subdomain**, **App ID**, and **App Secret**:
1. Open the form where you need to authenticate with Timify.
2. Enter your **Subdomain** (e.g. `api` for [https://api.timify.com](https://api.timify.com)), **App ID**, and **App Secret** in their respective fields.
3. Submit the form, and you should be successfully authenticated.
 You are now connected to Timify.