> ## Documentation Index
> Fetch the complete documentation index at: https://nango.dev/docs/llms.txt
> Use this file to discover all available pages before exploring further.
# Salesforce (Client Credentials) - How do I link my account?
# Overview
To authenticate with Salesforce (Client Credentials), you will need:
1. **Client ID** – The Consumer Key from your Salesforce External Client App.
2. **Client Secret** – The Consumer Secret from your Salesforce External Client App.
3. **Hostname** – Your Salesforce instance hostname (e.g. `acme.my.salesforce.com`).
This guide walks you through obtaining these values.
### Prerequisites
* A Salesforce account with administrative privileges to create External Client Apps.
### Instructions
#### Step 1: Create an External Client App
1. Log in to Salesforce and go to **Setup**.
2. In the Quick Find box, enter **App Manager**, then select **App Manager**.
3. Click **New External Client App**.
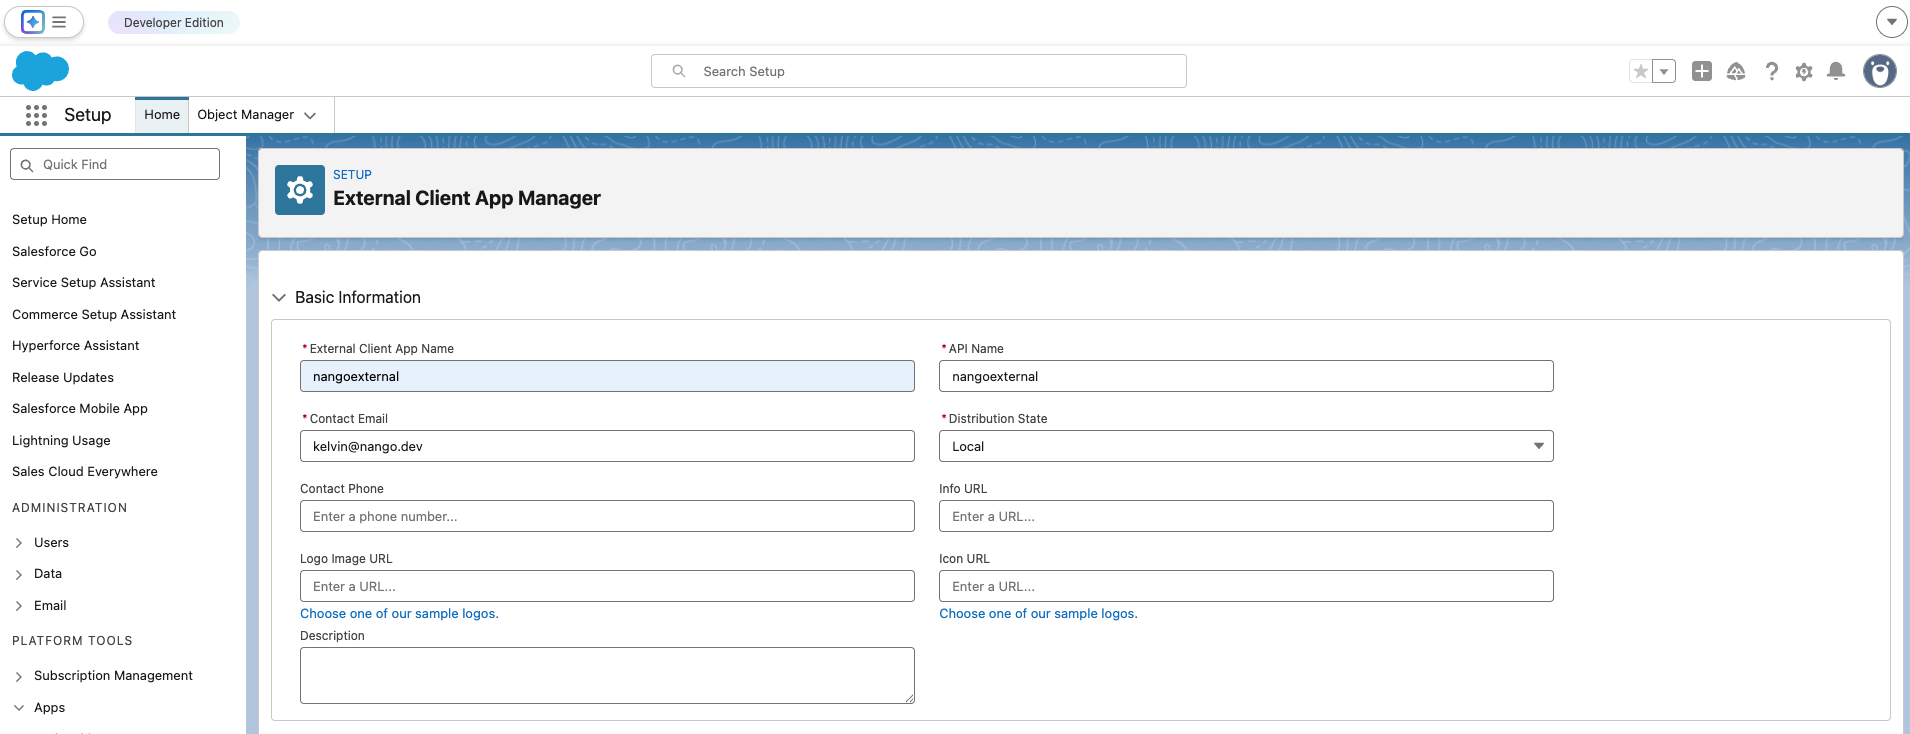
4. Fill in the required basic information (Name, API Name, Contact Email).
 5. Check **Enable OAuth Settings**.
6. For **Callback URL**, you can enter `https://api.nango.dev/oauth/callback`.
7. Under **Selected OAuth Scopes**, add at least `Access and manage your data (api)`.
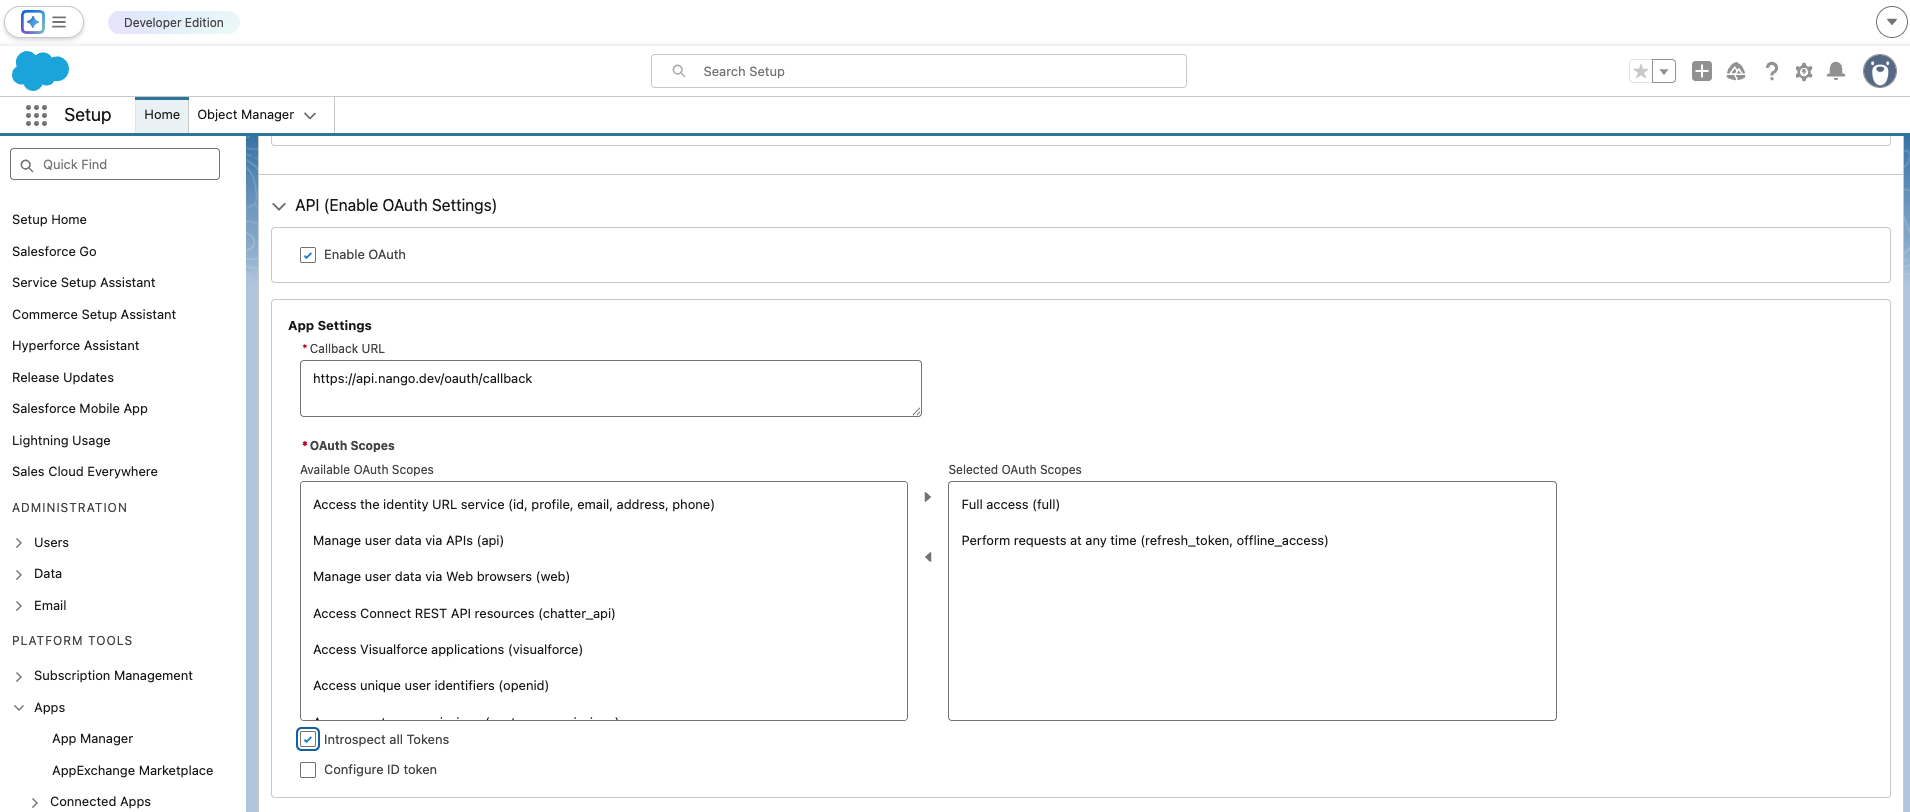
5. Check **Enable OAuth Settings**.
6. For **Callback URL**, you can enter `https://api.nango.dev/oauth/callback`.
7. Under **Selected OAuth Scopes**, add at least `Access and manage your data (api)`.
 8. Enable the Client Credentials flow:
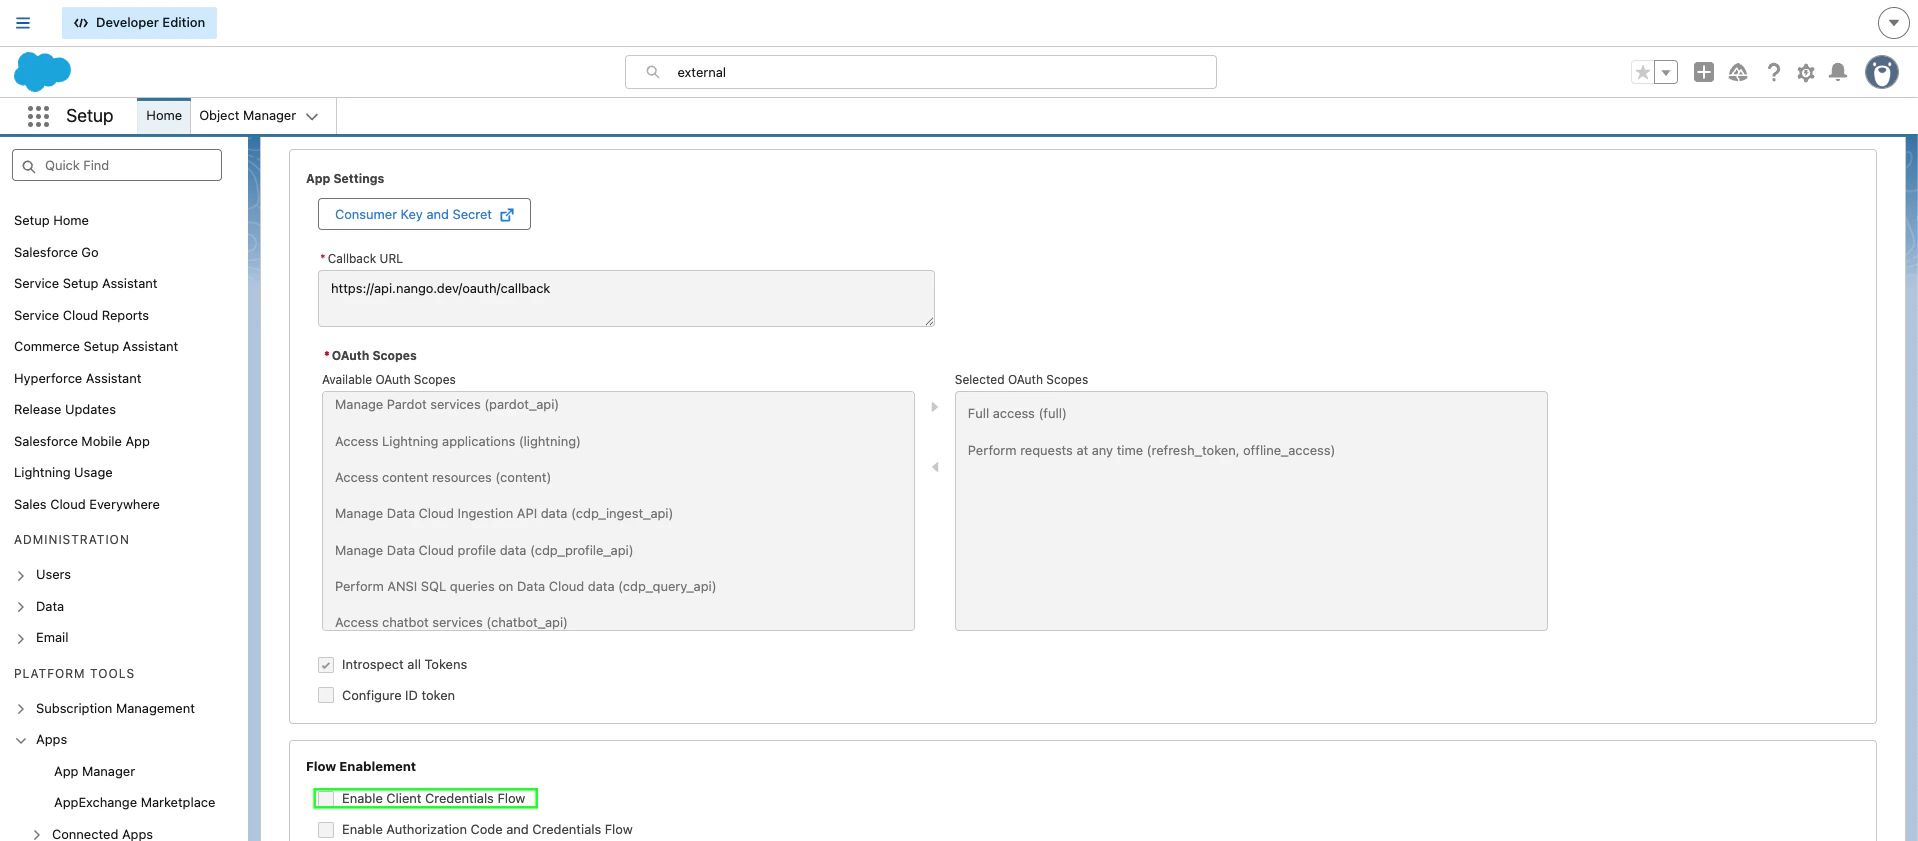
* In **OAuth Settings**: Under **Flow Enablement**, check **Enable Client Credentials Flow**.
8. Enable the Client Credentials flow:
* In **OAuth Settings**: Under **Flow Enablement**, check **Enable Client Credentials Flow**.
 9. Click **Save**.
#### Step 2: Assign an Execution User
For External Client Apps using the Client Credentials flow, Salesforce requires you to specify an execution user:
1. In **App Manager**, locate your app, click the dropdown arrow next to it, and select **Edit Policies**.
2. Navigate to the **OAuth Policies** section.
3. Under **OAuth Flows and External Client App Enhancements**:
* Enable **Client Credentials Flow**.
* In the **Run As (Username)** field, enter the username of a Salesforce user who has the necessary permissions required by the app.
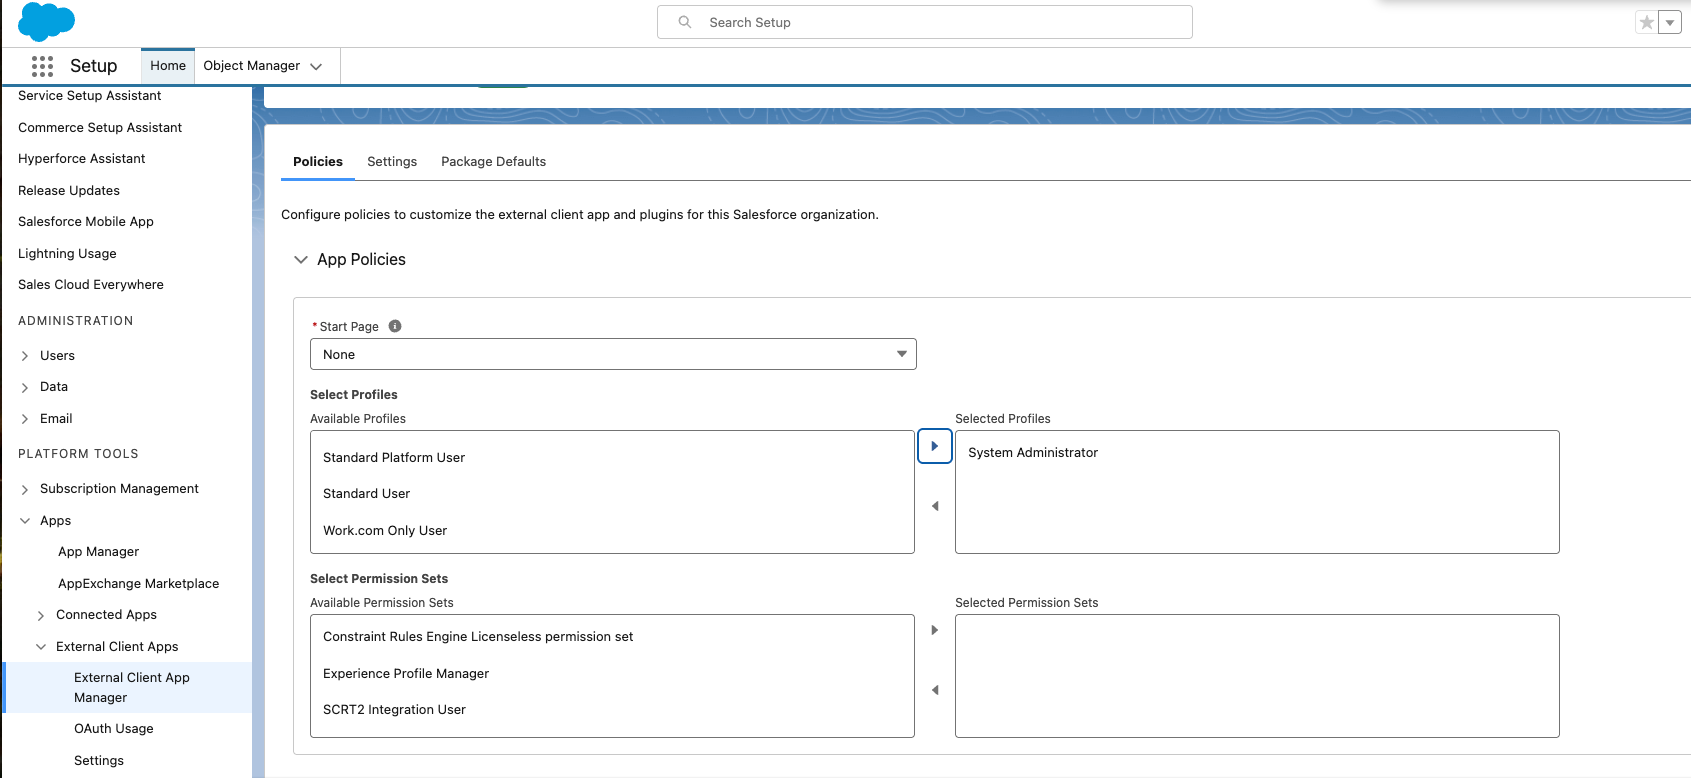
4. Click **App Policies**, select the profiles or permission sets that can use this app, then click **Save**.
9. Click **Save**.
#### Step 2: Assign an Execution User
For External Client Apps using the Client Credentials flow, Salesforce requires you to specify an execution user:
1. In **App Manager**, locate your app, click the dropdown arrow next to it, and select **Edit Policies**.
2. Navigate to the **OAuth Policies** section.
3. Under **OAuth Flows and External Client App Enhancements**:
* Enable **Client Credentials Flow**.
* In the **Run As (Username)** field, enter the username of a Salesforce user who has the necessary permissions required by the app.
4. Click **App Policies**, select the profiles or permission sets that can use this app, then click **Save**.
 #### Step 3: Obtain Client ID and Client Secret
1. In the **App Manager**, find your app and go to the **Settings** tab.
2. Click **Consumer Key and Secret** to view your credentials.
#### Step 3: Obtain Client ID and Client Secret
1. In the **App Manager**, find your app and go to the **Settings** tab.
2. Click **Consumer Key and Secret** to view your credentials.
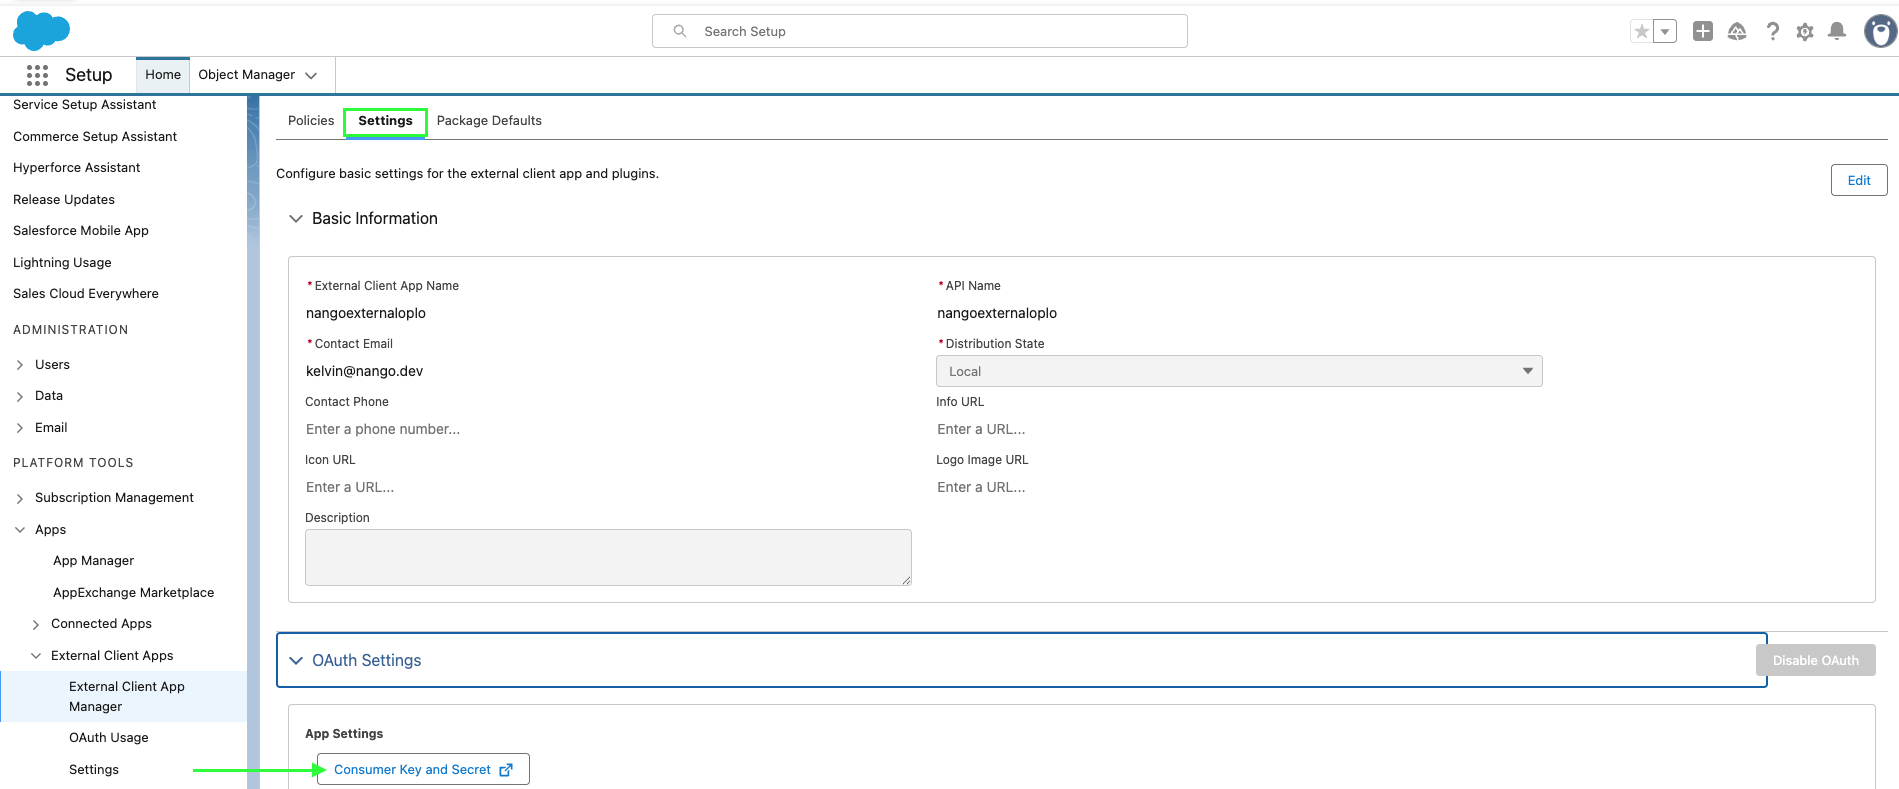 3. Copy the **Consumer Key** (Client ID) and **Consumer Secret** (Client Secret).
 #### Step 4: Find your Hostname
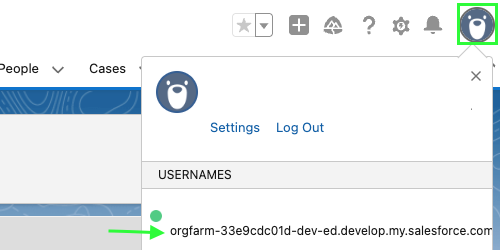
1. Click on your profile to view your hostname.
#### Step 4: Find your Hostname
1. Click on your profile to view your hostname.
 #### Step 5: Enter credentials in Nango
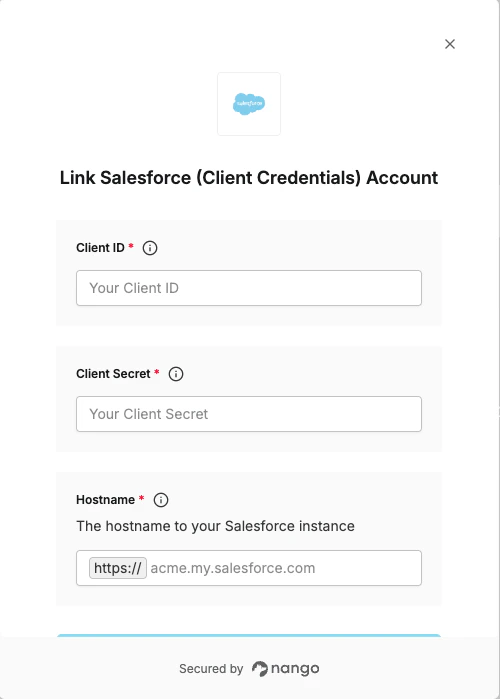
1. In the Nango Connect UI or dashboard, select the Salesforce (Client Credentials) integration.
2. Enter your **Hostname**, **Client ID**, and **Client Secret**.
3. Click **Authorize** to establish the connection.
#### Step 5: Enter credentials in Nango
1. In the Nango Connect UI or dashboard, select the Salesforce (Client Credentials) integration.
2. Enter your **Hostname**, **Client ID**, and **Client Secret**.
3. Click **Authorize** to establish the connection.
 You are now connected to Salesforce using Client Credentials.