> ## Documentation Index
> Fetch the complete documentation index at: https://nango.dev/docs/llms.txt
> Use this file to discover all available pages before exploring further.
# Rootly - How do I link my account?
# Overview
To authenticate with Rootly, you need:
1. **API Key** - A key that grants secure access to the API, enabling authorized applications to interact with Rootly resources and services.
This guide will walk you through generating your **API Key** within Rootly.
### Prerequisites:
* You must have an account with Rootly.
### Instructions:
#### Step 1: Generating Your API Key
1. Log in to your [Rootly](https://rootly.com/users/sign_in) account.
2. Navigate to the **Organization dropdown** and select **Organization Settings**.
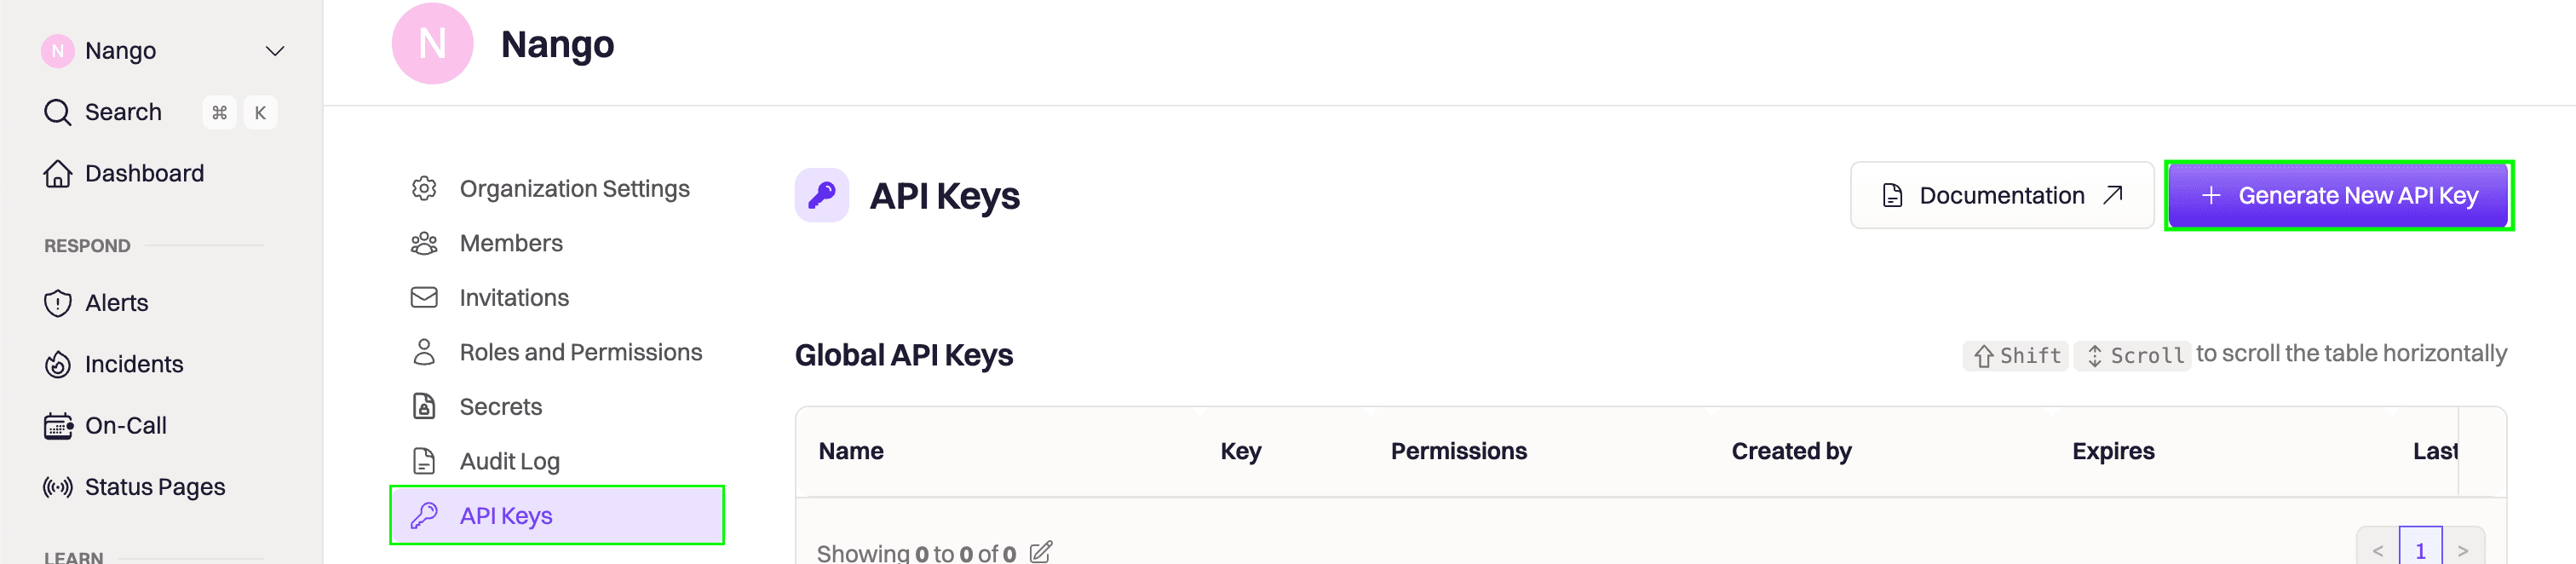
 3. Go to the **API Keys** section and click **Generate New API Key**.
 4. Choose the appropriate scope based on your needs. You can refer to the [scope table](https://docs.rootly.com/api-reference/overview#how-to-generate-an-api-key%3F) to determine the right one.
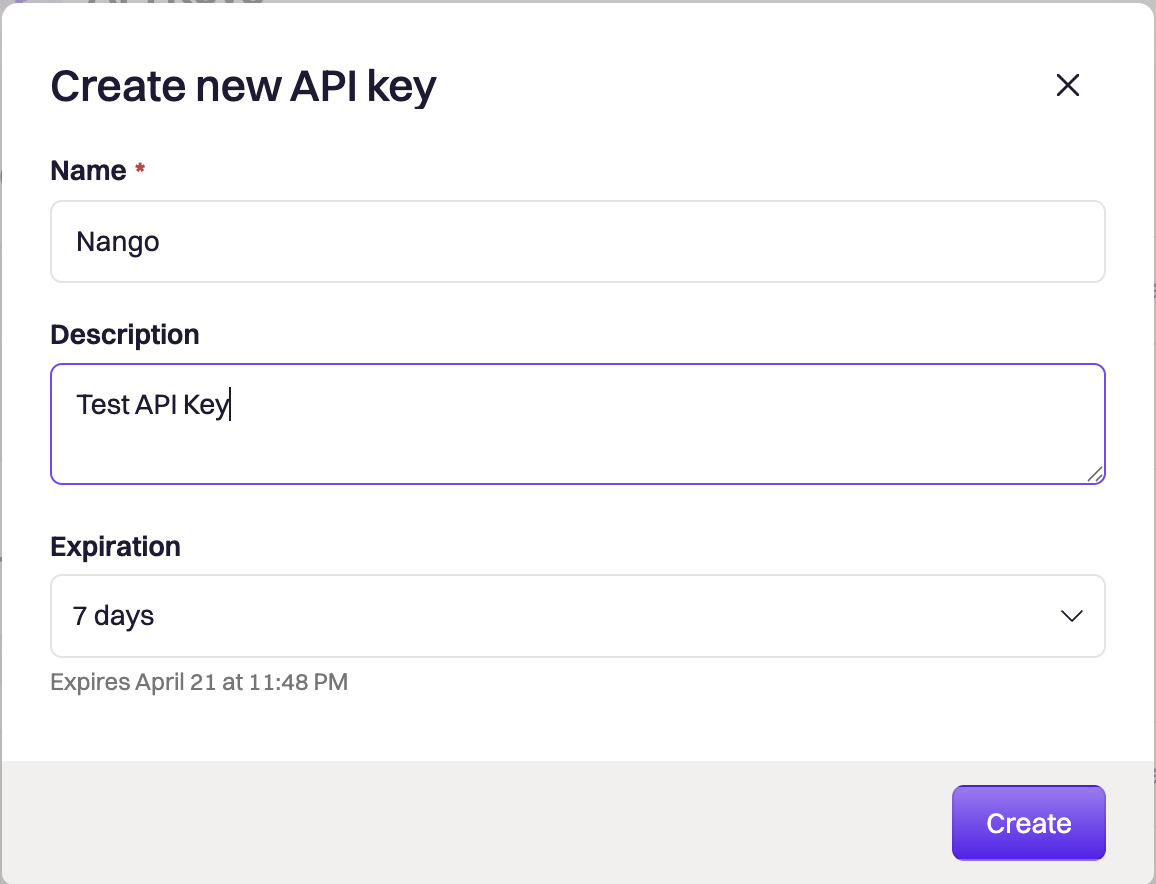
 5. Fill in the form that will pop up with the appropriate information:
* **Name** - A label to help you identify the purpose of this API key (e.g., **Nango Integration**).
* **Description** - A brief summary of what the key will be used for.
* **Expiration** - The duration for which the key should remain active.
* **Incident Response Role** - If creating a **Global API Key**, you must select an appropriate incident response role.
5. Fill in the form that will pop up with the appropriate information:
* **Name** - A label to help you identify the purpose of this API key (e.g., **Nango Integration**).
* **Description** - A brief summary of what the key will be used for.
* **Expiration** - The duration for which the key should remain active.
* **Incident Response Role** - If creating a **Global API Key**, you must select an appropriate incident response role.
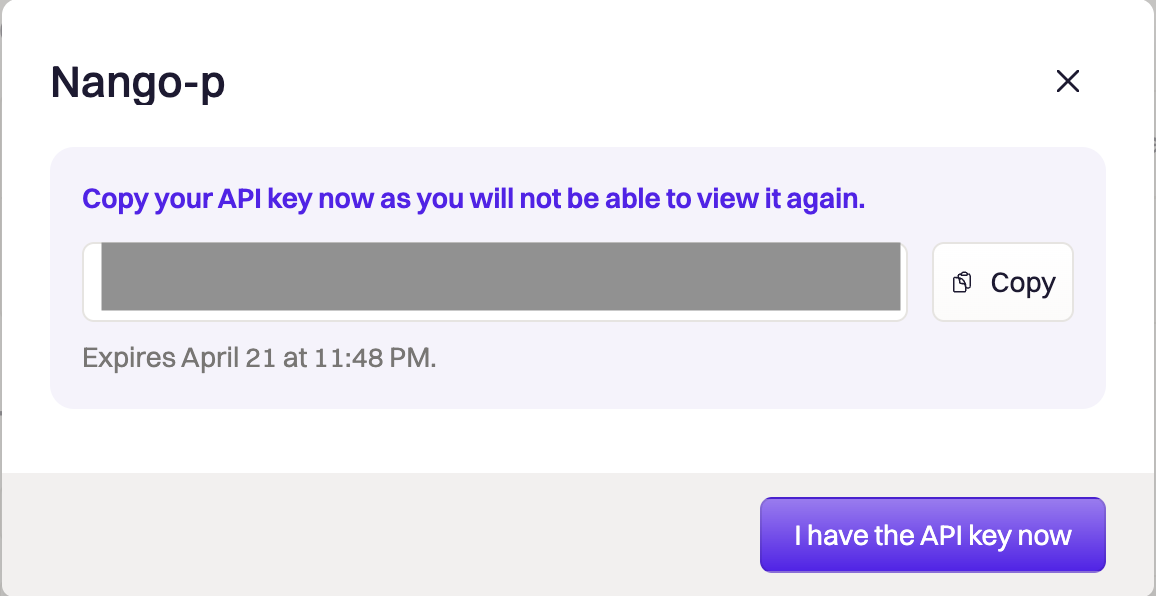
 6. Click **Create**, and your **API Key** will be generated.
 #### Step 2: Enter credentials in the Connect UI
Once you have your **API Key**:
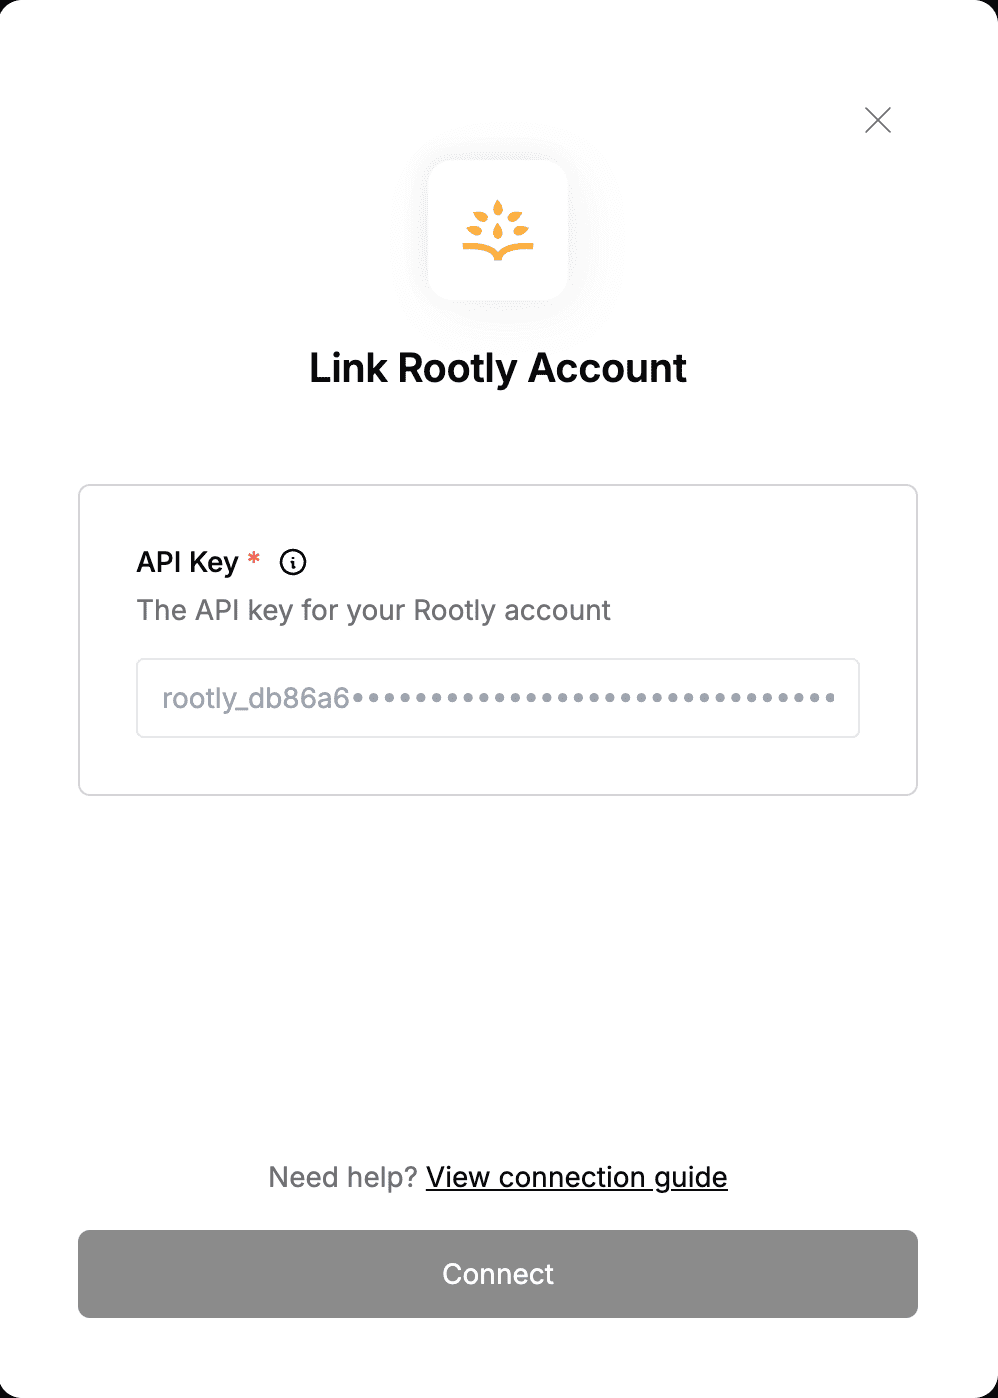
1. Open the form where you need to authenticate with Rootly.
2. Enter your **API Key** in its designated field.
3. Submit the form, and you should be successfully authenticated.
#### Step 2: Enter credentials in the Connect UI
Once you have your **API Key**:
1. Open the form where you need to authenticate with Rootly.
2. Enter your **API Key** in its designated field.
3. Submit the form, and you should be successfully authenticated.
 You are now connected to Rootly.