> ## Documentation Index
> Fetch the complete documentation index at: https://nango.dev/docs/llms.txt
> Use this file to discover all available pages before exploring further.
# Paligo - How do I link my account?
# Overview
To authenticate with Paligo, you will need:
1. **Instance Name** - The name of your Paligo instance (subdomain).
2. **Username** - Your Paligo account email address.
3. **API Key** - A key that grants Nango permission to interact with the Paligo API.
This guide will walk you through finding your instance name and generating an API key in Paligo.
### Prerequisites:
* You must have a registered Paligo account.
* You must be an **admin user** in Paligo — only admin users can access the API.
* The Paligo API is a public interface that provides access to several of Paligo's core features. Developers can use it to get external applications to interact with Paligo. You can find more information, including details of its endpoints, in the [Paligo API documentation](https://developers.paligo.net/reference).
### Instructions:
#### Step 1: Find your Paligo instance name
1. **Log in** to your Paligo account.
2. Check the URL in your browser's address bar. Your **Instance Name** is the text that appears after `https://` and before `.paligoapp.com`.
* For example, if the URL is `https://mycompany.paligoapp.com`, your **Instance Name** is `mycompany`.
#### Step 2: Create an API key
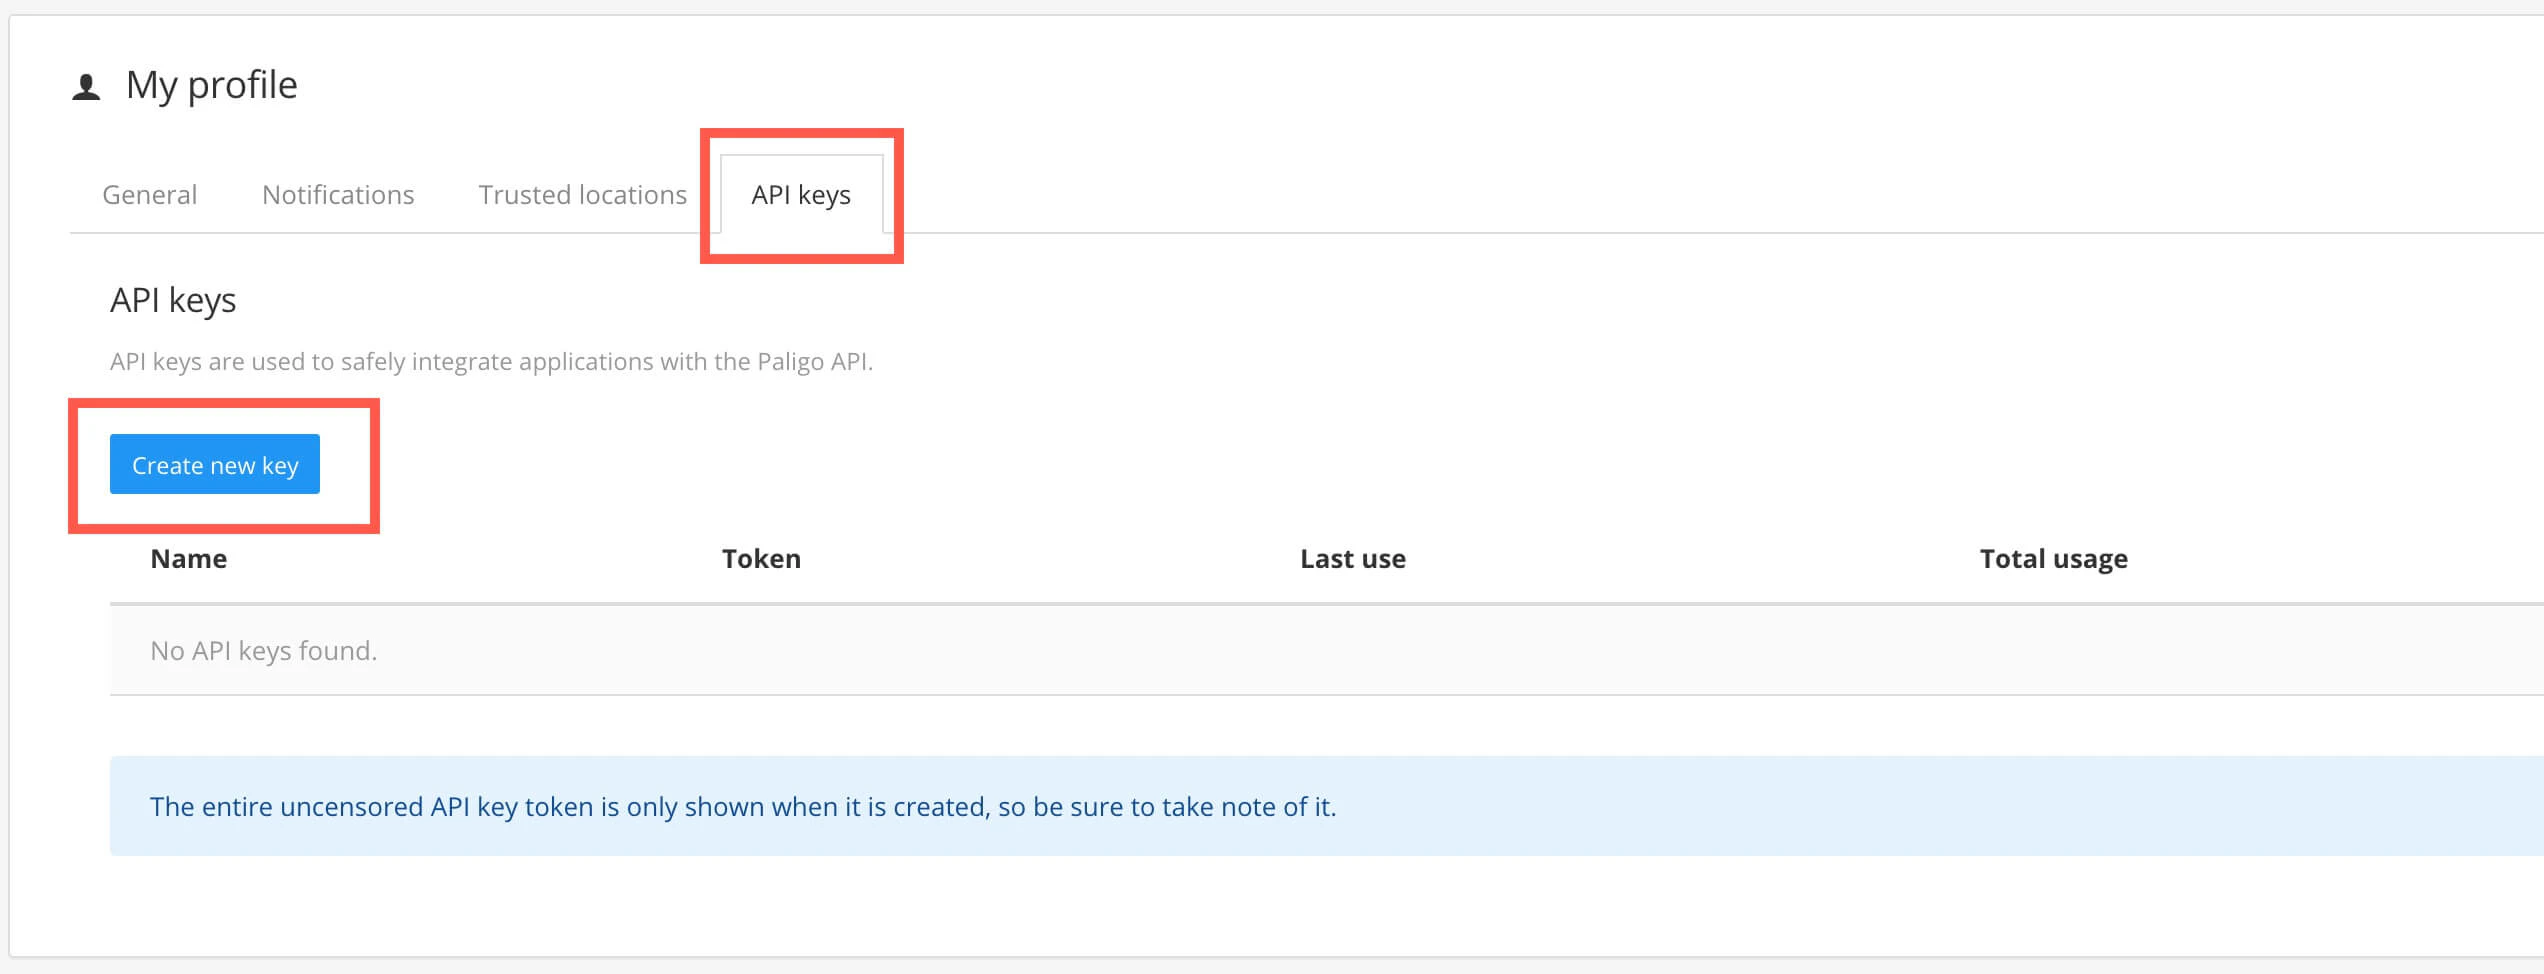
1. Select the **avatar** in the top-right corner to open the user menu.
2. Select **My Profile**.
3. Select the **API Keys** tab.
4. Select **Create New Key**.
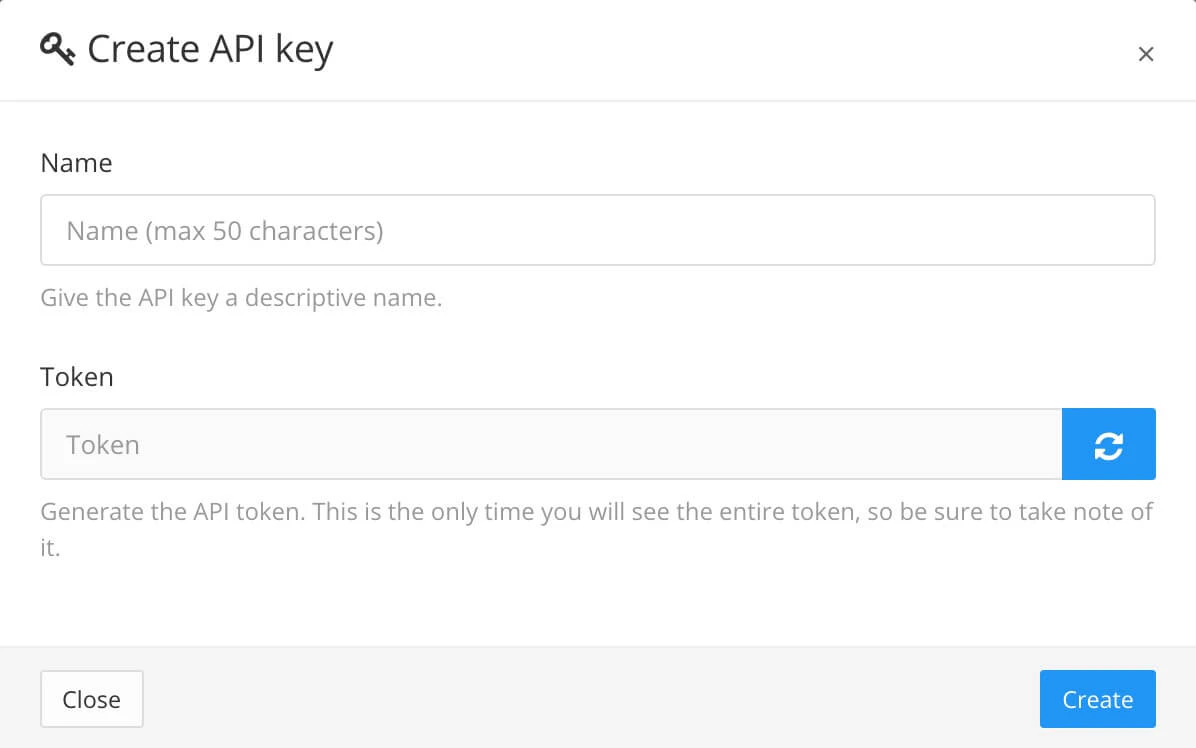
 5. Enter a descriptive **Name** for the key.
 6. Select the **refresh button** on the Token field to generate the key token.
7. **Copy and save the token** somewhere secure, this is the only time you will see the full key.
6. Select the **refresh button** on the Token field to generate the key token.
7. **Copy and save the token** somewhere secure, this is the only time you will see the full key.
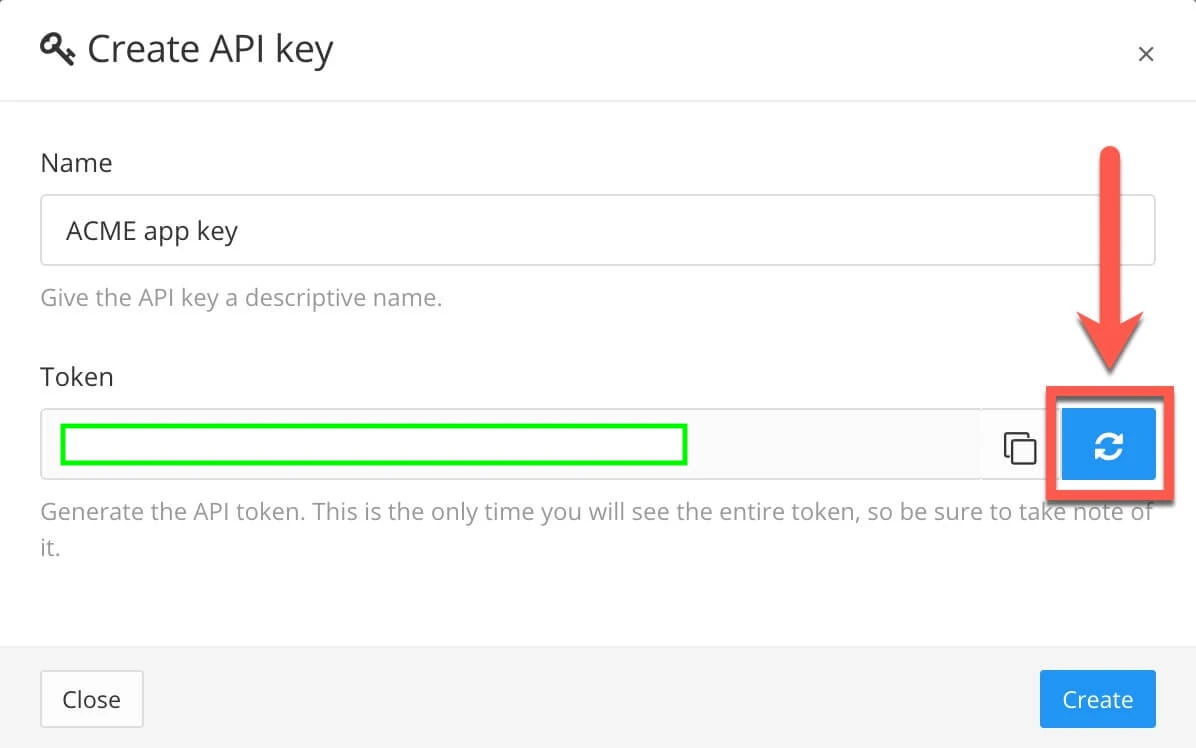 8. Select **Create**.
#### Step 3: Enter credentials in the Connect UI
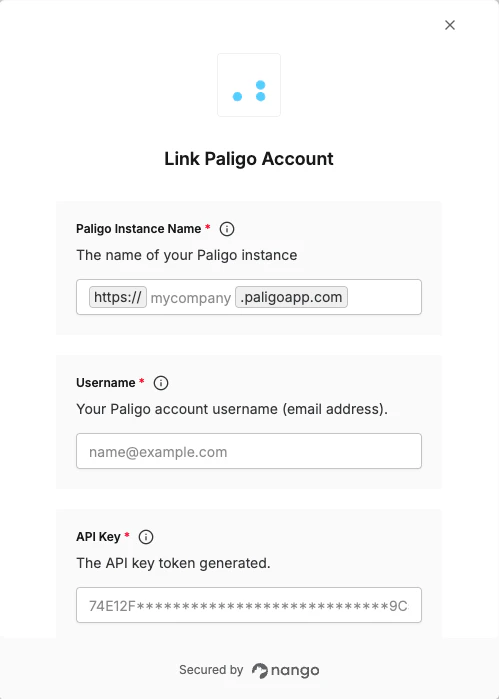
Once you have the **Instance Name**, **Username**, and **API Key**:
1. Open the form where you need to authenticate with Paligo.
2. Enter your **Instance Name**, **Username** (email address), and **API Key** in their respective fields.
3. Submit the form, and you should be successfully authenticated.
8. Select **Create**.
#### Step 3: Enter credentials in the Connect UI
Once you have the **Instance Name**, **Username**, and **API Key**:
1. Open the form where you need to authenticate with Paligo.
2. Enter your **Instance Name**, **Username** (email address), and **API Key** in their respective fields.
3. Submit the form, and you should be successfully authenticated.
 You are now connected to Paligo.