> ## Documentation Index
> Fetch the complete documentation index at: https://nango.dev/docs/llms.txt
> Use this file to discover all available pages before exploring further.
# Microsoft Intune - How do I link my account?
# Overview
To connect Microsoft Intune in Nango, you need to provide:
1. **Tenant ID** — The unique identifier for your organization that uses Microsoft services.
2. **Client ID** — The unique identifier that Azure assigns to your application when it's registered.
3. **Client Secret** — A unique string that enables the client application to access Microsoft Intune.
This guide will walk you through generating and finding these credentials within Azure.
### Prerequisites
* You must have an active Azure account with a Microsoft Intune subscription.
* You must have permission to register applications and grant admin consent in Microsoft Entra ID.
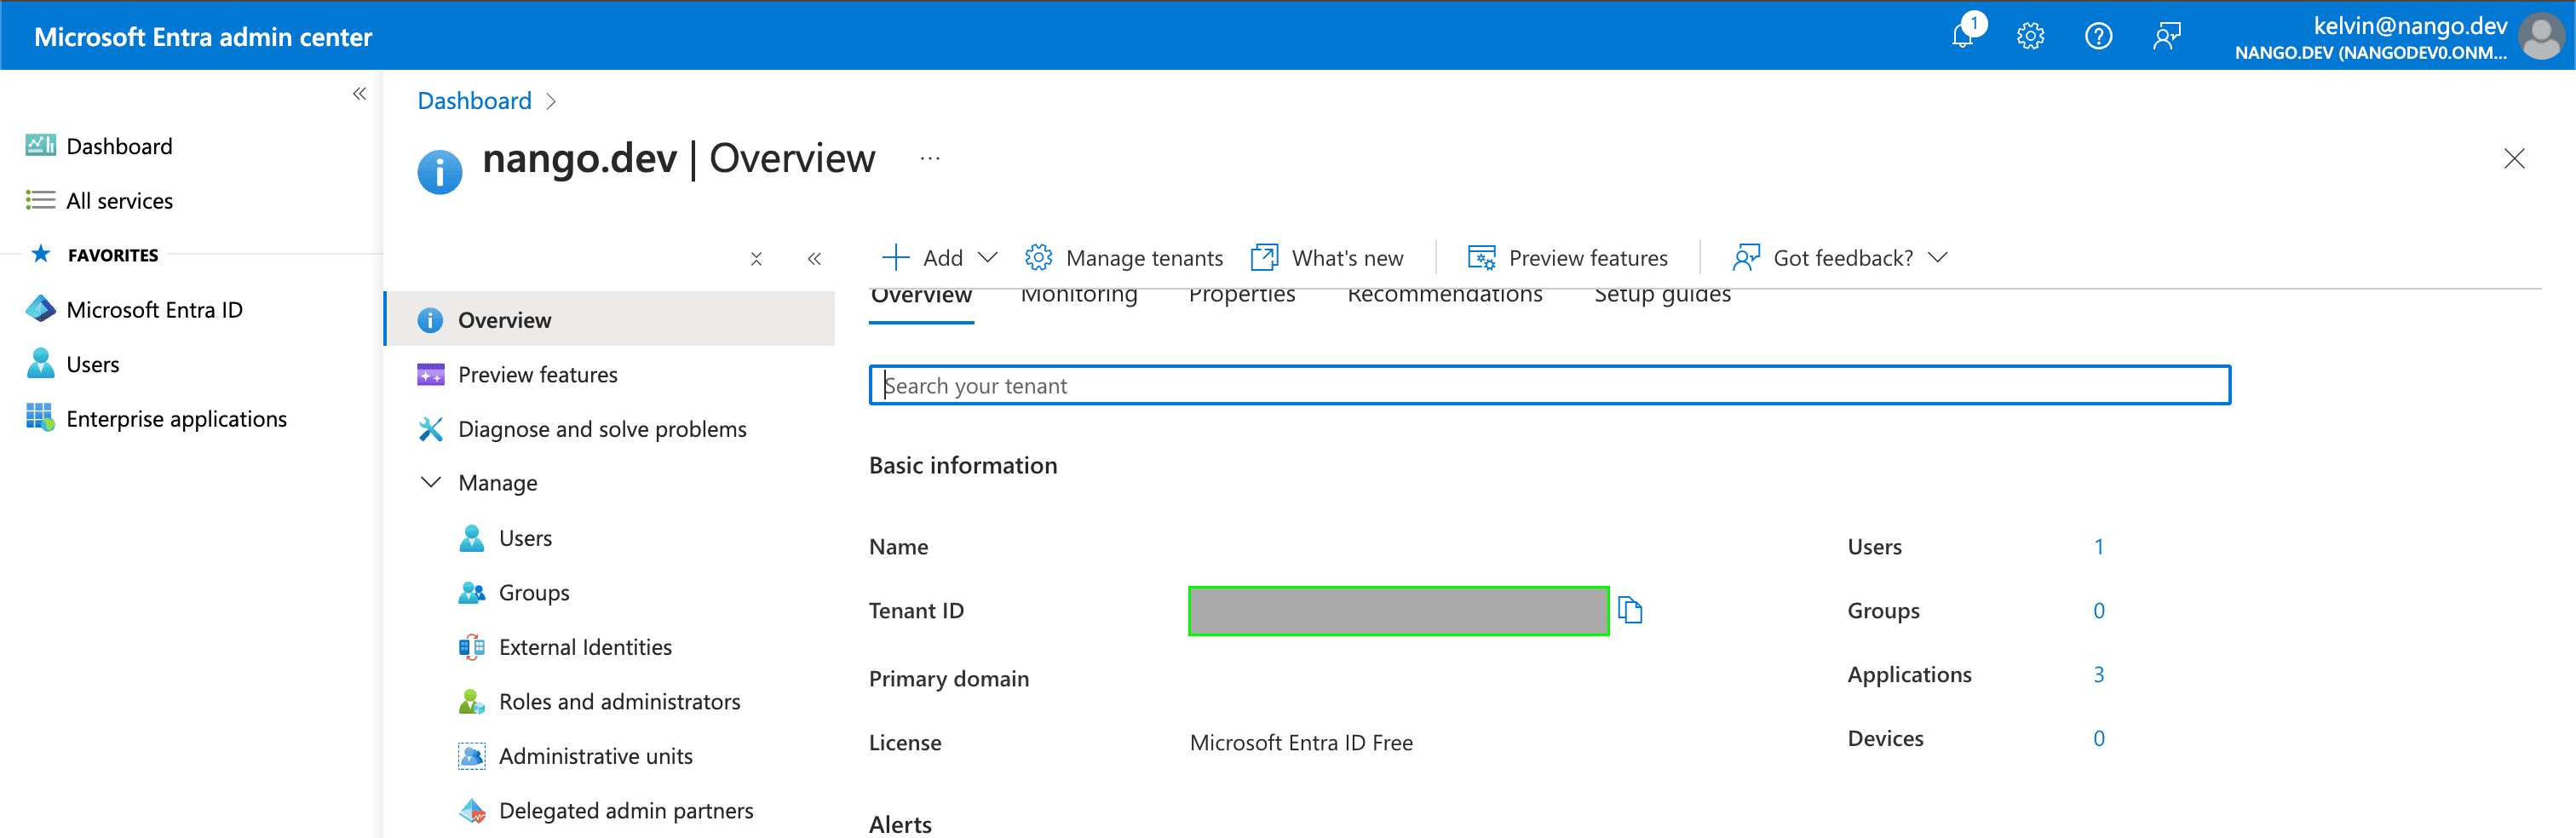
### Step 1: Finding your Tenant ID
1. Your Tenant ID can be found in the **Tenant ID** field on the [Overview page](https://aad.portal.azure.com/#view/Microsoft_AAD_IAM/ActiveDirectoryMenuBlade/~/Overview) within your Azure account.
 ### Step 2: Generating your Client ID
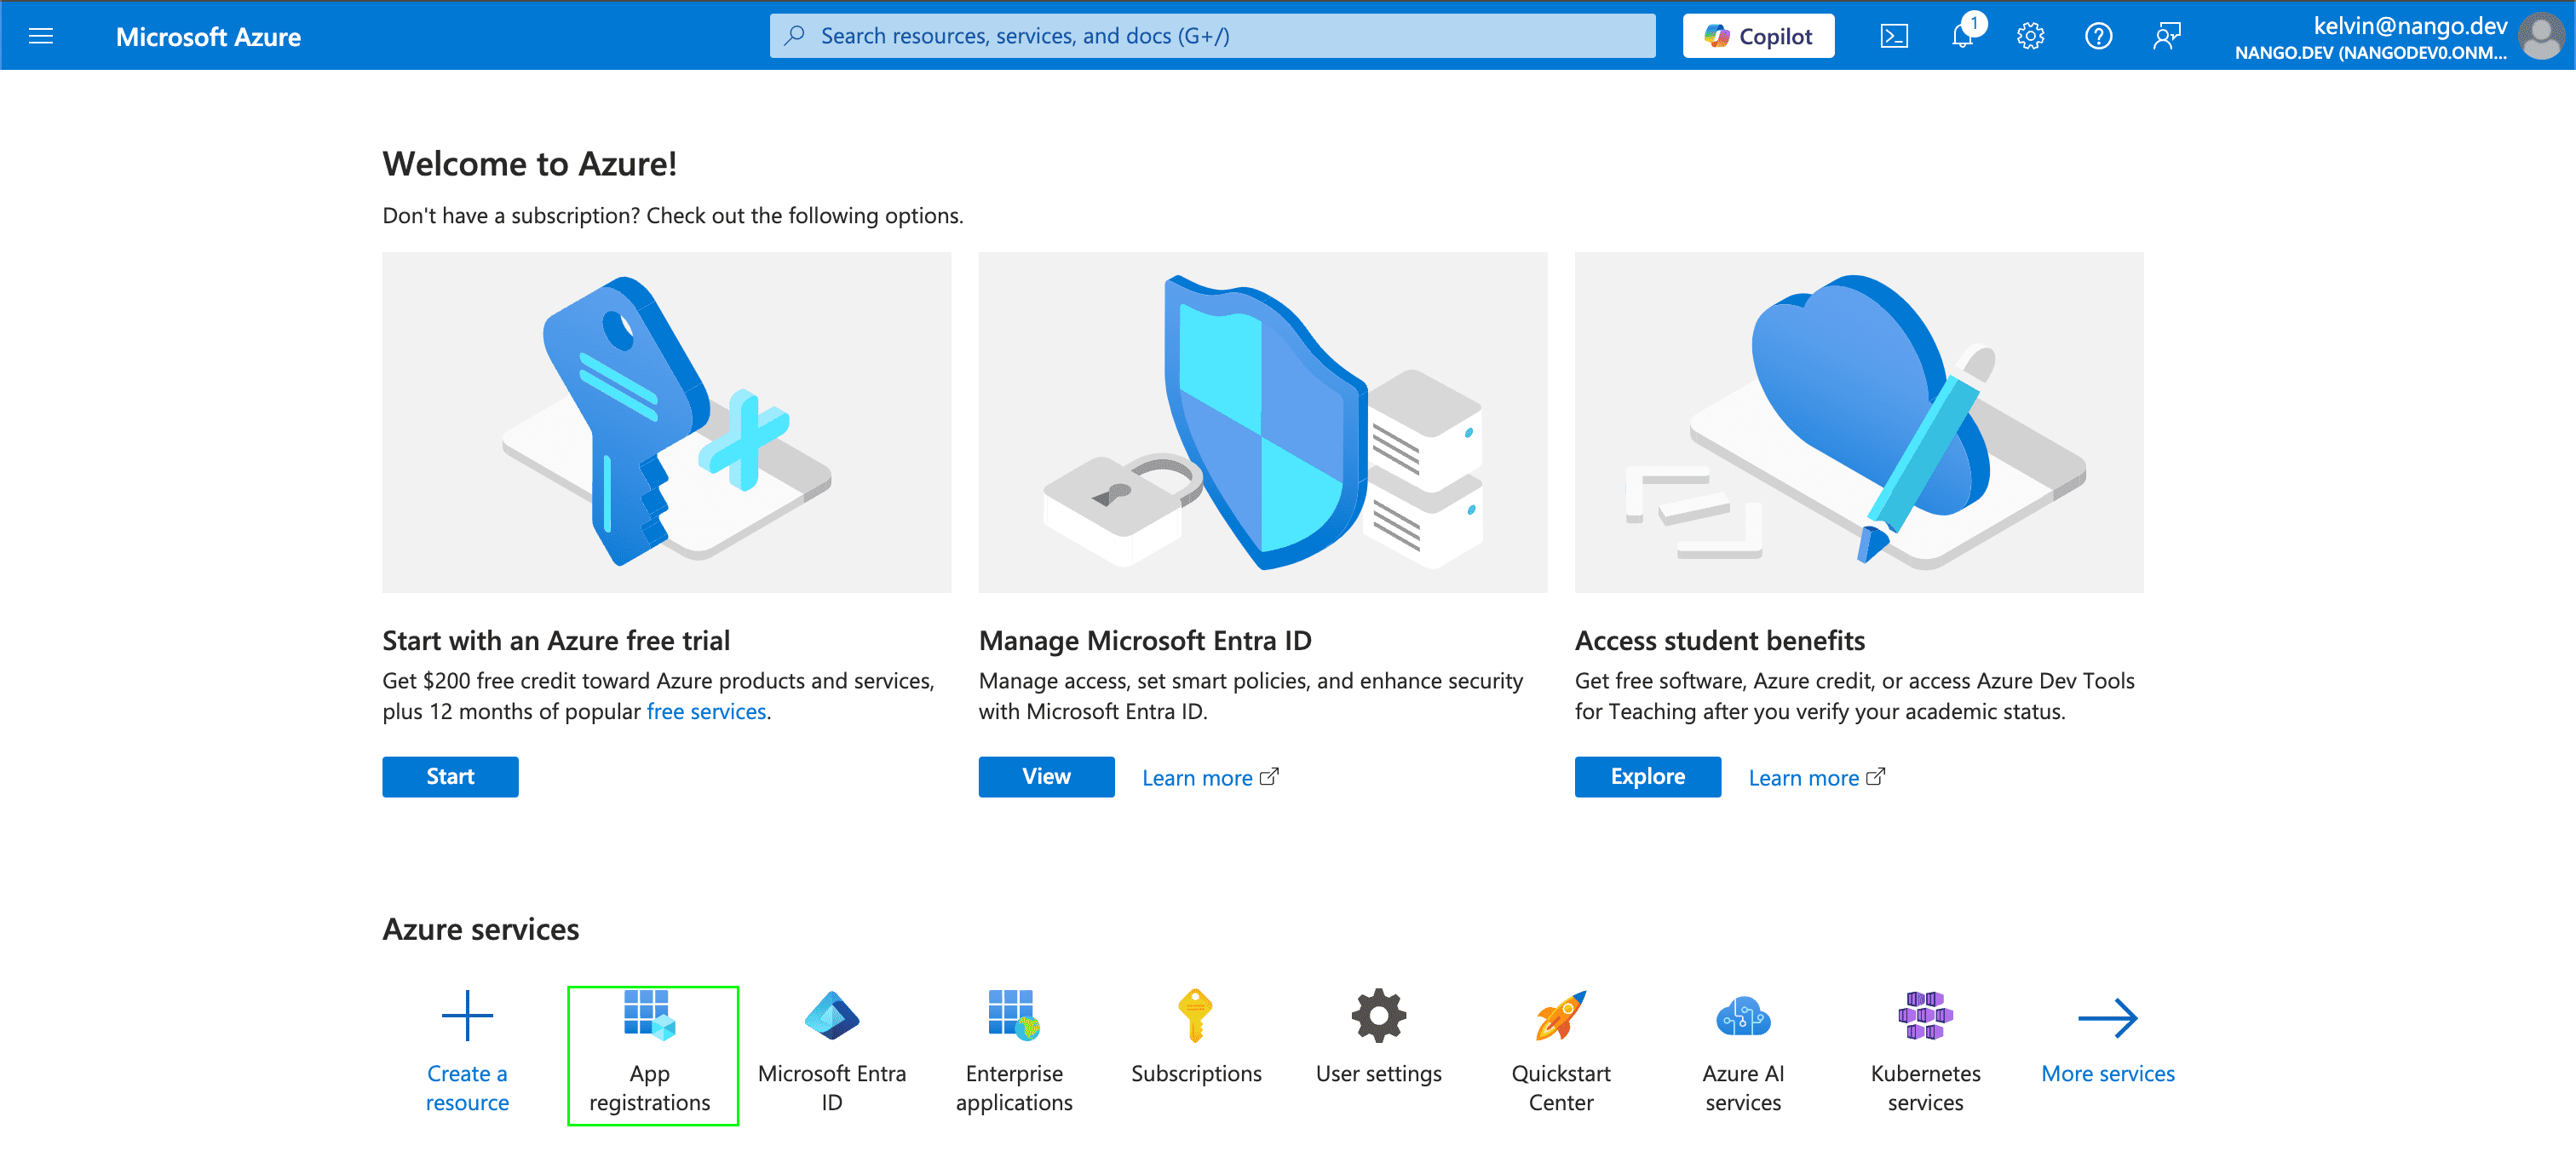
1. Navigate to the [Azure portal home page](https://portal.azure.com/#home) and sign in using the credentials of an administrator.
2. Select **App registrations**.
### Step 2: Generating your Client ID
1. Navigate to the [Azure portal home page](https://portal.azure.com/#home) and sign in using the credentials of an administrator.
2. Select **App registrations**.
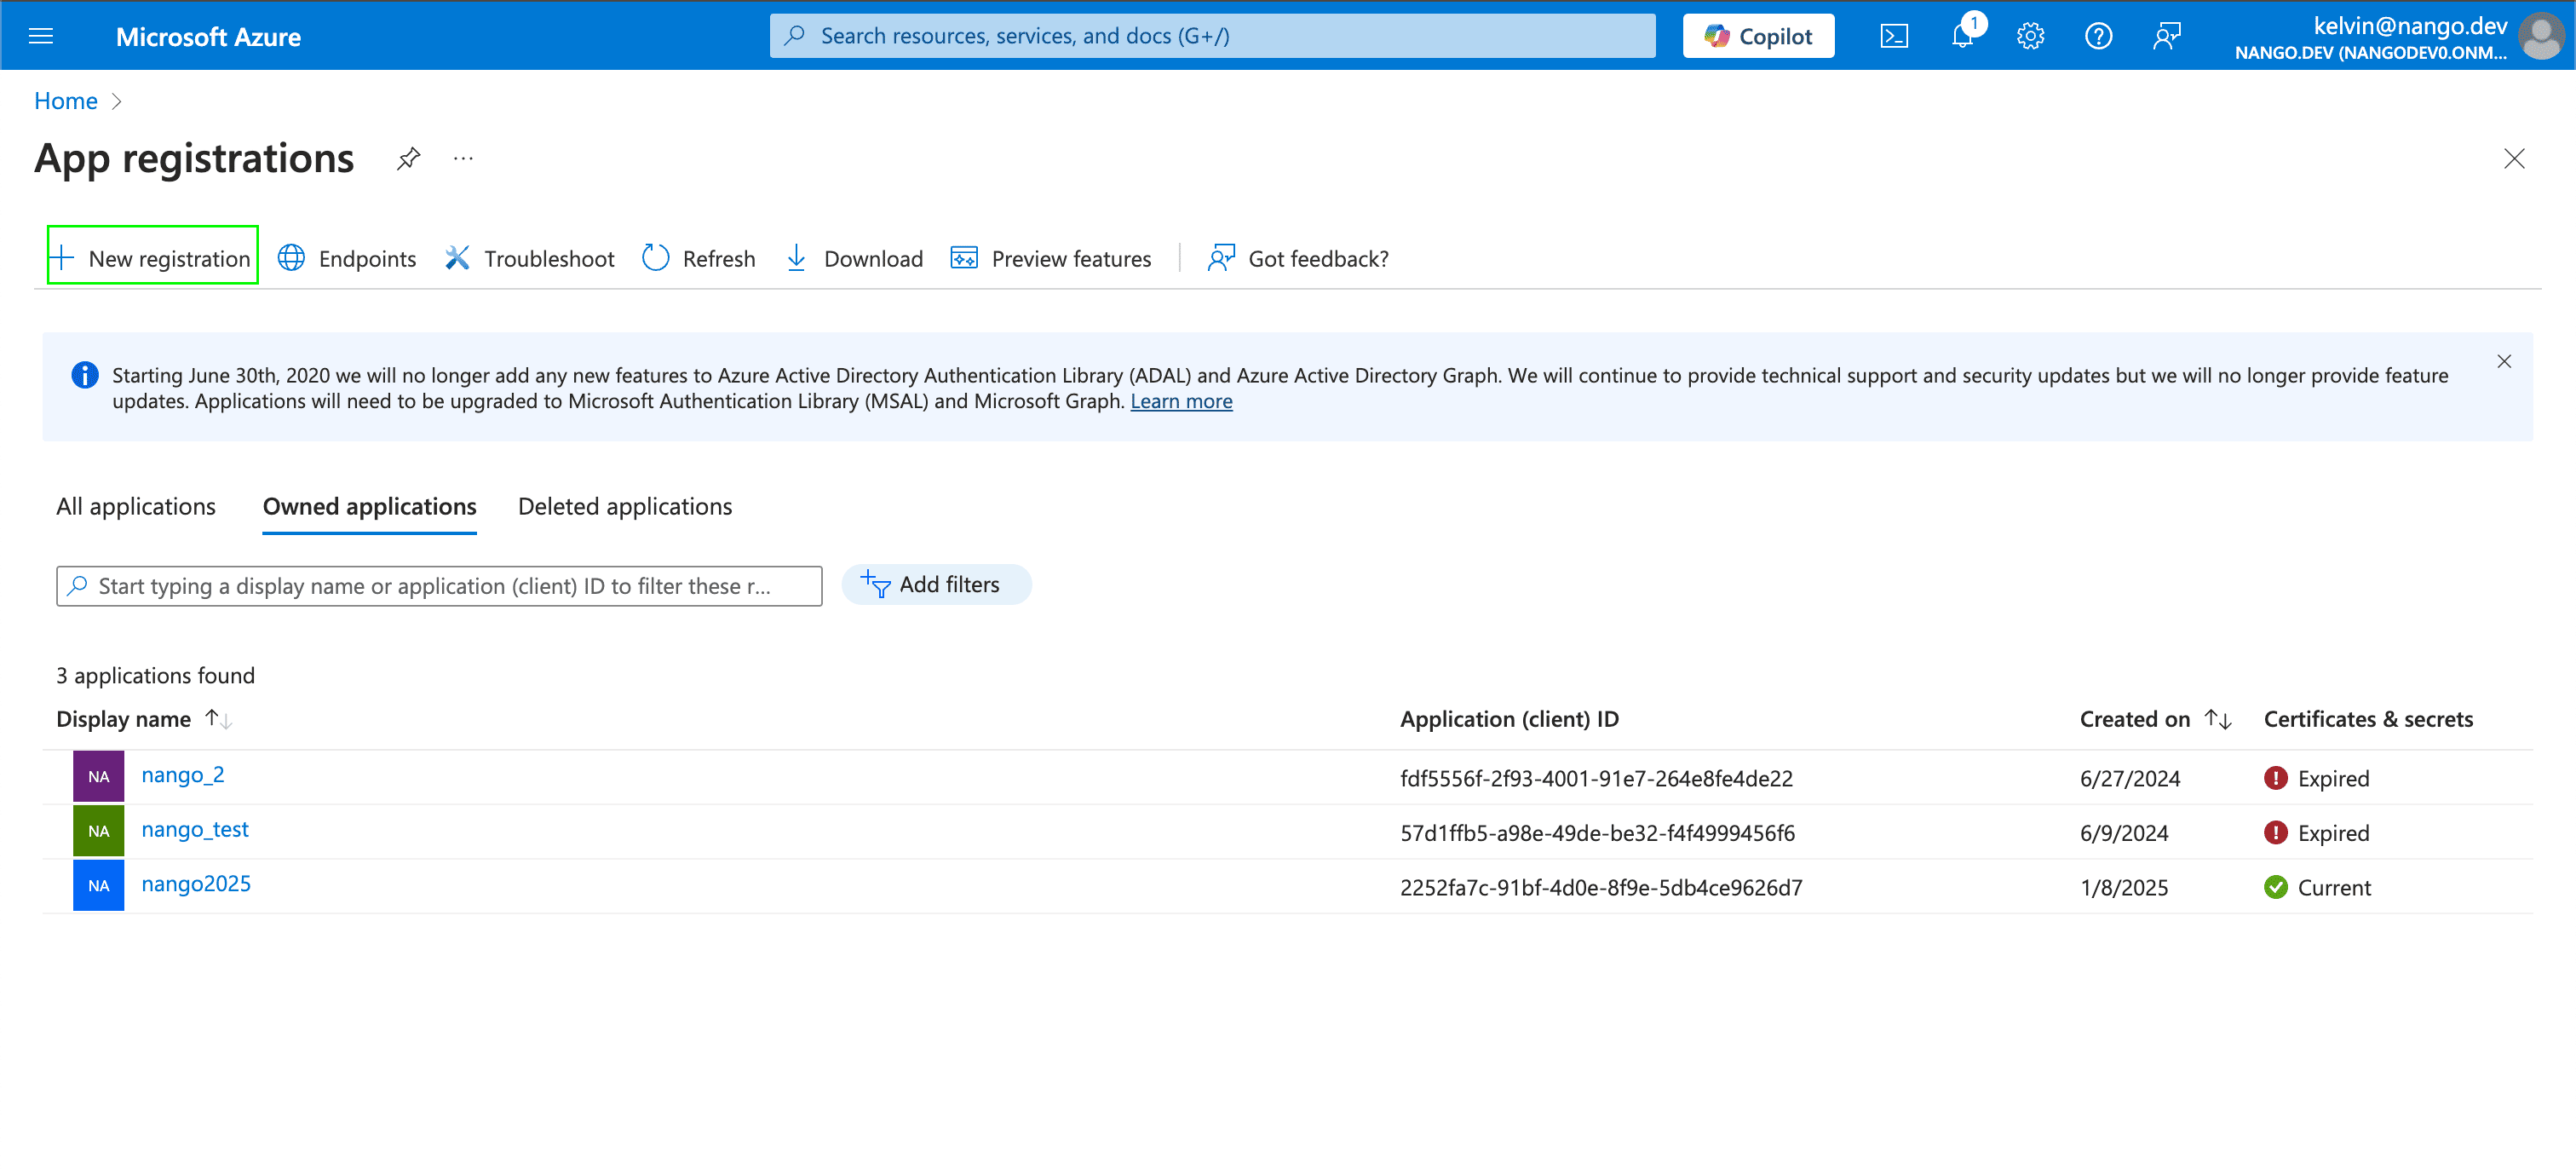
 3. Select **New registration**.
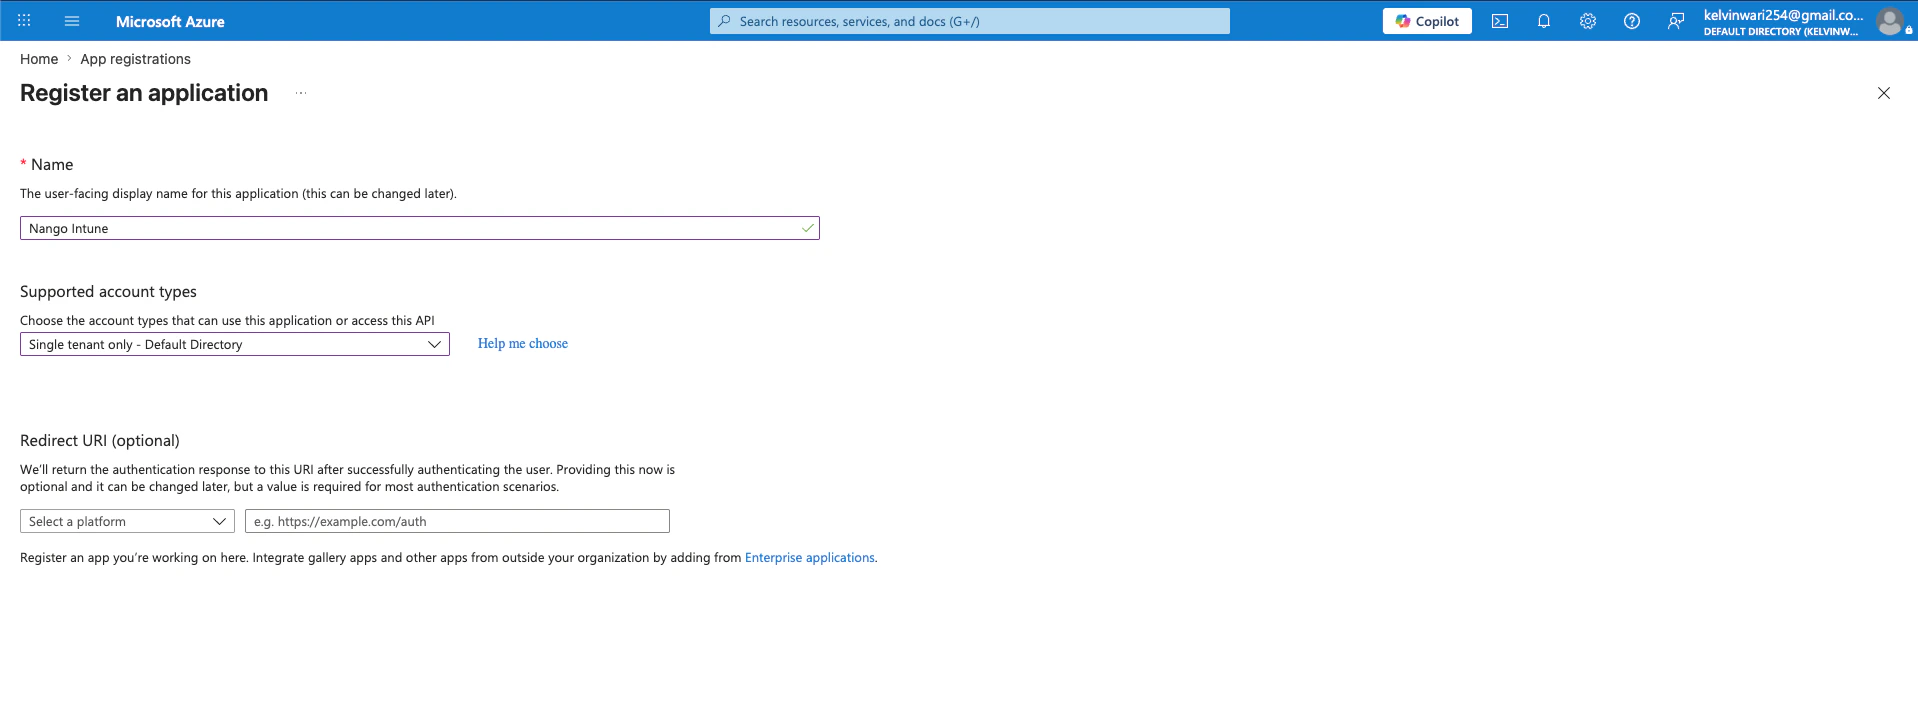
 4. In the **Register an application** section, enter a meaningful application name to display to users (e.g. `Nango Intune`). Under **Supported account types**, leave it to the default one which is **Single tenant Only** and click **Register**.
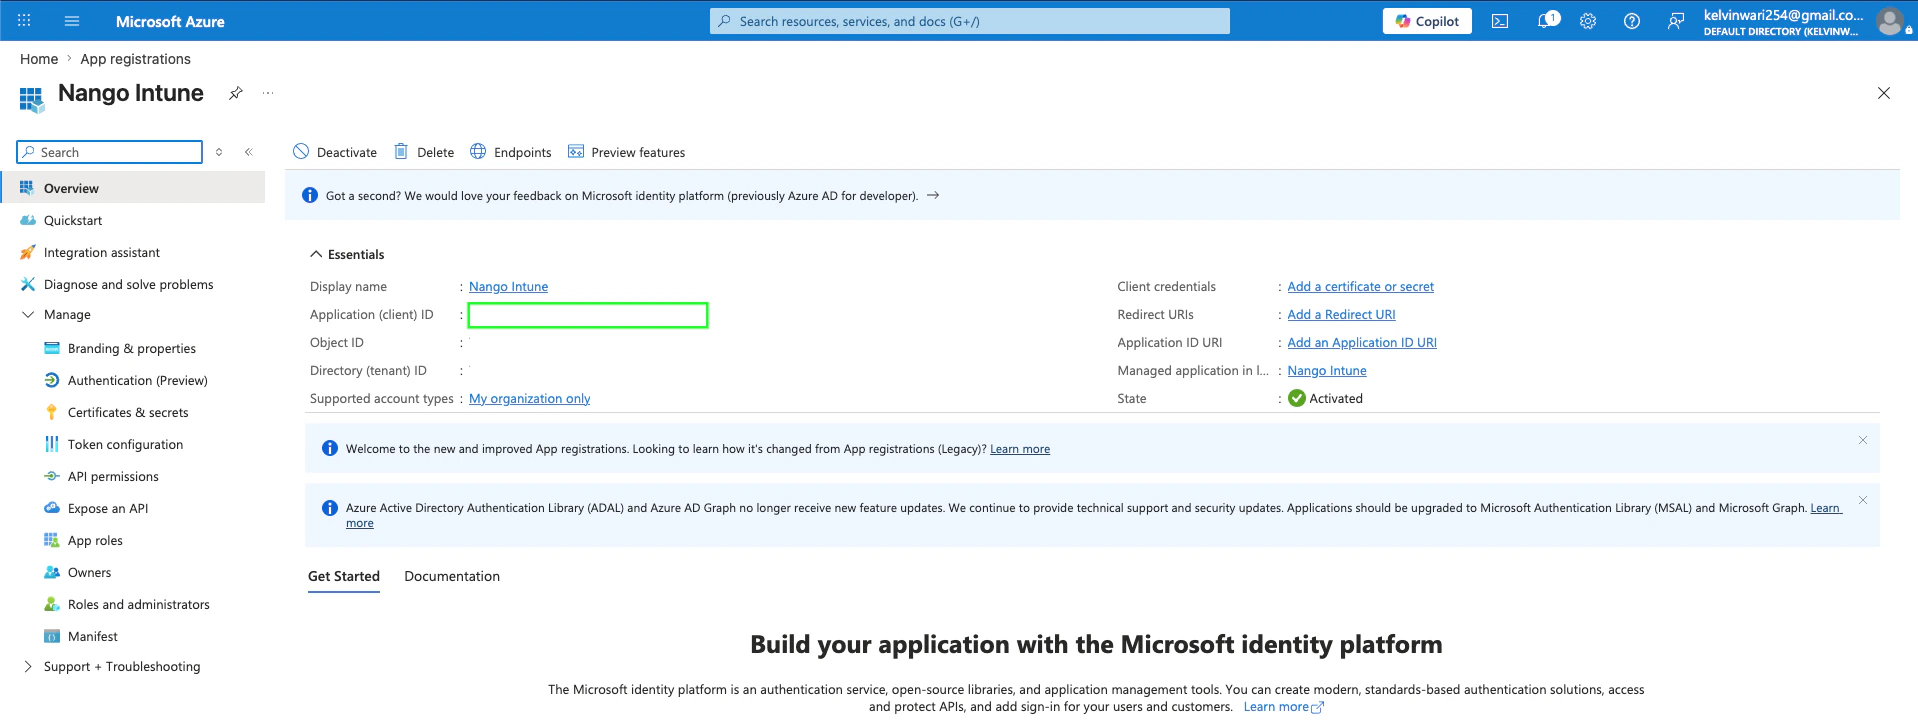
 5. Once you have registered your application, your **Client ID** will be displayed in the **Application (client) ID** field within the **Essentials**. Your **Tenant ID** is shown in the **Directory (tenant) ID** field.
 ### Step 3: Generating your Client Secret
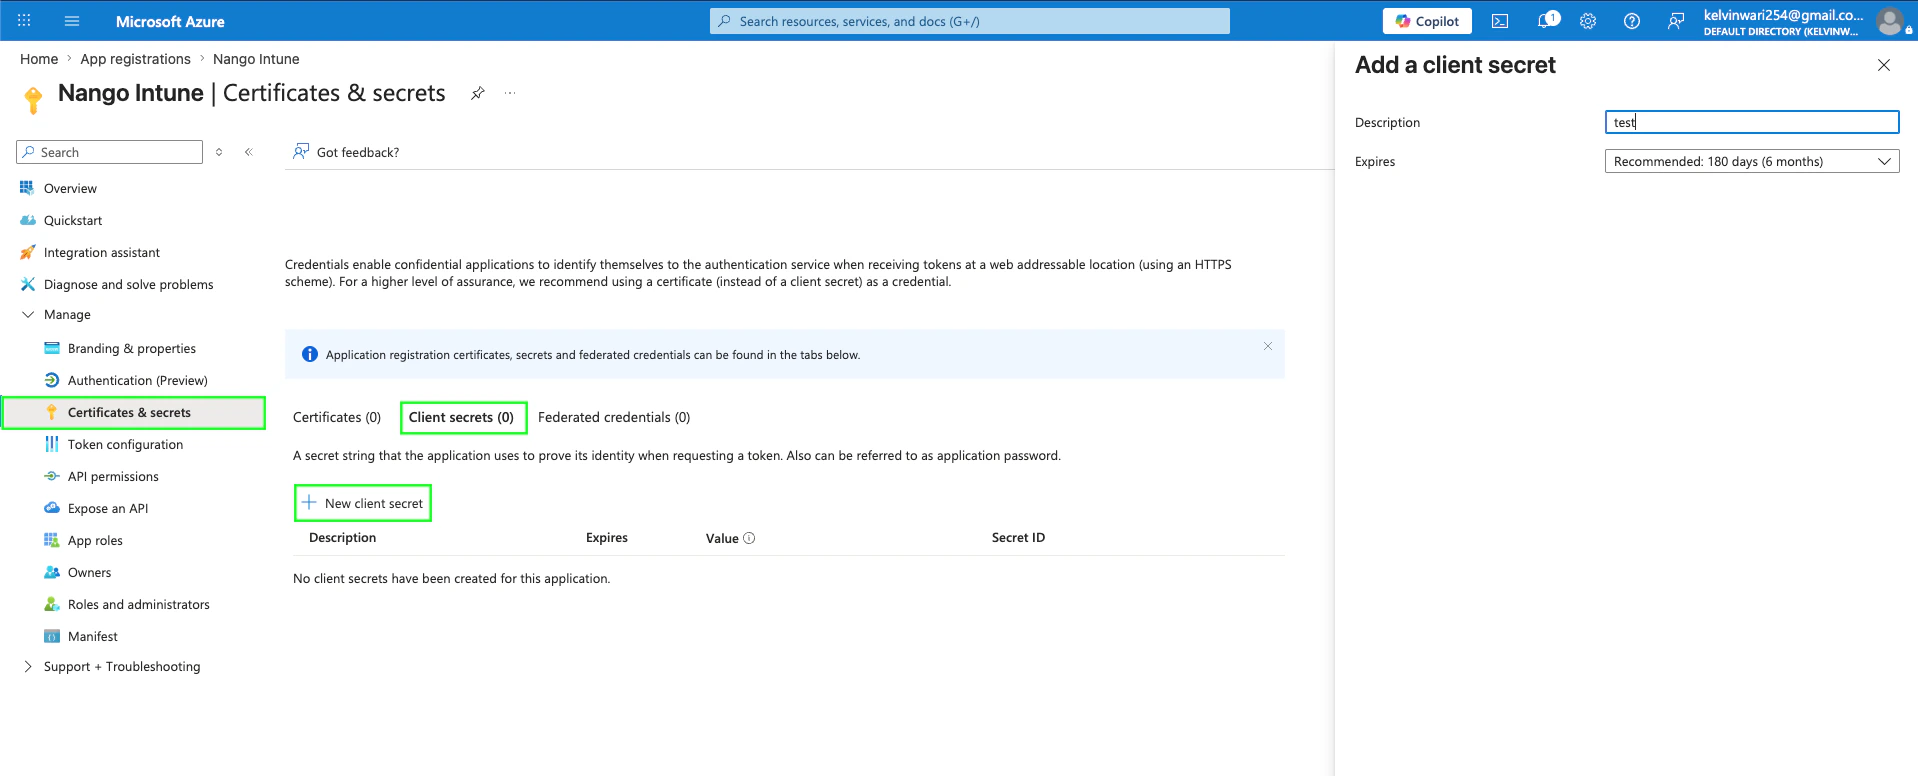
1. After registering a new app in the [step above](#step-2-generating-your-client-id), navigate to **Certificates & secrets** under **Manage**, and click **New client secret**.
2. A pop-up modal will appear, prompting you to enter your secret's **Description** and **Expires** values. Fill these then click on **Add**.
### Step 3: Generating your Client Secret
1. After registering a new app in the [step above](#step-2-generating-your-client-id), navigate to **Certificates & secrets** under **Manage**, and click **New client secret**.
2. A pop-up modal will appear, prompting you to enter your secret's **Description** and **Expires** values. Fill these then click on **Add**.
 3. Once completed, your **Client Secret** will be generated. This value can be found in the **Value** field within the **Client Secrets** table.
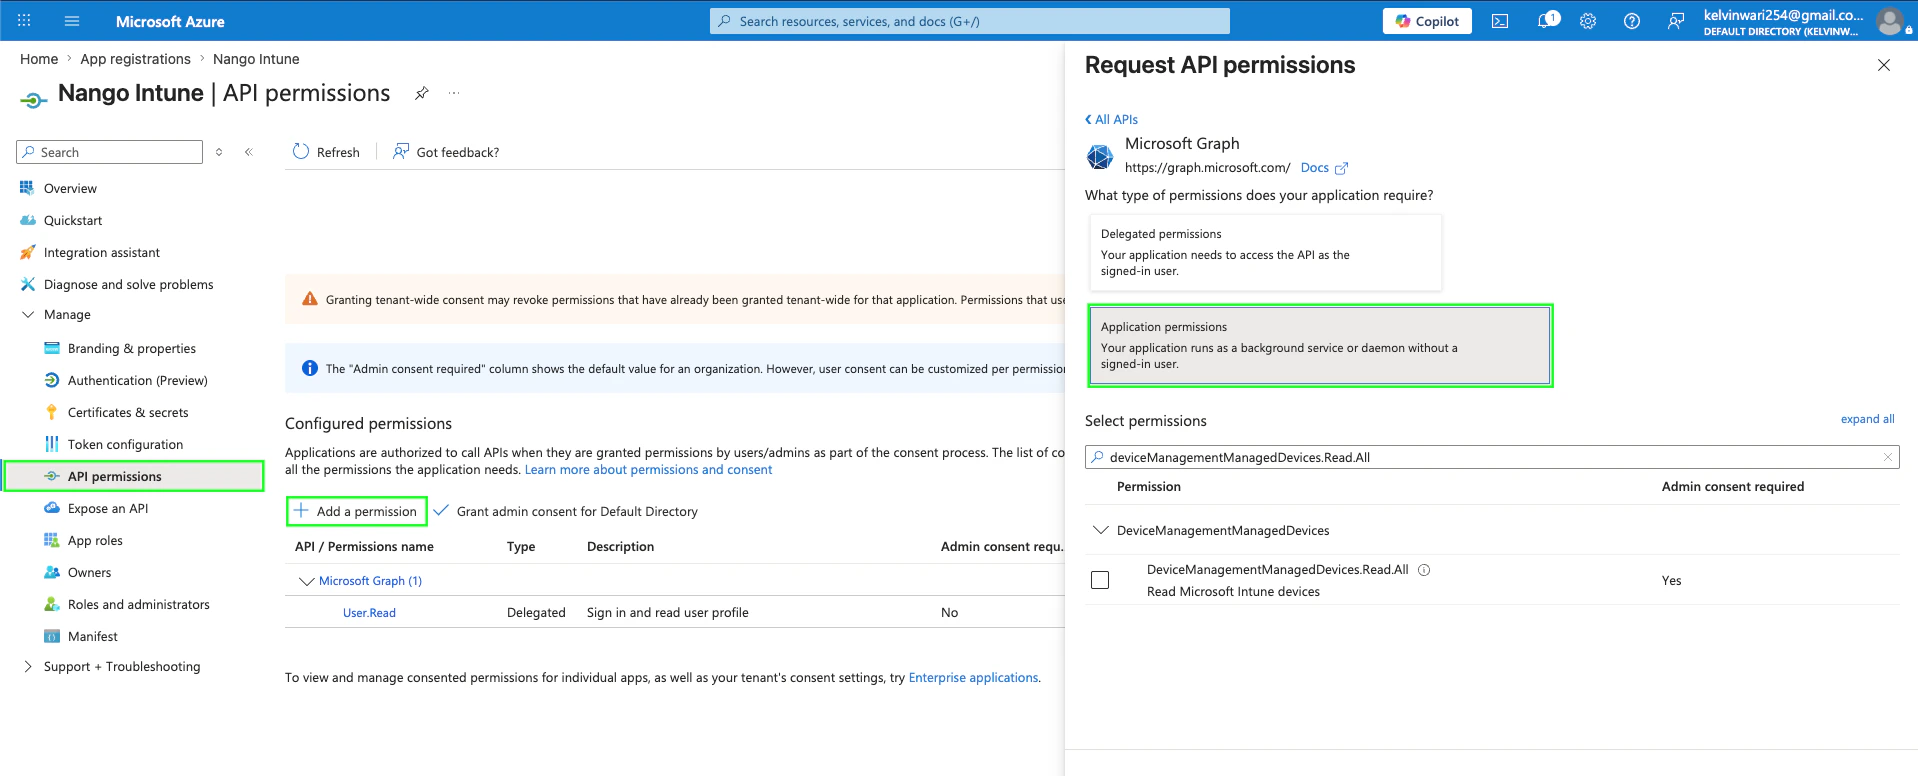
4. After generating the **Client Secret**, you must grant the registered application the necessary permissions. Navigate to **API permissions**, select **Add a permission**, and choose **Microsoft Graph**.
5. From the displayed list, choose **Application permissions**, select the required Intune permissions, and click **Add permissions**. Common permissions include:
* `DeviceManagementManagedDevices.Read.All` — read managed devices
* `DeviceManagementManagedDevices.ReadWrite.All` — read and write managed devices
* `DeviceManagementConfiguration.Read.All` — read device configuration policies
* `DeviceManagementApps.Read.All` — read mobile app management data
3. Once completed, your **Client Secret** will be generated. This value can be found in the **Value** field within the **Client Secrets** table.
4. After generating the **Client Secret**, you must grant the registered application the necessary permissions. Navigate to **API permissions**, select **Add a permission**, and choose **Microsoft Graph**.
5. From the displayed list, choose **Application permissions**, select the required Intune permissions, and click **Add permissions**. Common permissions include:
* `DeviceManagementManagedDevices.Read.All` — read managed devices
* `DeviceManagementManagedDevices.ReadWrite.All` — read and write managed devices
* `DeviceManagementConfiguration.Read.All` — read device configuration policies
* `DeviceManagementApps.Read.All` — read mobile app management data
 6. Select **Grant admin consent for \[your organization]** and confirm. Admin consent is required for application permissions.
The Intune service must be correctly licensed on the tenant for these API calls to succeed, regardless of whether the permissions are granted.
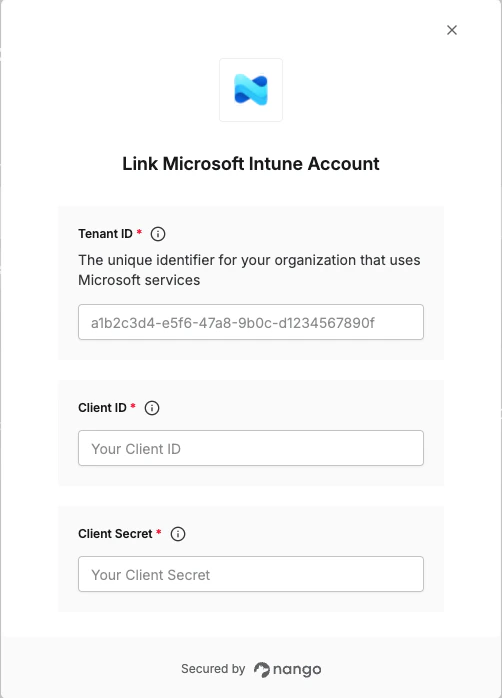
### Step 4: Enter credentials in the Connect UI
Once you have your credentials:
1. Open the form where you need to authenticate with Microsoft Intune.
2. Enter the **Tenant ID**, **Client ID**, and **Client Secret** in their designated fields.
3. Submit the form, and you should be successfully authenticated.
6. Select **Grant admin consent for \[your organization]** and confirm. Admin consent is required for application permissions.
The Intune service must be correctly licensed on the tenant for these API calls to succeed, regardless of whether the permissions are granted.
### Step 4: Enter credentials in the Connect UI
Once you have your credentials:
1. Open the form where you need to authenticate with Microsoft Intune.
2. Enter the **Tenant ID**, **Client ID**, and **Client Secret** in their designated fields.
3. Submit the form, and you should be successfully authenticated.
 You are now connected to Microsoft Intune.