> ## Documentation Index
> Fetch the complete documentation index at: https://nango.dev/docs/llms.txt
> Use this file to discover all available pages before exploring further.
# Halo PSA - How do I link my account?
# Overview
To authenticate with Halo PSA, you need:
1. **Hostname** - Your Halo PSA hostname.
2. **Client ID** - The client ID from your Halo API application.
3. **Client Secret** - The client secret from your Halo API application.
This guide will walk you through finding your Halo API details and creating an API application that uses OAuth 2.0 Client Credentials.
### Prerequisites
* You must have administrator access to your Halo PSA instance.
* You must be able to create API applications in Halo.
### Instructions
#### Step 1: Find your Halo API details
The Halo API is available on the same site as your Halo web application. For example, if your Halo web application is hosted at `https://example.halopsa.com`, enter `example.halopsa.com`.
1. Log in to Halo PSA as an administrator.
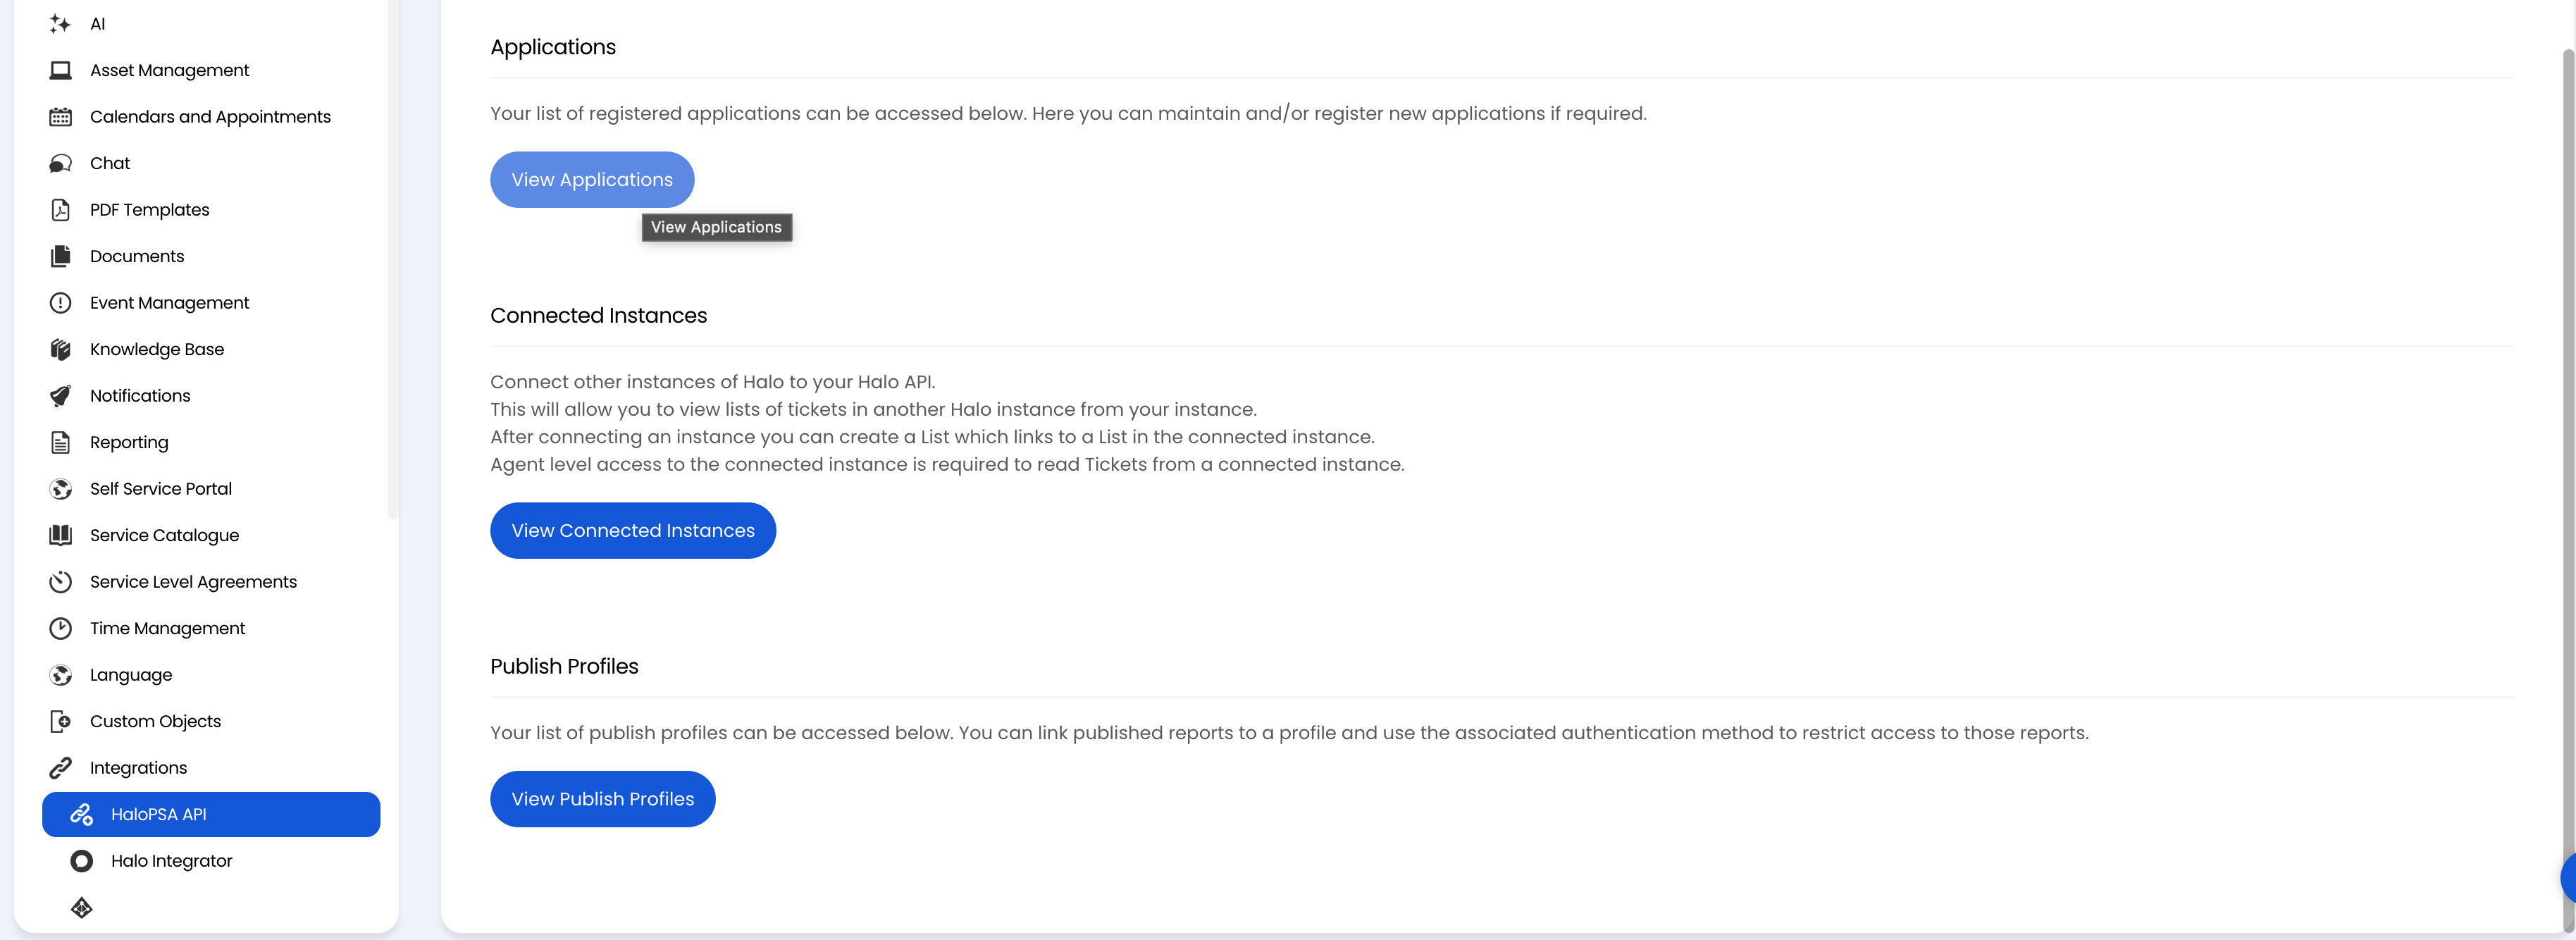
2. Go to **Configuration** > **Integrations** > **Halo API**.
3. Open **API Details**.
4. Copy the hostname from your **Resource Server** or **Authorisation Endpoint** URL.
Example value:
```text theme={null}
Hostname: example.halopsa.com
```
#### Step 2: Create an API-only agent
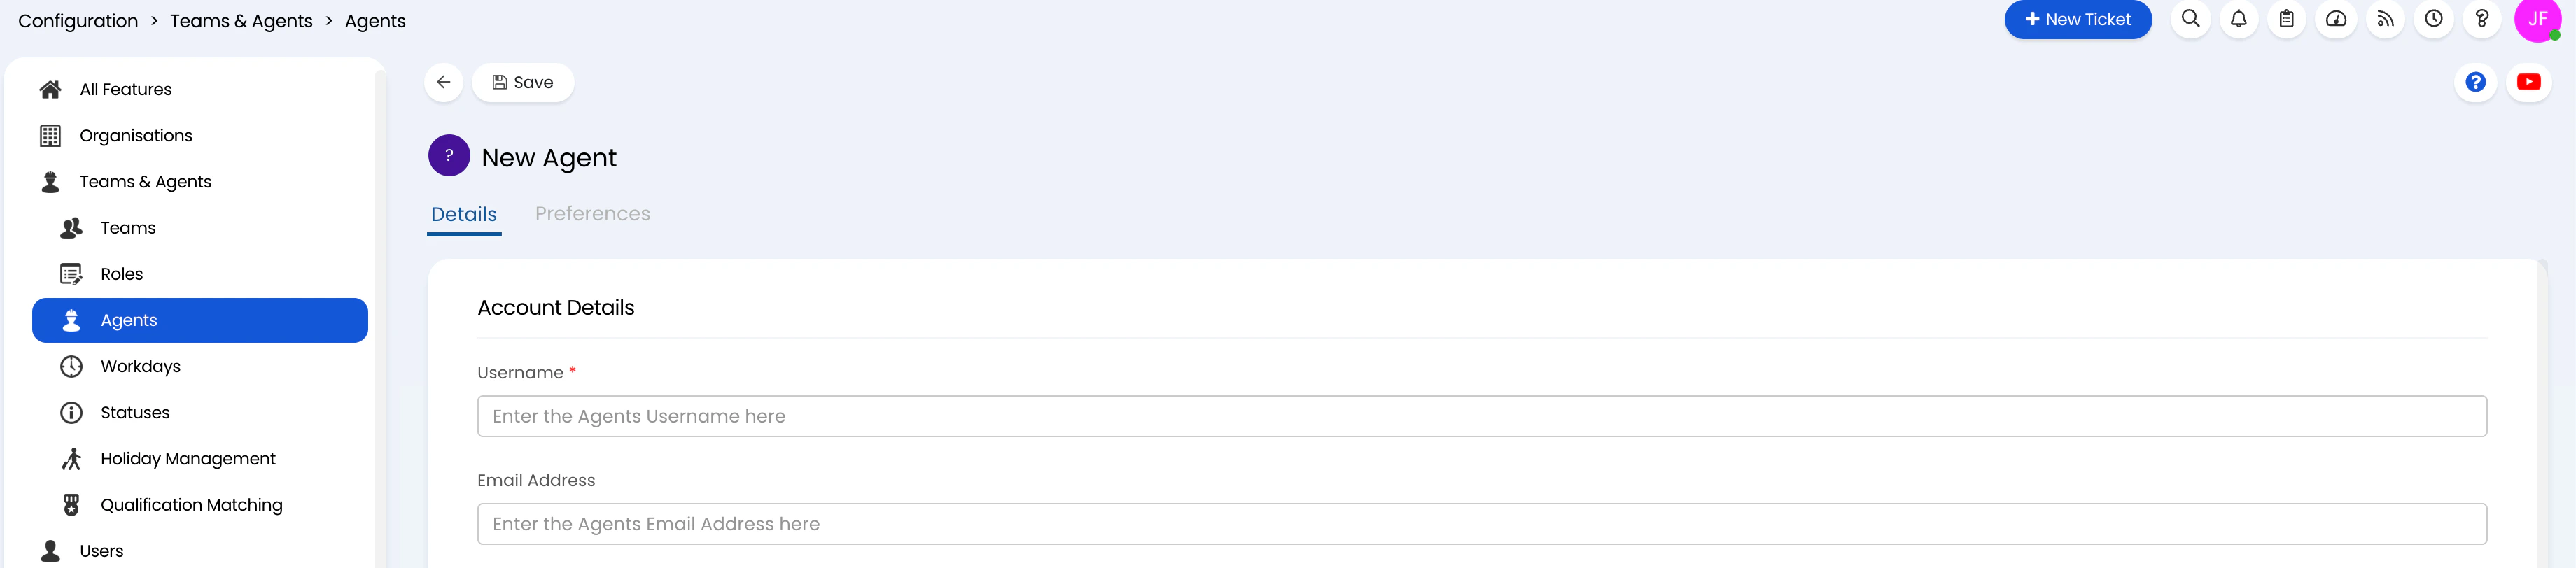
1. Go to **Configuration** > **Teams & Agents** > **Agents**.
2. Create a new agent for this integration, such as `Nango Integration`.
3. Enable **Is an API-only Agent**.
4. Assign this agent to the teams and departments whose tickets, customers, assets, and other records Nango should access.
Halo uses agent team, department, and permission settings when returning API data. If connected API calls return empty lists or authorization errors, check this agent's visibility before changing API code.
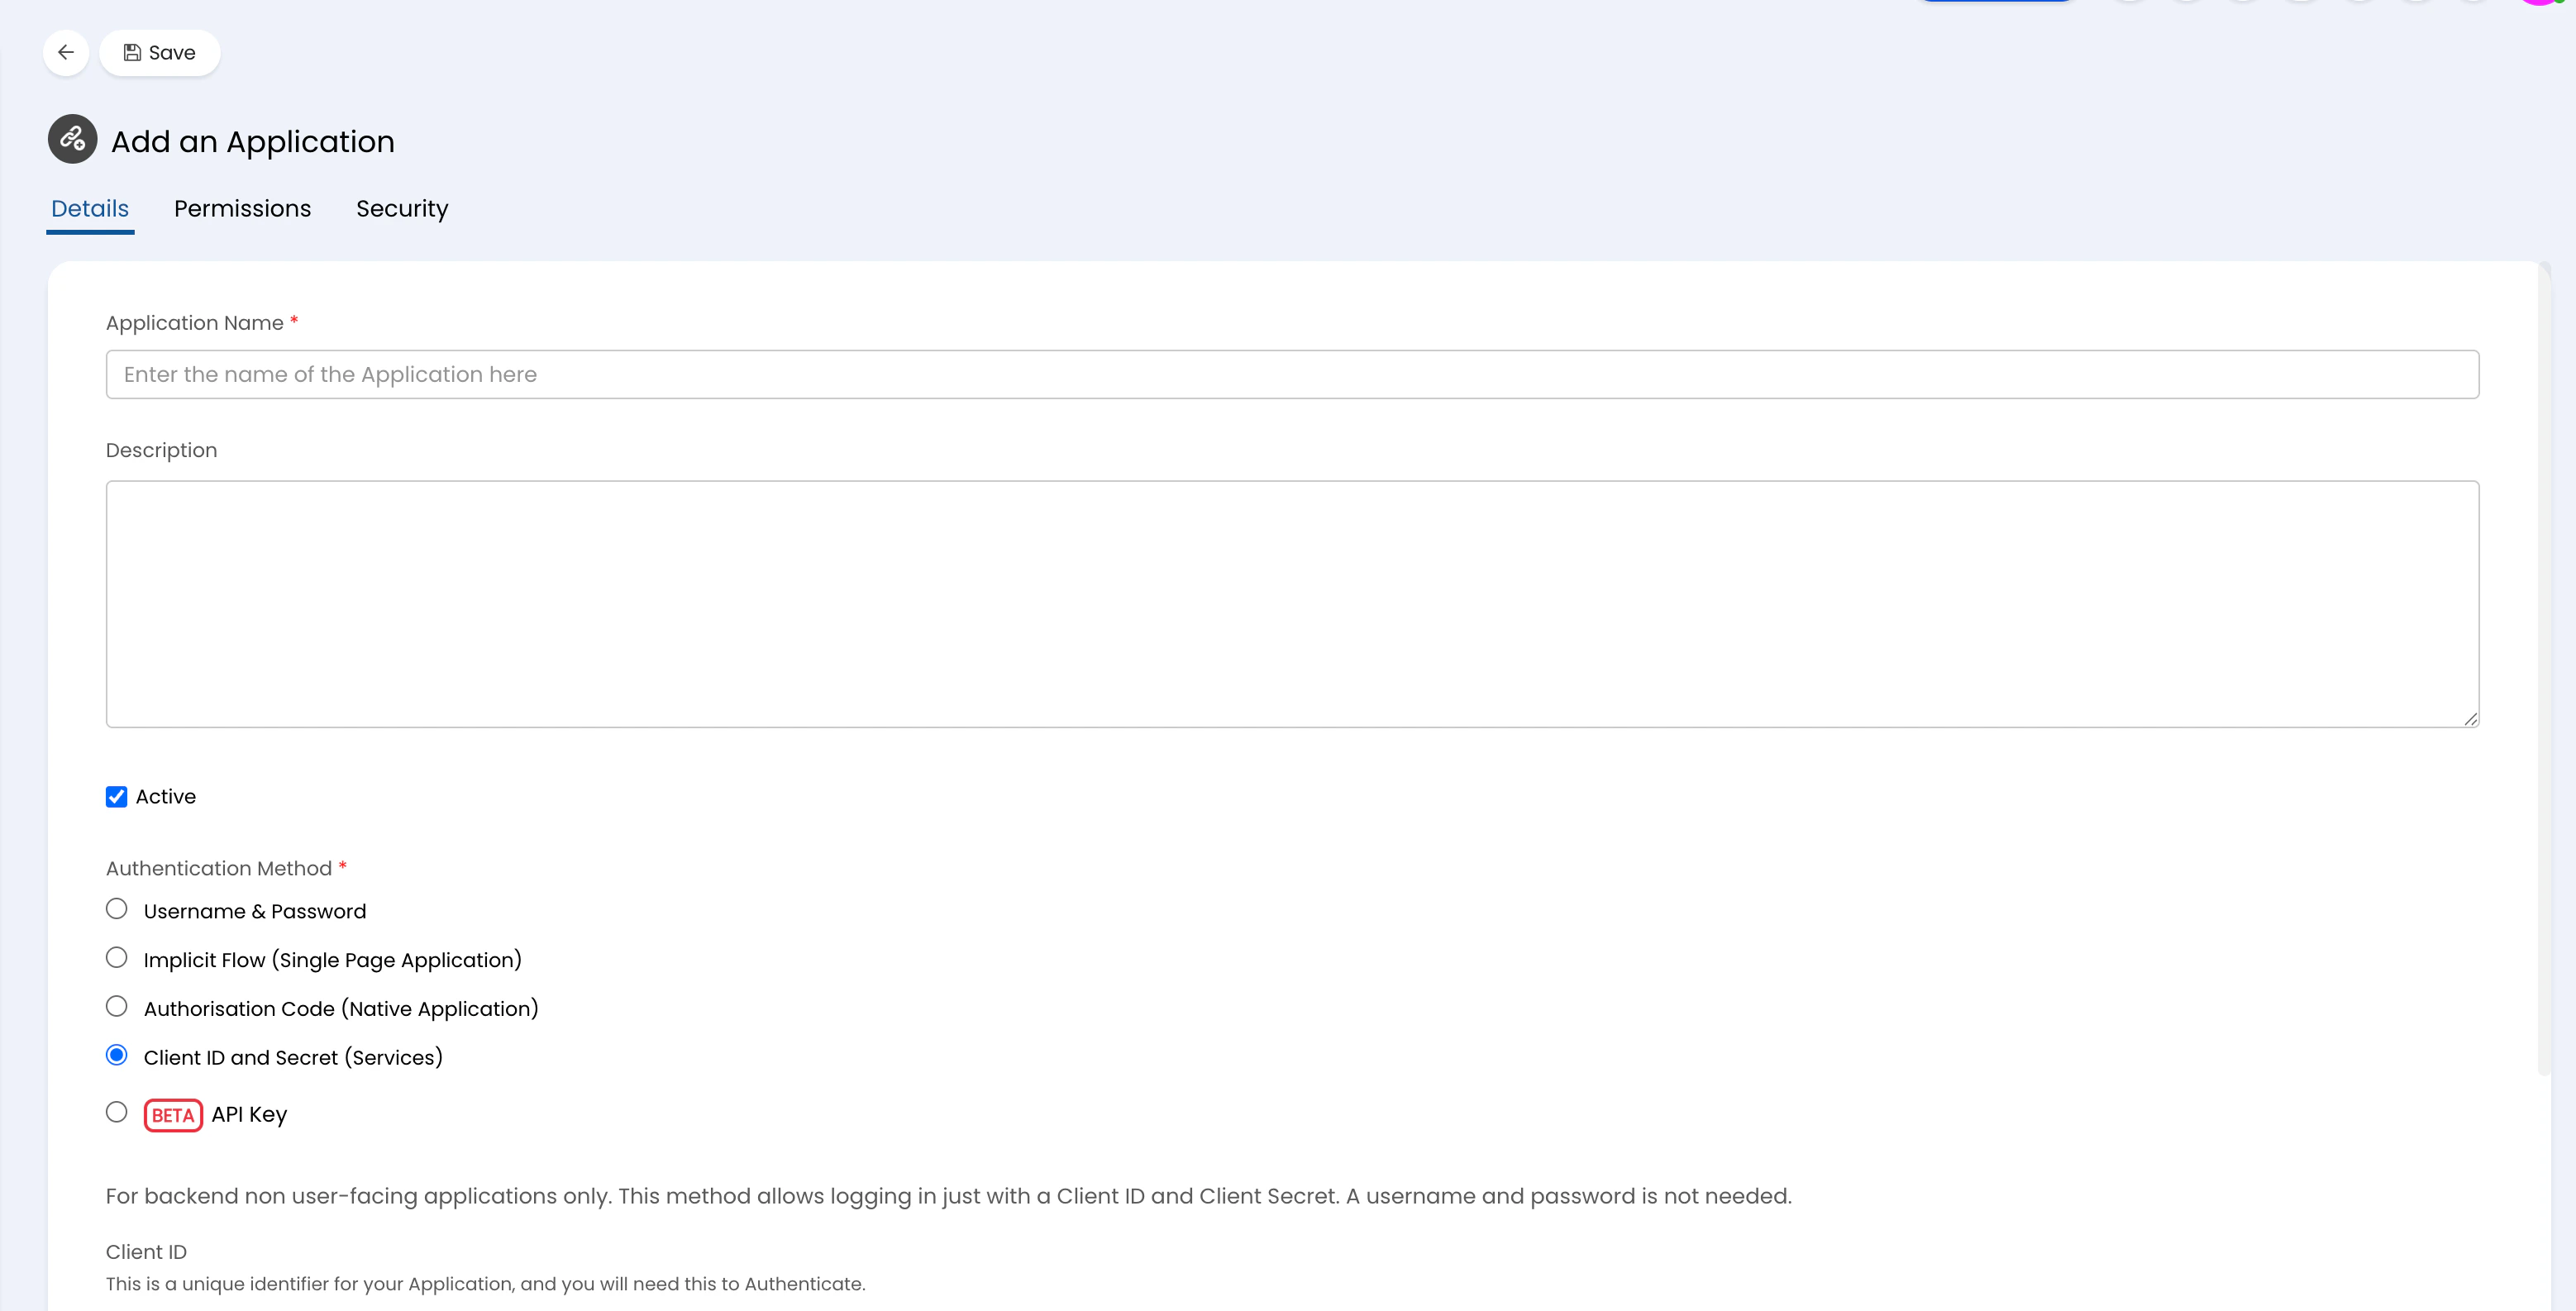 #### Step 3: Create an API application
1. Go to **Configuration** > **Integrations** > **Halo API** > **View Applications**.
2. Create a new application.
3. Enable **Active**.
4. Set **Authentication Method** to **Client ID and Secret (Services)**.
5. Set **Login Type** to **Agent**.
6. Set **Agent to log in as** to the API-only agent from Step 2.
7. Save the application.
8. Copy the generated **Client ID** and **Client Secret**.
#### Step 3: Create an API application
1. Go to **Configuration** > **Integrations** > **Halo API** > **View Applications**.
2. Create a new application.
3. Enable **Active**.
4. Set **Authentication Method** to **Client ID and Secret (Services)**.
5. Set **Login Type** to **Agent**.
6. Set **Agent to log in as** to the API-only agent from Step 2.
7. Save the application.
8. Copy the generated **Client ID** and **Client Secret**.
 #### Step 4: Set application permissions
In the API application's permissions tab, enable the API permissions your application needs.
#### Step 4: Set application permissions
In the API application's permissions tab, enable the API permissions your application needs.
 #### Step 5: Enter credentials in the Connect UI
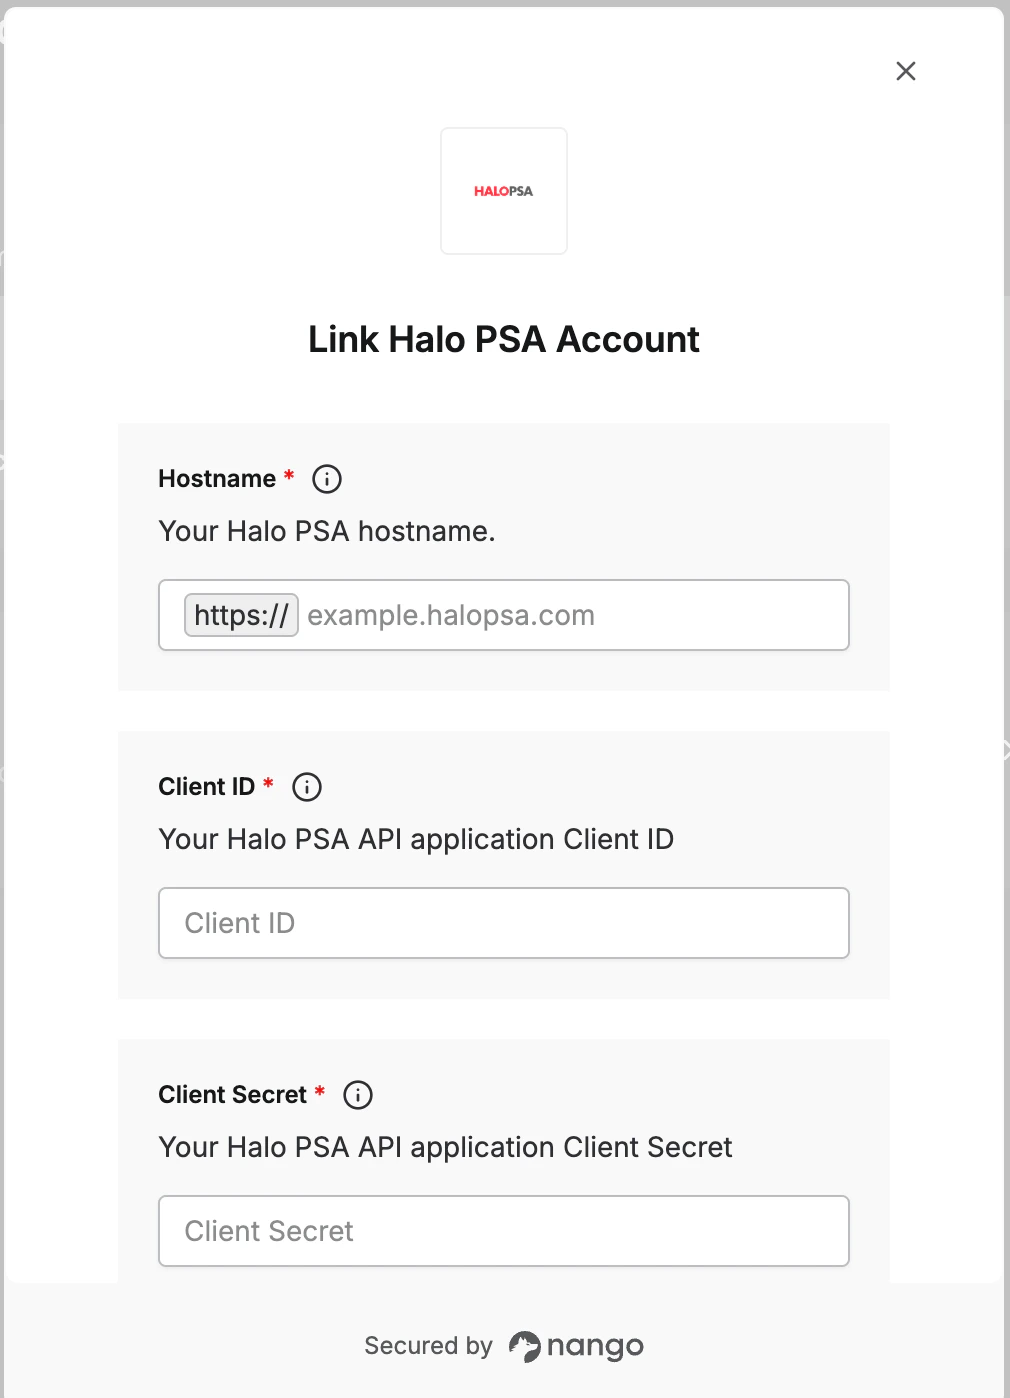
Once you have your **Hostname**, **Client ID**, and **Client Secret**:
1. Open the form where you need to authenticate with Halo PSA.
2. Enter your **Hostname**.
3. Enter your **Client ID**.
4. Enter your **Client Secret**.
5. Submit the form.
#### Step 5: Enter credentials in the Connect UI
Once you have your **Hostname**, **Client ID**, and **Client Secret**:
1. Open the form where you need to authenticate with Halo PSA.
2. Enter your **Hostname**.
3. Enter your **Client ID**.
4. Enter your **Client Secret**.
5. Submit the form.
 You are now connected to Halo PSA.