> ## Documentation Index
> Fetch the complete documentation index at: https://nango.dev/docs/llms.txt
> Use this file to discover all available pages before exploring further.
# Dynatrace (OAuth) - How do I link my account?
# Overview
To authenticate with Dynatrace using OAuth, you need:
1. **Account UUID** - Your Dynatrace account identifier.
2. **Client ID** - Your Dynatrace OAuth client ID.
3. **Client Secret** - Your Dynatrace OAuth client secret.
This guide walks you through creating an OAuth client in Dynatrace and connecting your account.
### Prerequisites
* Access to [Dynatrace Account Management](https://myaccount.dynatrace.com)
* Permission to manage OAuth clients (requires Identity & access management admin rights)
### Instructions
#### Step 1: Find your account UUID
1. Go to [Dynatrace Account Management](https://myaccount.dynatrace.com).
2. If you have more than one account, select the account you want to connect.
3. Your account UUID is visible in the URL: `https://myaccount.dynatrace.com/account/home?account-uuid={accountUuid}`
#### Step 2: Create an OAuth client
1. In Account Management, go to **Identity & access management** > **OAuth clients**.
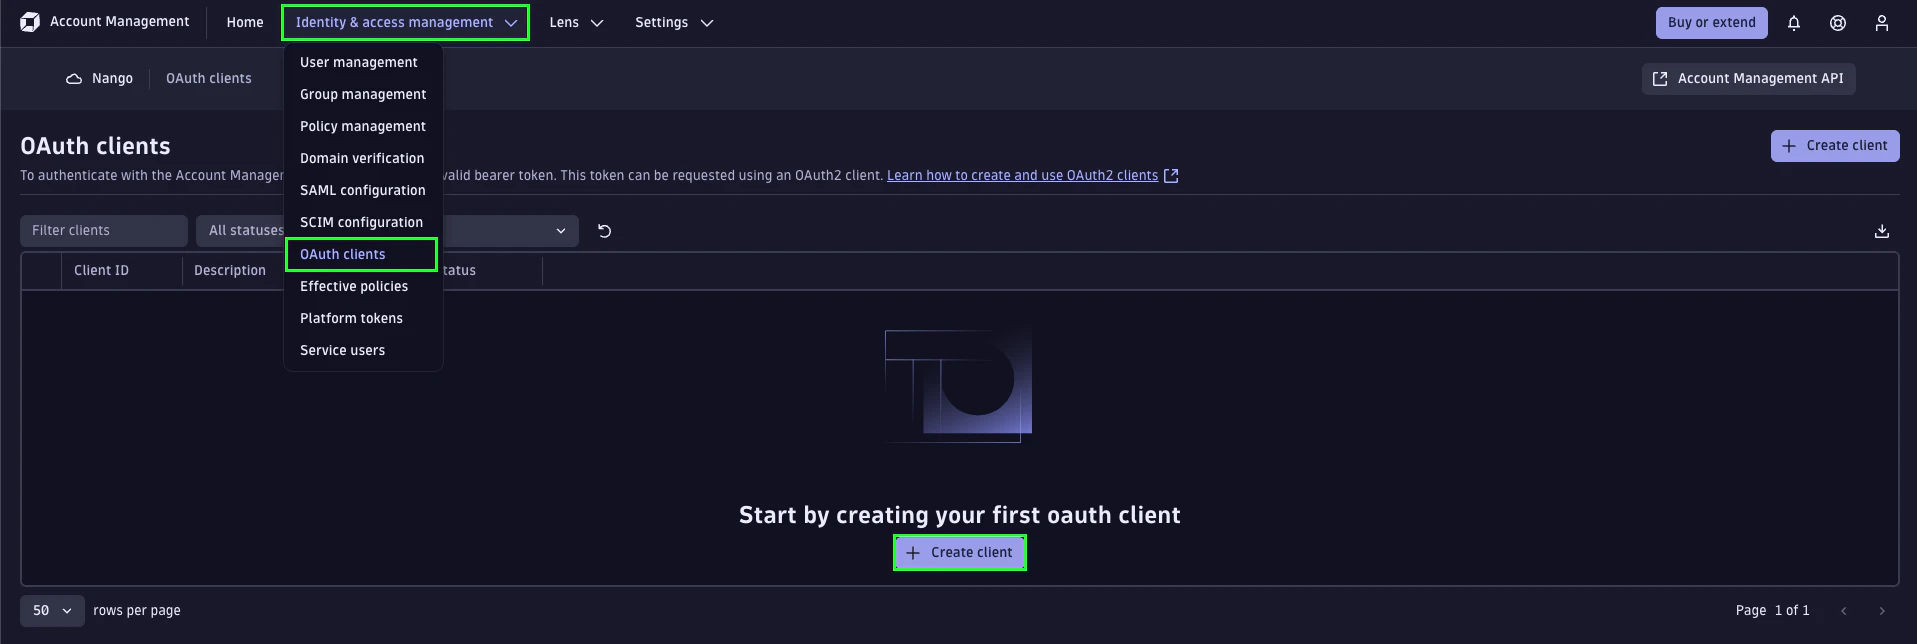 2. Select **Create client**.
3. Fill in the form:
* **Owner email**: the email of the user who owns the client.
* **Description**: describe what service will use this client and why.
* **Permissions**: select the scopes this client needs. Tokens generated by the client can only use the scopes granted here. Common scopes include:
* `account-uac-read` / `account-uac-write` — user and group management
* `app-engine:apps:run` — run apps on AppEngine
* `storage:buckets:read` / `storage:logs:read` — read logs and storage
4. Select **Create client**.
2. Select **Create client**.
3. Fill in the form:
* **Owner email**: the email of the user who owns the client.
* **Description**: describe what service will use this client and why.
* **Permissions**: select the scopes this client needs. Tokens generated by the client can only use the scopes granted here. Common scopes include:
* `account-uac-read` / `account-uac-write` — user and group management
* `app-engine:apps:run` — run apps on AppEngine
* `storage:buckets:read` / `storage:logs:read` — read logs and storage
4. Select **Create client**.
 5. Copy the **Client ID** and **Client Secret** from the generated credentials dialog.
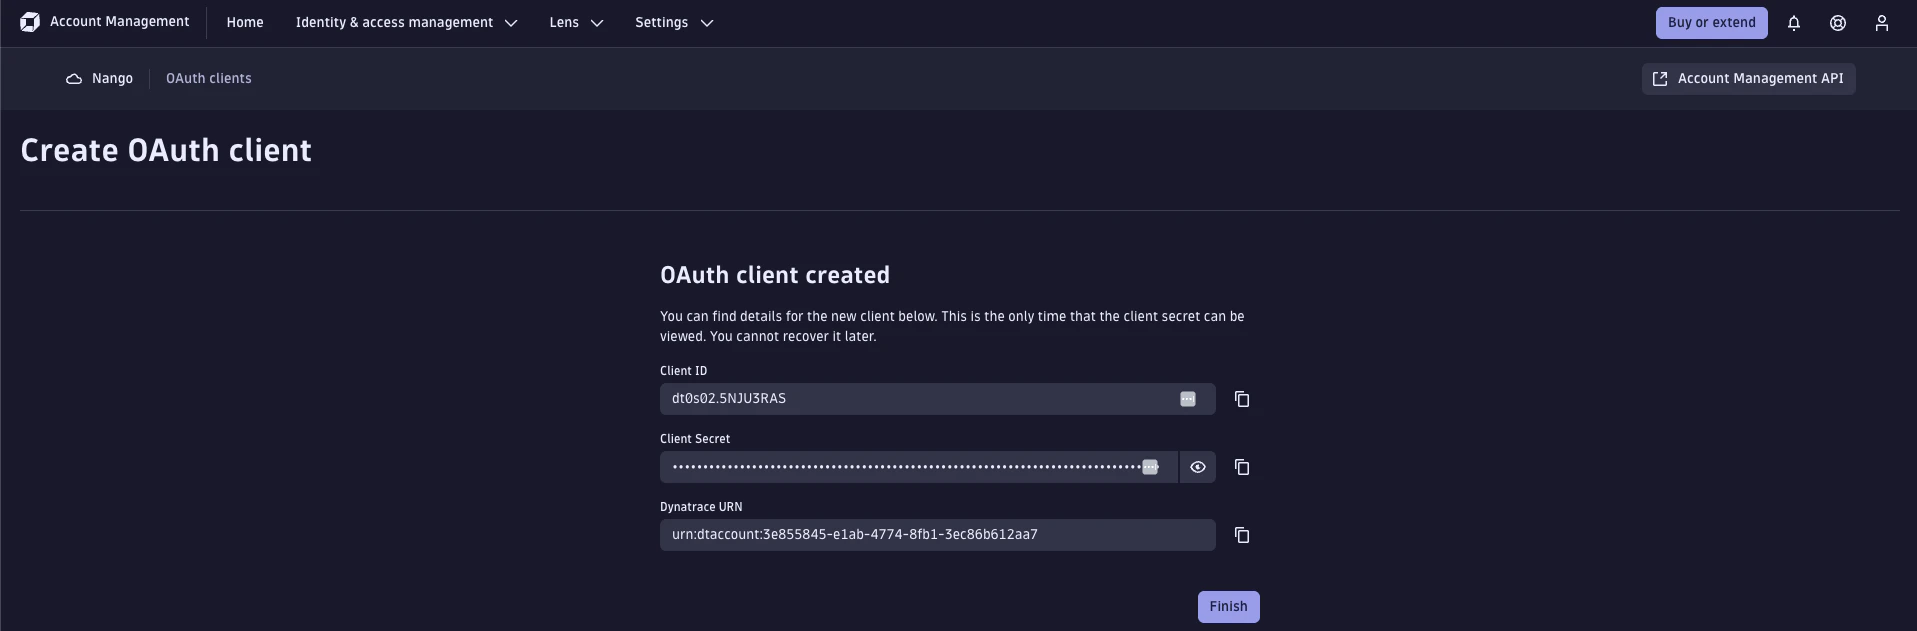 The client secret is shown only once. Copy it immediately and store it in your organization's secure vault — it cannot be retrieved after you close the dialog. If lost, you must create a new client.
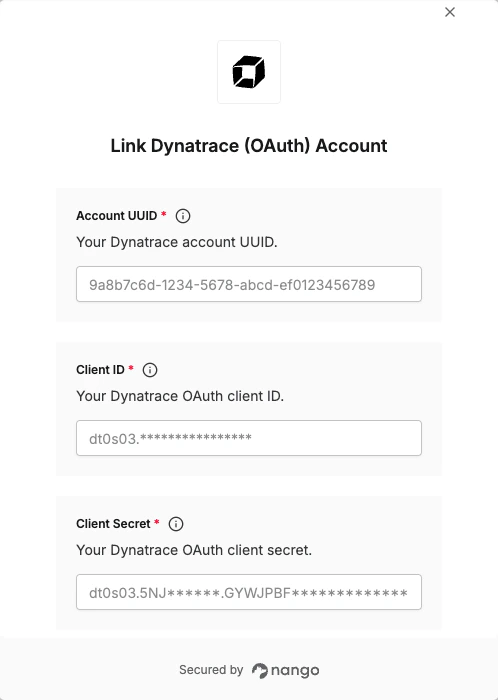
#### Step 3: Enter credentials in the Connect UI
1. Open the form where you need to authenticate with Dynatrace.
2. Enter your **Account UUID**, **Client ID** and **Client Secret** in their respective fields.
3. Submit the form to authenticate.
The client secret is shown only once. Copy it immediately and store it in your organization's secure vault — it cannot be retrieved after you close the dialog. If lost, you must create a new client.
#### Step 3: Enter credentials in the Connect UI
1. Open the form where you need to authenticate with Dynatrace.
2. Enter your **Account UUID**, **Client ID** and **Client Secret** in their respective fields.
3. Submit the form to authenticate.
 You are now connected to Dynatrace.