> ## Documentation Index
> Fetch the complete documentation index at: https://nango.dev/docs/llms.txt
> Use this file to discover all available pages before exploring further.
# bol.com - How do I link my account?
> Create bol.com Retailer API client credentials and connect them to Nango
## Overview
To authenticate with the bol.com Retailer API, you need:
1. **Client ID** - The identifier for your Retailer API client.
2. **Client Secret** - The secret paired with your Client ID.
This guide walks you through creating both credentials and connecting them to Nango. bol.com uses OAuth 2.0 client credentials, so no user redirect is required.
### Prerequisites
* A bol.com seller account with access to the Retailer API.
### Instructions
#### Step 1: Open API settings
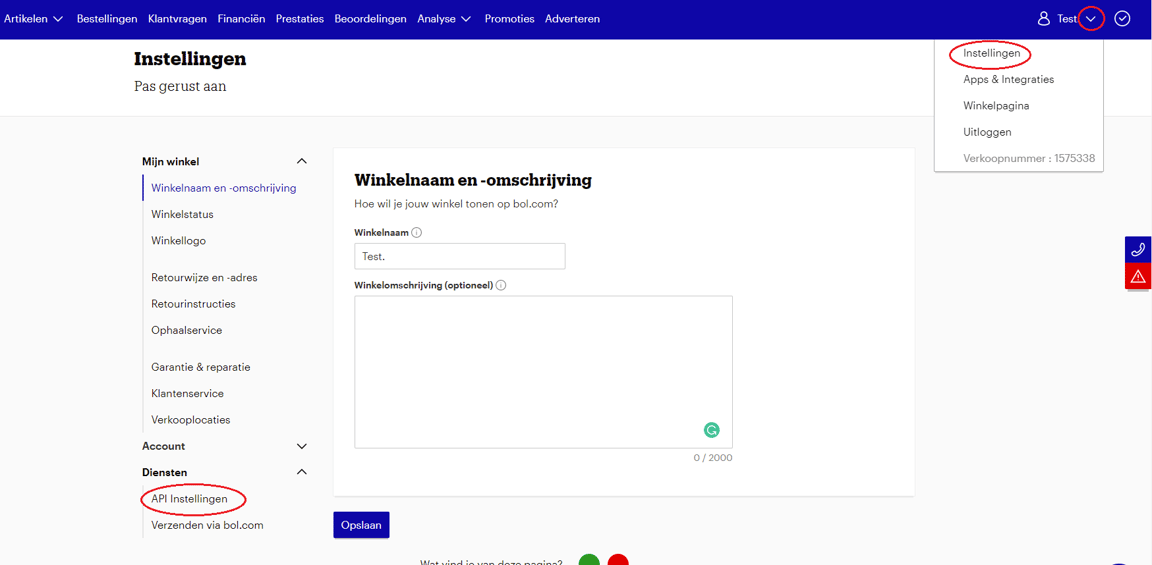
1. Sign in to your [bol.com seller account](https://partnerplatform.bol.com/).
2. Open your account profile and select **Settings**.
3. Under **Services**, select **API settings**.
 #### Step 2: Add a technical contact
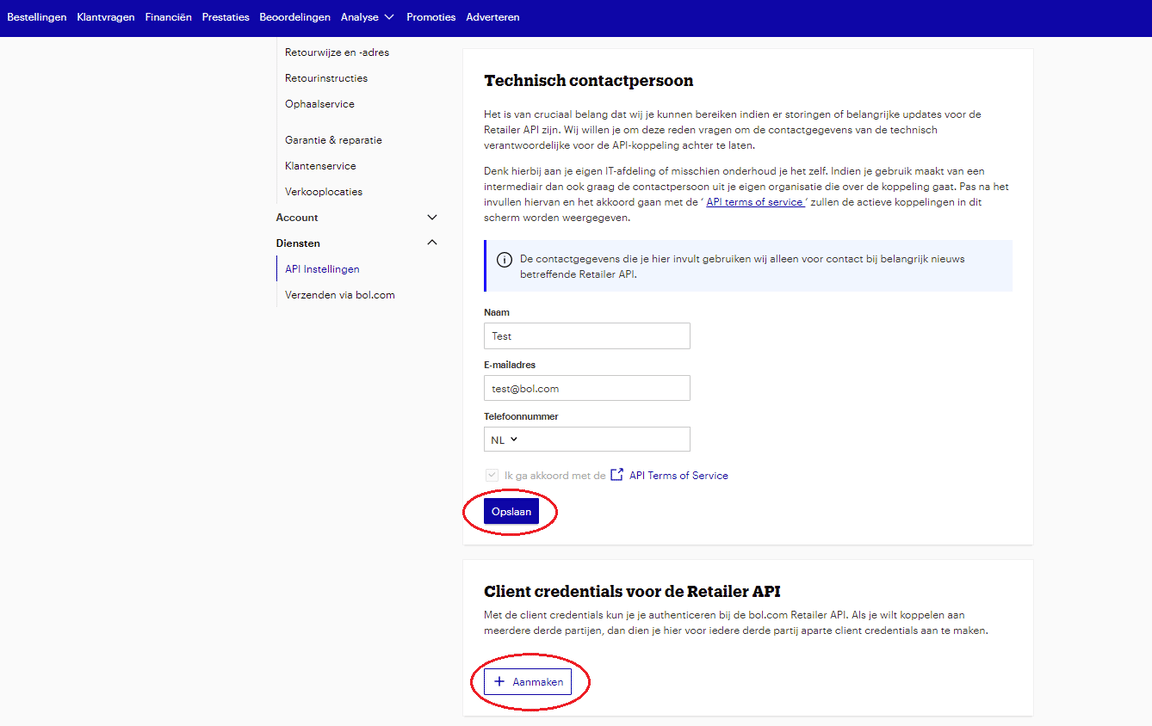
Enter and save the contact details for the person responsible for the integration. bol.com requires a technical contact before you can create API credentials.
#### Step 2: Add a technical contact
Enter and save the contact details for the person responsible for the integration. bol.com requires a technical contact before you can create API credentials.
 #### Step 3: Create client credentials
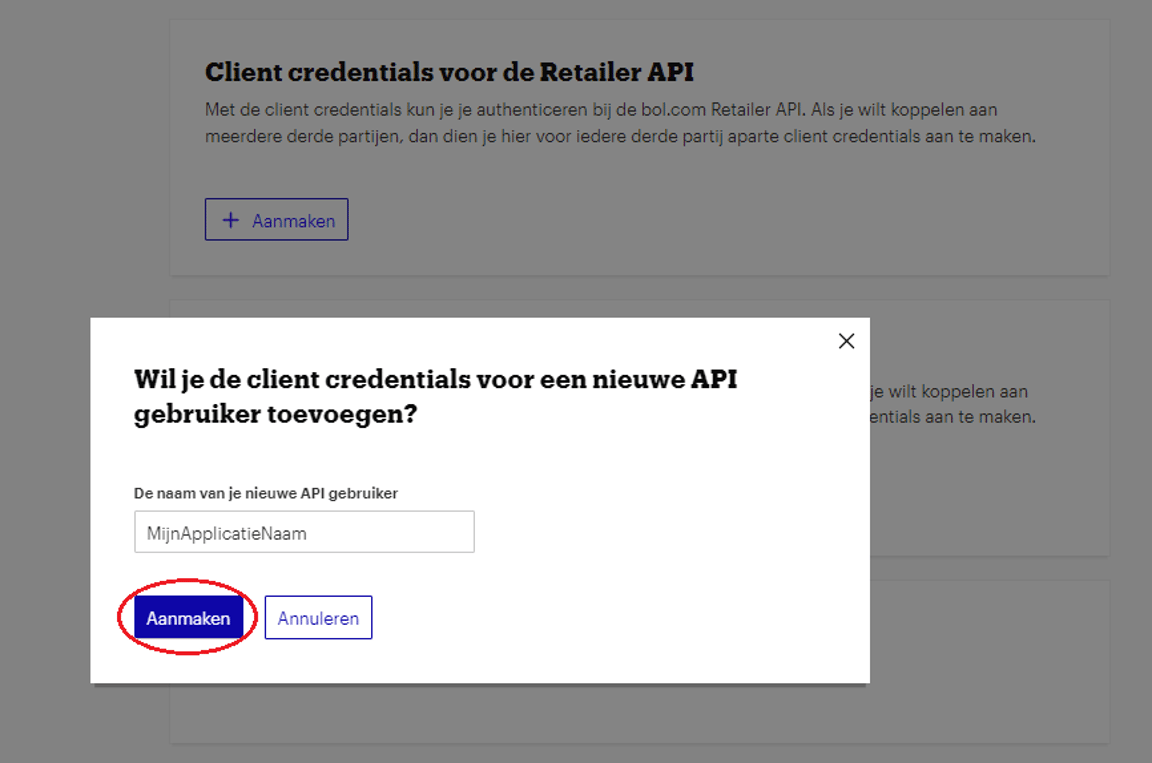
1. Under **Client credentials for the Retailer API**, select **Create**.
2. Enter a recognizable name for the credential and select **Create**.
#### Step 3: Create client credentials
1. Under **Client credentials for the Retailer API**, select **Create**.
2. Enter a recognizable name for the credential and select **Create**.
 3. Copy the generated Client ID, then select **Show secret** and copy the Client Secret.
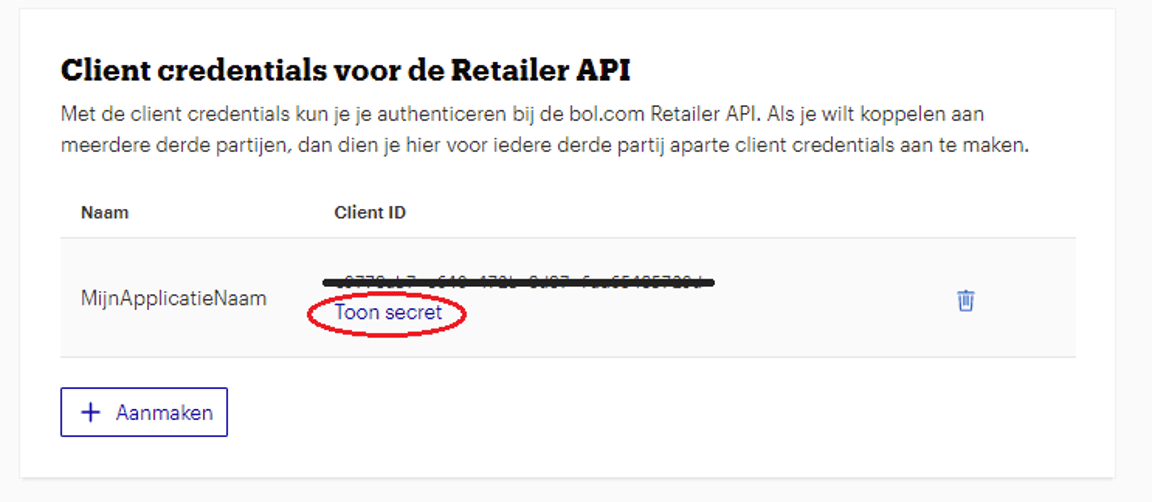 The Client Secret is shown only when you reveal it. Store it securely and create separate credentials for each application or third party.
#### Step 4: Enter credentials in the Connect UI
1. Open the form where you need to authenticate with bol.com.
2. Enter your **Client ID** and **Client Secret** in their respective fields.
3. Submit the form to connect your account.
The Client Secret is shown only when you reveal it. Store it securely and create separate credentials for each application or third party.
#### Step 4: Enter credentials in the Connect UI
1. Open the form where you need to authenticate with bol.com.
2. Enter your **Client ID** and **Client Secret** in their respective fields.
3. Submit the form to connect your account.
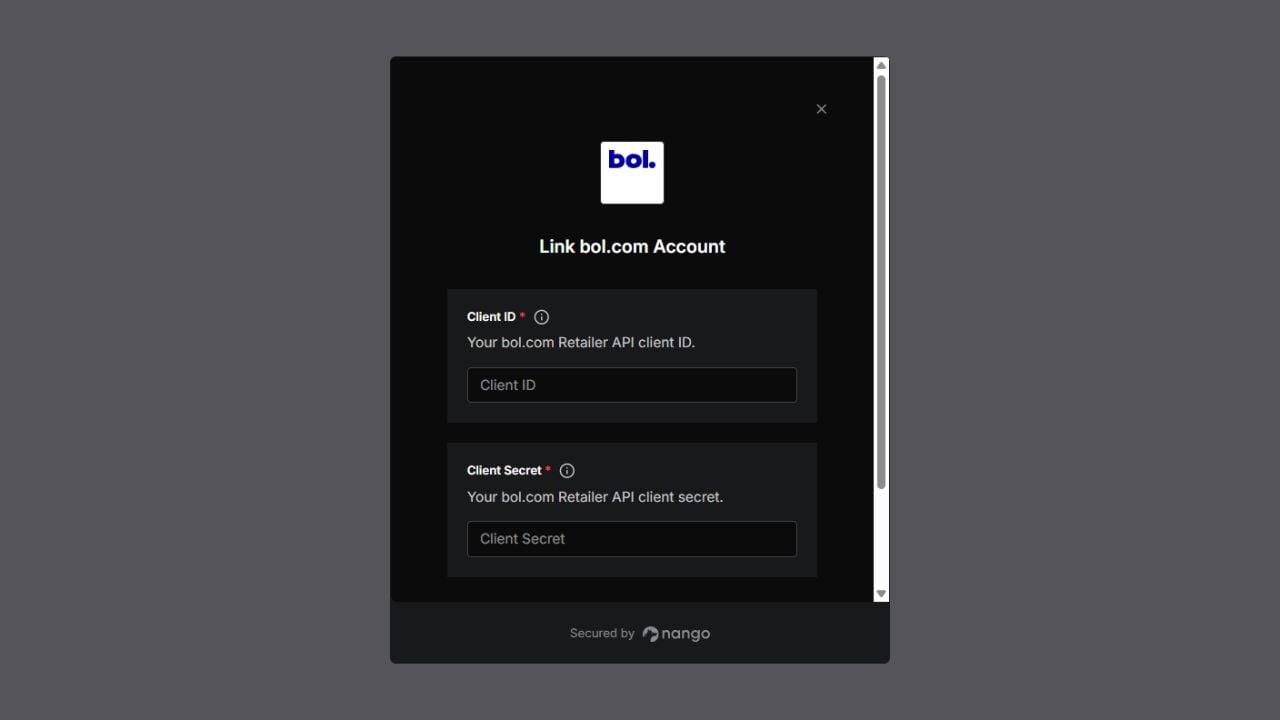 You are now connected to the bol.com Retailer API.