> ## Documentation Index
> Fetch the complete documentation index at: https://nango.dev/docs/llms.txt
> Use this file to discover all available pages before exploring further.
# Bird - How do I link my account?
# Overview
To authenticate with Bird, you will need:
1. **Subdomain** - The subdomain of your Bird API instance
2. **Access Key** - Your Bird access key for API authentication
This guide will walk you through finding your **Subdomain** and creating your **Access Key**.
### Prerequisites:
* You must have a Bird account
* You must have access to the Bird Dashboard
### Instructions:
#### Step 1: Finding your subdomain
The subdomain is the part of the Bird API you wish to connect to—i.e. the host in the base URL before `.bird.com`. It varies by api and region:
* **Emails API**
* EU workspaces: `https://email.eu-west-1.api.bird.com` → subdomain is `email.eu-west-1.api`
* US workspaces: `https://email.us-west-2.api.bird.com` → subdomain is `email.us-west-2.api`
* **MessageBird (general) API:** `https://api.bird.com/` → subdomain is `api`
* **Base media URL** (for retrieving media): `https://media.api.bird.com` → subdomain is `media.api`
You can confirm the correct base URL and subdomain for your use case by checking the [Bird API documentation](https://docs.bird.com/api).
#### Step 2: Creating an Access Key
1. Log in to your Bird account and navigate to the [Access keys](https://app.bird.com/settings/organization/access-keys) page in your Bird dashboard.
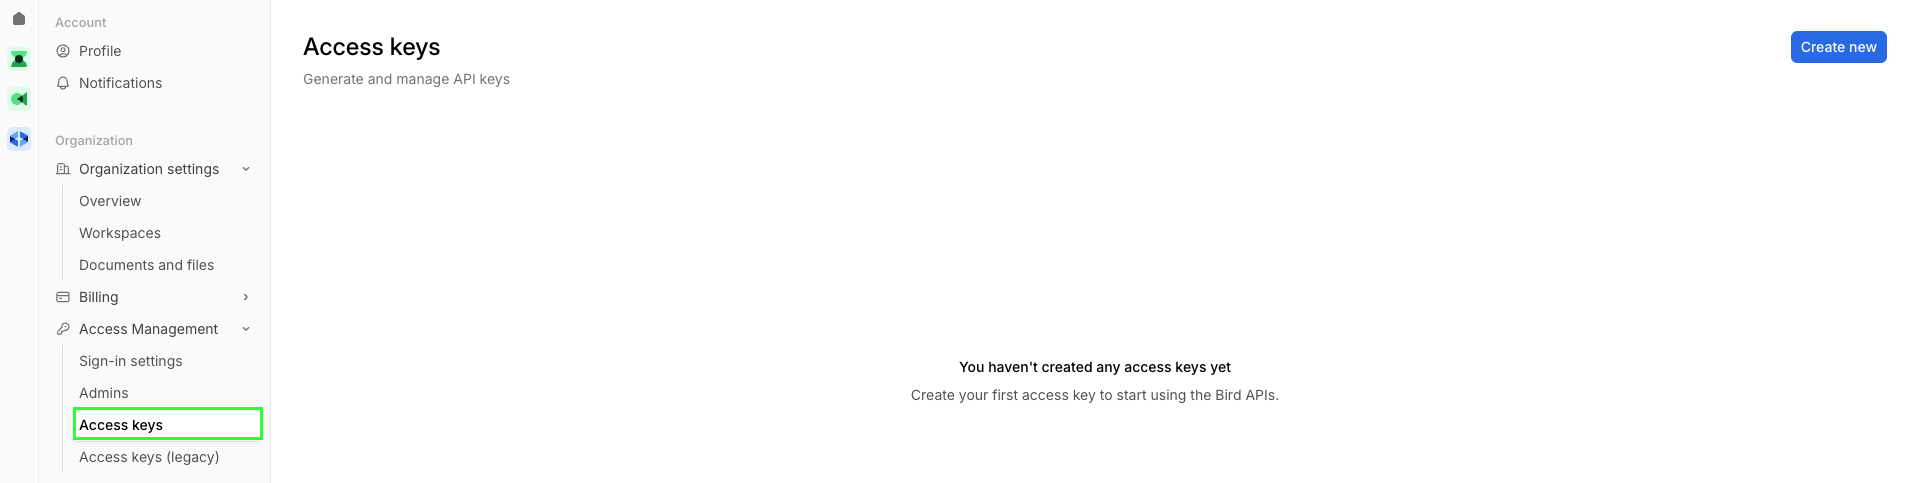 2. Click **Create new**.
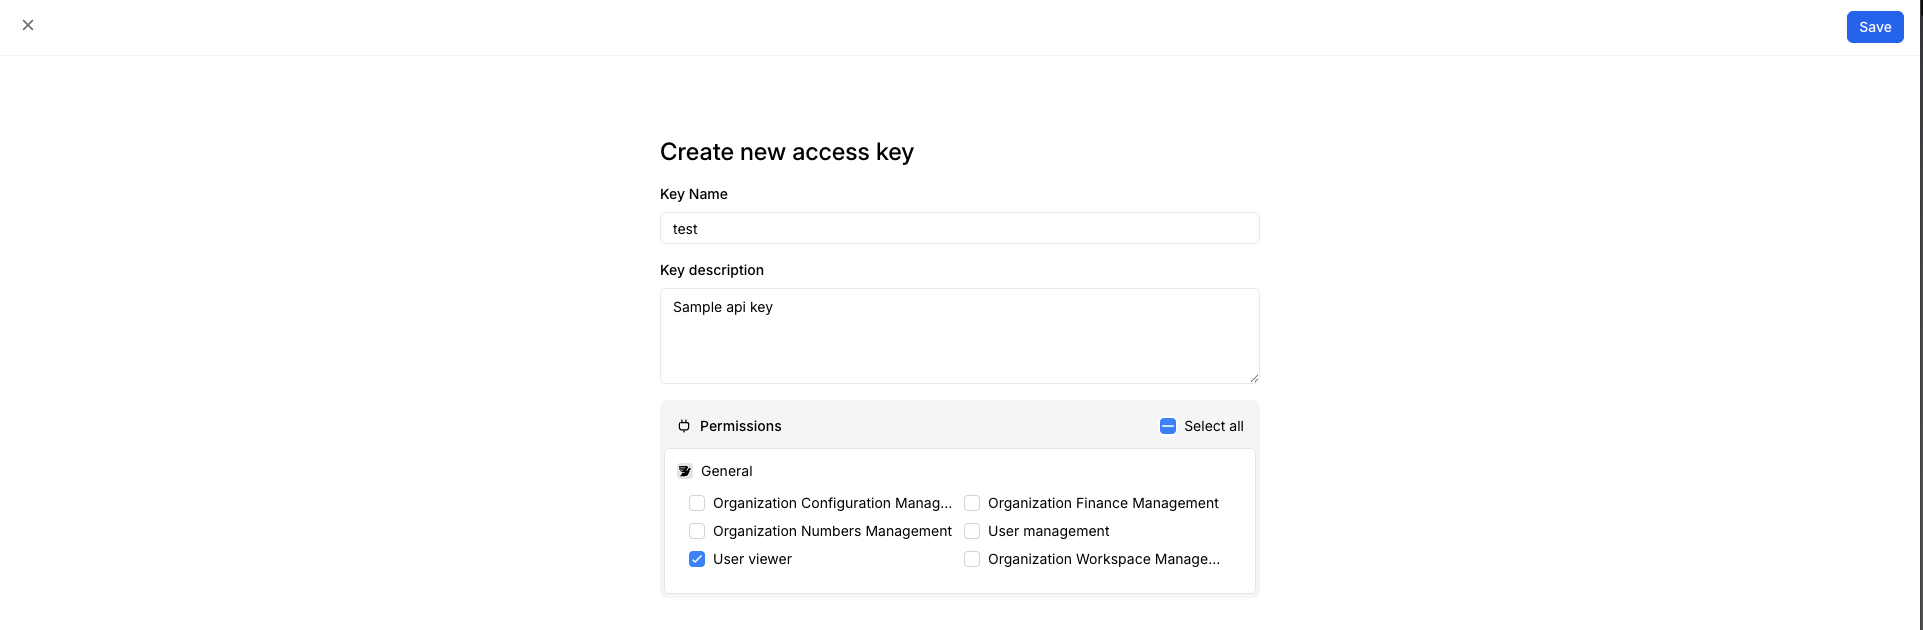
3. Enter a name and description, select the permissions you want to grant to the key, then click **Save**.
2. Click **Create new**.
3. Enter a name and description, select the permissions you want to grant to the key, then click **Save**.
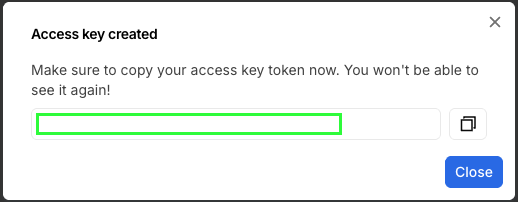
 4. Your API key will be generated — save it securely.
 #### Step 3: Finding your workspace ID
From the same [Access keys](https://app.bird.com/settings/organization/access-keys) page, check the URL in your browser address bar. It has the form:
`https://app.bird.com/workspaces//iam/access-keys`
Your workspace ID is the value between `workspaces/` and `/iam`.
#### Step 4: Enter credentials in the Connect UI
Once you have your **Subdomain**, **Workspace ID**, and **Access Key**:
1. Open the form where you need to authenticate with Bird
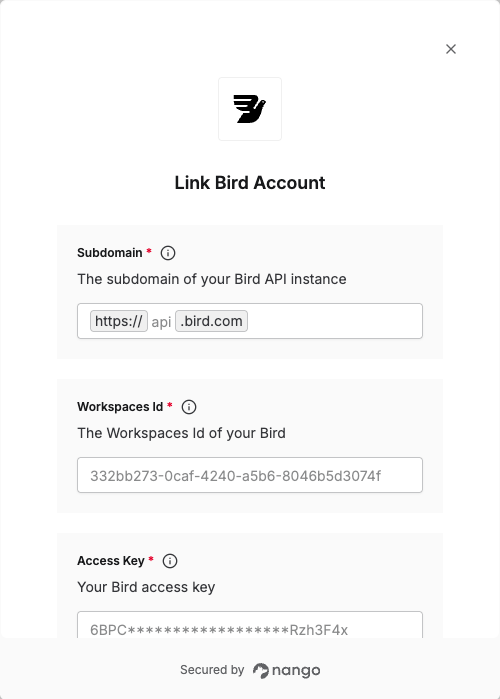
2. Enter your **Subdomain**, **Workspace ID**, and **Access Key** in their respective fields
3. Submit the form, and you should be successfully authenticated
#### Step 3: Finding your workspace ID
From the same [Access keys](https://app.bird.com/settings/organization/access-keys) page, check the URL in your browser address bar. It has the form:
`https://app.bird.com/workspaces//iam/access-keys`
Your workspace ID is the value between `workspaces/` and `/iam`.
#### Step 4: Enter credentials in the Connect UI
Once you have your **Subdomain**, **Workspace ID**, and **Access Key**:
1. Open the form where you need to authenticate with Bird
2. Enter your **Subdomain**, **Workspace ID**, and **Access Key** in their respective fields
3. Submit the form, and you should be successfully authenticated
 You are now connected to Bird.
***
You are now connected to Bird.
***