> ## Documentation Index
> Fetch the complete documentation index at: https://nango.dev/docs/llms.txt
> Use this file to discover all available pages before exploring further.
# ADOXX (Client Credentials) - How do I link my account?
# Overview
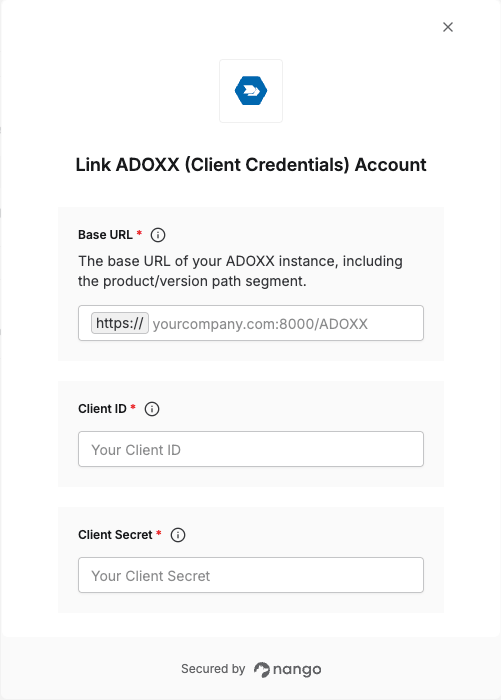
To connect with ADOXX (Client Credentials), you need:
1. **Base URL** – The address of your ADOXX instance, including the product/version path segment (e.g. `yourserver.com:8000/ADOXX`).
2. **Client ID** – The Client ID of an OAuth 2.0 client registered for the Client Credentials Flow.
3. **Client Secret** – The Client Secret generated for that client.
This guide walks you through obtaining these values from the ADOXX Administration (steps below use ADONIS terminology — menu names may differ slightly on other ADOXX-based products).
If your ADOXX instance is BOC's cloud-hosted (SaaS) offering rather than self-hosted, some settings may be pre-configured or restricted rather than self-service — for example, SaaS customers configure their CORS policy by contacting `hotline@boc-group.com` instead of editing it directly. If you can't find or access the screens in the steps below, contact BOC support to confirm what's self-service on your plan.
### Prerequisites
* Administrative access to the ADOXX Administration.
### Instructions
#### Step 1: Create a technical user
The Client Credentials Flow runs requests in the context of a technical user, so create one first.
1. Go to the **Users** page and click **New User**.
2. On the **General** tab, enter a name (e.g. `Technical_StandardRESTfulServices`) and set a password.
3. On the **Groups and roles** tab, assign the user to the **Default** user group.
4. On the **Repository** tab, assign only the repository holding the data you want to query.
5. Click **Create**.
6. Hover over the new user, click **More** > **Edit**, and on the **General** tab enable **Trusted login**.
#### Step 2: Set the Base URL and link the technical user
1. Go to **Settings > System settings > System**.
2. In the **Base URL** field, enter the URL where the instance can be reached from other machines, e.g. `http://:/ADONIS16_0/` (default port is `8000`).
3. Nango's **Base URL** field expects a different format: no protocol and no trailing slash — Nango always connects over `https://`. Strip both from the value above before entering it in Nango, e.g. `:/ADONIS16_0`.
4. Click **Select users** and choose the technical user created in step 1.
5. Click **Save**.
#### Step 3: Enable the REST API and OAuth 2.0, and define a scope
1. Go to **Settings > Standard RESTful Services > General**.
2. Enable **Enable Standard RESTful Services globally**.
3. Switch to the **OAuth 2.0** tab and enable **Enable OAuth 2.0**.
4. Enable the REST scenarios (Repository / Users / Metamodel) your integration needs — a disabled scenario returns `403 FORBIDDEN` for its endpoints.
5. Under **Scopes**, click **Add scopes** and create at least one scope: give it a name (e.g. `REST_READ`), optionally restrict it by IP, and select the technical user from step 1.
6. Save your changes.
#### Step 4: Register an OAuth 2.0 client
1. Go to **Home > More options > OAuth 2.0**.
2. Select **OAuth 2.0 enabled**.
3. Click **Add** to create a new client.
4. Fill in the Client Data form:
* **Type**: `Confidential` (able to securely store a client secret).
* **ID**: a unique client identifier, kept simple (avoid special characters).
* **Name**: a display name for the client application.
* **Redirect URI**: the form requires this field even though it's unused for the Client Credentials Flow — any placeholder value works.
* **Secret**: click **Generate** to create the Client Secret.
5. Click **Save changes**. Copy the **ID** and **Secret** — these are your **Client ID** and **Client Secret**.
#### Step 5: Enter credentials in Nango
1. Open the Nango Connect form.
2. Enter your **Base URL** (from step 2), **Client ID**, and **Client Secret** (from step 4).
3. Submit the form, and you should be successfully authenticated.
 You are now connected to ADOXX using Client Credentials.